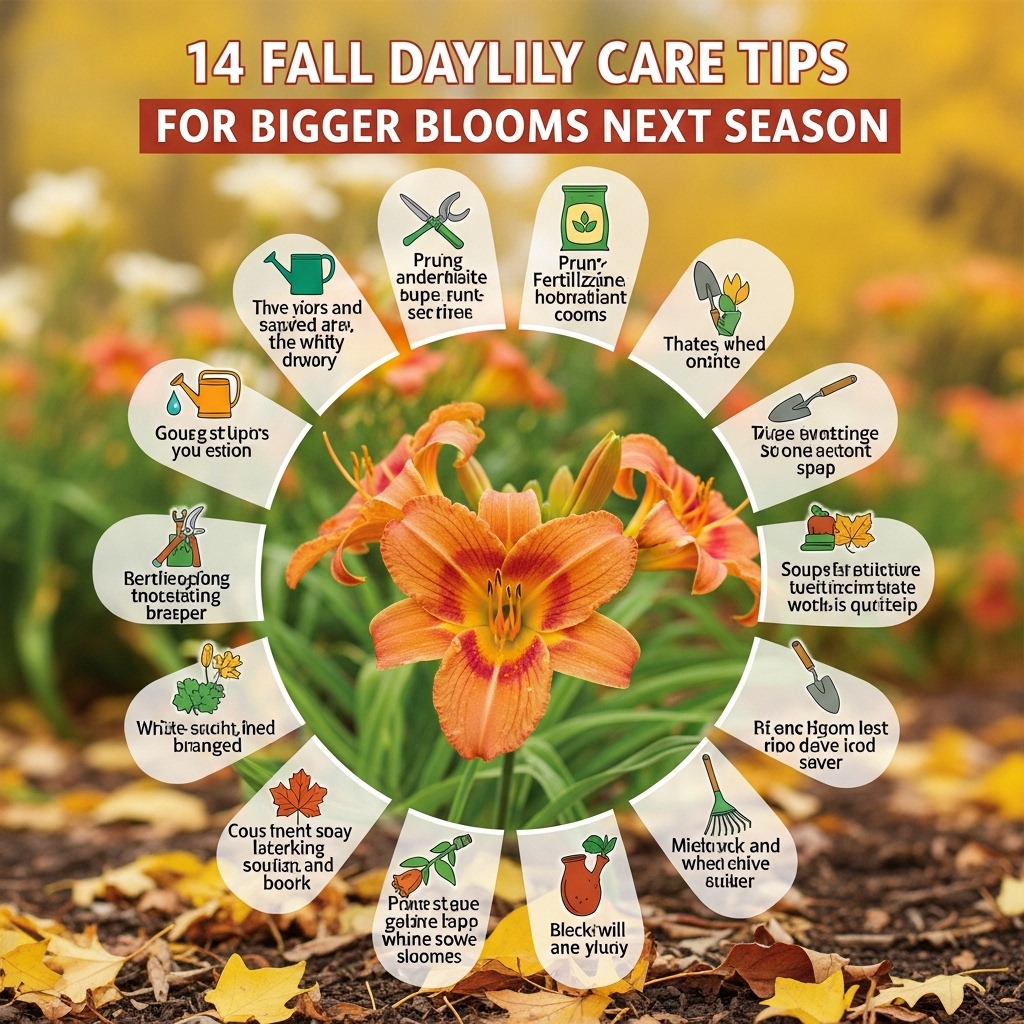
Want to know the secret to daylilies so full and lush next summer that your neighbors stop to stare? It all starts with what you do right now, in the fall! Most gardeners ignore their daylilies once the blooms fade — and that’s exactly why their plants underperform year after year. Fall daylily care is the hidden key to unlocking bigger, bolder blooms, and you’re about to learn every trick in the book. Let’s dive in!
At a Glance
- Cutting back daylily foliage at the right moment — not too early — protects the plant’s ability to store energy for next season’s blooms.
- Dividing overcrowded clumps every 3–4 years in fall is one of the most effective ways to dramatically increase bloom production.
- A low-nitrogen, phosphorus-rich fertilizer applied in early fall feeds roots without pushing tender new growth before winter.
- Mulching with 2–3 inches of organic material after the ground cools protects crowns from freeze-thaw damage.
- Fall is the ideal time to move underperforming daylilies to sunnier spots, since cooler temperatures reduce transplant stress.
1. Deadhead Spent Blooms First
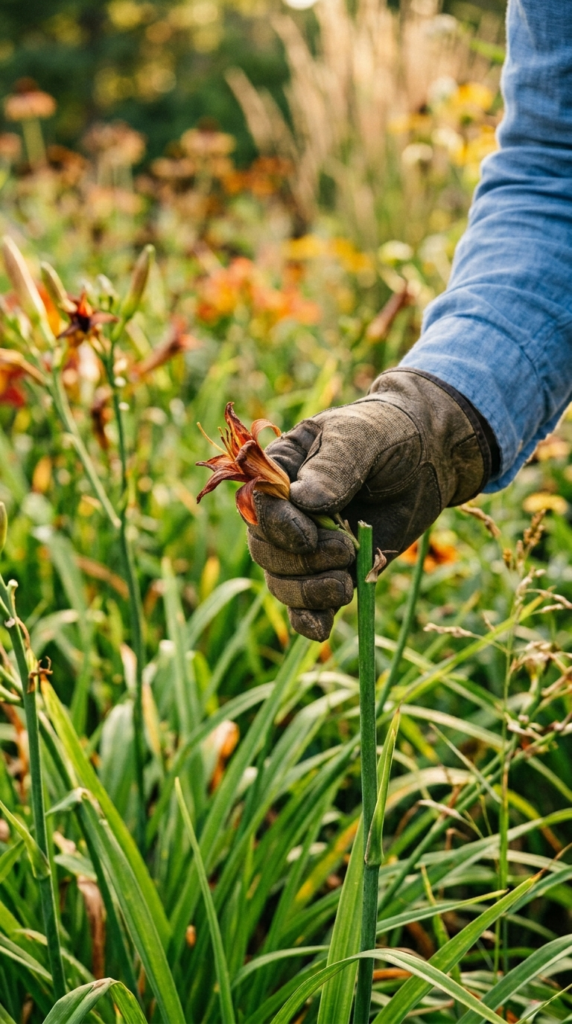
Before you do anything else this fall, go through your daylilies and deadhead every spent flower. It sounds simple, but this one step stops the plant from wasting precious energy on seed production.
When a daylily puts energy into forming seed pods, it pulls resources away from the root system — and strong roots are exactly what fuel next summer’s big blooms. Snap off or snip any remaining spent blooms and developing seed pods at the base of the flower stem.
Don’t stress about being too aggressive here. Daylilies are tough, and removing that dead material only redirects the plant’s focus toward exactly where you want it: deep, energy-rich roots.
Learn more about deadheading flowering perennials the right way for a full technique breakdown.
Such a small step, such a big payoff — you’ve got this!
2. Cut Back the Foliage at the Right Time
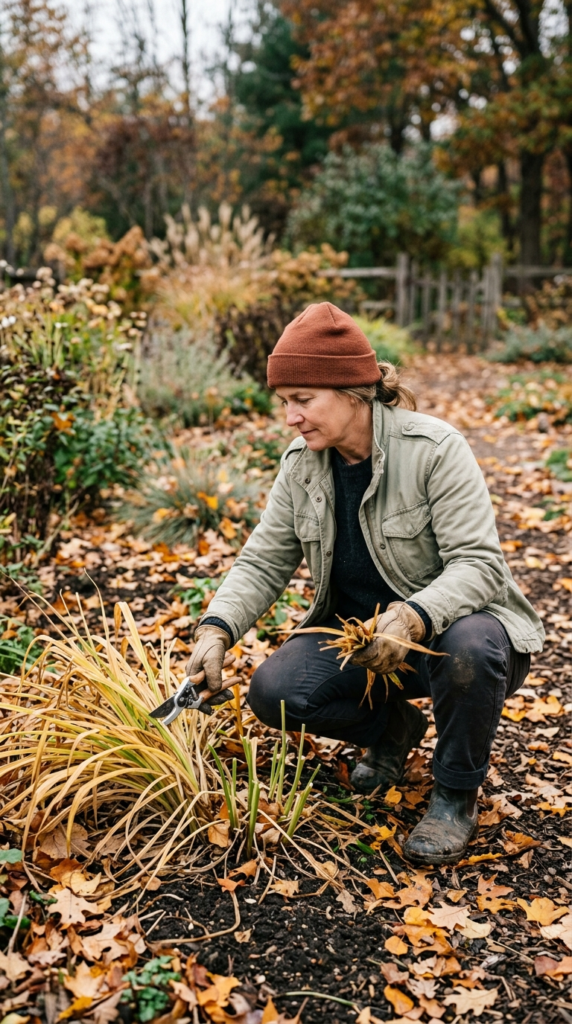
Here’s the thing: timing your foliage cutback is everything. Cut too early and you rob the plant of photosynthesis time it needs to store energy. Cut too late and you leave a home for pests and disease over winter.
The sweet spot is after the first hard frost, when the leaves have turned yellow or brown and are clearly done for the season. At that point, cut the foliage back to about 3 inches above the crown — not flush with the soil, which can damage the growing point.
💡 Pro Tip: Always use clean, sharp scissors or pruning shears when cutting back daylilies. Dirty tools can spread fungal issues from plant to plant faster than you’d think.
Bag and dispose of the cut foliage rather than composting it, especially if you noticed any disease or pest issues during the season. Better safe than sorry!
Visit the American Hemerocallis Society for expert guidance on fall daylily maintenance specific to your region.
Clean cuts now mean clean, healthy growth come spring!
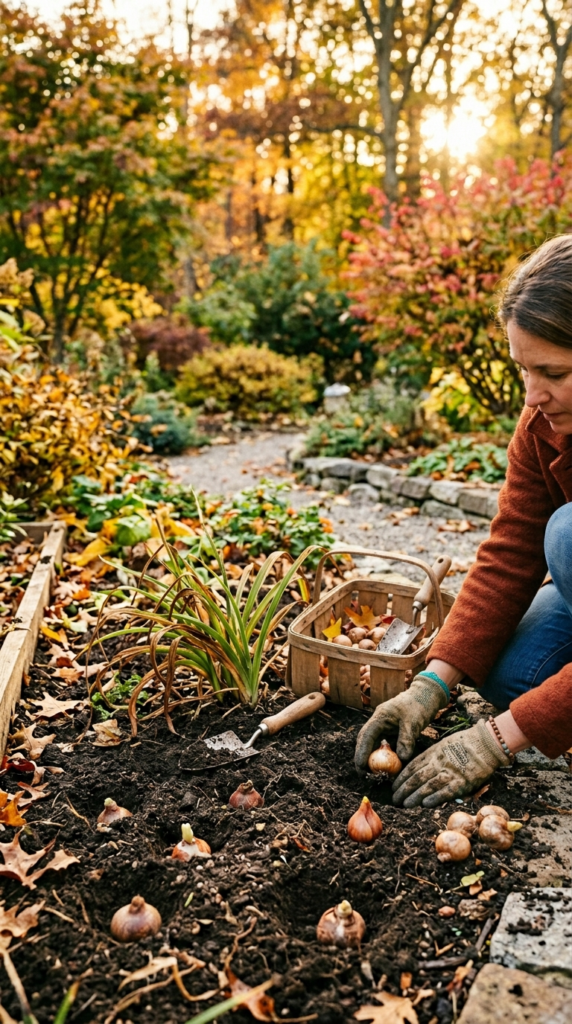
3. Divide Overcrowded Clumps
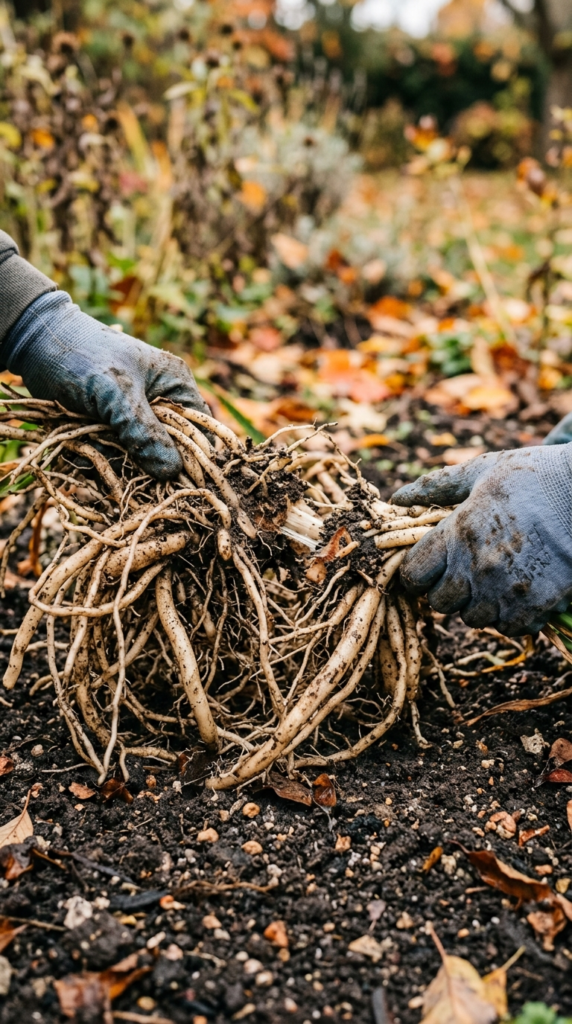
This is honestly one of the biggest game-changers for fall daylily care. Daylilies that have been in the same spot for 3–4 years or more get overcrowded, and overcrowded plants produce fewer, smaller blooms. Dividing them fixes that instantly.
Dig up the entire clump with a garden fork, then use two forks back-to-back — or even a sharp spade — to pull or cut the clump into sections. Each division should have 3 to 5 healthy fans (the leafy growth points) attached to a good chunk of roots.
Replant the divisions at the same depth they were growing before, water them in well, and they’ll establish beautifully before the ground freezes. The result next summer? Multiple thriving clumps producing far more blooms than one congested mass ever could.
- Signs your daylilies need dividing: Fewer blooms than previous years, crowded fan growth, dying out in the center of the clump
- Ideal division size: 3–5 fans per section
- Best time to divide: Early to mid-fall, at least 4–6 weeks before hard frost
Explore our guide to dividing and transplanting perennials in fall for step-by-step photos.
Divide and conquer — your future blooms will thank you enormously!
4. Feed With the Right Fall Fertilizer
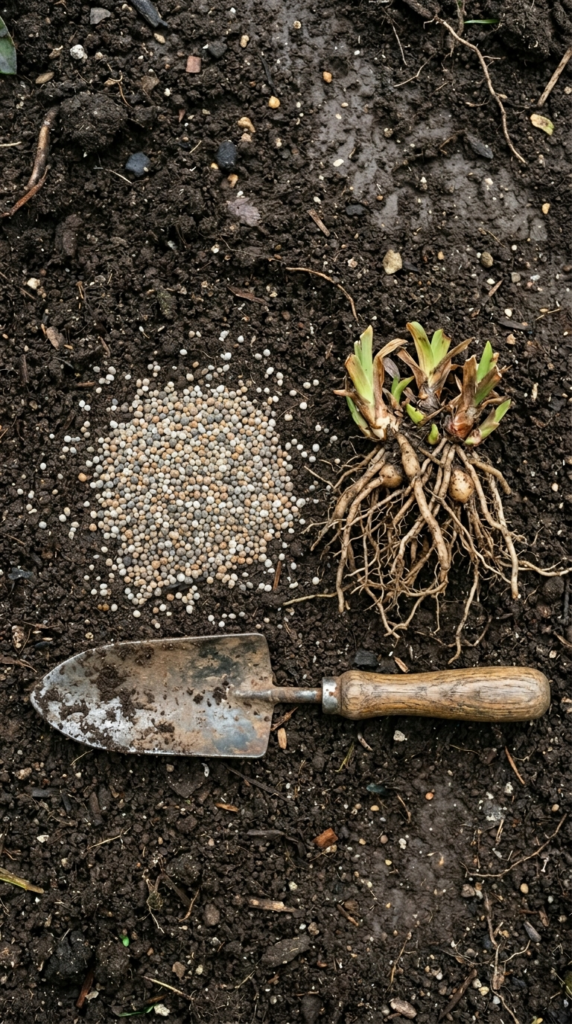
Here’s the deal: not all fertilizers are created equal, and the wrong fertilizer in fall can actually hurt your daylilies more than help them. High-nitrogen fertilizers push leafy green growth, and new tender growth right before winter is a recipe for frost damage.
What you want instead is a low-nitrogen, phosphorus-rich fertilizer — something like a 5-10-10 or bone meal — applied in early fall. Phosphorus feeds the root system directly, helping daylilies store maximum energy for next season’s spectacular show.
💡 Pro Tip: Scratch the fertilizer lightly into the soil surface around the crown and water it in well. Avoid piling fertilizer directly against the crown, which can cause rot.
Skip fertilizing entirely once you’re within 6 weeks of your average first frost date. At that point, the plant just needs to wind down naturally, not push new growth.
Discover the best fertilizers for flowering perennials in your garden to make sure you’re feeding your plants right.
Feed smart this fall and brace yourself for an incredible bloom season ahead!
5. Water Deeply Before the Ground Freezes

People always talk about spring watering, but deep fall watering is just as important and way more overlooked. Daylilies going into a well-hydrated winter are significantly more cold-hardy than those going in dry.
Before the ground freezes solid, give your daylilies a thorough, deep soaking — enough to penetrate 8–10 inches into the soil. This charges the root zone with moisture that will carry the plant through the dormant season.
In dry fall climates, plan to water every 2–3 weeks right up until the ground freezes. After that, nature takes over. Just don’t water when the soil is already frozen or waterlogged, as that can cause crown rot.
Read our full guide to fall watering schedules for perennial gardens for a region-by-region breakdown.
One great deep drink before winter goes a long, long way!
6. Mulch for Winter Root Protection

Mulching daylilies in fall is like tucking them in with a warm blanket for winter — and it makes a huge difference in bloom performance the following year. A good mulch layer insulates the crown against the freeze-thaw cycles that can heave roots right out of the ground.
Wait until after the first hard frost and the soil has started to cool before applying mulch. If you mulch too early, you can actually trap warmth and encourage the plant to keep growing when it should be going dormant.
Apply 2–3 inches of organic mulch — shredded leaves, straw, or wood chips all work beautifully — around the crown but not directly on top of it. Leave a small gap right at the crown to prevent moisture buildup and rot.
💡 Pro Tip: In milder climates (zones 7+), daylilies may stay semi-evergreen and need less mulch. In zones 4–6, don’t skip this step — it’s genuinely critical for winter survival and spring vigor.
Check out our complete guide to mulching perennials for winter to get the details right.
A little mulch now equals a lot more blooms later — pretty cool, right?
7. Check for and Treat Pests
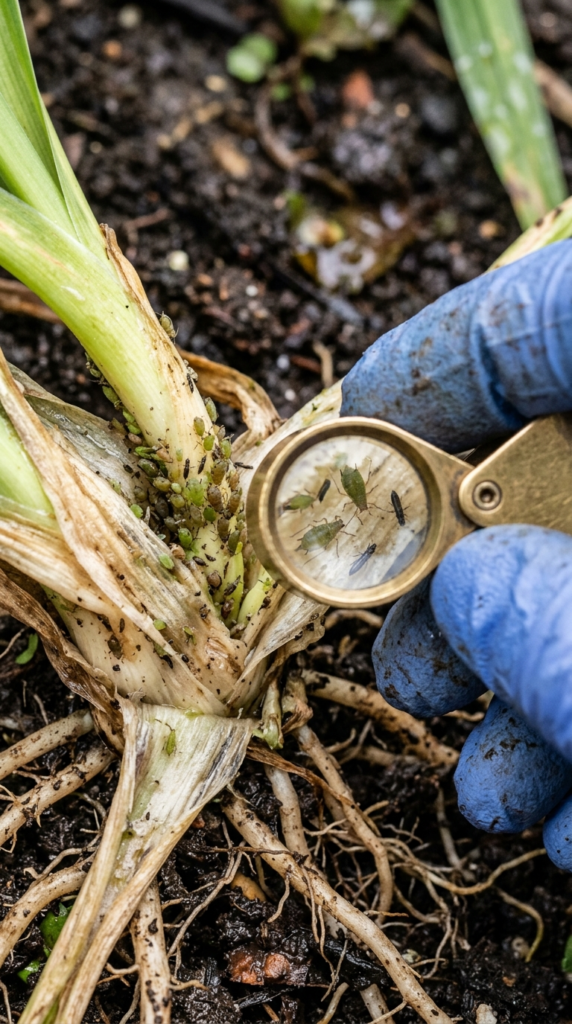
Fall is the perfect time to scout for pests because many insects are looking for exactly that cozy spot to overwinter — and your daylily crown is prime real estate. Getting ahead of them now prevents a nasty surprise infestation next spring.
The most common daylily pests to look for include aphids, thrips, spider mites, and the increasingly problematic daylily gall midge. Check the crown, the undersides of foliage, and the soil surface around the plant.
If you find pests, treat with insecticidal soap or neem oil before cutting the foliage back. Then dispose of all trimmed material in the trash — not the compost pile — to remove any overwintering eggs or larvae from your garden entirely.
- Aphids: Look for clusters on stems and crowns; treat with insecticidal soap
- Thrips: Tiny, fast-moving; cause streaked or silvery foliage
- Spider mites: Fine webbing on leaves; treat with neem oil
- Gall midge: Distorted, swollen buds in summer; remove and destroy affected material
Visit Penn State Extension’s pest management resources for identification guides and treatment recommendations.
A little pest patrol now saves a massive headache next season!
8. Inspect and Amend Your Soil
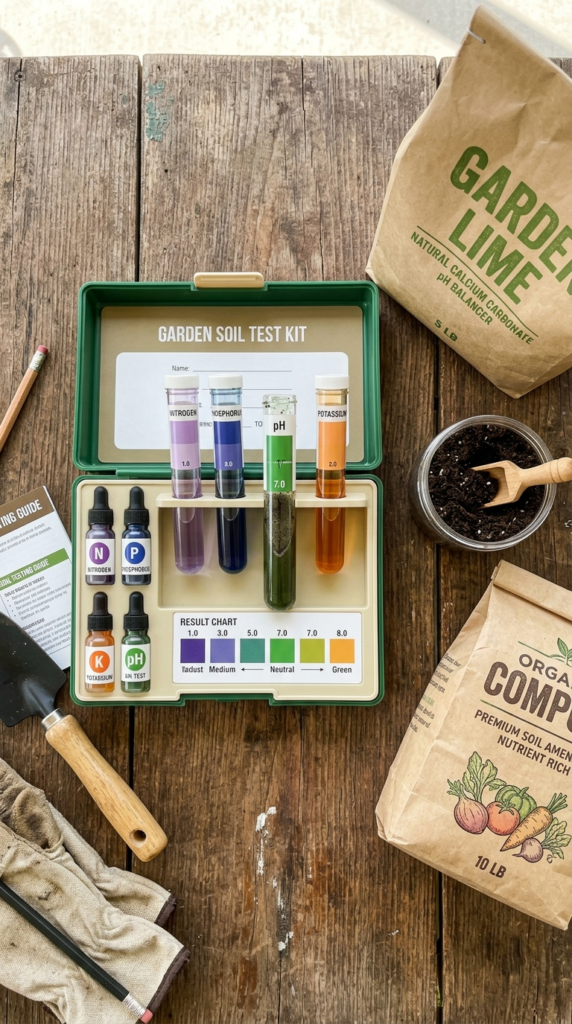
The secret to bigger daylily blooms often lies underground — literally. Fall is the ideal time to test your soil and make amendments, because organic materials have all winter to break down and integrate before your plants need them in spring.
Daylilies thrive in slightly acidic to neutral soil — a pH of 6.0 to 6.5 is the sweet spot. Pick up an inexpensive soil test kit from a garden center or send a sample to your local cooperative extension for a more detailed analysis.
If your soil is too acidic, add garden lime. Too alkaline? Incorporate sulfur or acidic compost. While you’re at it, work in a generous layer of finished compost to improve drainage, soil structure, and microbial activity all at once.
💡 Pro Tip: If your daylilies are growing in clay-heavy soil, fall is the best time to work in coarse sand and compost to improve drainage — because poor drainage is one of the top reasons daylily crowns rot over winter.
Learn how to test and improve your garden soil for perennials before the growing season begins.
Healthy soil is the foundation of every stunning bloom — invest in it!
9. Relocate Plants That Aren’t Thriving

Be honest with yourself here: if a daylily has been underperforming for two seasons in a row, the location is probably the problem. Daylilies need at least 6 hours of direct sun per day to bloom their best, and shady spots simply won’t cut it.
Fall is actually the ideal time to transplant daylilies because cooler temperatures drastically reduce transplant stress. The plant can focus all its energy on re-establishing roots rather than simultaneously trying to survive summer heat.
Dig up the underperforming plant, move it to a sunnier spot with good drainage, and replant at the same soil depth. Water it in well and add a light mulch layer. By spring, it’ll be settled in and ready to finally show you what it’s capable of.
Find the best sun-loving perennials for your garden beds to plan the perfect companions.
Sometimes the plant just needs a better address — give it one!
10. Clean Up Debris Around the Crown
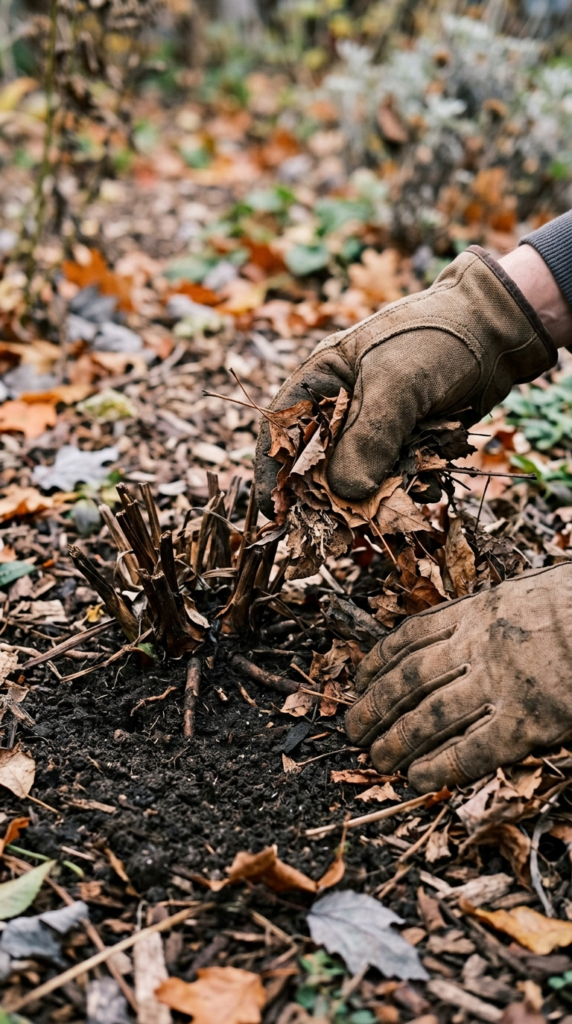
This step is quick, easy, and genuinely important. Dead leaf litter and debris piled around the crown creates the perfect damp, sheltered habitat for fungal disease, slugs, and overwintering pest eggs.
After you’ve cut back the foliage, take a few extra minutes to gently clear away any remaining dead material, old mulch, and debris from right around the crown of the plant. You don’t need to be aggressive — just clear and tidy.
Then you’re ready to apply fresh mulch on a clean, debris-free base. That one-two punch of cleanup plus fresh mulch gives your daylilies the healthiest possible environment to overwinter in.
Read our fall garden cleanup checklist for perennial beds to make sure you don’t miss a thing.
A clean crown is a happy, healthy crown going into winter!
11. Treat Any Disease Issues Now
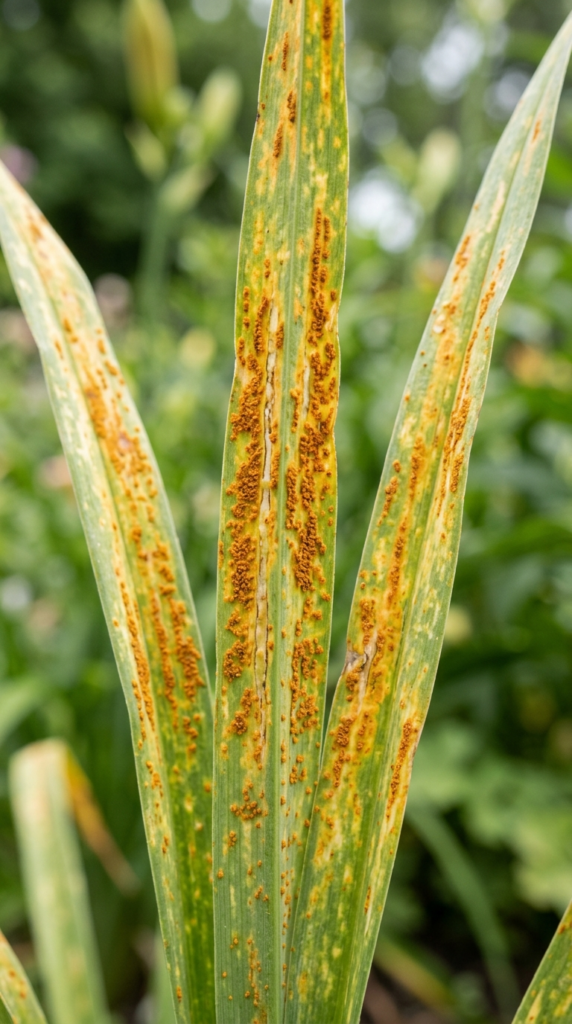
If you noticed any leaf streak, crown rot, or daylily rust during the growing season, fall is your opportunity to deal with it before it overwinters and reinfects your plants next year. Don’t skip this step — disease can absolutely kill your bloom potential.
Daylily rust (caused by the fungus Phakopsora hemerocallidis) shows up as yellow streaks on leaves with rusty orange pustules underneath. If you saw this, remove and bag all affected foliage, then treat the crown area with a copper-based fungicide.
For crown rot issues, improve drainage now (see tip #8!) and avoid overwatering. Remove any soft, mushy crown sections and dust the cut area with garden sulfur before replanting or mulching.
💡 Pro Tip: Switching to drip irrigation instead of overhead watering significantly reduces fungal disease in daylilies, since wet foliage is one of the primary disease triggers.
Visit Missouri Botanical Garden’s plant finder for a detailed daylily disease and problem guide.
Handle disease head-on this fall and start fresh with a clean, healthy plant next spring!
12. Mark Your Varieties Before They Disappear
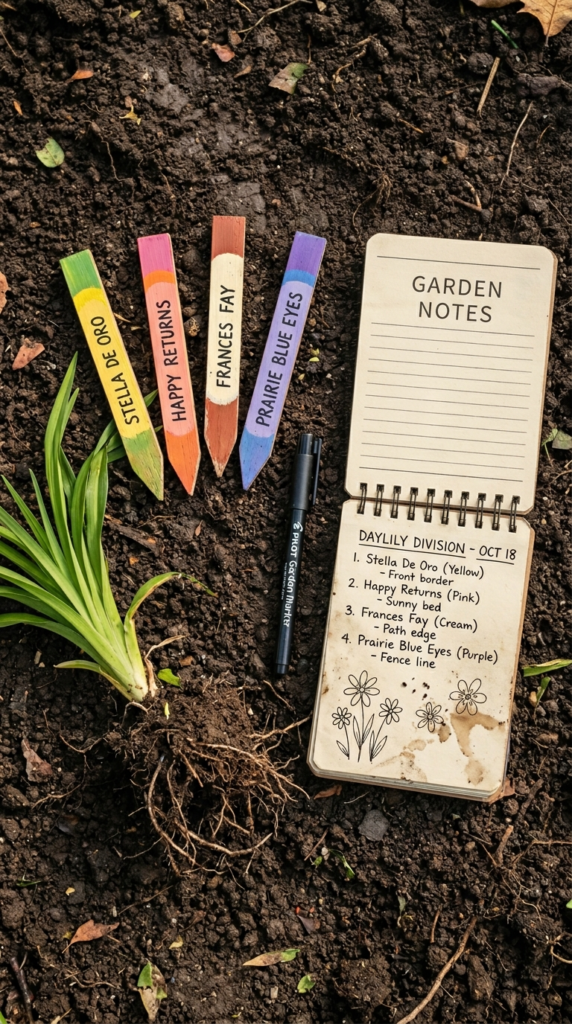
Here’s something so many gardeners kick themselves over every spring: by the time those first green shoots emerge, you have absolutely no idea which daylily is which. Labeling your varieties now while the plants are still somewhat visible saves enormous frustration.
Use waterproof, UV-resistant plant labels and a permanent marker — cheap stakes fade and disintegrate over winter, so invest in quality markers. Write the variety name and color so you remember exactly what you’ve got when planning your garden layout for next season.
This is especially important if you’re growing multiple cultivars and want to make intentional decisions about which to divide, move, or expand. Knowing your varieties also helps you look up their specific care preferences for maximum bloom performance.
Find our favorite durable plant labeling solutions for the garden to keep your beds beautifully organized.
Label now, thank yourself enormously later — trust us on this one!
13. Add Companion Plants for Spring Support
Fall is the perfect window to plant spring-blooming bulbs right alongside your daylilies — and the combination is absolutely stunning in the garden. Tulips, daffodils, and alliums will pop up and bloom in the gap between late winter and early summer, right before your daylilies take over the show.
This layered planting approach means your garden bed has something exciting happening from early spring all the way through late summer. It’s a simple trick that makes your garden look like it was designed by a pro.
Daffodils are a particularly smart companion choice because deer and rodents avoid them, which offers some protection to your nearby daylily crowns during winter. Win-win!
Discover the best companion plants for daylilies in your garden beds to plan your most beautiful season ever.
Layer your garden with fall bulbs now and enjoy a seamless, stunning show all season long!
14. Plan Your Bloom Layout for Next Year
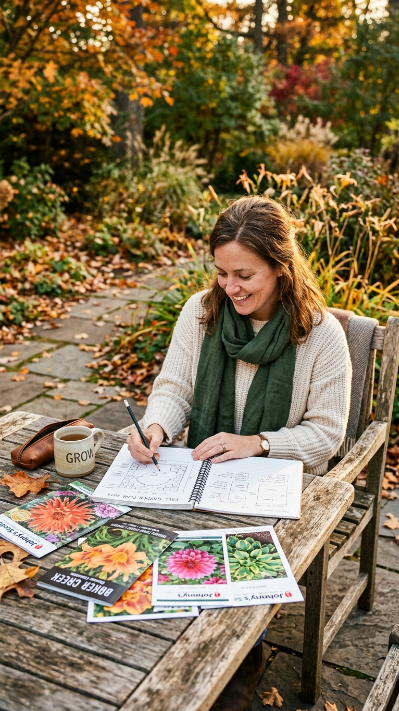
The final piece of fall daylily care is the most fun one: dreaming and planning! Fall is when your memory of the garden is freshest — you remember exactly which spots looked sparse, which colors clashed, and which plants absolutely stole the show.
Grab a notebook and sketch your current bed layout while it’s still visible. Note which daylily varieties performed best, where you want to add more color next summer, and which areas need more plants to fill in gaps.
Cross-reference with daylily catalogs or reputable online nurseries — many offer pre-order discounts in fall and winter for spring shipping, and the best varieties sell out fast. Planning now means planting exactly what you want, not just what’s left on the shelf.
💡 Pro Tip: Aim to stagger bloom times by choosing early, mid, and late-season daylily varieties together, so your display is continuous from June right through August or even September.
Browse our guide to the best daylily varieties for continuous summer blooms to build your dream lineup.
Plan it out now and next summer’s garden will be absolutely everything you imagined!
Frequently Asked Questions
When should I cut back daylilies in fall?
Wait until after the first hard frost when the foliage has turned yellow or brown and is clearly dying back naturally. Cut stems to about 3 inches above the crown. Cutting too early can reduce the energy the plant stores for next year’s blooms, so patience really does pay off here.
Do daylilies need to be covered for winter?
In most climates, established daylilies are very cold-hardy (zones 3–9) and don’t strictly need protection. However, applying 2–3 inches of mulch over the crown after the ground cools helps prevent freeze-thaw heaving and is especially beneficial in zones 4–6 or for newly planted or divided clumps going into their first winter.
How often should I divide daylilies for the most blooms?
Most daylilies benefit from division every 3 to 4 years. If you notice a significant decline in bloom number or size, or if the center of the clump appears to be dying out, that’s a clear signal it’s time to divide regardless of the timeframe. Dividing in early fall gives new transplants time to establish before winter.
Can I fertilize daylilies in fall?
Yes, but carefully! Apply a low-nitrogen, phosphorus-rich fertilizer like bone meal or 5-10-10 in early fall to support root development. Stop fertilizing at least 6 weeks before your expected first frost date to avoid stimulating soft new growth that would be damaged by cold temperatures.
Why did my daylilies produce fewer blooms this year?
The most common culprits are overcrowding (time to divide!), insufficient sunlight (less than 6 hours daily), or nutrient-depleted soil. Pest and disease pressure can also reduce bloom output. Running through all 14 of these fall daylily care steps this season systematically addresses every one of those issues — so you’re already on the right track!
A Few Final Thoughts
Taking care of your daylilies in fall isn’t just garden maintenance — it’s an investment in one of the most rewarding shows your garden will ever put on. Each of these 14 fall daylily care tips works together to build a healthier, more energized plant that has everything it needs to explode with blooms come summer. From dividing crowded clumps to marking your varieties and planning next year’s layout, these steps are completely doable and make a genuinely massive difference. Don’t let your daylilies just survive winter — set them up to absolutely thrive next season. Your future self, standing in front of a garden overflowing with enormous, gorgeous blooms, will be so glad you did this work today. Now go make it happen!