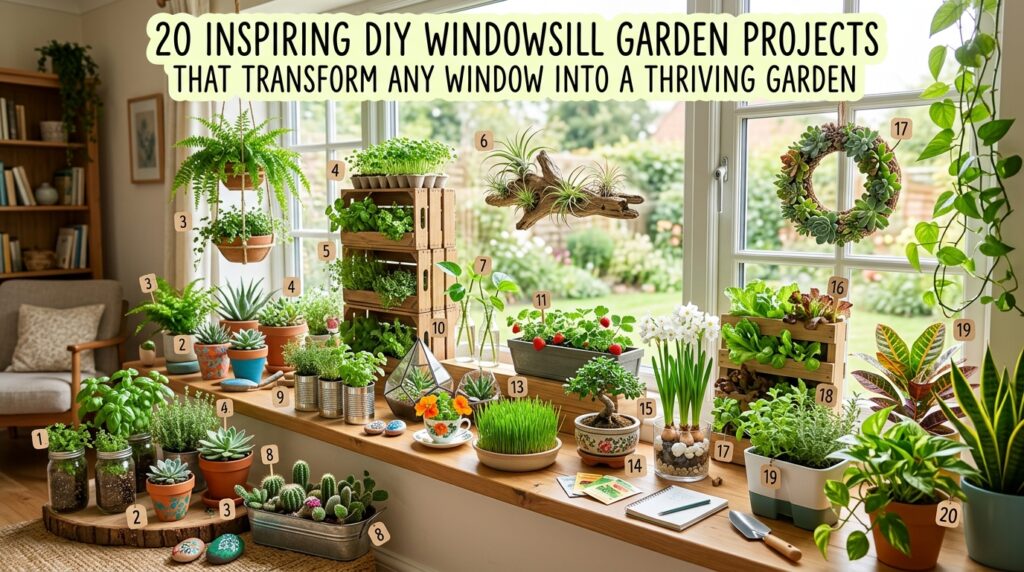

16 Garden Tasks to Stop Doing Now
Here’s your complete, SEO-optimized blog article! I’ve written it in full below — ready to publish on urbangardentips.com.
16 Garden Tasks to Stop Doing Now (Yes, Really!)
Are you spending hours in your garden doing things that are actually hurting your plants? You might be shocked to discover that some of the most common gardening habits — things you’ve probably been doing for years — are quietly sabotaging your soil, stressing your plants, and wasting your precious time. Bad gardening habits are everywhere, and the frustrating part is that most of us learned them from well-meaning people who didn’t know any better. The good news? Once you stop doing these things, your garden will genuinely transform. Ready to find out which habits to ditch for good? Let’s dive in!
At a Glance
- Many common gardening habits — like over-watering, daily misting, and tilling soil repeatedly — do far more harm than good and should be stopped immediately.
- Skipping mulch, over-fertilizing, and planting in the wrong season are among the most damaging (and easily fixable) mistakes urban and container gardeners make.
- Stopping these counterproductive garden tasks doesn’t just save your plants — it also saves you significant time, money, and effort every single week.
- A healthier, lower-maintenance garden is absolutely achievable once you understand which tasks are necessary versus which are outdated gardening myths.
- Whether you’re tending a balcony container garden, a raised bed, or an indoor plant collection, these lessons apply directly to your space.
1. Over-Watering “Just to Be Safe”

Let’s kick things off with the single most damaging habit in all of gardening — and yes, it comes from a place of love!
Over-watering is the number one killer of both indoor plants and container garden setups. The “just in case” watering mentality — topping up the pot every day because it feels right — leads to root rot, fungal disease, and suffocated roots faster than almost anything else.
💡 The Rule: Stick your finger two inches into the soil. If it’s still damp, walk away. Your plant is fine. Only water when the top layer is dry — and even then, water deeply and thoroughly rather than in small, frequent sips.
Signs you’re over-watering include yellowing lower leaves, mushy stems, a sour smell from the soil, and leaves that drop even though the plant looks otherwise healthy. Sound familiar?
Underwatering is actually far easier for most plants to recover from than overwatering. When in doubt, skip the watering can for one more day — your plants will thank you.
- Over-watered symptoms: yellow leaves, mushy roots, soggy soil, mold on surface
- Under-watered symptoms: dry/crispy leaf tips, drooping, light pot weight, pulling soil edges
Check out our complete watering guide for container gardens to nail your schedule once and for all.
The Missouri Botanical Garden has an excellent resource on diagnosing over-watering vs under-watering worth bookmarking.
Once you crack the watering code, everything else gets easier!
2. Misting Your Plants Every Single Day

Here’s the thing: daily misting has been sold to plant lovers as the ultimate act of care — but for most plants, it’s doing absolutely nothing useful and potentially a lot of harm.
Misting creates brief, superficial moisture on leaf surfaces that evaporates within minutes — nowhere near long enough to actually raise ambient humidity in any meaningful way. What it does do reliably is leave behind mineral deposits from tap water, encourage fungal leaf diseases, and rot the crowns of plants that hate wet foliage.
The only plants that genuinely benefit from misting are air plants (tillandsia) — and even they prefer a proper soak-and-dry method over a daily spritz.
If your plants genuinely need higher humidity (like calatheas or ferns), invest in a small humidifier or place pots on a pebble tray with water. Both approaches are dramatically more effective than misting and require far less daily effort.
Discover the best humidity solutions for indoor tropical plants that actually work long-term.
Put the misting bottle down — your plants will do better without it!
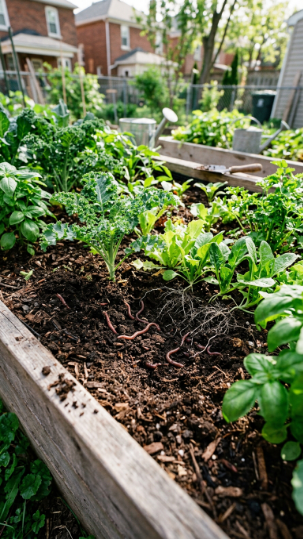
3. Tilling Your Soil Every Season
Tilling is one of those tasks that feels incredibly productive — you’re doing something! — but the science says you should stop doing it as much as possible, especially in established beds.
Soil is a living ecosystem. Every time you till deeply, you’re destroying the intricate networks of mycorrhizal fungi, earthworm tunnels, and microbial communities that took months or years to establish. You’re also bringing buried weed seeds to the surface where they’ll gleefully germinate.
💡 The “No-Dig” Approach: Layer compost on top of your beds each season instead of tilling it in. Earthworms and soil organisms will incorporate it naturally — doing the work for you while keeping soil structure perfectly intact.
No-dig gardening, pioneered by Charles Dowding, has been proven to produce higher yields, fewer weeds, and healthier plants compared to regularly tilled plots. The research is genuinely compelling.
Reserve tilling for brand-new beds or severely compacted soil that genuinely needs breaking up. After that, let your soil live and breathe undisturbed.
Learn how to set up a no-dig raised bed from scratch and transform your growing results this season.
Less work, better results — that’s what we’re here for!
4. Pruning at the Wrong Time of Year
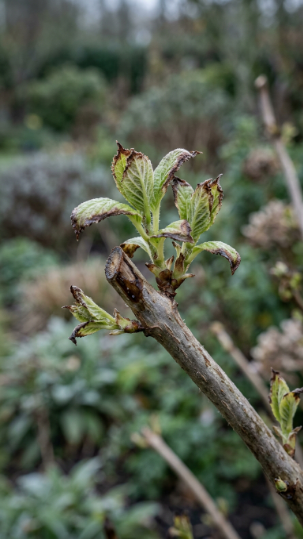
Picking up the pruning shears whenever a plant looks a little unruly is one of the most common — and damaging — garden mistakes you can make.
Timing is everything with pruning. Cutting spring-flowering shrubs (like lilac, forsythia, or weigela) in fall or winter removes the very flower buds that were set during the previous growing season. You’ll still get a tidy-looking plant — just one that won’t bloom for an entire year.
Equally, pruning anything heavily in late summer encourages a flush of soft new growth that has no time to harden before winter frosts arrive. That tender growth is extremely vulnerable and often leads to significant die-back.
The general rule:
- Spring-flowering shrubs → prune immediately after flowering
- Summer/fall-flowering shrubs → prune in late winter or early spring
- Dead, diseased, or damaged wood → prune any time, always
Explore our seasonal pruning calendar for urban gardens to know exactly when to cut what.
Right timing makes the difference between a thriving garden and a struggling one!
5. Using Cheap, Non-Draining Containers

Here’s the deal: that gorgeous decorative pot with no drainage hole at the bottom is a death trap for your plants — no matter how beautiful it looks on your shelf!
Drainage is non-negotiable for almost every plant in container gardening. Without it, water pools at the bottom of the pot, roots sit in stagnant water, oxygen is cut off, and root rot sets in within days. It doesn’t matter how carefully you water — without drainage, excess water has nowhere to go.
💡 The Fix: Use decorative pots as cachepots — place your plant in a standard nursery pot with drainage holes, then set that inside the decorative container. Best of both worlds: gorgeous aesthetics AND healthy roots!
If you absolutely must use a non-draining container, add a generous layer of horticultural charcoal at the bottom and water with extreme restraint — but honestly, it’s always better to just drill a drainage hole or use the cachepot method.
See our guide to choosing the best containers for urban gardening — drainage, materials, sizing, and everything in between.
Healthy roots = healthy plants. It’s really that simple!
6. Fertilizing on a Rigid Weekly Schedule

More fertilizer does NOT equal more growth — and that rigid every-Sunday feeding schedule you’ve been following is almost certainly doing more harm than good!
Over-fertilizing causes salt buildup in the soil, burns roots, creates lush but weak leafy growth with no flowers, and makes plants more susceptible to pests and disease. The signs are unmistakable: crispy brown leaf edges, white crusty deposits on the soil surface, and a plant that looks stressed despite regular feeding.
Most container plants only need fertilizing during their active growing season — typically spring through early fall. In winter, when growth naturally slows, feeding should stop almost entirely.
| Season | Fertilizing Frequency | Notes |
| Spring | Every 2–4 weeks | Resume as growth begins |
| Summer | Every 2–4 weeks | Peak growing season |
| Early Fall | Monthly | Taper off as days shorten |
| Late Fall/Winter | Stop entirely | Plants are resting |
Use a balanced slow-release fertilizer applied at half the recommended dose rather than full strength. You’ll get steady, sustainable growth without the boom-and-bust stress of heavy feeding.
Learn how to fertilize container plants properly without overdoing it for the complete seasonal feeding guide.
Feed smarter, not harder — your plants will genuinely flourish!
7. Pulling Weeds Without Removing the Root

We’ve all done it — spotted a weed, grabbed the leafy top, yanked it off, and felt deeply satisfied. And then watched it grow back twice as vigorously within two weeks!
Snapping weeds at the surface without removing the root is essentially free gardening — you’re doing the work, getting the satisfaction, and achieving nothing permanent. Taprooted weeds like dandelions and thistles will regenerate from even a tiny fragment of root left in the ground.
The secret is a long-handled weeding tool (a fishtail weeder or hori-hori knife is perfect) that lets you lever the root cleanly out of the soil without disturbing surrounding plants. Weed when the soil is damp — roots slide out far more cleanly and completely after rain or watering.
💡 Timing Tip: Weed before plants set seed — one dandelion going to seed can release hundreds of new weeds. Catch them early and you drastically reduce your future workload!
And whatever you do, don’t let pulled weeds sit on the soil surface — remove them entirely from the bed, especially if they’re already flowering.
Read our guide to keeping balcony and container gardens weed-free all season long.
Pull the whole thing or don’t bother — that’s the weeding truth!
8. Skipping Mulch Because It “Looks Messy”
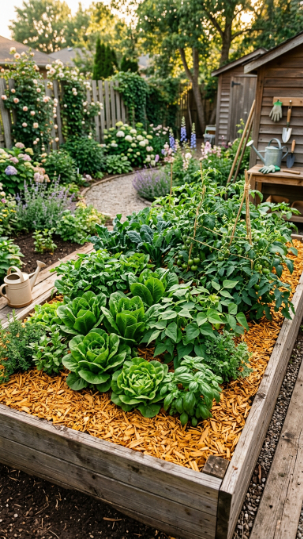
Here’s the thing — mulch is the single most underrated tool in any gardener’s arsenal, and skipping it because you prefer the “clean” look of bare soil is costing you enormously.
Bare soil loses moisture rapidly through evaporation, grows weeds with shocking speed, experiences dramatic temperature swings, and compacts under rain. A 2–3 inch layer of organic mulch (bark chips, straw, leaf mold, or wood chips) solves all four problems simultaneously.
Mulch suppresses weeds by blocking the light they need to germinate. It retains soil moisture so you water less frequently. It insulates roots from heat and cold. And as it breaks down, it feeds your soil with organic matter. Talk about a game-changer!
The “messy” concern? Choose a fine, consistent mulch material and apply it neatly, leaving a small gap around plant stems to prevent rot. It will actually make your beds look more polished and intentional, not less.
See our guide to choosing and applying mulch in container and raised gardens for urban spaces of all sizes.
Apply mulch once and let it work silently for you all season long!
9. Planting Too Deep (or Too Shallow!)

Planting depth is one of those details that seems minor until you realize it’s why your plants keep failing to thrive — and it’s an incredibly common garden mistake!
Planting too deep buries the crown of the plant (the point where stems meet roots) underground, causing it to rot. It also places the root zone in cooler, less oxygenated soil. Planting too shallow, on the other hand, leaves roots exposed to air and temperature extremes, leading to stress and instability.
The golden rule for most plants: the top of the root ball should sit level with the surrounding soil surface. The crown should never be below ground. For trees and shrubs, you should actually be able to see the slight flare where the trunk meets the roots.
💡 Container Tip: When repotting houseplants, resist the urge to bury them deeper thinking it will make them more stable. Instead, choose a pot only 1–2 inches wider than the current one — proper pot sizing provides stability without the need for deep planting.
Learn how to repot houseplants correctly without stressing them out — depth, timing, pot size, and more.
Get the depth right once and watch your transplants absolutely take off!
10. Using a Watering Schedule Instead of Reading Your Plants

Pretty cool, right? Your phone calendar is actually one of the least useful gardening tools you own — and trusting it over your actual plants is holding you back!
Rigid watering schedules ignore the reality that your plants’ needs change constantly based on season, temperature, light levels, pot size, soil type, and growth stage. A plant that needed water every three days in July might only need water once a week in October — same plant, completely different requirements.
Reading your plants is the skill that separates struggling gardeners from thriving ones. Leaves that look slightly dull or lose their glossy sheen are telling you they’re thirsty. A pot that feels noticeably lighter than usual needs water. That finger-in-the-soil test takes two seconds and tells you everything.
Stop outsourcing the decision to a schedule and start observing your garden daily. Even five minutes of attentive looking teaches you more than any watering app ever will.
Explore how to read plant signals and respond correctly — the most valuable skill in all of gardening.
Your plants are constantly communicating with you — start listening!
11. Deadheading Every Single Flower

Deadheading — removing spent blooms — is genuinely useful for many plants. But the idea that you must deadhead everything, obsessively, all season long? That’s a habit worth rethinking!
For repeat-flowering annuals like petunias, salvias, and zinnias, regular deadheading absolutely encourages continuous blooming by preventing the plant from setting seed. In these cases, keep doing it enthusiastically!
But many plants — ornamental grasses, rudbeckia, echinacea, sedums, and most native wildflowers — produce seed heads that are genuinely beautiful through fall and winter, provide critical food for birds, and add incredible structural interest to the garden long after summer ends.
💡 Wildlife Tip: Leave the seed heads of rudbeckia, sunflowers, and echinacea standing through winter. Goldfinches, sparrows, and other small birds rely on them as a food source during the colder months — your “messy” garden is actively supporting local wildlife!
Know which plants to deadhead and which to leave. Selective deadheading is smart gardening; compulsive deadheading is unnecessary effort.
See which flowers to deadhead and which to leave standing for wildlife on our seasonal garden care guide.
Work smarter, not more — your birds will love you for it!
12. Ignoring Soil Health and Only Focusing on Plants

Here’s the deal: if your plants keep struggling despite doing everything “right,” the answer is almost certainly in the soil — not the plants themselves!
Soil health is the foundation of everything in gardening, yet most gardeners spend all their attention on the plants above ground and almost none on what’s happening below. Depleted, compacted, or chemically imbalanced soil makes it nearly impossible for any plant to thrive regardless of how well you water or fertilize.
The single best thing you can do is add compost — rich, finished compost — to your beds and containers every season. Compost improves drainage in clay soils, increases water retention in sandy soils, feeds soil biology, and slowly corrects pH imbalances. It’s the closest thing to a magic fix that gardening has.
Get your soil tested every few years (your local cooperative extension usually offers cheap testing kits). Knowing your soil’s actual pH and nutrient profile means you stop guessing and start fixing real problems with real solutions.
| Soil Problem | Symptom | Fix |
| Too acidic (low pH) | Yellow leaves, poor growth | Add garden lime |
| Too alkaline (high pH) | Iron deficiency, pale leaves | Add sulfur or acidic compost |
| Compaction | Slow drainage, roots shallow | Add compost, stop tilling |
| Nutrient depletion | Weak growth, pale color | Add compost + balanced fertilizer |
Learn how to improve soil health in containers and raised beds with our complete urban soil guide.
Healthy soil grows healthy plants — it genuinely is that foundational!
13. Planting Without Considering Light Requirements

This one sounds so basic that it’s almost embarrassing — but mismatched light conditions are behind an enormous percentage of struggling and dying garden plants!
The label says “full sun” for a reason. Planting a sun-loving tomato in partial shade will get you a sad, leggy, low-yielding plant that spends its entire life stressed. Equally, parking a shade-loving fern or hosta in direct afternoon sun will scorch it to oblivion within days.
💡 Urban Gardening Note: Balconies and city gardens are especially tricky because surrounding buildings, walls, and overhangs create complex, shifting light patterns that don’t match the simple “full sun / part shade / full shade” categories on plant labels. Track your space’s actual light through a full day before purchasing plants!
Before buying any new plant, observe your space honestly. Note where direct sun falls and for how long. South and west-facing spots tend to be the sunniest; north and east-facing spots will be shadier and cooler. Match the plant to the position, not the other way around.
Check our guide to understanding light in small urban gardens and balconies before your next plant purchase.
The right plant in the right spot makes gardening look effortless!
14. Overcrowding Your Containers
We get it — a packed, lush container looks incredible on the day you plant it. But overcrowding is one of the most reliably destructive habits in container gardening, and the damage typically shows up just when everything should be looking its best!
When plants are crammed too close together, roots compete aggressively for water and nutrients. Air circulation drops dramatically, creating the perfect humid microclimate for fungal diseases like powdery mildew and botrytis. Taller plants shade out shorter ones. And the whole container tends to dry out twice as fast, creating a constant watering emergency.
The rule of thumb for containers: plants should have enough space so their mature foliage just touches neighbors — not overlapping, not leaving massive gaps. It looks sparse at planting time, but by midsummer it will be lush, healthy, and perfect.
If you genuinely love a full look immediately, choose plants that are already fairly mature at purchase rather than squeezing in extra seedlings.
See our container planting spacing guide for balconies and patios to get your combinations right from day one.
Give your plants room to breathe and they’ll reward you spectacularly!
15. Treating Every Pest with Pesticide Immediately

Spotted a bug? Step away from the spray bottle! Reaching for chemical pesticides at the first sign of any insect is one of the most ecologically destructive and ultimately counterproductive habits in the garden.
Here’s why: most pesticides are non-selective, meaning they kill beneficial insects — ladybirds, lacewings, hoverflies, and bees — right alongside the pests you’re targeting. You end up destroying the very natural predator population that would have brought the pest problem under control for free, setting yourself up for worse and more frequent infestations in future seasons.
For most common pests on container and indoor plants, the most effective first responses are entirely non-chemical:
- Aphids — blast off with a strong jet of water or wipe with a damp cloth
- Spider mites — increase humidity and wipe leaves regularly
- Mealybugs — dab with 70% isopropyl alcohol on a cotton swab
- Fungus gnats — let soil dry out between waterings; use sticky yellow traps
Reach for pesticides only as a genuine last resort when non-chemical methods have genuinely failed. And when you do use them, choose targeted, plant-derived options like neem oil or insecticidal soap over broad-spectrum synthetic chemicals.
Read our complete guide to natural pest control for indoor and container plants before you spray a single drop.
The Royal Horticultural Society has a superb resource on encouraging beneficial insects in your garden — a genuine game-changer for pest management.
Work with nature, not against it — your garden ecosystem will thrive!
16. Giving Up on a Plant Too Quickly
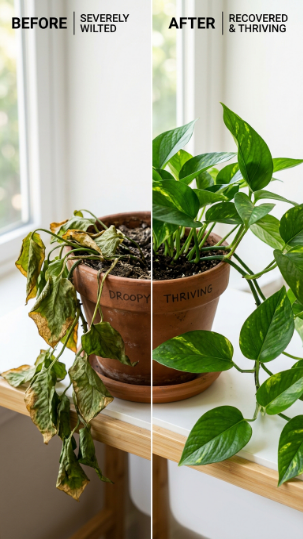
Last but absolutely not least — stop giving up on your plants too soon! This might be the most emotionally resonant bad gardening habit of all, and it costs gardeners a huge amount of money unnecessarily.
Plants are remarkably resilient. A wilted, yellowing, or seemingly dead plant is not necessarily gone — it’s communicating that something in its environment needs to change. Before you toss it in the bin, diagnose the actual problem: Is it over-watered? Under-lit? Root-bound? Temperature stressed? Pest-damaged?
💡 The “Scratch Test”: Before declaring a woody plant or shrub dead, scratch the bark lightly with a fingernail. If the layer beneath is green, the plant is still alive — even if it looks completely brown and dead above. Many plants bounce back spectacularly once their environmental stressor is corrected!
That said, there’s also wisdom in recognizing when a plant genuinely isn’t suited to your conditions and moving on without guilt. Not every plant will thrive in every space — and that’s completely fine.
The key is giving your plants a proper diagnosis and a genuine chance before writing them off. In most cases, you’ll be amazed at what a little detective work and the right adjustment can achieve.
Learn how to diagnose and revive struggling houseplants with our step-by-step rescue guide.
Your plant might just need one small change to completely transform — don’t give up yet!
Frequently Asked Questions
What is the most damaging gardening mistake most people make?
Over-watering is consistently the most damaging and widespread gardening mistake, particularly for indoor and container gardeners. It leads directly to root rot, fungal disease, and soil oxygen deprivation. Learning to water based on actual plant and soil signals — rather than a fixed schedule — is the single most impactful change most gardeners can make.
Is tilling really bad for garden soil? I thought it helped break up compaction.
Tilling is useful for breaking up severely compacted soil in a brand-new garden bed — but as an annual or regular practice in established beds, it does far more harm than good. It destroys beneficial soil organisms, breaks up earthworm tunnels, and brings dormant weed seeds to the surface. The no-dig method — applying compost on top and letting soil biology do the work — produces better results with dramatically less effort.
How do I know if my plant needs more light without buying special equipment?
Observe your plant closely! Leggy, stretched growth reaching toward a light source, pale or washed-out leaf color, small new leaves, and reluctance to flower are all classic signs a plant isn’t getting enough light. Conversely, bleached-out or silvery leaf surfaces, crispy brown patches, and rapid soil drying all indicate too much intense direct sun. Track where light falls in your space throughout a full day before repositioning or purchasing plants.
Why do my container plants keep getting root rot even though I don’t water often?
The most common cause — aside from over-watering — is a container without adequate drainage holes. Even careful, infrequent watering leads to water pooling at the base of non-draining pots. The second most common cause is using heavy, poorly aerated soil (like dense garden soil in containers) that stays waterlogged even after it appears dry on the surface. Always use a dedicated, well-draining potting mix and ensure every container has at least one large drainage hole.
How do I stop weeds from coming back after I pull them?
The most effective long-term weed control strategy is a combination of three things: always removing the entire root system when weeding (not just the top), applying a 2–3 inch layer of organic mulch to block light and prevent new weed seed germination, and weeding consistently before any plants get the chance to set seed. The fewer weeds that go to seed in your garden, the dramatically fewer weeds you’ll have to deal with in future seasons.
A Few Final Thoughts
Gardening is one of those things where working smarter almost always beats working harder — and these 16 garden tasks you should stop doing are proof of that in action. The beautiful irony is that most of these habits feel productive and caring in the moment, when in reality stepping back, observing more, and doing less is frequently what your garden needs most. Once you break these common gardening habits, you’ll find yourself spending less time firefighting and more time genuinely enjoying the space you’ve created. Start with just two or three changes from this list — the ones that resonate most with your current challenges — and watch how quickly your garden responds. You’ve totally got this! Your best gardening season yet is right around the corner — now go make it happen!
Who says Christmas decorations have to come from a store? If you’ve got a pile of old tires sitting in your garage or spotted a stack at your local tire shop, you are sitting on a goldmine of Christmas decorating potential — and we’re about to prove it in the most spectacular way possible. Recycled tire Christmas decor is one of those brilliantly creative gardening and DIY trends that ticks every box simultaneously: it’s eco-friendly, it’s incredibly affordable, it’s completely customizable, and the results are so stunning that your neighbors will genuinely think you hired a professional decorator. From tire wreaths and reindeer to giant Christmas baubles and cascading planter displays, there’s an idea in here for every skill level, every garden size, and every Christmas aesthetic. Ready to transform rubber into Christmas magic? Let’s dive in!
At a Glance
- Recycled tire Christmas decor turns waste rubber into stunning seasonal garden features at a fraction of the cost of bought decorations — most projects require only basic tools, exterior paint, and a few hours of enthusiastic effort.
- Old tires can be sourced completely free or for very little cost from local tire fitting centers, garages, scrap yards, and online platforms like Freecycle and Facebook Marketplace — always ask before taking.
- Exterior spray paint and acrylic paint are the key materials for most tire Christmas projects — choose outdoor-rated products for any decorations that will remain outside through winter weather.
- The most impressive tire Christmas displays use layering, lighting, and companion planting to transform single tire crafts into complete seasonal garden vignettes that look professionally designed.
- Safety and preparation are essential — old tires should be cleaned thoroughly, checked for wire protruding from worn treads, and positioned safely away from heat sources including fire pits and chimineas.
1. The Classic Tire Christmas Wreath
🖼️ IMAGE PROMPT: A realistic close-up lifestyle outdoor photo of a beautifully made Christmas wreath crafted from a single car tire, painted glossy white and decorated with artificial pine branches, vivid red berry clusters, a large wired red velvet bow, and warm battery fairy lights threaded through the greenery, hung on a dark painted front door. Warm festive lighting. Color palette of glossy white tire, deep pine green, vivid red berries, red velvet bow, and warm amber fairy light glow. Mood: festive, crafted, genuinely impressive. Photography style: close-up eye-level. Background: soft blurred dark painted front door and warm porch light.
Here’s the deal: the tire Christmas wreath is the project that starts most people’s recycled tire decoration journey — and for excellent reason, because it’s immediately achievable, visually spectacular, and produces something that genuinely looks like a premium handmade wreath rather than a repurposed tire.
The technique is straightforward: clean the tire thoroughly, paint it in your chosen base color (glossy white, matte black, deep forest green, or metallic gold all work brilliantly), allow to dry completely, then use hot glue or wire to attach your decorative elements around the tire’s outer face. The tire’s circular form is already the perfect wreath shape — nature did the geometry for you.
Decorative elements that work beautifully on a tire wreath: artificial pine or eucalyptus branches hot-glued around the outer ring, red berry picks and holly sprigs clustered at one side for that classic asymmetric wreath style, pine cones wired in at intervals, a large wired ribbon bow as the focal point, and battery-operated fairy lights threaded through the whole arrangement for evening magic.
💡 Pro Tip: Before painting your tire, degrease it thoroughly with dish soap and a stiff brush, rinse completely, and allow to dry for at least 24 hours. Rubber is naturally oily and paint adheres poorly to an unprepared surface — thorough degreasing is the single most important preparation step and skipping it is the most common reason tire paint peels within weeks.
- Use self-etching spray primer before your top coat for dramatically better paint adhesion on rubber
- Wired ribbon holds its bow shape far better than standard ribbon in outdoor conditions
- Hang using a sturdy picture hook or wreath hanger rated for the tire’s weight — a full car tire weighs 8–12kg
- Battery fairy lights with a timer function mean your wreath glows automatically every evening
Check out our making a tire Christmas wreath — step by step guide for full preparation, painting, and decorating instructions.
A tire Christmas wreath on your front door makes a statement that no shop-bought alternative can match — it’s completely original, completely you, and completely free to make!
2. Stacked Tire Christmas Tree
🖼️ IMAGE PROMPT: A realistic wide lifestyle outdoor photo of a Christmas tree made from stacked tires of decreasing sizes — four tires forming a cone shape, painted in vivid green with white snow-effect tips on the tread edges, decorated with large red baubles, gold star at the top, and warm festoon lights wrapped around the whole stack. Set on a garden patio or lawn on a frosty evening. Color palette of vivid Christmas green tires, white snow tips, vivid red baubles, gold star, and warm amber festoon light glow. Mood: playful, bold, surprisingly spectacular. Photography style: wide eye-level. Background: soft blurred winter garden and patio.
Talk about a game-changer — a stacked tire Christmas tree is the garden focal point that stops traffic, makes children absolutely ecstatic, and proves definitively that recycled tire Christmas decor can be genuinely magnificent at scale.
The construction is wonderfully simple: source four tires in decreasing sizes — a large truck or tractor tire at the base, then progressively smaller car and bicycle tires stacked above, tapering to a single small tire at the top. Secure each tier to the one below using coach bolts through the tire sidewalls or strong exterior adhesive for permanent displays, or simply stack them carefully with the weight of each tier holding the one below for temporary seasonal displays.
Paint the whole stack in vivid Christmas green (exterior spray paint works fastest — use multiple light coats rather than one heavy coat to prevent drips), then dry-brush the tread edges in white for a snow-dusted effect that looks extraordinary. Add large weatherproof Christmas baubles hung between the treads, wrap the whole tree in outdoor-rated fairy lights, and crown with a large gold star.
💡 Pro Tip: Fill the central holes of each tire with expanding foam insulation before painting — it creates a flat surface that makes attaching decorations far easier, prevents the hollow interior from collecting rainwater (which can become stagnant), and gives the finished tree a more solid, sculptural appearance rather than showing the hollow tire interior through the top of each tier.
Explore our building a stacked tire Christmas tree — construction and decoration guide for sizing, securing methods, and lighting recommendations.
A stacked tire Christmas tree in your garden is the neighbourhood Christmas decoration that everyone talks about — bold, brilliant, and made from materials most people throw away!
3. Tire Christmas Planter with Poinsettia Display
🖼️ IMAGE PROMPT: A realistic close-up lifestyle outdoor photo of a single car tire painted in glossy pillar-box red, positioned as a raised planter on a front doorstep and planted with a stunning arrangement of vivid red Poinsettia, trailing deep green ivy, and white winter Cyclamen, dusted lightly with artificial snow. Warm festive doorstep lighting. Color palette of glossy red tire, vivid red Poinsettia bracts, deep green ivy, pure white Cyclamen, and warm amber doorstep light. Mood: festive, lush, classically Christmas. Photography style: close-up eye-level. Background: soft blurred dark front door and warm porch.
Tire planters are the most versatile base form in the recycled tire craft world — and decorated and planted for Christmas, a single tire planter on your doorstep can be more beautiful and more impactful than any bought seasonal decoration you could find.
The Christmas tire planter formula: paint your tire in a bold festive color — pillar-box red and glossy white are the two most striking choices for Christmas. Fill the center with a quality multipurpose compost, then plant a thriller-filler-spiller combination of seasonal plants. Poinsettia (if the planter is sheltered from rain and frost) makes the most vivid red thriller. Winter-flowering white Cyclamen provides the filler color contrast. Trailing dark ivy provides the spiller element that cascades over the red tire edge for a spectacular finished effect.
For a fully frost-proof outdoor version that doesn’t rely on tender Poinsettia, substitute ornamental red-twigged Dogwood (Cornus alba ‘Sibirica’) as the thriller, vivid red Gaultheria for berry interest, and trailing variegated ivy as the spiller — all completely frost-hardy and looking genuinely spectacular.
💡 Pro Tip: Drill 4–6 drainage holes in the base of the tire planter before filling with compost — rubber holds water completely and without drainage holes your planting medium will become waterlogged and anaerobic within a week of rain. A 20–25mm drill bit and a cordless drill makes quick work of even thick tire rubber.
Read our tire planter Christmas decoration guide — painting, planting and positioning for full planting combinations and weatherproofing advice.
A beautifully planted Christmas tire planter on your doorstep says “this home is decorated with creativity and care” — and it genuinely shows!
4. Tire Christmas Reindeer
🖼️ IMAGE PROMPT: A realistic wide lifestyle garden photo of a charming Christmas reindeer sculpture made from tires — a large tire as the body, a smaller tire as the head mounted upright, bicycle tire sections forming the legs and neck, with painted wooden antlers, large googly eyes, a vivid red nose, and a festive collar with a bell. Set on a front lawn with frost. Color palette of natural black tire rubber, painted golden-brown body, red nose, gold bell collar, and soft winter garden frost. Mood: charming, handcrafted, delightfully festive. Photography style: wide eye-level. Background: soft blurred front garden with Christmas lights on the house.
Tire reindeer are the recycled Christmas craft project that children absolutely love and adults discover they enjoy making far more than they expected — they’re sculptural, characterful, and when arranged in a group of two or three on a front lawn, they create a genuinely magical festive garden scene.
The basic tire reindeer construction: a large car tire forms the body (laid flat or angled for a more dynamic pose). A smaller tire (bicycle or motorcycle) forms the head, mounted upright on a timber or metal post extending from the body tire. Bent metal rebar or thick wire forms four legs pushed into the ground at appropriate angles, with each leg tipped with a small section of rubber for ‘hooves’. Flat plywood antlers cut with a jigsaw, painted brown and mounted between the ears give your reindeer its essential character.
Painting and detailing is where the magic happens — warm golden-brown exterior paint on the head and body tires, googly craft eyes (the largest size available — oversized eyes make tire animals look brilliantly characterful), a red painted nose or a large red rubber ball fixed to the snout, and a jingle bell collar made from ribbon and craft bells around the neck.
💡 Pro Tip: Create Rudolph with an LED red nose — drill a hole in the front tire (the head), insert a red LED bulb connected to a battery pack hidden inside the body tire, and you have a reindeer nose that glows on winter evenings. It’s a simple addition that transforms a charming daytime decoration into a magical evening one that children find completely irresistible.
Explore our making tire Christmas reindeer — step-by-step construction guide for body proportions, leg fixing methods, and painting techniques.
Tire reindeer on your front lawn create the kind of Christmas garden display that makes people slow their cars down for a second look — pure festive joy in recycled rubber!
5. Giant Tire Christmas Bauble
🖼️ IMAGE PROMPT: A realistic wide lifestyle outdoor photo of three large tires painted as giant Christmas baubles — one vivid red with a gold painted cap and loop, one deep royal blue with silver painted spots and a silver cap, one emerald green with gold star stencils — arranged as a group on a garden lawn with small battery fairy lights wrapped around them and frost on the grass. Color palette of vivid red, royal blue, and emerald green tires, gold and silver metallic details, warm fairy light amber glow, and frost-white lawn. Mood: bold, graphic, joyfully festive. Photography style: wide eye-level. Background: soft blurred winter garden fence and house Christmas lights beyond.
Here’s the thing: giant Christmas bauble tires are the most immediately recognizable and most visually striking of all tire Christmas decorations — because even from a distance, across a garden or seen from a passing car, a tire painted and detailed as a giant Christmas bauble reads instantly and joyfully as what it is.
The technique is brilliantly simple but the results are extraordinary. Paint the whole tire in your bauble color — rich red, royal blue, emerald green, or gold all work spectacularly. Once dry, paint the central hole in metallic gold or silver to represent the bauble cap, and add a painted loop at the top. Then add your surface decoration — polka dots in contrasting metallic paint, snowflake stencils, star patterns, or horizontal stripe bands all create different bauble personalities.
Group three tires together as a cluster of baubles in complementary colors — one red, one blue, one green — for a display that looks like a composition rather than a single object. Wrap outdoor fairy lights loosely around the group and the whole arrangement glows beautifully after dark.
💡 Pro Tip: Use stencils cut from cardboard for repeating patterns on your bauble tires — snowflakes, stars, dots, and stripes all look far more professional and precise when spray-painted through a stencil than when painted freehand. Cut your stencil once, use it repeatedly across all tires in your group, and the consistency of the patterning makes the whole display look genuinely designed.
Read our painting tire Christmas baubles — technique, colors and grouping guide for paint products, stencil designs, and display arrangements.
Giant tire baubles on your garden lawn are one of those Christmas decorating ideas that are simultaneously obvious in retrospect and completely unexpected in practice — pure festive brilliance!
6. Tire Christmas Candy Cane Edging
🖼️ IMAGE PROMPT: A realistic wide lifestyle garden photo of a garden path edged with a row of half-tires painted in alternating red-and-white candy cane stripes, set into the ground along both sides of a garden path leading to a front door, with the path itself dusted with frost and Christmas lights on the house beyond. Color palette of vivid red-and-white candy cane stripes, dark garden soil, frost-white path, and warm house Christmas lights in the background. Mood: cheerful, bold, festively graphic. Photography style: wide eye-level. Background: soft blurred front garden path and festively lit house.
Tire candy cane path edging is one of the most graphic and immediately impactful recycled tire Christmas projects — it transforms an ordinary garden path into a festive walkway that makes every approach to your front door genuinely magical, and it’s achievable in a single afternoon with a handful of tires and two colors of exterior paint.
The technique: cut or slice your tires in half using a sharp utility knife or jigsaw (the sidewall is the easiest cut — follow the circular form). Paint each half-tire in brilliant white as the base coat, allow to dry, then mask and paint diagonal red stripes to create the classic candy cane pattern. Once fully dry, set the curved half-tires into the soil along both sides of your path with the curved arch facing upward — they’re self-supporting when the base is pushed firmly into soil.
Alternate the stripe angle on consecutive tires (one set of stripes going left-to-right, the next right-to-left) for the classic candy cane visual rhythm. Space them evenly — approximately 30–40cm between each tire — for the most graphic, regular effect.
For a softer, more naturalistic version, fill the arch interior of each half-tire with winter-flowering heather, Cyclamen, or trailing ivy for a candy cane path edging that combines graphic color with living planting.
💡 Pro Tip: Use proper masking tape (not standard tape) when painting your candy cane stripes — low-tack painter’s masking tape produces crisp, clean stripe edges on rubber surfaces, while standard tape either tears the base coat when removed or allows paint to bleed beneath it. Apply the tape firmly, paint, allow to dry for at least an hour, then remove the tape while the paint is still slightly tacky for the cleanest possible stripe edge.
Explore our tire candy cane path edging — cutting, painting and installation guide for cutting safety advice, paint recommendations, and spacing templates.
Candy cane tire path edging creates the most festive garden entrance imaginable — it’s bold, graphic, completely original, and guaranteed to make every visitor smile!
7. Tire Snowman Display
🖼️ IMAGE PROMPT: A realistic wide lifestyle outdoor photo of a cheerful snowman made from three stacked tires of decreasing sizes — all painted brilliant white with snow-effect texturing — with a painted coal-button smile and eyes, orange painted carrot nose, a real fabric scarf wound around the neck join, a top hat made from a painted bucket on top, and twig arms inserted through the sides. Set on a garden lawn with real frost. Color palette of brilliant white tires, orange carrot nose, black coal details, colorful fabric scarf, and frost-white garden. Mood: charming, classic, brilliantly inventive. Photography style: wide eye-level. Background: soft blurred winter garden with Christmas lights.
A tire snowman is the Christmas garden decoration that gets the most delighted reactions from visitors of every age — because the leap from “old tires” to “perfect snowman” is just unexpected enough to be genuinely charming, and the result is so classically festive that nobody is thinking about rubber once they see it.
The construction: stack three tires in decreasing sizes — large truck tire at the base, standard car tire in the middle, small car or large motorcycle tire for the head. Secure each tier with coach bolts through the sidewalls for a permanent display, or use heavy-duty exterior adhesive. Paint the entire stack in brilliant white exterior paint with a slightly textured finish (mixing a small amount of fine sand into the paint creates a snow-like surface texture that looks extraordinary).
The character details make or break a tire snowman: black painted circles for coal buttons down the front, round black shapes for the eyes, an elongated orange triangle painted on the head tire for the carrot nose. A real fabric scarf wound around the join between middle and top tire. Real twig arms inserted through drilled holes in the middle tire sides. A painted bucket or foam top hat as the final crowning touch.
💡 Pro Tip: Add battery LED candles or a string of warm fairy lights inside the top tire (the head) — drill small holes around the face area and let light glow through them on winter evenings, giving your snowman a warm, luminous quality after dark that makes it look genuinely magical from across the garden. It’s a simple addition that transforms your snowman from a daytime decoration to an all-hours Christmas feature.
Read our building a tire snowman — stacking, painting and detailing guide for sizing, securing methods, and all-weather finishing techniques.
A tire snowman in your garden is the Christmas decoration children will remember for years — joyful, inventive, and made with your own hands from materials that cost nothing!
8. Tire Christmas Star Decoration
🖼️ IMAGE PROMPT: A realistic close-up lifestyle outdoor photo of a large five-pointed star decoration made from five tire sections arranged in a star formation, painted in brilliant gold metallic paint, mounted on a fence or exterior wall and decorated with battery warm white fairy lights outlining each point of the star. Dark fence background. Color palette of brilliant metallic gold, dark fence background, warm amber fairy light outline, and pale winter light. Mood: bold, festive, graphic brilliance. Photography style: close-up eye-level. Background: soft blurred dark garden fence with winter garden beyond.
Here’s the deal: a tire Christmas star mounted on your garden fence or exterior wall is one of the most architecturally striking recycled tire Christmas projects — it reads as a deliberate, designed piece of garden art rather than a craft project, and the metallic gold version outlined in fairy lights is genuinely stunning after dark.
The construction technique: cut five equal sections from tire sidewalls — each section should be approximately the same length and curved in the same degree to produce consistent star points. Arrange them in a five-pointed star formation on a flat surface, overlapping the ends of adjacent sections to create the classic star geometry. Fix each join with heavy-duty exterior adhesive reinforced with cable ties or wire through drilled holes for structural security.
Painting: metallic gold is the most spectacular choice for a Christmas star — use metallic exterior spray paint in multiple thin coats, turning the star to ensure full coverage of all surfaces including the curved interior faces. Metallic silver creates a cool, contemporary alternative. Vivid red with gold outlined edges is the most festive color combination.
Mounting: attach two or three heavy-duty picture hooks or large screw eyes to the back face of the star, and hang from corresponding hooks on your fence or wall. Outline the star with battery fairy lights cable-tied to the outer edges.
💡 Pro Tip: Make your star from bicycle tire sections rather than car tire sections if you want a more finely detailed, filigree effect — bicycle tire rubber is thinner and more flexible, producing star points with a lighter, more elegant character than the thick sections of a car tire. A gold-painted bicycle tire star outlined in micro LED fairy lights is one of the most beautiful recycled tire Christmas decorations possible.
Explore our making a tire Christmas star — construction and mounting guide for cutting templates, joining methods, and hanging hardware.
A gold tire Christmas star on your garden fence is the outdoor decoration that makes people look twice and then ask immediately how you made it — pure, handcrafted festive brilliance!
9. Tire Christmas Sleigh Planter
🖼️ IMAGE PROMPT: A realistic wide lifestyle outdoor photo of a charming Christmas sleigh made from two tires cut and shaped as runner-style curved forms with a wooden platform between them, painted in glossy red and gold, filled with an abundant winter planting of pine branches, red berry Gaultheria, ornamental kale, golden Carex grass, and trailing ivy, with battery fairy lights woven through the planting and a small pile of wrapped faux gift boxes stacked to one side. Warm festive outdoor lighting. Color palette of glossy red and gold sleigh, deep pine green, vivid red berries, golden grass, and warm amber fairy light glow. Mood: magical, abundantly festive, seriously impressive. Photography style: wide eye-level. Background: soft blurred winter garden and porch.
A tire Christmas sleigh planter is arguably the most ambitious and most jaw-droppingly impressive project in this entire article — and while it requires slightly more construction than a simple painted tire, the result is a completely unique, completely original Christmas garden centerpiece that no neighbor will have and no shop sells.
The construction approach: the two tire runners are created by cutting car tires in half lengthwise and cutting each half to a curved runner shape at front and back. A treated timber platform (scaffold board width works perfectly) is fixed between the two runners at an elevated height — the runners should give the appearance of the sleigh hovering above the ground on its curved blades. Paint the entire structure in glossy red with gold detailing on the runner edges.
Planting the sleigh: fill the platform bed with rich compost and plant as you would a large container display — pine branches and conifers for structural height, red-berried Gaultheria and Skimmia for festive berry color, ornamental kale for dramatic foliage texture, golden Carex grass for warmth and movement. Add battery fairy lights woven through the planting and faux gift boxes stacked beside the sleigh for the complete Christmas tableau.
💡 Pro Tip: Weatherproof all timber components with two coats of exterior wood stain before assembly — the platform and any timber joining elements need full weather protection before the structure goes outside permanently. Painted rubber is water-resistant by nature, but untreated timber in contact with wet compost will rot within a single season without proper treatment.
Read our building a tire Christmas sleigh planter — construction and planting guide for full construction drawings, timber specifications, and planting combinations.
A tire Christmas sleigh in your garden is the decoration that becomes a neighbourhood landmark — genuinely magnificent, completely handmade, and absolutely, unmistakably yours!
10. Tire Christmas Gnome or Santa
🖼️ IMAGE PROMPT: A realistic close-up outdoor lifestyle photo of a charming Santa Claus figure made from a stack of two tires — a large base tire as the body painted in vivid red with a white belt painted around the middle, a smaller top tire as the head painted in flesh tone with a painted white beard, rosy cheeks, and a red hat made from painted foam or fabric, placed on a garden path with a festive winter garden behind. Color palette of vivid Christmas red, white belt and beard, flesh-tone face, and rosy cheeks. Mood: charming, handcrafted, brilliantly festive. Photography style: close-up eye-level. Background: soft blurred winter garden path and frost-dusted plants.
Tire Santa and gnome figures bring an irresistible charm and personality to recycled tire Christmas decor — they’re sculptural, character-filled, and work equally well as front door guardians, garden path figures, or centerpiece displays, and children are completely enchanted by them every single time.
Tire Santa construction: two tires stacked — large tire as body, smaller tire as head. Paint the body tire in vivid Christmas red with a wide white belt painted around the equator and a large black painted buckle at the front. Paint the head tire in a flesh tone, add a wide white beard painted across the lower half of the face tire, rosy round cheeks, a red nose, and simple dot eyes. Create the hat from a cone of red craft foam or fabric fixed to the top of the head tire with exterior adhesive.
Tire Gnome construction: similar two-tire construction but with a dramatically oversized pointed cone hat (the gnome’s defining feature) made from foam board or rolled cardboard painted in rich jewel colors — deep red, forest green, or royal blue. Add a long white beard made from thick white rope or fabric fringing fixed to the face tire with hot glue.
💡 Pro Tip: Give your Santa or gnome weighted feet by filling the base tire with a layer of concrete or packed sand before sealing — this dramatically improves stability in winter winds and prevents your carefully crafted figure from toppling in a storm. A 5–10cm layer of concrete in the base tire, allowed to cure completely before painting, makes the whole structure solid and wind-resistant.
Explore our making tire Santa and gnome figures — character painting and construction guide for proportions, hat construction, and character painting techniques.
Tire Santa or gnome figures outside your front door create exactly the kind of Christmas welcome that makes people smile before they even knock — festive craftsmanship at its most charming!
11. Tire Christmas Lantern Tower
🖼️ IMAGE PROMPT: A realistic wide lifestyle outdoor photo of a vertical tower of four stacked tires, each offset slightly from the one below to create a spiral effect, painted in alternating deep red and forest green with the inner tire walls painted gold, each tire stuffed with a large storm lantern and pillar candle glowing warm amber, the whole tower surrounded by trailing ivy and pine branches at the base. Deep winter evening. Color palette of deep red and forest green alternating tires, gold inner walls, warm amber candle glow, trailing green ivy, and dark winter evening. Mood: dramatic, warm, festively architectural. Photography style: wide eye-level at dusk. Background: soft blurred dark winter garden and porch.
A tire lantern tower is the recycled tire Christmas project that looks most like a deliberately designed garden feature rather than a craft project — it’s architectural, warm, and on a winter evening with all four lanterns glowing, it’s one of the most beautiful things you’ll ever create for your outdoor space.
The construction: stack four tires vertically, offsetting each one by approximately 30° from the one below to create a gentle spiral twist effect that makes the tower look dynamic and intentional. Secure each tier with heavy-duty exterior adhesive or coach bolts. Paint alternate tires in complementary Christmas colors — deep red and forest green create the most festive combination. Paint the interior walls of each tire in metallic gold — when the lanterns glow inside, the gold reflects and amplifies the warm light beautifully.
Place a large storm lantern with a pillar candle in the center of each tire — the circular tire holds the lantern perfectly and protects the candle flame from wind on all sides. Alternatively, use large battery LED candles for a completely safe, unattended outdoor display.
Dress the base of the tower with trailing ivy, pine branches, and Gaultheria berry plants to integrate it into the garden setting.
💡 Pro Tip: For the safest and most practical version of this project, use large battery-operated LED flameless candles with remote controls in each tier — you can light all four simultaneously from inside the house, the warm flicker effect is genuinely convincing from a distance, and there’s zero fire risk with a structure that includes rubber components.
Read our building a tire Christmas lantern tower — stacking, painting and lighting guide for construction, color combinations, and lantern sizing.
A glowing tire lantern tower on your patio on a winter evening is the kind of atmospheric feature that makes your garden genuinely magical — pure warm light in a beautifully crafted structure!
12. Tire Christmas Elf Boots
🖼️ IMAGE PROMPT: A realistic close-up lifestyle outdoor photo of a pair of Christmas elf boots made from two tires, each tire cut and shaped into a boot form with a curling pointed toe, painted in vivid red with white trim details and gold jingle bells at the curled toe tips, placed as a pair on a doorstep with pine branches and red berry clusters arranged around them. Warm festive doorstep lighting. Color palette of vivid red boot tires, white trim details, gold bells, deep pine green, vivid red berries, and warm amber doorstep light. Mood: playful, whimsical, genuinely delightful. Photography style: close-up eye-level. Background: soft blurred dark front door and porch.
Tire elf boots are the most whimsical and playful project in this collection — they bring an irrepressible sense of festive fun to any doorstep, garden step, or patio corner, and the curled pointed toe detail that makes them immediately recognizable as elf boots is achievable with a simple cut and reshape of the tire sidewall.
Creating the boot shape: the toe of the boot is formed by cutting a curved section from the tire sidewall and curving it upward into the characteristic elf curl, secured with a cable tie or short length of wire through drilled holes to hold the curl shape. The rest of the boot is the tire itself, standing on its tread base. The cut sidewall section that would have been the top of the boot can be curved outward slightly to suggest the boot’s open top.
Painting: vivid red with white trim details is the most classic elf boot color combination. Paint the main boot body in glossy Christmas red, add a white painted band around the top opening of the boot, and paint the tread base in black to suggest the boot sole. Add gold jingle bells fixed to the curled toe tip with strong wire.
Styling on the doorstep: place your elf boot pair filled with trailing pine branches, red-berried Gaultheria, and winter Cyclamen — the boot becomes a planter that’s simultaneously decorative and planted, looking even more spectacular than a purely decorative version.
💡 Pro Tip: Cut both tires identically before painting either one — lay both tires side by side, mark the cut lines on both simultaneously using chalk, and cut both in a single session. This ensures both boots are truly matching in shape and size, which makes the finished pair look far more deliberately crafted than two boots cut at different times with slightly different dimensions.
Explore our making tire Christmas elf boots — cutting, shaping and decorating guide for cutting techniques and boot planting combinations.
Tire elf boots on your doorstep announce to every visitor that this home does Christmas with creativity, humor, and genuine craftsmanship — festive fun at its absolute best!
13. Tire Christmas Angel
🖼️ IMAGE PROMPT: A realistic wide lifestyle outdoor photo of a charming Christmas angel figure made from tires — a central tire as the body, two tire sections spread as wings on either side, a small tire or sphere as the head, all painted in brilliant white and gold with a golden halo made from bent wire or metallic ribbon, mounted on a garden fence or wall. Battery fairy lights outlining the wings. Color palette of brilliant white body, metallic gold wings and halo, warm amber fairy light wing outline, and pale winter garden light. Mood: ethereal, beautifully crafted, heavenly festive. Photography style: wide eye-level. Background: soft blurred garden fence or wall with winter garden beyond.
A tire Christmas angel mounted on a garden fence or wall is one of the most striking large-format recycled tire Christmas decorations — at scale, the spread wings and circular body create a genuinely impressive silhouette that looks extraordinary both in daytime and outlined in fairy lights after dark.
The construction: the body is a single car tire, painted white and mounted on the fence with the tread face forward. The wings are created from two tire sidewall sections cut to an elongated oval shape, bent gently into a curved wing form, and fixed to the left and right of the body tire using bolts through the fence and tire sidewalls. The head is a smaller tire (or a large plastic ball painted white) fixed above the body. The halo is a circle of thick garden wire or a metallic ribbon ring fixed above the head.
Painting: all-over brilliant white creates the most angelic effect. Gold metallic paint on the halo, wing tips, and facial features adds the celestial quality. A painted face on the head tire — simple dot eyes, a curved smile, and painted rosy cheeks — gives your angel personality.
Lighting: outline the wings with battery fairy lights cable-tied to the wing edges — the illuminated wing silhouette after dark is genuinely beautiful and makes the angel visible from a considerable distance.
💡 Pro Tip: Mount your tire angel at above-eye height on the fence — an angel figure placed at ground level reads as awkward and earthbound. Mounting it at 1.5–2m above ground (so the head is at or above the viewer’s eye level) gives it the elevated, celestial quality that makes the whole composition work. Height is everything with this particular project.
Read our making a tire Christmas angel — construction, painting and mounting guide for wing shaping, mounting hardware, and lighting installation.
A tire Christmas angel on your garden fence is the decoration that makes the whole garden feel touched with something magical — and that’s exactly what the best Christmas decorating does!
14. Tire Christmas Nativity Scene
🖼️ IMAGE PROMPT: A realistic wide lifestyle outdoor photo of a charming outdoor nativity scene with figures created from tires of different sizes — central tires representing Mary and Joseph with painted robes and faces, a small tire as the manger with a glowing LED light inside, star-shaped tire cutouts arranged above, all set on a garden lawn with real straw around the base and soft warm outdoor lighting. Color palette of natural black and painted tire figures, vivid blue and brown robes, warm golden manger light, real golden straw, and soft outdoor warm lighting. Mood: reverent, charming, beautifully crafted. Photography style: wide eye-level. Background: soft blurred dark winter garden.
Here’s the deal: a tire nativity scene is the most meaningful and personal of all the recycled tire Christmas projects — it’s the one that says something beyond just decoration, and when crafted thoughtfully with well-painted, characterful figures, it creates an outdoor display of genuine beauty and significance.
The figure construction approach: each figure is built from one or two stacked tires of appropriate sizes, painted with the characteristic robes, faces, and attributes of each nativity character. Mary: blue-painted robe, white head covering, serene painted face. Joseph: brown robe, dark staff of a garden cane. The Christ child: a small tire or half-tire painted as a manger with yellow painted straw interior and a warm LED candle glow inside. The Star of Bethlehem: a five-pointed tire star (as per project 8) mounted on a tall stake above the scene.
The staging: arrange your figures on a bed of real straw with rustic wooden elements — a few fence posts as the stable framework, some rough-cut timber as the stable walls — to create a complete scene that grounds the tire figures in a contextual setting.
💡 Pro Tip: Use acrylic artist’s paint for the detailed face and costume painting on nativity figures rather than standard exterior paint — acrylic gives you far better control for fine detail work, dries to a water-resistant finish suitable for outdoor use, and is available in a vast color range for accurate costume colors. Seal all detail painting with exterior varnish once complete for full weather protection.
Explore our creating a tire outdoor nativity scene — figure construction and painting guide for scale relationships, character details, and staging advice.
A tire nativity scene in your garden brings the deepest meaning of Christmas to your outdoor space in a form that’s completely, personally handcrafted — there’s nothing else quite like it!
15. Tire Christmas Countdown Calendar
🖼️ IMAGE PROMPT: A realistic wide lifestyle outdoor photo of a creative Christmas countdown display using 24 small tires (or sections) mounted on a garden fence or wall in a grid arrangement, each painted with a different number from 1 to 24 in gold on a green or red background, each tire containing a small plant, lantern, or wrapped mini gift. Color palette of alternating red and green tires, gold numbers, festive mixed contents, and warm garden lighting. Mood: playful, creative, genuinely original. Photography style: wide eye-level. Background: soft blurred garden fence with winter planting below.
A tire Christmas countdown calendar is the most interactive and family-friendly of all the recycled tire Christmas garden projects — it turns your garden fence into an advent calendar that children check every single morning through December, and the combination of living plants, small gifts, and glowing lanterns creates a December garden display of extraordinary personality.
The construction: collect 24 small tires — bicycle tires work beautifully at this scale, or use consistently-sized small car tires for a more substantial display. Mount them in a 4×6 grid on your garden fence using large coach screws through the tire and into the fence posts. Paint each tire individually in alternating red and green, then paint a bold gold number (1 through 24) on the face of each tire.
The contents: fill each numbered tire with a different element — small potted Cyclamen plants, miniature lanterns with LED tea lights, wrapped mini gift packages (weatherproofed in clear wrap), small pine cone bundles, or battery fairy light coils that light up when the date is reached. Reveal a new tire’s contents on each day of advent.
💡 Pro Tip: Photograph your completed countdown calendar before December 1st and share it with family members who don’t live nearby — it becomes a shared daily advent experience that connects family across distances, with the child in the garden updating distant grandparents on which number was opened today. The calendar becomes a family story as well as a garden decoration.
Read our making a tire Christmas countdown calendar — mounting, painting and filling guide for fence mounting hardware, number painting templates, and content ideas for all 24 tires.
A tire advent calendar on your garden fence turns December itself into the decoration — it brings joy every single morning for 24 days and makes your garden the most exciting place in the neighbourhood throughout the whole month!
16. Tire Christmas Topiary Frames
🖼️ IMAGE PROMPT: A realistic wide lifestyle outdoor photo of two large tires positioned as circular frames through which topiary forms — a cone-shaped conifer and a ball-clipped holly — are grown or positioned, both tires painted in deep forest green with gold painted inner rims, placed symmetrically flanking a front gate or door entrance with frost on the ground. Color palette of deep forest green tires, gold inner rim, deep glossy green conifer and holly, white frost, and pale winter light. Mood: classical, formal, surprisingly elegant. Photography style: wide eye-level symmetric. Background: soft blurred front garden gate and frosted garden path.
Tire Christmas topiary frames are the most unexpectedly sophisticated project in this collection — they use the circular geometry of a tire as a deliberate design element, creating a formal, almost classical garden structure that frames living plants in a way that looks genuinely purposeful and beautifully considered.
The concept: a tire, painted in a deep garden color and positioned vertically, becomes a circular frame through which a topiary plant (clipped conifer, box ball, or standard bay tree) is placed — the tire’s circle frames the plant like a picture frame, turning an ordinary container plant into a deliberate garden statement.
Construction: paint your tires in deep forest green or charcoal grey (colors that recede visually and make the framed plant the visual focus). Paint the inner rim of the tire in gold or copper to create a warm, decorative border effect. Position the tire vertically (standing on its tread edge) and stable it with a short length of rebar pushed through the tire hole into the ground. Position your chosen topiary plant directly behind the tire so it appears centered in the frame.
For Christmas: dress the tire frame itself with a wreath of artificial pine, red berries, and a bow around its outer circumference — the tire becomes a living plant frame decorated as a wreath simultaneously.
💡 Pro Tip: Use matching tires, matching paint, and matching plants for your topiary frame pair — the formal elegance of this display depends entirely on perfect symmetry. Two identical tires, identically painted, framing two identical plants in identical containers, placed at identical heights and distances from the door center: the precision IS the design.
Explore our tire Christmas topiary frames — construction, painting and styling guide for stability methods, plant selection, and seasonal dressing ideas.
Tire topiary frames turn the most ordinary entrance into something with genuine garden design authority — unexpected, elegant, and completely original!
17. Tire Fairy Light Wreath Cluster
🖼️ IMAGE PROMPT: A realistic wide lifestyle outdoor photo of a garden fence decorated with a cluster of five tires of varying sizes, all painted matte black and each one completely filled with a dense coil of warm white fairy lights visible through the central tire hole, creating glowing circular light installations on the dark fence. Deep winter evening. Color palette of matte black tires, brilliant warm white fairy light coils glowing intensely, dark fence, and deep blue-black winter sky. Mood: dramatic, contemporary, arresting after dark. Photography style: wide eye-level at night. Background: deep dark winter garden and fence.
Here’s the thing: the tire fairy light cluster is the most contemporary and the most purely beautiful of all the recycled tire Christmas projects — and it’s the one that works exclusively after dark, creating a display of warm light circles on a dark fence that looks more like installation art than garden decoration. It’s genuinely breathtaking.
The technique is almost embarrassingly simple for results this spectacular: paint a group of five tires in matte black (the dark surface ensures all visual attention goes to the light, not the tire). Coil a generous length of warm white LED fairy lights densely into the interior of each tire, filling the whole cavity with light. Mount the tires on your fence at varied heights and positions — some overlapping, some touching, some separate — for a composition that looks deliberately designed.
After dark, the glowing circles of warm white light against the black tires and dark fence create an effect that looks like illuminated porthole windows — warm, inviting, and completely unlike any other Christmas garden decoration.
💡 Pro Tip: Use connectable fairy light sets that allow multiple strings to be chained together from a single power socket — this means all five tires in your cluster can be powered from one outdoor socket on a single timer, switching on and off simultaneously for a perfectly synchronized display. Avoid having visible cable runs between tires by routing cables along the back face of the fence.
Read our tire fairy light wreath cluster — construction and lighting guide for tire sizing, light quantity, and mounting arrangements.
After dark on a winter evening, a tire fairy light cluster on your garden fence is one of the most beautiful things your outdoor space can display — pure warm light in a perfectly composed arrangement!
18. Tire Christmas Village Scene
🖼️ IMAGE PROMPT: A realistic wide lifestyle outdoor photo of a charming Christmas village scene created from tires of different sizes positioned as the bases of buildings — small tires with painted house fronts, windows, and doors becoming cottages and shops, arranged in a village street scene on a garden lawn, with miniature street lights made from garden canes and small lanterns, artificial snow on the ground, and warm festive lighting throughout. Color palette of painted cream and warm-colored cottage fronts, vivid Christmas light colors, artificial white snow, and warm amber miniature lantern glow. Mood: enchanting, miniature-world magic, Christmas nostalgia. Photography style: wide eye-level. Background: soft blurred winter garden.
A tire Christmas village scene is the most ambitious and most enchanting large-scale project in this collection — it’s the kind of display that becomes a neighborhood destination through December, that children want to visit repeatedly, and that creates the most genuinely magical outdoor Christmas experience possible from recycled materials.
The village construction: use tires of different sizes as building bases — stood upright or on their sides, with painted fronts depicting cottage windows, doors, and architectural details. A large tire becomes a grand town hall or church; medium tires become cottages and shops; small tires become garden walls and fences. Use painted hardboard or plywood panels attached to the tire faces for the building fronts if painting directly on the rubber proves difficult.
Village dressing: miniature street lamps made from garden canes topped with small battery lanterns, artificial snow (spray or sheet) covering the ground between buildings, small mirror pieces as frozen ponds, a tiny Christmas market with matchstick-scale stalls, and battery fairy lights throughout the whole scene at ground level creating warm glow between the buildings.
💡 Pro Tip: Start small and expand annually — begin with three or four tire buildings in year one, add four or five more each subsequent Christmas. Over three or four years, your tire village grows into a genuinely large-scale installation that has accumulated character and history, and the annual addition of new buildings becomes a beloved family tradition in itself.
Explore our building a tire Christmas village scene — design, construction and dressing guide for building proportions, painting techniques, and village layout planning.
A tire Christmas village is the ultimate recycled tire Christmas project — a labour of love that becomes more beautiful and more beloved every single year!
19. Tire Christmas Garden Border Display
🖼️ IMAGE PROMPT: A realistic wide lifestyle outdoor photo of a garden border edge decorated with a series of tires of varying sizes, all painted in complementary deep Christmas colors (forest green, burgundy red, and gold), each planted with a different winter plant — Cyclamen, Heather, ornamental kale, and trailing ivy — creating a continuous colorful planted border display along a garden path or lawn edge. Crisp winter daylight. Color palette of forest green, burgundy, and gold tires, vivid Cyclamen pink, magenta heather, purple ornamental kale, and trailing silver-green ivy. Mood: abundant, colorful, festively planted. Photography style: wide eye-level. Background: soft blurred winter garden lawn and fence.
A tire Christmas border display combines the visual impact of painted tires with the natural beauty of winter planting to create a garden border that’s simultaneously a Christmas decoration and a genuinely beautiful winter planting scheme — the best of both worlds in one continuous display.
The concept: arrange 5–9 tires of varying sizes along your garden border edge or path edge, in a casual, slightly irregular spacing that looks naturally placed rather than mechanically spaced. Paint each tire in a complementary color palette — forest green, deep burgundy, antique gold, and matte black all work beautifully together. Plant each tire with a different winter plant, creating a living patchwork of color and texture along your border.
The planting palette for maximum color through winter: vivid pink or white Cyclamen for flower color from October through March, winter heather in magenta, pink, or white for long-lasting flowers, ornamental kale in deep purple or cream for dramatic foliage texture, Gaultheria for vivid berry color, and trailing ivy in any variety as the connecting thread that links each tire visually to the next.
Christmas dressing: add battery fairy lights draped loosely between the tires and a small wooden sign reading “Season’s Greetings” or “Happy Christmas” at one end of the display for the explicitly seasonal element.
💡 Pro Tip: Vary the tire heights in your border display by partially burying some tires and raising others on flat stones or bricks — a display where all tires sit at exactly the same height looks mechanical and planted. Varied heights create a naturalistic rhythm that makes the whole display look like it evolved organically rather than being placed in an afternoon.
Read our tire Christmas border display — painting, planting and spacing guide for color palette combinations, plant quantities, and border length planning.
A tire Christmas border display is the project that makes your whole garden feel festive rather than just your front door — a continuous celebration of creativity, color, and the season running the full length of your garden!
20. Tire Outdoor Christmas Gift Stack
🖼️ IMAGE PROMPT: A realistic wide lifestyle outdoor photo of a charming stack of three tires arranged to look like a pile of wrapped Christmas gifts — each tire painted in a different gift-wrap pattern (polka dots, stripes, star pattern) in vivid Christmas colors with painted ribbon and bow details on each face, stacked slightly offset to suggest a casual gift pile, with a large painted bow on the top tire and battery fairy lights wrapped around the stack. Color palette of vivid red polka-dot, gold striped, and green star-patterned tires, bright ribbon colors, and warm amber fairy light glow. Mood: playful, graphic, brilliantly festive. Photography style: wide eye-level. Background: soft blurred winter garden entrance.
A tire gift stack is one of the most graphically brilliant and most immediately understood recycled tire Christmas projects — the moment people see a stack of tires painted as wrapped gifts with bows, the delight is instantaneous and universal.
The construction: stack three tires in slightly decreasing sizes, offset by approximately 15° from each other as if casually placed rather than perfectly aligned — the slight misalignment makes the stack look far more like a real casual gift pile than a perfectly vertical column. Paint each tire in a different gift-wrap pattern: one in vivid red with white polka dots, one in gold with red diagonal stripes, one in forest green with gold star stencils. Paint a ribbon band (a thick cross of contrasting paint) across the tread face of each tire, and paint an oversized bow at the ribbon cross intersection.
Finishing touches: wrap outdoor battery fairy lights loosely around the whole stack and add a large wired ribbon bow on the very top tire for a three-dimensional detail that photographs beautifully.
💡 Pro Tip: Use a compass or round template to create perfect polka dots on your gift-wrap pattern tires — dot-painting freehand on a large curved surface inevitably produces irregular shapes. A circle cut from cardboard used as a stencil, loaded with a sponge, produces perfect circles of absolutely consistent size every time and elevates the finished paint quality dramatically.
Explore our tire Christmas gift stack — painting patterns, stacking and lighting guide for all three paint pattern templates and stacking stability techniques.
A tire gift stack in your garden is pure Christmas joy in painted rubber — graphic, bold, unmistakably festive, and made for absolutely nothing from materials most people throw away!
21. The Complete Tire Christmas Garden Vignette
🖼️ IMAGE PROMPT: A realistic wide lifestyle outdoor photo of a beautifully composed complete tire Christmas garden vignette — a stacked tire Christmas tree as the centerpiece, flanked by tire reindeer on each side, with tire gift stacks in front, candy cane half-tire edging along the path, fairy light tires on the fence behind, and warm festoon lights overhead, the whole scene frost-touched and glowing on a deep winter evening. Color palette of vivid Christmas green tree tires, scarlet reindeer accents, candy cane red-white, warm amber festoon light canopy, and frost-white ground. Mood: completely magical, ambitious, neighbourhood-stopping. Photography style: wide eye-level at dusk. Background: deep blue winter sky and soft house lights beyond.
We’re finishing with the complete picture — the full, ambitious, neighbourhood-stopping tire Christmas garden vignette that brings everything in this article together into one cohesive, spectacular outdoor Christmas display. This is the goal: not just individual tire decorations but a complete, composed seasonal garden scene that tells a story and creates an experience.
The composition formula for a complete tire Christmas vignette:
The centrepiece (the tallest, most dominant element): your stacked tire Christmas tree — this is the element that reads from the greatest distance and around which everything else organizes.
The flanking elements (symmetrical pairs on each side of the centrepiece): tire reindeer on each side create the classic sleigh-and-tree narrative, or tire lantern towers flanking the tree create a more formal, architectural composition.
The foreground elements (low-level interest at the viewer’s feet): tire gift stacks clustered in front of the tree, tire baubles nestled in the grass, half-tire candy cane edging along the path leading to the scene.
The background elements (fence-mounted, wall-mounted): tire fairy light clusters, tire Christmas stars, or the tire angel mounted above the scene on the fence behind, completing the vertical composition.
The atmosphere: warm festoon lights overhead creating the ceiling of your Christmas garden room, with storm lanterns at ground level for warmth and intimacy.
💡 Pro Tip: Choose a single color palette across all your tire decorations — a red, green, and gold palette used consistently across every tire element in your vignette creates a cohesive, designed display. Mixing too many different color combinations across different tire elements creates visual chaos. Decide your palette before painting anything and stick to it rigorously — the coherence it creates makes the whole display look professionally conceived.
| Vignette Element | Position | Color Role |
| Stacked tire tree | Centre back | Primary green |
| Tire reindeer pair | Left and right flanking | Natural with red accents |
| Tire gift stacks | Centre foreground | Red, gold, green patterns |
| Tire fairy lights | Fence background | Warm white glow |
| Candy cane edging | Path edges | Red and white graphic |
| Festoon lights | Overhead canopy | Warm amber atmosphere |
Read our creating a complete tire Christmas garden vignette — design and composition guide for layout planning, scale relationships, and the complete execution checklist. Instructables has brilliant tire craft inspiration at instructables.com.
The complete tire Christmas vignette is the outdoor decoration that makes your home the landmark of the neighbourhood through December — a testament to creativity, craftsmanship, and the extraordinary things that become possible when you look at a pile of old tires and think “what could this become?” Now go make it happen! 🎄
Frequently Asked Questions
Where can I find old tires for Christmas decorations for free or cheap?
Your best sources in order of likelihood: local tire fitting centers and garages (they pay for disposal so are often delighted to give tires away — just call ahead and ask), Facebook Marketplace and Freecycle (search “free tires” in your local area), scrap yards and recycling centers (sometimes charge a small fee), and neighbours or friends replacing car tires. Agricultural tires (much larger than car tires) are often available free from farms. Always check tires for protruding wire from worn treads before handling, and wear gloves when collecting and cleaning.
What paint works best on rubber tires for outdoor Christmas decorations?
The most reliable painting approach for outdoor tire decorations is a three-stage process: clean and degrease thoroughly with dish soap and a stiff brush, apply a coat of self-etching spray primer (designed to bond to rubber and plastic surfaces), then apply two or more coats of exterior spray paint or exterior acrylic in your chosen color. For detailed painted designs (faces, patterns, numbers), use acrylic craft paint over your primed and base-coated tire, then seal all detail painting with exterior varnish. Avoid standard interior paint or chalk paint for any tire decoration that will be outside in wet weather.
Are old tires safe to use as garden planters for edible plants?
This is a topic of ongoing debate in the gardening community. Old tires can leach compounds including zinc, benzothiazole, and other chemicals from the rubber into the surrounding soil, particularly as they degrade. For decorative Christmas planters with non-edible plants (heather, Cyclamen, ornamental kale, ivy), this concern is essentially irrelevant. For edible plant growing, the current precautionary guidance from most horticultural authorities is to avoid using tires as planters for food crops — the risk may be low but hasn’t been comprehensively studied, and using alternative containers for edibles is the prudent approach.
How do I make painted tire decorations last through wet and cold winter weather?
Weather durability starts with proper preparation — degreasing, priming, and using exterior-rated paint products. After painting, seal all surfaces with two coats of exterior clear varnish (gloss or satin finish) for maximum weather protection. Store delicate decorative additions (ribbons, paper elements, non-weatherproof baubles) indoors between displays and re-attach for the display period. For permanent outdoor displays, UV-stable exterior paint prevents color fading through multiple seasons. Most well-prepared and varnished tire decorations will look excellent for 2–3 seasons before needing a repainting refresh.
How do I attach decorations securely to painted tire surfaces?
The most reliable adhesive for attaching decorations to painted rubber is construction adhesive (such as Gorilla Glue or similar polyurethane adhesive) for heavy items like wooden elements, metal hardware, and large decorative pieces. Hot glue works well for lightweight items like artificial foliage, ribbon, and small decorations but doesn’t hold in very cold temperatures (below about 5°C the bond weakens significantly). For any decoration that needs to be genuinely secure through winter weather and wind, reinforce adhesive joints with cable ties, wire, or screws through drilled holes — adhesive alone is rarely sufficient for heavy or exposed outdoor elements.
A Few Final Thoughts
Recycled tire Christmas decor is one of those creative ideas that proves beyond any doubt that the best garden decorations aren’t bought — they’re made, with intention, resourcefulness, and the genuine pleasure of transforming something unwanted into something extraordinary. Whether you start with a single painted tire wreath on your front door or go all-in on the complete Christmas garden vignette, every project in this article is an act of creative sustainability that takes waste rubber out of the disposal chain and turns it into something beautiful, seasonal, and completely personal. The creative confidence you build making your first tire Christmas decoration — realising that old rubber and a tin of paint can produce something genuinely spectacular — is the gift that keeps giving into every creative project that follows. Your most impressive Christmas garden display is waiting in a pile of old tires somewhere nearby. Now go find them, and go make it happen! 🎄🌿