
Watching rainwater flood your yard, wash away your garden beds, or puddle against your foundation is genuinely frustrating — and expensive if left unchecked. But here’s the exciting news: a rain garden is one of the most beautiful, eco-friendly, and surprisingly affordable solutions you can create yourself! It captures stormwater runoff, filters it naturally through plants and soil, and transforms a soggy problem spot into a stunning garden feature. Ready to find out how to build one without breaking the bank? Let’s dive in!
At a Glance
- A rain garden is a shallow, planted depression that captures and absorbs stormwater runoff from roofs, driveways, and lawns — reducing flooding and pollution naturally.
- You can build a functional, beautiful rain garden for as little as $50–$150 using free materials, native plants, and DIY labor.
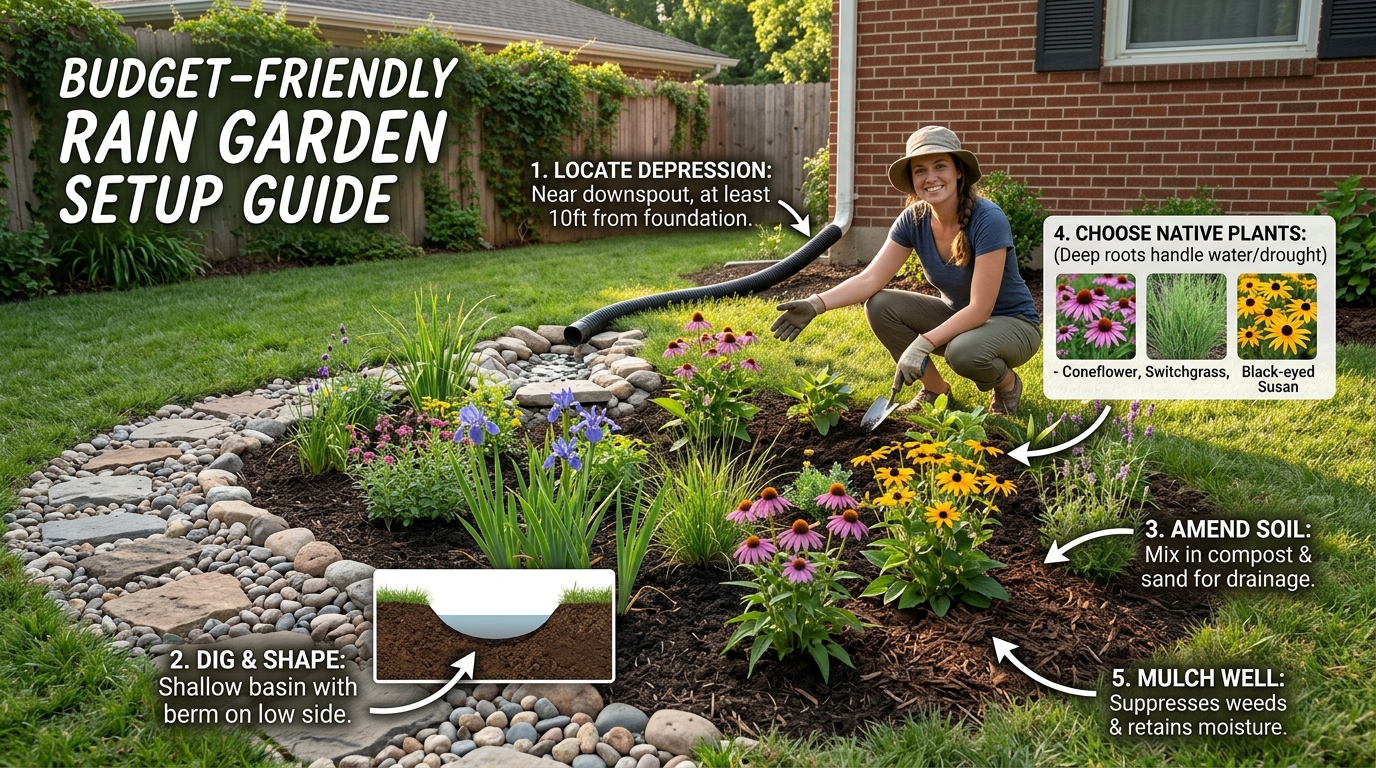
- The most important location rule is to place your rain garden at least 10 feet from your home’s foundation and away from septic systems or underground utilities.
- Native plants are the best choice for rain gardens because they’re adapted to local wet-dry cycles, require zero fertilizing, and are often available free through local plant swaps or native plant societies.
- A well-built rain garden should drain completely within 24–48 hours after a rain event — if it holds water longer, your soil mix or depth needs adjustment.
What Is a Rain Garden and Why Should You Build One?

Here’s the deal: a rain garden is basically a shallow bowl planted with deep-rooted, water-tolerant plants that acts like a natural sponge for your yard. It’s not a pond — it drains completely between rain events, usually within a day or two.
Stormwater runoff is a genuine environmental problem. When rain hits hard surfaces like roofs, driveways, and compacted lawns, it picks up pollutants and rushes straight into storm drains and waterways. A rain garden intercepts that flow, lets it soak slowly into the ground, and filters out pollutants through plant roots and soil — pretty cool, right?
Beyond the environmental win, rain gardens solve real yard problems:
- Eliminates chronic wet spots and standing water areas
- Reduces soil erosion on slopes and lawn edges
- Cuts down on mosquito breeding by preventing stagnant pooling
- Adds genuine curb appeal with a naturalistic planting feature
- Can actually increase your property value by demonstrating smart water management
💡 Pro Tip: Many states and municipalities offer rebates or grants specifically for rain garden installation — always check your local stormwater authority’s website before spending a single dollar. Free money is out there!
According to the University of Wisconsin Extension, a properly sized rain garden can absorb 30% more water than a conventional lawn of the same size. That’s serious stormwater management from a simple garden!
Check out our guide to water-wise urban gardening techniques for more eco-smart ideas.
Once you understand what a rain garden does, you’ll wonder why every yard doesn’t have one!
Choose the Right Location Without Expensive Surveys
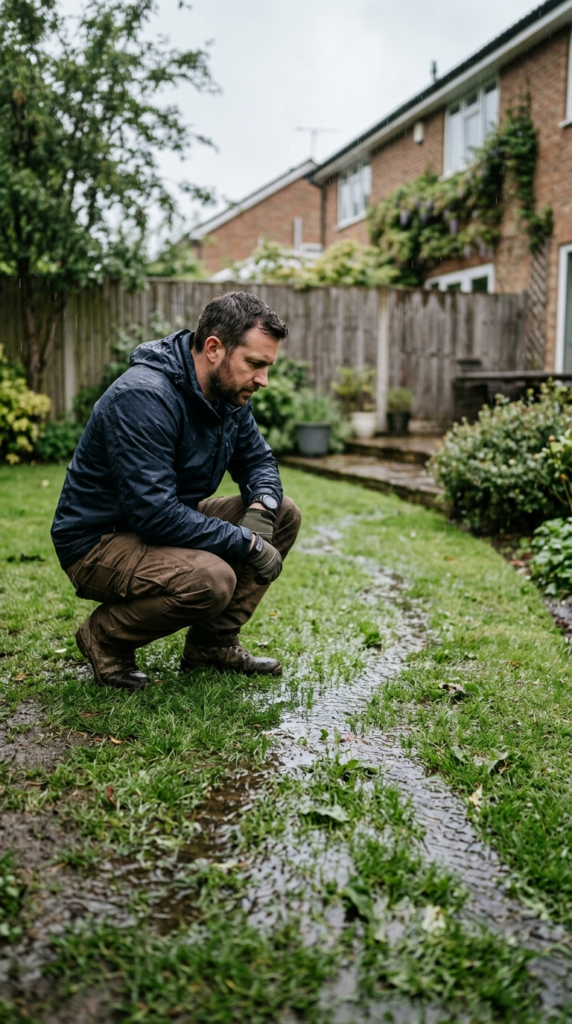
You don’t need to hire a landscape engineer to find the perfect rain garden spot — a good rainstorm and your own two eyes will do the job for free. Observing natural water flow in your yard during or after rainfall is the single most valuable siting tool available, and it costs nothing.
Watch where water naturally flows and pools in your yard. The ideal rain garden location sits at the end of that natural flow path — low enough to capture runoff, but not so low that it’s already saturated all the time. You want to intercept the water before it becomes a problem, not park your garden in a permanently wet zone.
Key location rules to follow:
- Minimum 10 feet from your home’s foundation — never let a rain garden direct water toward your house
- At least 25 feet from septic systems and drain fields
- Away from underground utilities — always call 811 (in the US) before digging
- In an area that receives full to partial sun — most rain garden plants love sun
- Where the soil is not compacted clay hardpan without amendment (we’ll cover fixing that cheaply)
💡 Pro Tip: Use a simple stake-and-string level or even a long board with a carpenter’s level to check the slope of your site. Ideal slope for a rain garden location is 2–7% — gently sloped, not flat, not steep.
A spot that already gets runoff from a downspout, driveway edge, or sloped lawn is basically a perfect candidate. You’re working with nature’s own drainage patterns rather than against them.
Learn more about reading your yard’s drainage patterns for smarter garden placement.
The best rain garden location is usually hiding right in plain sight — you just have to watch the rain!
Plan Your Rain Garden Size on a Budget
Here’s something the expensive landscape guides don’t emphasize enough: bigger is not always better for a budget rain garden. A correctly sized modest garden outperforms an oversized one every time — and costs a fraction of the money to build and plant.
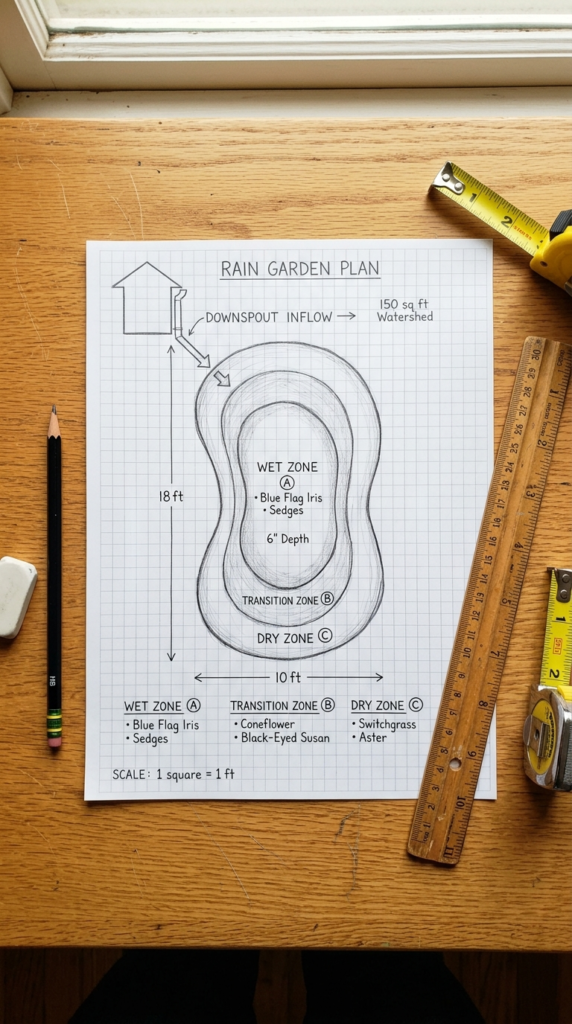
The general rule of thumb is that your rain garden should be about 20–30% of the size of the area draining into it (called the drainage area or catchment area). For a typical residential downspout draining a 1,000 sq ft roof section, a rain garden of 150–200 square feet is typically sufficient.
A simple sizing formula you can do yourself:
- Measure your drainage area (roof section, driveway, lawn slope) in square feet
- Multiply by 0.20–0.30 to get your target rain garden size
- Adjust slightly based on soil type — sandy soil can be smaller; clay-heavy soil needs to be larger since it drains more slowly
For a truly budget setup, start small! A 50–100 square foot rain garden is completely manageable as a DIY first project and can handle the runoff from a single downspout beautifully. You can always expand later.
The Penn State Extension offers a free online rain garden sizing calculator — bookmark it immediately, it takes all the guesswork out of the math.
Browse our article on planning small urban water gardens for compact design ideas.
Start small, do it right, and expand when you’re ready — your rain garden will thank you!
DIY Excavation: Save Big by Doing It Yourself
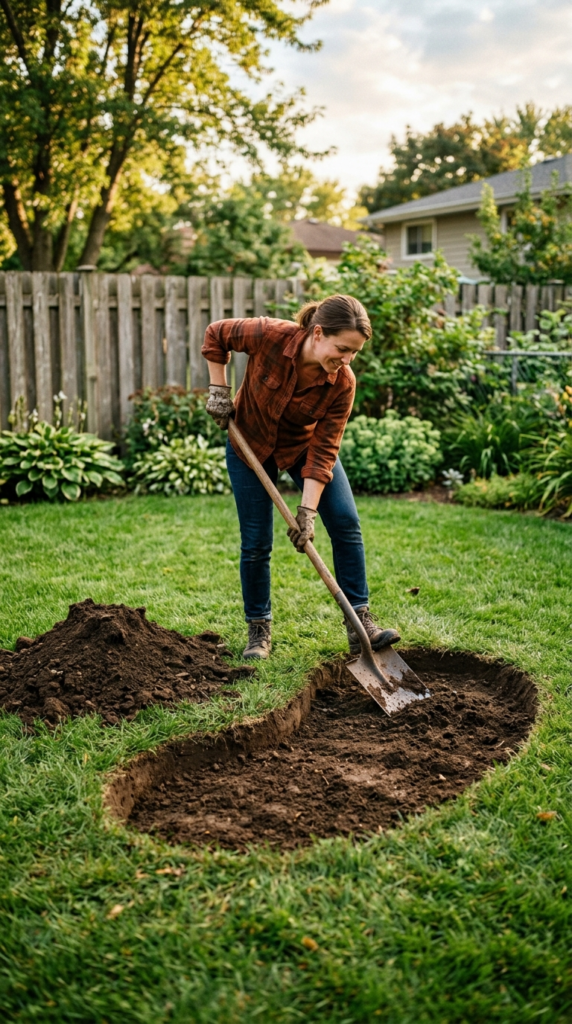
Hiring excavation help is the fastest way to blow your rain garden budget into the stratosphere. The good news? DIY digging for a standard backyard rain garden is completely doable in a weekend — and you’ll need nothing fancier than a flat spade, a round-nosed shovel, and some muscle.
The basic shape you’re going for is a gentle bowl or kidney shape, typically 4–8 inches deep at its deepest point, with gently sloping sides. This isn’t a dramatic trench — it’s a subtle depression that would barely be noticeable when dry.
Here’s a simple step-by-step for budget DIY excavation:
- Mark your shape using a garden hose or rope laid on the ground — adjust until you love the outline
- Use marking spray paint (a $3 can) to trace the hose outline onto the grass
- Remove the sod layer first with a flat spade — save it to patch bare spots elsewhere in your yard (free sod repair!)
- Excavate to your target depth, keeping the center deepest and sides sloping gently upward
- Use excavated soil to build a low berm (raised edge) on the downslope side — this is your water retention wall and it’s built from free material you already dug up
💡 Pro Tip: The excavated soil berm on the downhill edge should be about 6 inches high and firmly tamped — this is what holds water in the garden long enough for it to absorb. Don’t skip building this!
Renting a sod cutter for large areas costs $50–$80 for a half day and can save your back significantly if you’re doing anything over 150 square feet. Still far cheaper than hiring a landscaper.
See our guide to DIY garden excavation tips for beginners for more technique guidance.
A weekend of digging is all that stands between you and a functioning rain garden — you’ve absolutely got this!
Source Cheap or Free Soil Amendments
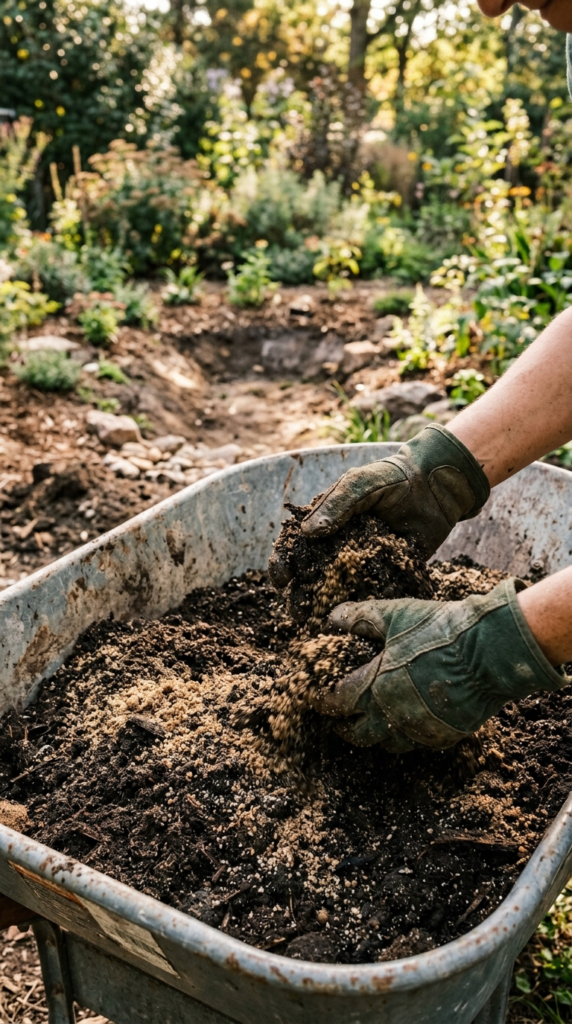
Most native soils — especially in urban areas — are compacted and drain poorly. That’s often what CAUSED your water problem in the first place! Improving your rain garden’s soil infiltration rate is essential, but it doesn’t have to be expensive.
The ideal rain garden soil mix is roughly 50–60% coarse sand, 20–30% compost, and 20% existing soil. This blend drains quickly enough to prevent mosquito breeding but retains enough nutrients for plant health. Here’s how to get those ingredients cheaply:
| Amendment | Free/Cheap Source | Cost |
| Coarse sand | Bulk landscape supplier | $15–$25/yard |
| Compost | Municipal free program / homemade | $0–$15 |
| Topsoil | Your own excavated soil | $0 |
| Wood chips (lower layer) | Arborist drop / ChipDrop | $0 |
Municipal compost programs (as we covered in our raised bed articles) are absolute gold here. Many cities will deliver a yard of compost for free or near-free — that’s the single biggest soil amendment cost you can eliminate entirely.
Avoid using peat moss (expensive and environmentally controversial) — finished compost does the job just as well and is often free. Similarly, skip expensive polymer moisture crystals — deep-rooted native plants don’t need them.
Find free soil amendment sources near you with our city-by-city resource guide.
According to the Natural Resources Defense Council, compost-amended rain garden soils filter pollutants up to 80% more effectively than unamended soil — so getting your soil mix right pays off hugely.
Better soil doesn’t have to mean a bigger budget — source smart and save!
Choose Budget-Friendly Native Plants

Here’s the thing: native plants are the ultimate budget rain garden choice — and not just because they’re often cheaper. They’re adapted to your exact regional climate, naturally handle the wet-dry cycles of a rain garden, and require zero fertilizing once established. You’re buying less and getting more.
Native plants for rain gardens are grouped by their water tolerance zones within the garden:
- Center/wettest zone: Blue flag iris, cardinal flower, swamp milkweed, soft rush, pickerelweed
- Middle zone: Purple coneflower, black-eyed Susan, Joe-Pye weed, switchgrass, wild bergamot
- Edge/driest zone: Little bluestem grass, butterfly weed, wild columbine, prairie dropseed
💡 Pro Tip: Start with grasses and sedges as your backbone plants — they establish fast, spread to fill space, and cost $3–$8 per start at native plant nurseries. They’re your best value plants in the entire rain garden.
You don’t need to fill every inch immediately — 3–5 plants per square yard is a perfectly reasonable starting density. Plants will fill in over one to two seasons, and many will self-seed and spread for free.
Avoid non-native ornamentals even if they look beautiful and seem cheap — they rarely handle the extreme wet-to-dry swings of a rain garden as well as true natives do, meaning replanting costs down the road.
The Lady Bird Johnson Wildflower Center has an incredible free native plant database sorted by region, soil type, and water tolerance — use it to build your exact plant list.
Browse our guide to the best native plants for urban rain gardens for regional recommendations.
Native plants work harder, cost less to maintain, and look absolutely stunning — it’s a total win!
Find Free and Cheap Plants Through Smart Sourcing
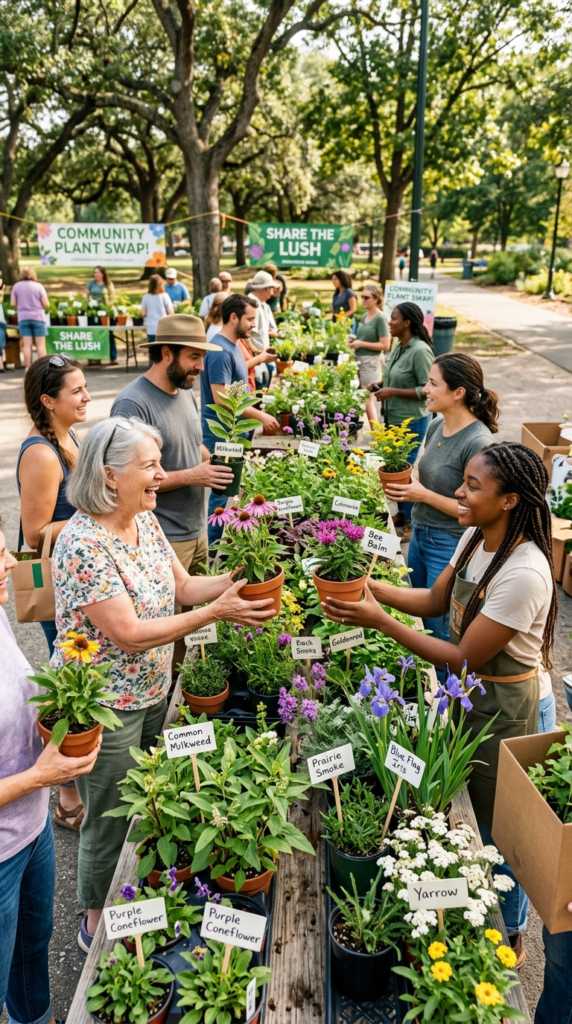
Even native plants add up fast if you’re buying them all at retail. The secret is knowing where to find free and deeply discounted plants — and there are more sources than most gardeners realize.
Your best budget plant sources, ranked by cost:
- Native plant society sales — Many regional native plant societies hold annual sales with plants at $2–$5 each, far below nursery prices
- Plant swaps — Facebook groups, Nextdoor, and community garden organizations frequently host plant swaps where everything is free
- Neighbors and friends — Switchgrass, black-eyed Susans, and coneflowers spread freely; neighbors with established gardens often WANT to give divisions away
- End-of-season nursery sales — August through October, nurseries slash prices 50–75% on remaining stock — perfectly good plants, just late season
- Native plant rescue programs — Some conservation organizations rescue native plants from development sites and offer them free to gardeners
💡 Pro Tip: Search Facebook Marketplace and Craigslist for “free plants” or “plant divisions” in your area — it’s astonishing how many free native plants are listed there by gardeners thinning their own beds!
Seed starting is the ultimate budget play for patient gardeners. A $3 packet of native wildflower seeds can produce 50–100 plants. Start them indoors in late winter for a summer rain garden planting — total plant cost drops to mere cents per plant.
Connect with your local Native Plant Society chapter to find plant sales, seed swaps, and gardening events near you.
See our full guide to sourcing free and cheap garden plants for even more creative ideas.
With smart sourcing, your entire rain garden planting can cost under $20 — talk about a game-changer!
Build a Simple DIY Inlet and Overflow System
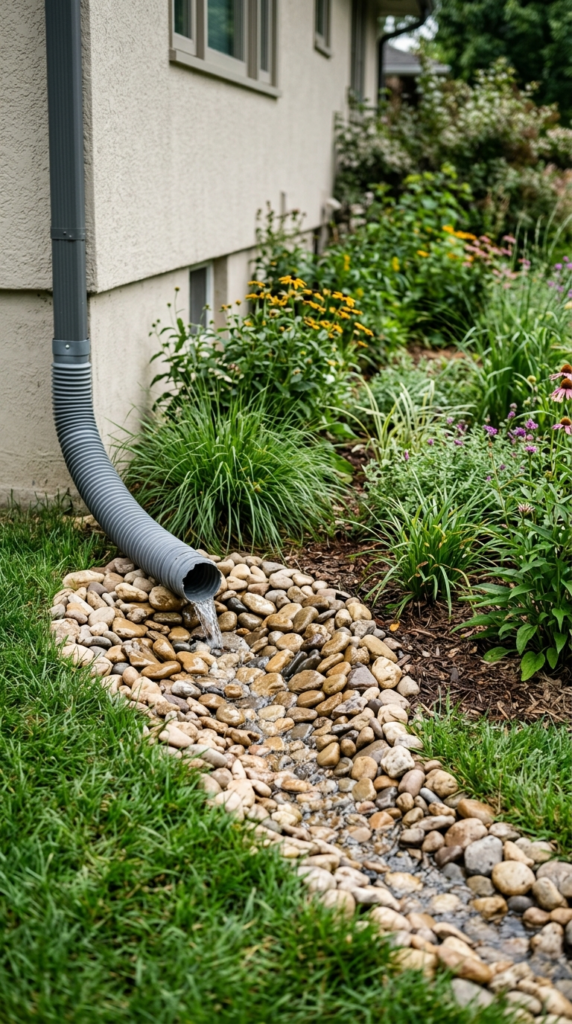
A rain garden without a proper inlet and overflow system is just a hole in the ground waiting to cause problems. But building a functional water entry and exit system doesn’t require an engineer or expensive materials — a little gravel, some river rock, and basic pipe fittings are all you need.
The inlet is how water enters your rain garden. For most backyard setups, this means extending a downspout with inexpensive flexible drain pipe ($10–$15 at any hardware store) and directing it toward your garden. Where the pipe meets the garden, place a rock splash pad — a simple pile of river rocks or flat stones that slows the water down and prevents erosion. River rocks cost $20–$40 per bag, or you can often source them free from stream banks, construction sites, or landscape company leftovers.
For the overflow, which handles water during very heavy rain events when your garden reaches capacity:
- Designate the lowest point of your berm as the overflow exit
- Line it with a band of river rocks or gravel to slow overflow water and prevent erosion
- Direct overflow toward a lawn area, secondary garden, or storm drain — never toward your foundation
Here’s a simple DIY inlet material list and cost:
| Item | Source | Estimated Cost |
| Flexible downspout extension | Hardware store | $10–$15 |
| River rock for splash pad | Landscape supplier / free | $0–$30 |
| Gravel for overflow channel | Bulk supplier | $5–$15 |
| Landscape fabric (optional) | Garden center | $10–$20 |
The whole system can be built for $25–$60 in materials — infinitely cheaper than hiring a drainage contractor.
Learn more about DIY downspout diversion systems for step-by-step installation tips.
A simple inlet and overflow system is the difference between a rain garden that works and one that causes new problems — get this part right and you’re set!
Use Free Mulch to Finish and Protect Your Rain Garden
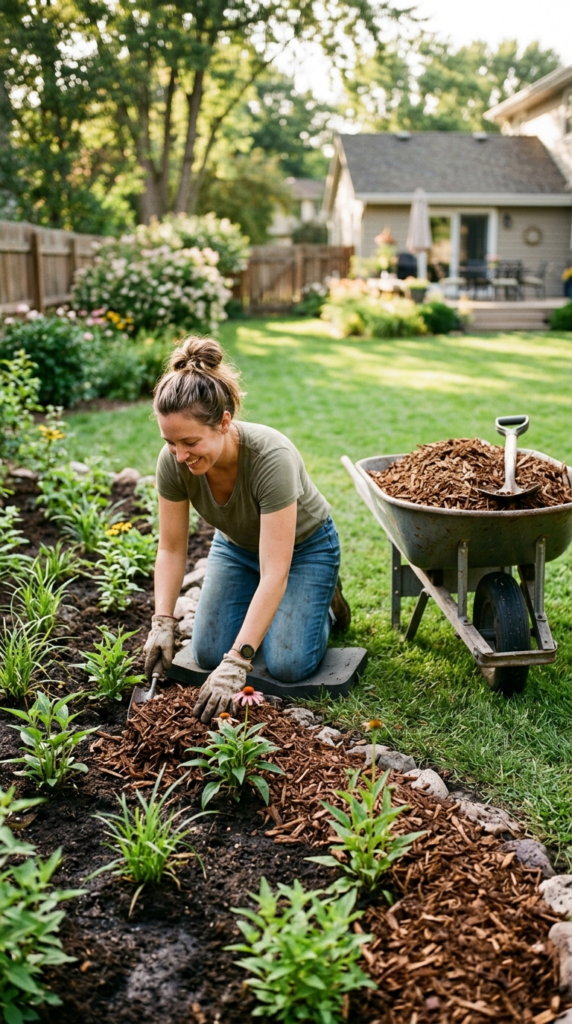
You’re almost there — plants are in, structure is built, now it’s time to mulch. This step is critical for rain garden success: mulch suppresses weeds, retains moisture between rain events, prevents soil erosion when water rushes in, and as it breaks down, improves your soil for free.
The good news? Free mulch is everywhere if you know where to look. The same ChipDrop service we mentioned for raised beds works brilliantly here — fresh arborist wood chips are perfect rain garden mulch. Spread them 2–3 inches deep around your plants, keeping mulch pulled slightly back from plant crowns.
What to use and what to avoid:
- ✅ Shredded wood chips — best overall, free from arborists, breaks down beautifully
- ✅ Shredded leaves — free every fall, excellent organic matter
- ✅ Pine needle mulch — great for acid-loving plants, free if you have pines nearby
- ❌ Dyed wood mulch — unnecessary chemical dyes, more expensive, no added benefit
- ❌ Rubber mulch — does NOT break down, can leach chemicals, completely wrong for a natural system
- ❌ Landscape fabric under mulch — prevents the natural soil improvement you’re trying to achieve, skip it entirely
💡 Pro Tip: Apply mulch immediately after planting — don’t wait. A bare rain garden soil surface is an open invitation for weed seeds to establish before your native plants fill in.
Replenish mulch once a year, typically in early spring. If you’re sourcing free wood chips, this annual refresh costs you absolutely nothing.
See our full guide to free mulch sources for urban gardens for local sourcing strategies.
A generous layer of free mulch is the final touch that makes your rain garden look established, polished, and intentional from day one!
Maintain Your Rain Garden for Almost Nothing
Here’s one of the best things about a well-designed budget rain garden: once it’s established, it practically takes care of itself. Year one requires a bit of attention, but by year two and three, a properly planted native rain garden is genuinely one of the lowest-maintenance garden features you can own.
Year one maintenance is the most intensive — but still minimal:
- Water newly planted natives during dry spells for the first 4–8 weeks while roots establish
- Pull weeds by hand every few weeks before they set seed — this is your biggest first-year task
- Check that your inlet and overflow are clear after heavy storms
- Top up mulch if it thins out in the first season
After establishment, your ongoing maintenance list is wonderfully short:
- Annual spring cleanup — cut back dead plant stems (leave them over winter for wildlife habitat and insect overwintering)
- Replenish mulch once a year with free wood chips
- Divide overgrown plants every few years — and give the divisions to neighbors or use them to expand your garden for free
- Check inlet rocks annually and reposition any that have shifted

Your total annual maintenance cost? Essentially $0 — maybe an hour or two of hand weeding in spring and a free mulch refresh. That’s it.
According to the EPA’s green infrastructure resources, rain gardens that are properly planted with natives require 50% less maintenance than conventional landscaping after the second year.
Explore our guide to low-maintenance native plant gardens for more effortless gardening inspiration.
Build it right once, plant it smart, and your rain garden rewards you with beauty and function for years — almost for free!
Frequently Asked Questions
How much does it cost to build a budget-friendly rain garden?
A small to medium DIY rain garden can be built for as little as $50–$150 when you source free materials like municipal compost, arborist wood chips, and free plant divisions. The main potential costs are coarse sand for soil amendment ($15–$30), downspout extension hardware ($10–$15), and any plants you purchase rather than source for free. Larger or more complex designs might run $200–$300 but remain dramatically cheaper than hiring a landscape contractor.
How deep should a rain garden be?
Most backyard rain gardens need to be only 4–8 inches deep at the center point. Deeper than 8 inches can actually cause water to sit too long and become a mosquito habitat. The gentle bowl shape — deepest in the center, sloping up to ground level at the edges — is what allows proper water retention and infiltration. The downslope berm you build from excavated soil adds another 4–6 inches of effective water-holding capacity.
What if my soil is heavy clay and drains very slowly?
Clay soil is the most common challenge for rain garden builders. The solution is to excavate an extra 6 inches deeper than your target depth and backfill with your amended soil mix (heavy on coarse sand and compost). This creates a well-draining “bowl” inside the clay that allows proper infiltration. For very severe clay sites, you may also want to add a simple French drain (perforated pipe in gravel) at the base of the excavation — still a budget-friendly fix at $20–$40 in materials.
Will a rain garden attract mosquitoes?
A properly designed rain garden should not become a mosquito problem. Mosquitoes require standing water for 7–10 days to complete their breeding cycle — a well-built rain garden drains completely within 24–48 hours. If your rain garden is holding water longer than 48 hours, you need to check your soil infiltration rate and possibly add more coarse sand to your soil mix. The deep-rooted native plants also help by pulling water out of the soil rapidly after a rain event.
Can I build a rain garden in a small urban yard or on a slope?
Absolutely! Small rain gardens of 50 square feet or less are completely effective for managing a single downspout’s runoff and are very manageable in tight spaces. For sloped sites (over 12% slope), consider building a series of smaller terraced rain gardens stepping down the slope rather than one large one — this is actually more effective and easier to build on a budget. Avoid placing rain gardens on slopes greater than 12% without terracing, as water moves too fast to absorb properly.
A Few Final Thoughts
A budget-friendly rain garden is genuinely one of the most rewarding weekend projects a gardener can take on — you’re solving a real water management problem, creating beautiful habitat, and doing it all without spending a fortune. The combination of free organic materials, smart native plant sourcing, and simple DIY construction means most homeowners can complete a functional rain garden for well under $150. Start small, observe how your first garden performs through a full season, and expand or refine from there. Every rainstorm becomes something to celebrate instead of dread when you’ve got a gorgeous, thriving rain garden ready to put that water to work. Now go make it happen — your yard (and your local watershed) will thank you for it!