
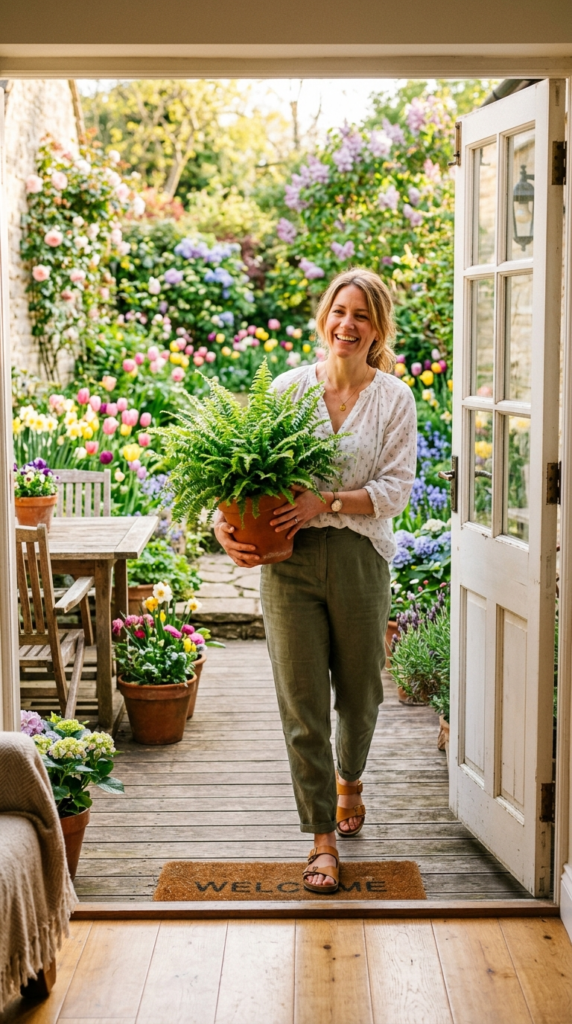
If you’ve ever watched your gorgeous outdoor ferns turn brown and crispy as the temperatures drop, you know the heartbreak is real. But here’s some exciting news — you don’t have to say goodbye to your beloved ferns every fall! Overwintering outdoor ferns indoors is totally doable, and with the right approach, those lush beauties will be ready to return outside looking better than ever come spring. Ready to find out how? Let’s dive in!
At a Glance
- You can successfully overwinter most tender outdoor ferns indoors by bringing them in before the first frost hits.
- Prepping your ferns properly — trimming, cleaning, and checking for pests — before they come inside is absolutely essential for success.
- Indoor ferns need bright, indirect light and consistently high humidity levels to thrive through the winter months.
- Reduce watering and stop fertilizing during the dormant winter period to avoid root rot and stress.
- In spring, gradually reintroduce your ferns to outdoor conditions over 1–2 weeks before leaving them outside full-time.
Why Overwinter Your Ferns Indoors?

Here’s the deal: ferns are an investment — in time, money, and pure gardening love. Why let all that effort die off with the first frost when you can save them?
Many popular outdoor ferns, like the Boston fern or the Kimberly Queen, are actually tropical plants at heart. They don’t truly go dormant the way some hardy perennials do, which means cold temperatures aren’t just uncomfortable for them — they can be deadly.
By overwintering ferns indoors, you save yourself from buying brand-new plants every spring. You also get to watch your ferns mature year after year into truly spectacular specimens. Talk about a game-changer!
💡 Pro Tip: Ferns that have been growing in your garden for multiple seasons are often much larger and more established than what you’d find at a nursery — definitely worth saving!
Learn more about which plants benefit most from indoor winter care at our container plant overwintering guide.
You’ve got more to gain than lose — so let’s make it happen!
Which Outdoor Ferns Can Be Brought Inside?
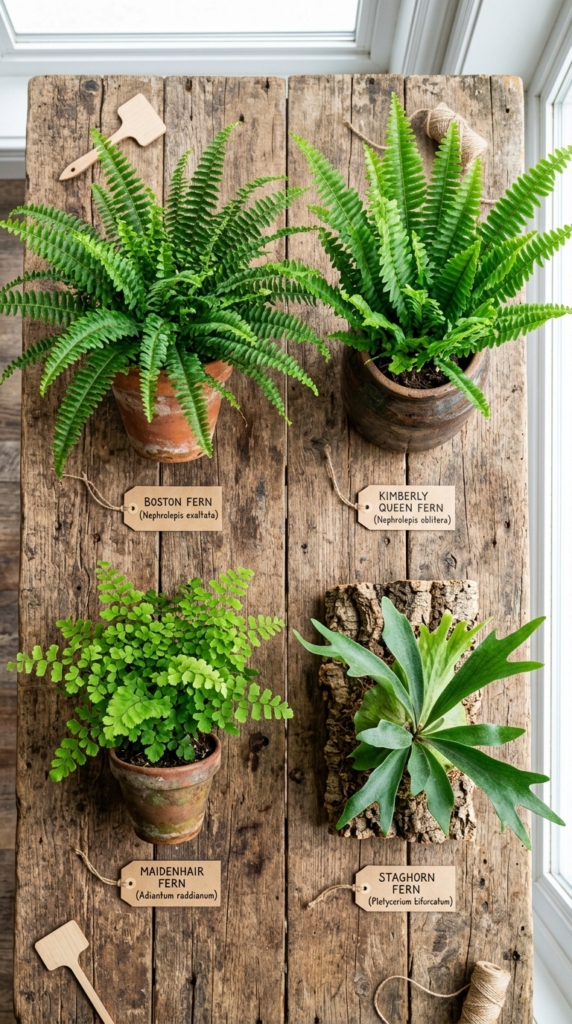
Not every fern is a great candidate for indoor overwintering — and knowing which types you have makes a huge difference!
Here’s a quick breakdown of the most common outdoor ferns and how they handle indoor life:
| Fern Type | Indoor Overwinter Friendly? | Notes |
| Boston Fern | ✅ Yes | Thrives indoors with humidity |
| Kimberly Queen Fern | ✅ Yes | More tolerant of dry indoor air |
| Maidenhair Fern | ✅ Yes (with effort) | Needs very high humidity |
| Staghorn Fern | ✅ Yes | Great as a mounted wall plant indoors |
| Ostrich Fern | ⚠️ Partially | Hardy; can stay outside in milder zones |
| Japanese Painted Fern | ⚠️ Partially | Hardy to Zone 5; may not need moving |
The key is knowing your USDA hardiness zone and whether your fern is a tender tropical type or a cold-hardy variety.
If you’re not sure what type you have, check the tag from when you bought it, or do a quick search on the Missouri Botanical Garden Plant Finder — it’s an incredibly reliable resource!
When in doubt, bring it in — better safe than sorry!
When Is the Right Time to Move Ferns Indoors?
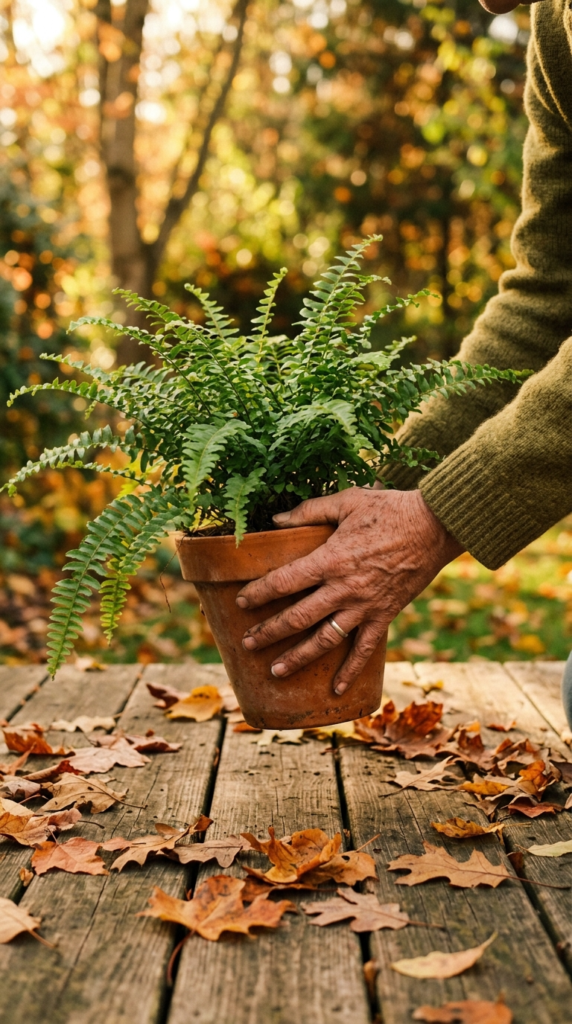
Timing is everything when it comes to overwintering ferns. Move too early and you miss out on those final warm outdoor days. Wait too long and frost damage can stress your plant before it even gets inside.
The sweet spot? Bring your ferns indoors about 2–3 weeks before your area’s first expected frost date. This gives the plant time to start adjusting without the shock of going from summer heat to indoor dryness overnight.
Keep an eye on your nightly temperatures too. Once lows consistently dip below 50°F (10°C), it’s time to start thinking about making the move.
💡 Pro Tip: Check your local frost dates at the Old Farmer’s Almanac frost date tool — it’s free and super accurate!
Check out how to read frost date charts for container gardeners for more timing tips.
A little planning now saves a lot of heartache later!
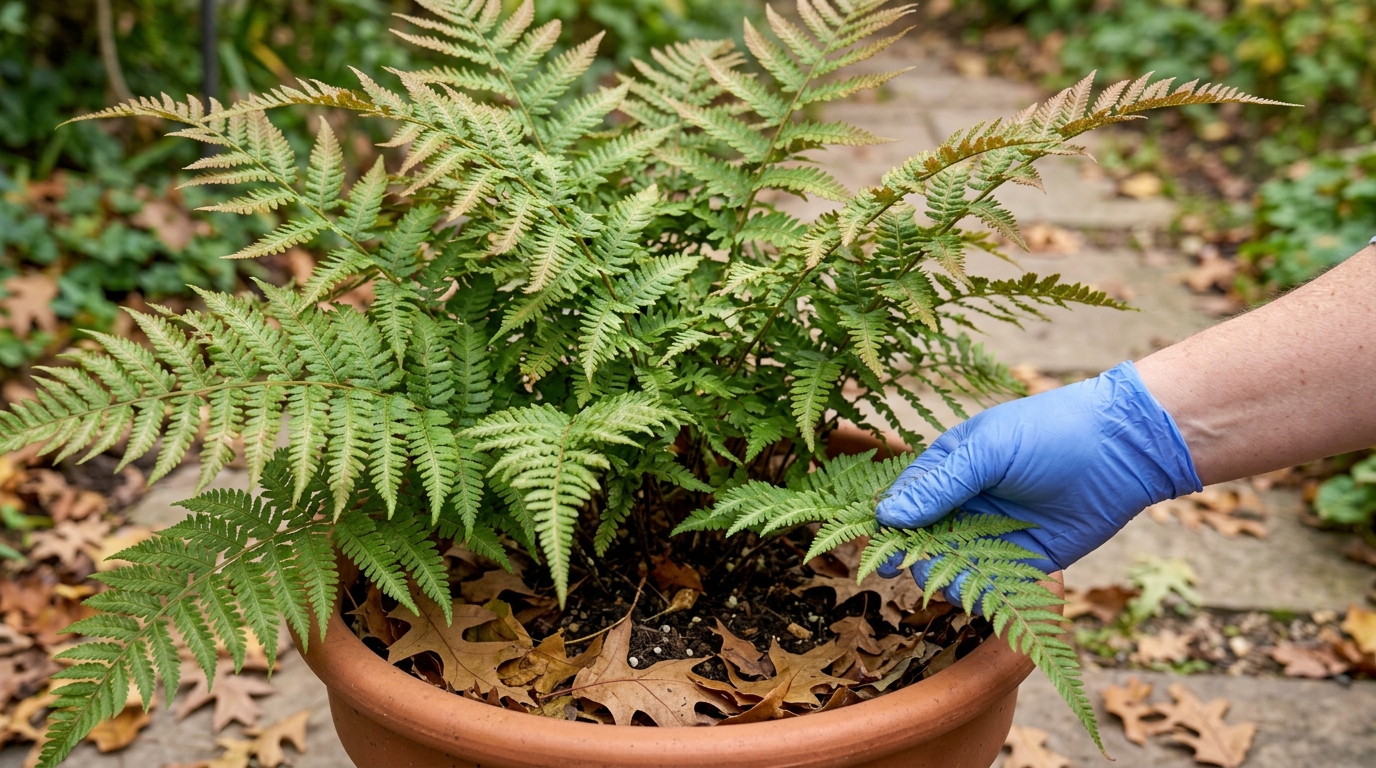
How to Prep Your Ferns Before Bringing Them In

Here’s the thing: you really don’t want to just pick up your fern and plop it on the living room shelf. A little prep goes a long way!
Start with a good visual inspection. Check the undersides of fronds for pests like scale, spider mites, or fungus gnats. Outdoor plants can harbor all kinds of stowaways that will absolutely thrive inside your warm home if you don’t catch them first.
Next, trim off any dead, yellowed, or damaged fronds with clean scissors. This removes hiding spots for pests and encourages fresh new growth. Don’t be afraid to be a little aggressive here — the plant will thank you!
Here’s your pre-move checklist:
- 🔍 Inspect every frond and the soil surface for pests
- ✂️ Trim dead or browning fronds back to the base
- 🚿 Give the plant a thorough rinse with the hose to dislodge any bugs
- 🪴 Check if the pot needs fresh drainage holes — waterlogged roots are a winter killer
- 🌱 Consider a soil top-dress with fresh well-draining potting mix if the soil looks compacted
For more on pest prevention, visit our article on common fern pests and how to treat them.
A clean, healthy fern going in means a thriving fern come spring!
Choosing the Best Indoor Spot for Your Ferns
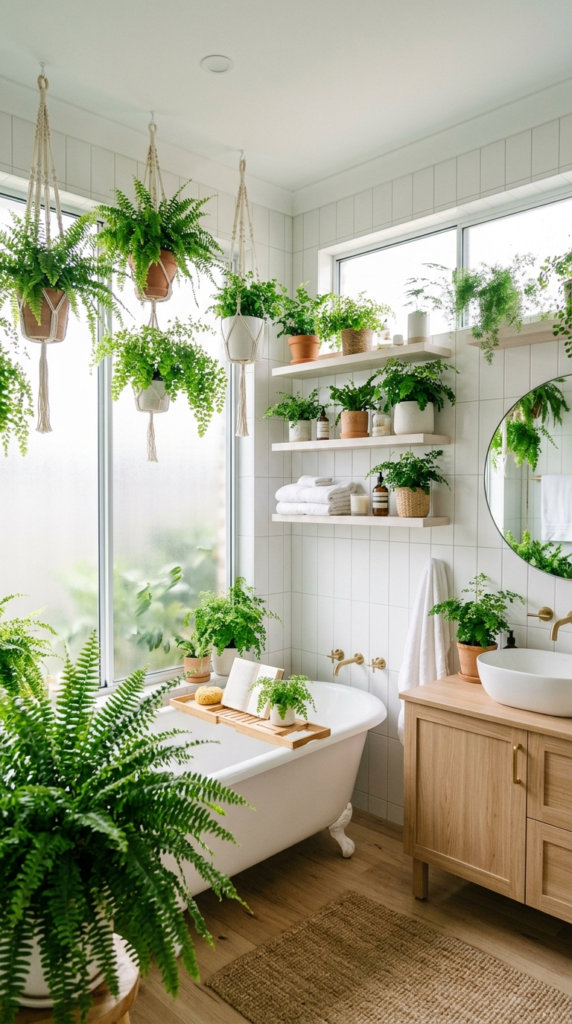
Location is everything for overwintering ferns indoors. Get this wrong and even the best care routine won’t save your plant.
Ferns need bright, indirect light — never harsh direct sun, which will scorch those delicate fronds. A north- or east-facing window is often ideal. If your home is on the darker side, a full-spectrum grow light on a 12-hour timer works brilliantly.
Temperature-wise, keep your ferns away from heating vents, radiators, and drafty windows. They prefer a steady 60–75°F (15–24°C) and absolutely hate sudden temperature swings.
- Best spots: Bright bathrooms, near east-facing windows, sunrooms
- Avoid: Near heating vents, on top of appliances, in dark hallways
Pretty cool, right? Your bathroom might actually be the perfect fern paradise thanks to the natural humidity from showers!
Watering Ferns During Winter Indoors
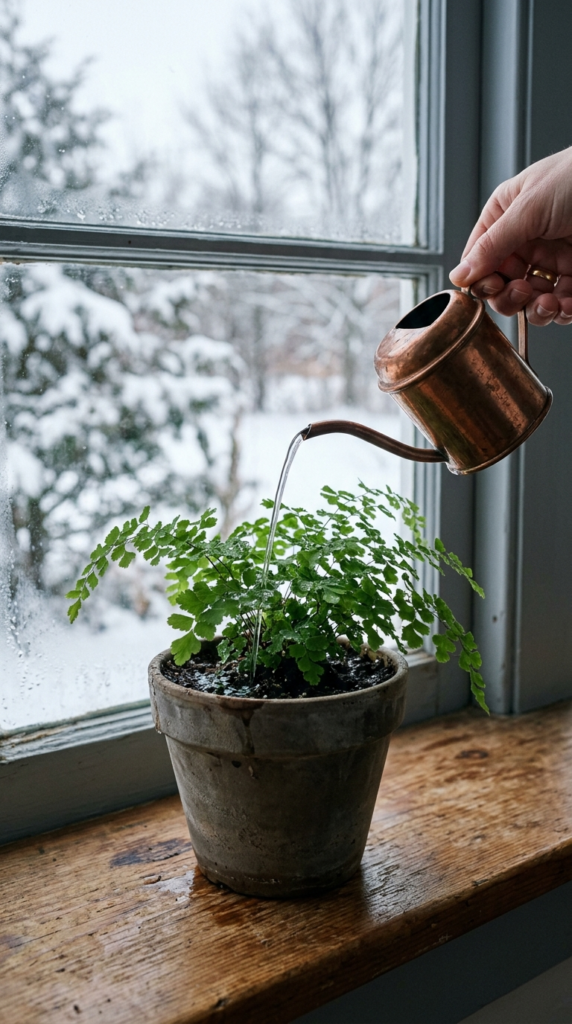
Overwatering is the number one mistake people make when bringing ferns inside for winter. Your fern’s growth slows way down in low light, which means it needs far less water than it did during its active outdoor season.
The rule of thumb? Water only when the top inch of soil feels dry to the touch. Stick your finger in — if it’s still moist, wait a few more days. In winter, this might mean watering only once every 7–10 days depending on your home’s conditions.
💡 Pro Tip: Always water thoroughly until it drains from the bottom — then let the pot drain completely. Never let ferns sit in standing water, as this leads to root rot fast.
Use room-temperature water when possible. Cold water can shock the roots, especially in an already-stressed overwintering plant.
For more watering guidance, check out the complete guide to watering indoor ferns.
Less really is more when it comes to winter watering — trust the soil, not the schedule!
Humidity: The Secret Weapon for Happy Indoor Ferns
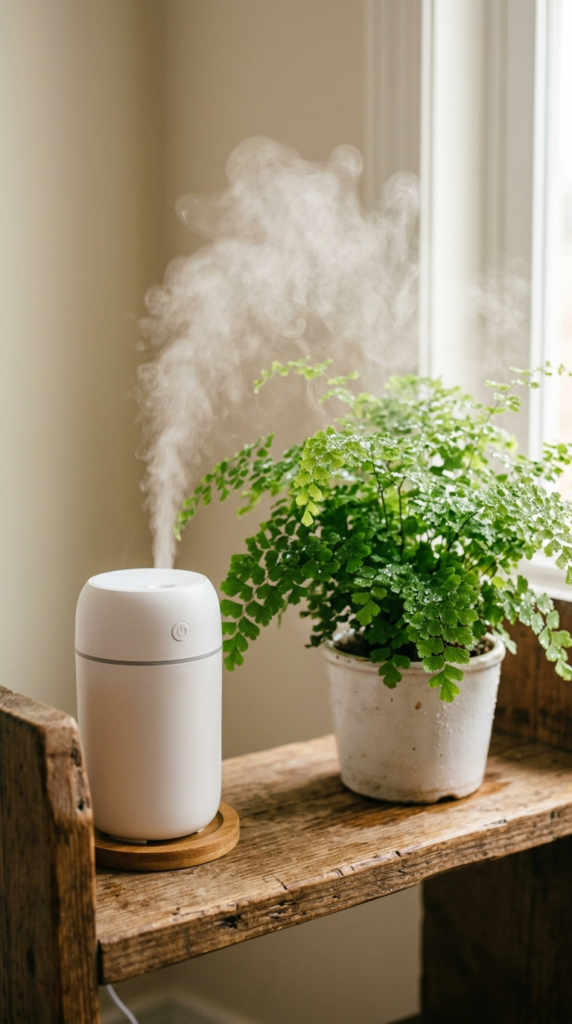
Here’s the deal: low indoor humidity is the silent killer of overwintered ferns. Central heating during winter can drop indoor humidity to 20–30% — way below the 50–80% that most ferns crave.
The secret is to tackle humidity proactively, not reactively. Once your fern starts dropping fronds from dryness, you’re already playing catch-up.
Your best options for boosting humidity:
- Cool-mist humidifier placed nearby (the most effective method)
- Pebble tray with water placed under the pot
- Grouping plants together to create a microclimate
- Regular misting of fronds with a spray bottle in the morning
💡 Pro Tip: Misting alone is rarely enough for tropical ferns like maidenhair. A humidifier is a worthwhile investment if you’re serious about overwintering success.
The University of Vermont Extension guide on indoor plant humidity is a fantastic deep-dive if you want the science behind it.
Humidity-happy ferns are lush, green ferns — it really is that simple!
Feeding Your Ferns Through Winter
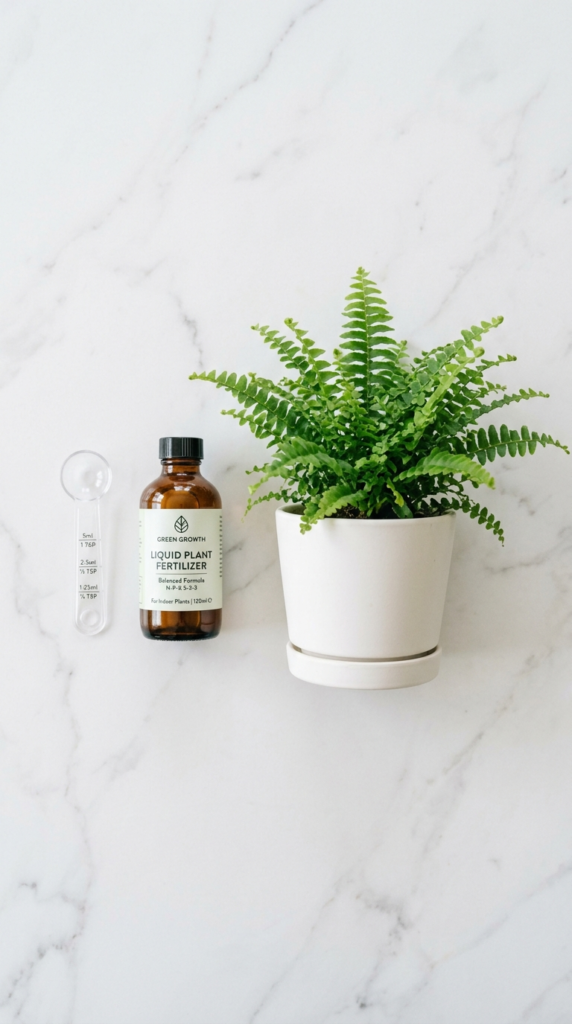
When your fern moves indoors, it shifts into a low-energy mode. This means fertilizing should stop almost entirely during the winter months.
Feeding a dormant or slow-growing fern is like forcing someone to eat a huge meal when they’re not hungry — it just creates problems. Excess fertilizer salts can burn roots and cause yellowing fronds.
Here’s the feeding schedule to follow:
- October–February: No fertilizer at all
- March: Begin with a quarter-strength balanced liquid fertilizer (like 20-20-20)
- April onward: Resume normal feeding as growth picks up and you prep for moving back outside
Once spring growth kicks in and you see fresh unfurling fronds, that’s your signal to start feeding again. It’s genuinely exciting to watch!
Check out our guide on the best fertilizers for ferns and when to use them for more detailed guidance.
Patience with feeding in winter pays off big-time in spring!
Common Problems When Overwintering Ferns (And How to Fix Them)
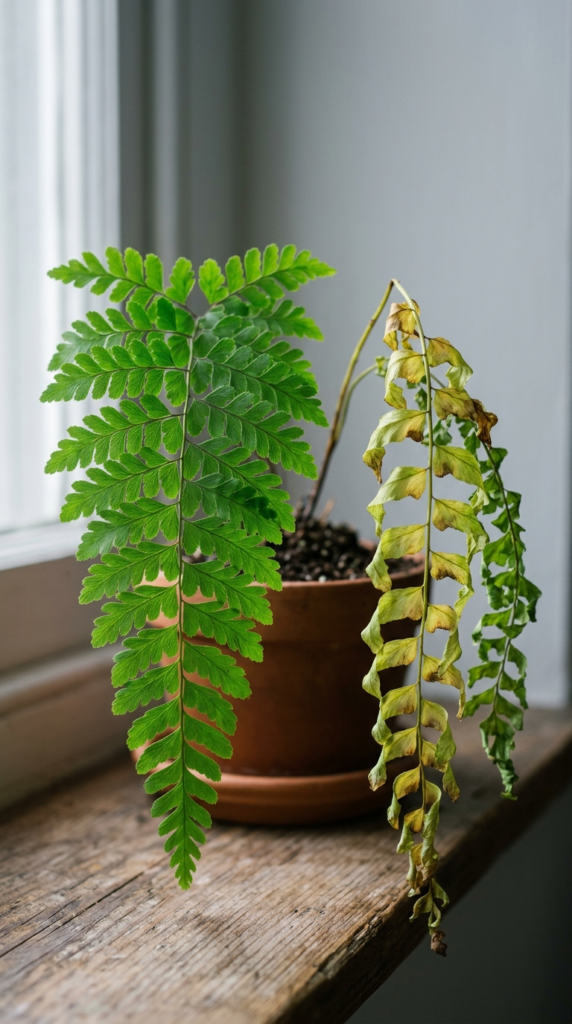
Even with the best care, overwintering ferns indoors can throw a few curveballs your way. The good news? Most problems are easy to fix once you know what to look for.
Here are the most common issues and their solutions:
- Yellowing fronds: Usually caused by overwatering or low humidity. Check soil moisture and boost humidity immediately.
- Brown, crispy tips: A classic sign of dry air or underwatering. Try a humidifier and adjust your watering schedule.
- Sudden frond drop: Often a reaction to the move itself — give it 2 weeks to adjust before panicking.
- Fungus gnats in the soil: Let the top layer of soil dry more between waterings. Use yellow sticky traps to monitor.
- Spider mites: Look for fine webbing on fronds. Treat with a gentle neem oil spray and increase humidity.
- Leggy, pale growth: Insufficient light. Move closer to a window or add a grow light.
💡 Pro Tip: A little yellowing right after the move indoors is completely normal. Ferns are drama queens and need a week or two to settle in!
Don’t stress — troubleshooting is just part of the gardening journey!
Bringing Your Ferns Back Outside in Spring
This is the moment you’ve been waiting for all winter! When temperatures are consistently above 50°F (10°C) at night, it’s time to start the transition back outdoors.
The key word here is gradually. Don’t just stick your fern back in its summer spot on day one. After months indoors, it needs to harden off — slowly reacclimate to outdoor sun, wind, and temperature fluctuations.
Follow this simple re-introduction schedule:
- Week 1: Place outside in a fully shaded, sheltered spot for 1–2 hours per day
- Week 2: Increase outdoor time to 4–6 hours, still in shade
- Week 3: Move to its permanent outdoor spot and leave it out full-time
Resume your normal spring fertilizing routine once you see fresh new growth kicking in. This is also a great time to repot if the plant has become root-bound over winter.
For a full spring plant care checklist, visit our spring container garden refresh guide.
You did it — and your fern will reward you with a spectacular season ahead!
Frequently Asked Questions
Can all outdoor ferns be overwintered indoors?
Not all outdoor ferns need to come inside — cold-hardy varieties like ostrich fern or Japanese painted fern can survive outdoors in Zones 3–5 with some mulch protection. However, tender tropical ferns like Boston ferns and Kimberly Queens must come inside before frost hits or they won’t survive. When in doubt, check your fern’s hardiness zone rating.
Will my fern lose all its leaves when brought inside?
Some frond drop is completely normal when overwintering ferns — it’s a stress response to the change in light, humidity, and temperature. Don’t panic if you lose some fronds in the first couple of weeks. As long as new growth appears within a month or so, your fern is adjusting just fine.
How much light does an overwintering fern need indoors?
Ferns need bright, indirect light during winter — ideally 4–6 hours near a north or east-facing window. They don’t need as much light as they get outdoors, but a dark corner will lead to pale, leggy growth. If your home is low on natural light, a full-spectrum LED grow light on a timer is a reliable solution.
Should I repot my fern before or after overwintering?
It’s generally best to repot in spring, just before or right after moving your fern back outside. Repotting in fall adds extra stress to a plant that’s already adjusting to indoor conditions. The only exception is if your fern is severely root-bound or the soil is waterlogged and poorly draining.
How do I keep pests from spreading to my other houseplants during overwintering?
Quarantine your outdoor ferns for at least 2 weeks in a separate room before introducing them to your existing houseplants. Treat with a neem oil solution or insecticidal soap spray as a precautionary measure, and keep a close eye on them during the transition period. This simple step can save your entire indoor plant collection from a pest invasion!
A Few Final Thoughts
Overwintering outdoor ferns indoors is one of the most rewarding things you can do as a gardener — it saves money, builds your plant collection, and deepens your connection to the plants you love. The process isn’t complicated once you understand what ferns truly need: consistent humidity, indirect light, restrained watering, and a little patience during the adjustment period. Every year you successfully bring a fern through winter, you’ll find it comes back fuller and more magnificent than the year before. It’s one of those gardening rituals that genuinely gets easier and more enjoyable with practice. So grab that fern off your porch, find it a cozy window spot, and give it the winter home it deserves. You’ve totally got this!