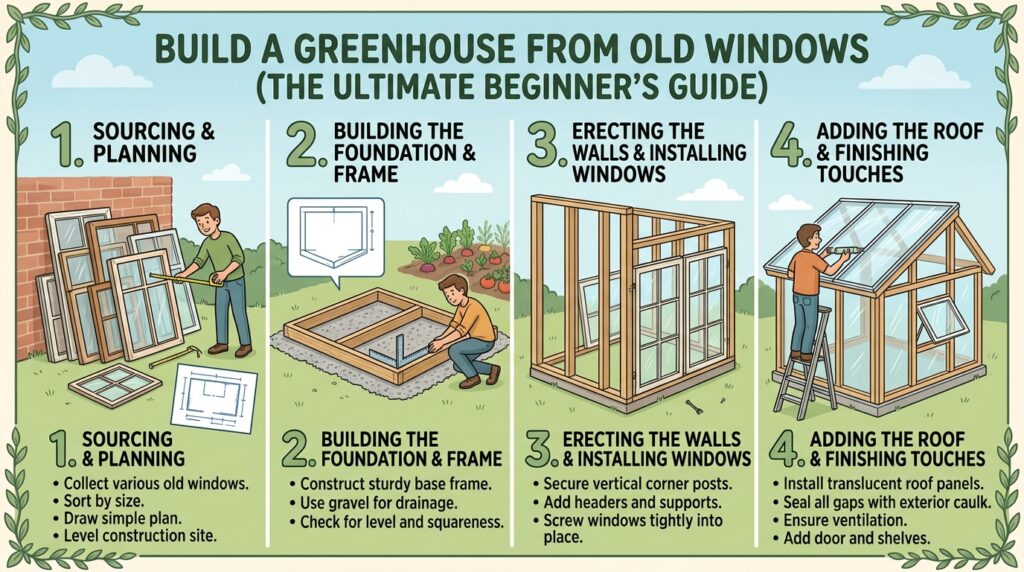
Have you been hoarding a pile of old windows in your garage, dreaming about turning them into something brilliant? Or maybe you’ve spotted a stack of reclaimed frames at a salvage yard and thought “I could do something incredible with those.” Well, you absolutely can — because building a greenhouse from old windows is one of the most satisfying, creative, and genuinely practical DIY projects a gardener can tackle, and the results are spectacular. We’re talking a custom, character-packed growing space that costs a fraction of a bought greenhouse, uses materials that would otherwise go to waste, and looks like something straight out of a Pinterest dream board. Ready to build your dream greenhouse? Let’s dive in!
At a Glance
- Building a greenhouse from old windows is an achievable DIY project for beginners with basic carpentry skills — you don’t need professional building experience to create a beautiful, functional growing space.
- Sourcing reclaimed windows from salvage yards, Facebook Marketplace, Freecycle, and building skips means the glazing (the most expensive component of any greenhouse) often costs almost nothing.
- Planning and foundation work are the most critical stages — a level, solid base and a well-thought-out frame design determine whether your old window greenhouse lasts 5 years or 25 years.
- Safety glazing considerations are essential — old windows may contain single glass or even leaded lights that require specific handling and positioning decisions to make the structure safe for regular use.
- The finished structure can be fully customised to your exact garden space, growing needs, and aesthetic preferences in a way that no off-the-shelf greenhouse can match — including size, height, door position, and design style.
1. Planning Your Old Window Greenhouse Design
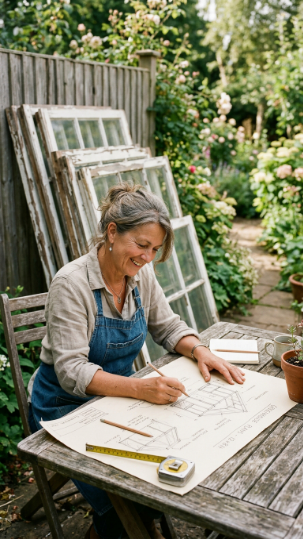
Here’s the deal: the planning stage is everything with an old window greenhouse — and the single biggest mistake beginners make is collecting windows first and designing around them last, when it should be the other way around. Start with a clear plan, then source windows that fit it, and your build will be dramatically smoother.
Your first planning decision is size and position — where in your garden will the greenhouse go, how much growing space do you genuinely need, and what orientation makes sense for maximum light? A south or south-west facing position with no shade from buildings or trees for the majority of the day is ideal. The longer walls of your greenhouse should run east to west so the south-facing side catches maximum winter sun.
Sketch your design before buying a single window — decide on wall height, roof pitch, door position, and overall footprint. Then measure your planned wall sections and source windows that fit those dimensions, rather than collecting random windows and trying to make them work together. This approach produces a more structurally sound and aesthetically coherent result every time.
💡 Pro Tip: Design your greenhouse around one consistent window size as much as possible — using 4–6 identical or very similar windows for the main wall panels makes the framing far simpler, produces a much cleaner finished appearance, and means any future replacement is straightforward. Save the interesting odd-shaped windows for feature details — a round porthole window in the end wall, a decorative panel above the door — rather than as structural components.
Key design decisions to make before sourcing:
- Footprint: 6x8ft is the practical minimum for a useful growing greenhouse; 8x10ft or larger is far more comfortable to work in
- Wall height: 6ft minimum at the eaves for comfortable standing; taller walls = more growing space and better ventilation
- Roof style: lean-to (single slope, against a wall) is the simplest build; apex (two slopes meeting at a ridge) is more complex but gives better headroom and symmetry
- Door position: always on a shorter end wall, ideally facing south or east
Read our planning your reclaimed window greenhouse — design decisions guide for a full sizing and orientation reference. The RHS has excellent greenhouse positioning advice at rhs.org.uk.
Invest the time in planning before you collect a single window — it is the single decision that most determines whether your build is a satisfying success or a frustrating puzzle!
2. Sourcing Old Windows — Where to Find the Best Frames
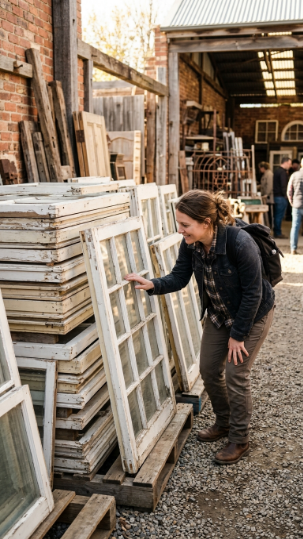
Sourcing your windows is the treasure-hunt stage of this project — and it’s genuinely one of the most enjoyable parts if you approach it with clear criteria and a little patience. The good news: old windows are one of the most readily available reclaimed building materials in existence, and you can often source excellent frames for free or for very little cost.
The best sources for reclaimed windows, roughly in order of cost from free to paid:
Freecycle and Facebook Marketplace are your first stops — homeowners replacing double glazing frequently have stacks of perfectly good old timber-framed single-glazed windows they’re desperate to give away. Search “old windows free” or “reclaimed windows” in your local area and set up alerts — good batches get snapped up quickly.
Building skips are another excellent source — when neighbours are having windows replaced, those old frames often go straight into a skip. It’s always worth asking before helping yourself, but most skips are fair game with the homeowner’s permission.
Architectural salvage yards give you the best selection and condition guarantee but come with a price tag — expect to pay £10–£40 per window depending on size, style, and condition. The advantage is finding matching sets of the same size, which makes the building process far simpler.
💡 Pro Tip: When collecting reclaimed windows, photograph every frame from both sides before you move them — this creates a reference library that makes the design and fitting stage much easier. Note the dimensions of every frame (height x width x depth) in a simple spreadsheet, and you’ll be able to design your greenhouse wall sections against actual measurements rather than estimates.
What to look for — and avoid:
| Condition Check | What to Look For | What to Avoid |
| Frame condition | Solid timber, no active rot | Soft, spongy wood at corners and joints |
| Glass condition | Intact panes, minor chips acceptable | Cracked glass, missing panes |
| Hardware | Working hinges and latches (for ventilation) | Seized or broken hardware (can be replaced) |
| Lead content | N/A — check for leaded lights | Avoid using leaded glass in roof positions |
| Frame depth | 50mm+ for robust framing | Very thin frames (under 40mm) are harder to work with |
Explore our complete guide to sourcing reclaimed windows for greenhouse builds for region-specific salvage sources and what to pay.
The window-sourcing stage is where your project’s character is established — take your time, stay patient, and hold out for frames that genuinely excite you!
3. Tools and Materials You’ll Need
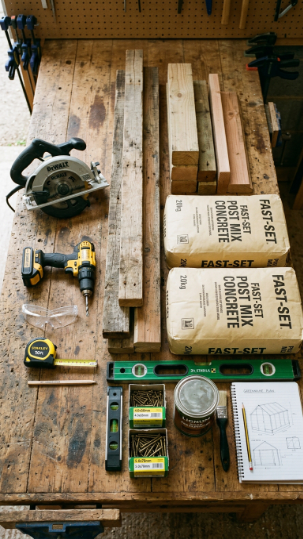
Here’s the thing: you don’t need a professional workshop or exotic specialist tools to build a reclaimed window greenhouse — the tool list is genuinely achievable for most competent DIY enthusiasts, and several of the larger power tools can be hired rather than bought if you don’t already own them.
Essential tools:
- Tape measure (5m minimum) and steel square for accurate marking
- Cordless drill/driver with a selection of drill bits and driver bits — the single most-used tool in the whole build
- Circular saw or hand saw for cutting timber to length (circular saw is faster for volume cutting; a sharp handsaw works fine)
- Spirit level (1.2m length) — essential for checking wall frames are plumb and base is level
- Rubber mallet for encouraging timber into position without damaging it
- Wood plane for fine-tuning frame fits
- Caulking gun for sealant application
- Paintbrushes for wood preservative application
Materials list (quantities depend on your specific design):
- Pressure-treated 75x50mm timber for the main structural frame — this is your primary material
- 75x25mm or 100x25mm timber for secondary framing and glazing beads
- Post mix concrete for setting corner and door posts
- Stainless steel or galvanized screws — 75mm, 100mm, and 125mm lengths cover most situations
- Exterior wood preservative — apply to all cut ends and all timber before assembly
- Clear silicone sealant for glazing and weatherproofing joints
- Roofing material — polycarbonate sheet or corrugated clear PVC for the roof section
- Door hinges and latch hardware
- Weed-suppressing membrane for the floor (if using a gravel floor)
💡 Pro Tip: Buy 20% more timber than your plan requires — you will make cuts that need redoing, you’ll find uses for off-cuts, and having extra material on site means you never have to stop the build for a supply run at a critical moment. Timber is inexpensive relative to the time wasted on an unnecessary trip to the builder’s merchant mid-project.
Read our complete tools and materials list for a reclaimed window greenhouse for a printable shopping list with quantities for a standard 8x6ft build.
Being fully prepared before the first cut is made makes the whole build faster, less frustrating, and more enjoyable — don’t start without your complete kit!
4. Choosing the Right Site and Preparing the Ground
Site selection and ground preparation are the unglamorous but absolutely critical foundation stages — every hour invested here prevents days of remedial work later. A poorly sited or poorly levelled greenhouse is the source of almost every structural problem that reclaimed window builds develop over time.
Choosing your site:
Your greenhouse needs maximum sunlight — ideally 6+ hours of direct sun per day, with the longest glazed wall facing south. Avoid positioning under or adjacent to deciduous trees — falling leaves block light, fallen branches can damage glazing, and tree roots can undermine foundations over time. Consider access to water and power — a greenhouse near a tap and an outdoor socket is dramatically more functional than one that requires long hose runs and extension leads.
Check for underground services before any digging — gas, water, electricity, and drainage pipes can run in unexpected places, and striking one is dangerous and expensive. Your utility providers can advise on mapped services.
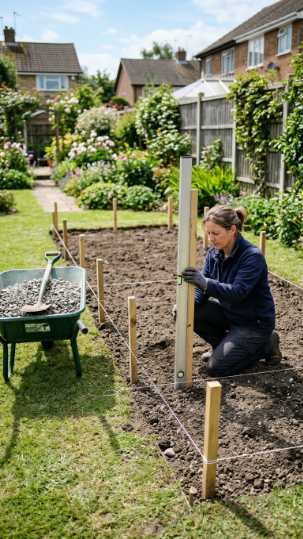
Preparing the ground:
Mark out your greenhouse footprint using string lines and stakes, measuring diagonals to confirm your rectangle is truly square (equal diagonals = square corners — the essential check that saves enormous fitting problems later).
Remove turf and topsoil from the footprint to a depth of 15–20cm, then compact the subsoil firmly. For a gravel floor (the simplest and most practical for a greenhouse), lay weed-suppressing membrane over the compacted subsoil and cover with 7–10cm of pea gravel or horticultural grit.
For a concrete or paving slab floor, pour a concrete pad or lay slabs on a compacted hardcore sub-base — a level, solid floor makes the whole build easier and produces a more professional result.
💡 Pro Tip: Don’t skip the diagonal check — marking out a rectangle that looks square to the eye but is actually a parallelogram means every wall panel, window frame, and door fits at a slight angle, and those small discrepancies compound through the entire structure. Measure both diagonals, adjust your string lines until they match exactly, and your build will go together far more cleanly from that point on.
| Floor Option | Cost | Drainage | Practicality | Aesthetics |
| Compacted gravel | Very low | Excellent | Very good | Natural, rustic |
| Paving slabs | Low-medium | Good (with gaps) | Excellent | Clean, tidy |
| Concrete pad | Medium | Poor (needs drains) | Excellent | Utilitarian |
| Original soil | Free | Excellent | Good (for border beds) | Natural |
Explore our preparing the perfect greenhouse site — ground, levels and foundations for a detailed excavation and levelling guide.
The perfect site perfectly prepared is the invisible foundation on which every beautiful detail of your greenhouse will stand — get it absolutely right before building a single wall!
5. Building the Base Frame and Corner Posts
🖼️ IMAGE PROMPT: A realistic wide lifestyle DIY photo of a person setting a treated timber corner post in a hole with post mix concrete, using a spirit level to check plumb on two faces simultaneously, with other corner posts already set and string lines running between them defining the greenhouse frame. Bright natural daylight. Color palette of natural timber
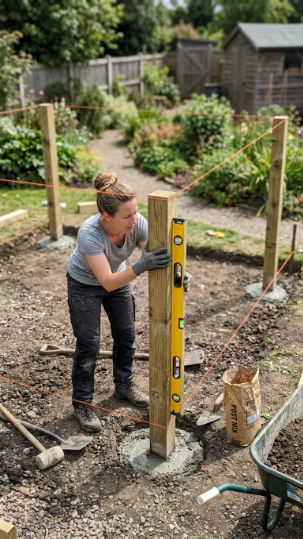
, grey post mix concrete, string lines, and bright construction site daylight. Mood: precise, foundational, methodical. Photography style: wide eye-level. Background: soft blurred garden setting with prepared greenhouse site.
With your site prepared and perfectly level, you’re ready for the most structurally important stage of the build — setting the base frame and corner posts that every wall panel, window frame, and roof structure will ultimately fix to. Get this stage right and everything that follows goes together far more smoothly.
Setting corner posts:
Use 100x100mm pressure-treated timber for corner posts — the larger section gives rigidity and a generous fixing surface for wall panels from two directions. Each post needs to go into the ground at least 45–60cm for stability in wind, with the hole filled and packed firmly with post mix concrete.
Set the first corner post perfectly plumb (check on two adjacent faces with your spirit level) and allow the concrete to set for at least 24 hours before continuing. Set the opposite diagonal corner post next, using string lines to ensure it’s in perfect alignment, then complete the remaining two corners.
The sill plate:
Once your corner posts are set, fix 75x75mm pressure-treated timber sill plates between the posts at ground level, sitting on the prepared floor surface. The sill plate forms the bottom fixing point for your wall panels and must be dead level — use packing shims beneath it to achieve perfect level before fixing.
💡 Pro Tip: Treat every cut end of timber with exterior wood preservative immediately after cutting — the end grain is the most vulnerable part of any timber section, where moisture penetrates most readily and rot initiates most quickly. Keeping a small brush and a jar of preservative beside your saw and applying it to every fresh cut adds 20 seconds per cut and can double the lifespan of your structure.
Checking the frame:
Before any wall panels go up, check the complete base frame for:
- All corners perfectly square (equal diagonals)
- Sill plates perfectly level in all directions
- Corner posts perfectly plumb on both faces
- All fixings tight and secure
These four checks at base frame stage prevent the vast majority of problems that emerge at later stages of the build. The time spent here is time saved tenfold later.
Read our setting posts and building the base frame for a reclaimed window greenhouse for detailed fixing specifications and concrete mix ratios.
The base frame is the skeleton everything else depends on — build it with absolute precision and every stage that follows will slot together with satisfying accuracy!
6. Constructing the Wall Frame Panels
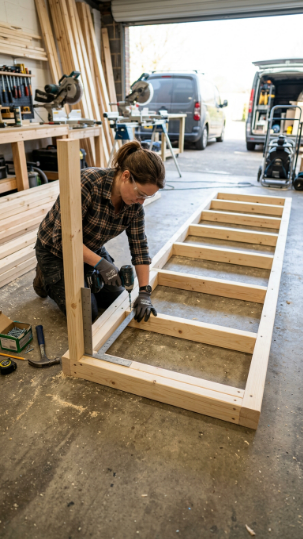
Here’s the deal: wall frame construction is where your greenhouse really begins to take shape — and the approach that produces the cleanest, most professional result is to build your wall panels flat on the ground first, then lift them into position and fix them to the base frame and corner posts. This is dramatically easier than trying to build in situ.
The wall frame principle:
Each wall panel consists of a top plate and bottom plate (the horizontal members at top and bottom of the panel) with vertical studs between them, spaced to match your window widths. The window frames themselves will be fitted into the openings between studs — so your stud spacing needs to match your window dimensions precisely, with enough timber to provide a fixing surface on both sides of each window.
Build each panel as follows:
- Cut your top and bottom plates to the exact wall length
- Mark stud positions on both plates simultaneously (same marks = guaranteed square openings)
- Cut vertical studs to wall height minus the combined depth of top and bottom plates
- Assemble flat on the ground, checking corners with a steel square
- Fix with two 100mm screws at every joint — pre-drill to prevent splitting
- Add diagonal bracing to prevent racking if your design has large openings
Fitting windows into the frame:
Your window frames should fit snugly but not tightly into the wall panel openings — a 5–10mm gap on each side allows for adjustment and sealant. Fix windows to the structural frame using frame fixings (expanding anchors into the timber perimeter) rather than relying on the glazing or beads to hold the window in place.
💡 Pro Tip: Pre-assemble all wall panels and dry-fit them together before any permanent fixing — lean each completed panel against the base frame and check how they fit together, where adjustments are needed, and whether your window frames sit correctly in their openings. Discovering that a panel needs 15mm trimming is a 2-minute job before fixing; discovering it after everything is screwed together is an hour’s work.
Explore our building wall frame panels for a reclaimed window greenhouse for detailed stud spacing calculations and window fitting guides.
Wall panel construction is where DIY precision pays off most visibly — take your time, check your squares constantly, and enjoy watching your greenhouse begin to stand!
7. Handling Old Glass Safely
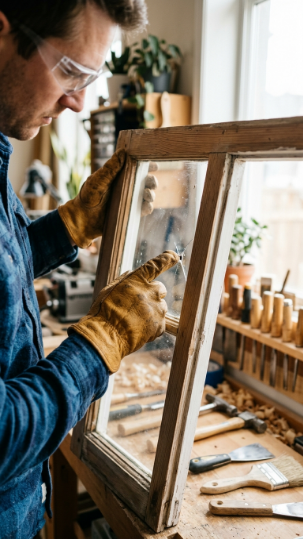
Here’s the thing: old glass requires careful handling and thoughtful positioning — and understanding the specific safety considerations of reclaimed glass is one of the most important aspects of this project that beginners frequently underestimate.
Single-pane glass (which is what virtually all old windows contain) is annealed glass — it shatters into large, sharp, dangerous shards when broken, unlike modern toughened safety glass which breaks into small, relatively harmless pieces. This has direct implications for where you use old glass in your greenhouse structure.
Safe positioning rules for old glass:
- Never use old single-pane glass in roof positions — a broken roof pane drops glass vertically onto anyone below. Use polycarbonate sheet or modern tempered glass for all roof sections.
- Side walls at height are lower risk — a broken side pane falls outward or inward at a low angle, which is manageable and much less dangerous than overhead glazing.
- Door panels should ideally use safety glass or polycarbonate — door glass is frequently struck and broken in a working greenhouse.
- Leaded lights are beautiful but poor insulators and inappropriate for a working greenhouse — use them only as decorative non-structural panels if you want to include them.
Handling old glass safely:
Always wear thick leather or cut-resistant gloves when handling old window frames. Inspect every pane before moving it — even a minor crack can cause a pane to shatter unexpectedly when pressure is applied. Transport frames vertically rather than flat where possible, and never stand below a frame being moved overhead.
💡 Pro Tip: Replace any cracked or compromised panes before incorporating a window into your structure — fitting a window with a cracked pane and intending to replace it later almost never happens, and a cracked pane in a fixed wall is harder to replace safely than one on the ground. A new pane of single glass cut to size by a local glazier costs very little and is far safer than hoping a crack doesn’t propagate.
Read our handling old glass safely in reclaimed greenhouse builds for a comprehensive glass safety and replacement guide. The Health and Safety Executive has excellent guidance on glass safety at hse.gov.uk.
Handle old glass with respect and position it thoughtfully — safety glazing decisions made at the design stage prevent accidents throughout the life of the structure!
8. Building the Roof Structure
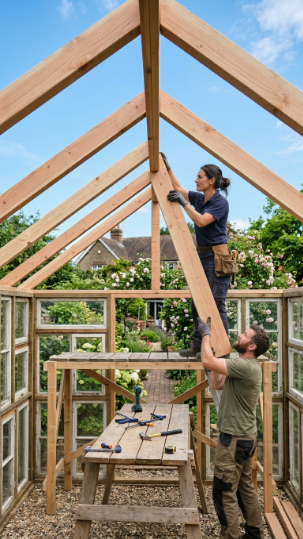
The roof is the most structurally demanding part of a reclaimed window greenhouse build — it needs to handle wind loading, snow loading, and the concentrated weight of glazing material while remaining weathertight for the life of the structure. It’s also the stage that most clearly benefits from having a helper on site.
For an apex roof (the classic greenhouse shape), the key components are:
- Ridge board: the horizontal timber running along the apex of the roof from end to end — typically 100x25mm timber, positioned at your chosen roof height
- Rafters: the sloping members running from the top wall plates up to the ridge board on both sides — typically 75x50mm timber, spaced at 600mm centres
- Rafter angle: the roof pitch (slope) needs to be at least 15° for adequate rainwater run-off, with 20–25° being the practical optimal for a greenhouse
For a lean-to roof (simpler, single slope, ideal for against-a-wall builds), you need only a ridge/wall plate at the high end fixed to the existing wall and rafters running at a consistent angle down to the front wall plate.
💡 Pro Tip: Cut a rafter template first — cut one rafter perfectly to your planned length and angle, check it fits correctly between wall plate and ridge, then use it as a pattern to cut all remaining rafters from. Every rafter will be identical, installation is consistent, and you avoid the cumulative errors that come from measuring each rafter individually from scratch.
Glazing the roof:
Use twin-wall or triple-wall polycarbonate sheet for the roof — it’s lightweight, excellent at retaining heat, allows good light transmission, is impact-resistant, and critically, it’s safe when broken. Fix polycarbonate sheets using purpose-made polycarbonate rafter glazing bars that clip over the rafters and provide weatherproof channels for the sheet edges.
Explore our building the roof for a reclaimed window greenhouse — apex and lean-to guide for rafter calculations, ridge board fixing, and polycarbonate glazing installation.
The moment the roof goes on is the moment your greenhouse transforms from a frame into a real structure — one of the most exciting moments in the whole build!
9. Weatherproofing and Sealing

A beautifully built greenhouse that leaks at every window joint and drips from every roof seam is a profoundly frustrating thing — and weatherproofing is the stage that separates a genuinely functional greenhouse from a leaky shed. Invest time in thorough sealing and your growing environment will be dramatically more effective and your structure will last significantly longer.
The sealing sequence:
Work from the top of the structure down — roof first, then wall-to-roof junctions, then window frames into wall frames, then base frame to floor. Water always travels downward, so sealing in this sequence means each lower seal is protected by the one above.
Roof sealing:
All polycarbonate-to-glazing-bar joints should be sealed with the specific butyl tape or sealant recommended by the glazing bar manufacturer. The ridge cap (the cover that bridges the two slopes at the apex) is the most critical sealing point on an apex roof — ensure it’s bedded in sealant and fixed securely. End walls where rafters meet the wall plates should be sealed with exterior flexible mastic.
Window frame sealing:
Apply clear exterior silicone sealant in a continuous bead around all four edges of every window frame where it meets the surrounding timber structure. Tool the sealant smooth with a wet finger immediately after application. Pay particular attention to the top edge and bottom corners of each frame — these are the points where water ingress most commonly occurs.
💡 Pro Tip: Use low-modulus neutral cure silicone rather than acetic cure (the type that smells strongly of vinegar) for sealing around timber — acetic silicone can cause staining and timber discolouration over time, while neutral cure silicone bonds better to timber and wood preservatives and remains flexible through temperature cycles without pulling away from the joint.
Read our weatherproofing a reclaimed window greenhouse — the complete sealing guide for a full joint-by-joint sealing sequence with product recommendations.
Thorough weatherproofing is what makes your greenhouse a genuine growing asset rather than a decorative structure — do it properly and you’ll thank yourself every time it rains!
10. Installing Ventilation
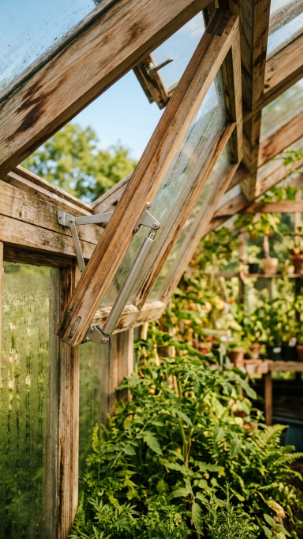
The ventilation rule of thumb for greenhouses is that vent area should equal approximately one-sixth of the total floor area — so a 6x8ft greenhouse (48 sq ft floor area) needs approximately 8 sq ft of vent opening. This sounds like a lot and it is — most commercial greenhouses are actually under-ventilated because manufacturers compromise on the number of vents to reduce cost.
Using existing opening windows from your reclaimed frame collection is the most elegant ventilation solution — you’ve almost certainly collected some windows with functional hinges and stays, and these become your roof vents and side vents by design.
Automatic vent openers (wax-filled cylinder mechanisms that expand with heat and push the vent open automatically, then close as temperature falls) are one of the single best investments you can make in a greenhouse — they regulate temperature on days when you’re not present, cost around £15–£25 each, require no electricity, and last for years. Fit them to every opening roof vent as standard.
💡 Pro Tip: Position at least one vent in the roof of your greenhouse — hot air rises, and a roof vent exhausts heat far more effectively than side vents alone. The combination of a low side vent (for cool air intake) and a high roof vent (for hot air exhaust) creates a natural convection current through the greenhouse that is enormously more effective at temperature regulation than side vents alone.
Explore our ventilation planning for reclaimed window greenhouses for vent sizing calculations and automatic opener installation.
Great ventilation is what makes your greenhouse plants actually thrive rather than merely survive — never compromise on it!
11. Building and Hanging the Door
The door is the most used and most visible component of your greenhouse — and a well-made, well-hung door that opens smoothly, closes securely, and seals properly makes an enormous difference to both the practicality and the aesthetic of the finished structure.
Door construction:
The simplest approach for a reclaimed window greenhouse is a ledge and brace door — a basic timber frame with ledges (horizontal rails), a diagonal brace (to prevent the door dropping at the latch side), and either timber boarding, a reclaimed glass panel, or a combination of both filling the frame.
For a reclaimed window door (using one or two window frames as the glazed panel in a timber door frame), fix the window frame into a timber door surround of 75x50mm sections, add a diagonal brace on the back face running from the hinge bottom to the latch top (this direction prevents sagging), and hang on heavy-duty T-hinges or parliament hinges that give full clearance for the door to open without catching on the frame.
Door hanging:
Use at least three hinges for a full-height greenhouse door — two is the minimum but three distributes the door weight more evenly and prevents the common sagging problem that eventually causes single-glazed doors to bind in their frames.
Set the hinge-side clearance first (2–3mm between door and frame at the hinge side), check the door is plumb, then fix the latch side hardware. A door that hangs plumb and swings freely is one of the most satisfying moments in any timber build.
💡 Pro Tip: Fit a door closer spring to your greenhouse door — a simple overhead spring-loaded closer (available for a few pounds) that pulls the door shut automatically behind you is one of the most practically useful greenhouse fittings. Leaving the door accidentally open overnight in cold weather can devastate tender plants; a spring closer eliminates that risk entirely.
Read our building and hanging a reclaimed timber greenhouse door for full construction dimensions, hinge selection, and hanging technique.
A beautifully made door is the finishing detail that makes your entire greenhouse feel genuinely crafted rather than improvised — take the time to get it absolutely right!
12. Wood Treatment and Exterior Finishing
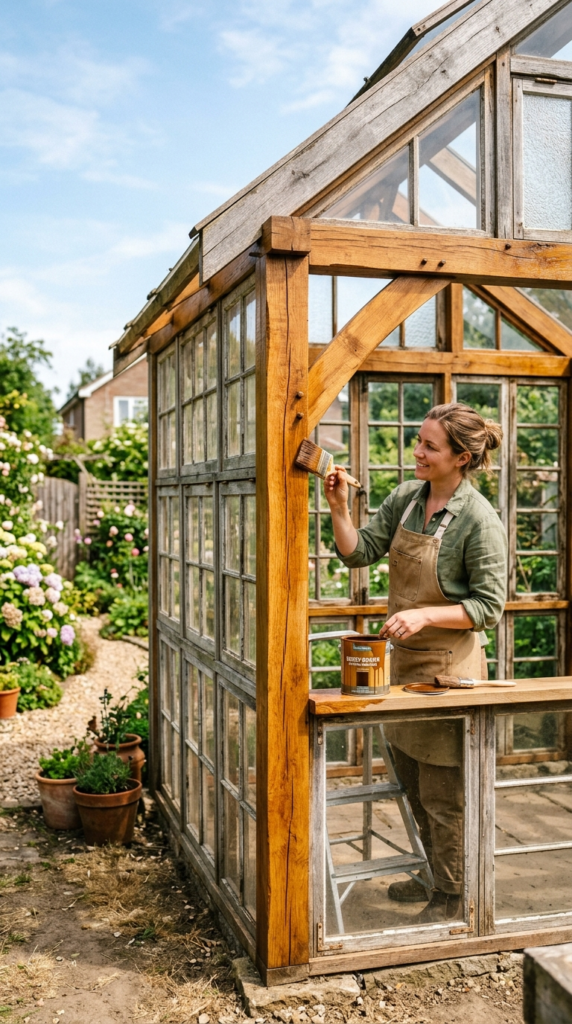
Here’s the deal: wood treatment is not optional for a greenhouse that you want to last — a reclaimed window greenhouse exposed to the wet British climate (or indeed most climates where greenhouses are useful) without adequate timber protection will show significant deterioration within 3–5 years, while a properly treated one can last 20–30 years with periodic maintenance.
Treatment before and after assembly:
The most effective protection comes from treating timber before assembly (when all surfaces, including those that will become joints, are accessible) and then applying a second treatment coat to all external surfaces after assembly (to seal any cuts, joints, and fixing points that were made during building). These two stages together give comprehensive protection that treating only after assembly cannot achieve.
Product selection:
Exterior wood stain in a medium or dark tone (oak, cedar, dark oak, or dark green all work beautifully on a reclaimed window greenhouse) provides both UV protection and moisture resistance, and gives your structure a cohesive, finished appearance that unifies the mix of reclaimed window frames and new structural timber.
Preservative base coats should be applied to all timber before any coloured stain — purpose-made timber preservative (not the same as decking stain or fence paint) penetrates the wood deeply and provides the biocidal protection against rot and fungal attack that coloured stains alone don’t deliver.
💡 Pro Tip: Paint the reclaimed window frames to match your structural timber rather than leaving them in their original mix of colours and finishes — unifying all the timber in one consistent colour transforms a collection of salvaged windows into a coherent, designed structure. Dark green, slate grey, or classic white all look spectacular and give your greenhouse a genuinely purposeful, professional aesthetic.
Explore our treating and finishing a reclaimed window greenhouse — products and techniques for product recommendations, application techniques, and maintenance schedules.
A beautifully finished greenhouse is one you’ll be proud to show off for decades — the treatment investment is modest and the aesthetic return is enormous!
13. Setting Up the Interior for Growing
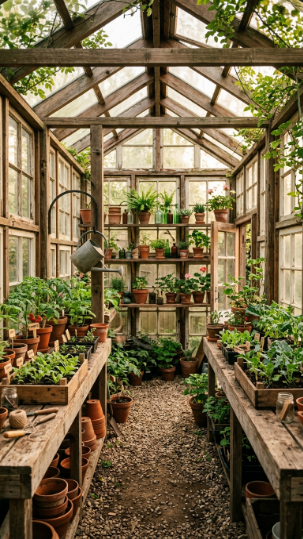
The interior setup transforms your beautiful structure into a functioning growing space — and a well-planned greenhouse interior dramatically increases both the quantity you can grow and the pleasure of spending time in there.
Staging (growing benches):
Timber staging along both side walls at bench height (typically 80–90cm) is the most space-efficient arrangement for a working greenhouse — it gives you surface area for seed trays, pots, and propagating equipment at a comfortable working height while leaving the floor space below free for larger container plants or grow bags.
Build staging from pressure-treated timber with slatted tops (gaps between slats allow air circulation and excess water to drain away) rather than solid shelves that hold moisture and encourage fungal disease. A simple ladder-style construction (two side rails with horizontal slats fixed between them at 150mm centres) is easy to build, very strong, and looks great.
Shelving for the end wall:
The end wall opposite the door is prime shelving real estate — use it for tiered shelving that captures the full height of the greenhouse for maximum growing capacity. Wall-mounted timber brackets with adjustable shelf positions give you flexibility to accommodate different plant heights throughout the season.
💡 Pro Tip: Install hooks on the roof rafters for hanging baskets, propagation lights, and equipment storage — the overhead space in a greenhouse is enormously underused and hooks cost almost nothing. Hanging baskets of tumbling tomatoes or strawberries from the rafters doubles your productive floor area without using any bench or floor space.
Read our setting up the interior of a reclaimed window greenhouse for maximum growing for staging plans, shelving options, and heating recommendations.
A well-set-up greenhouse interior is a joy to work in and a marvel of productive efficiency — invest the same care in the inside as you did in the outside!
14. Adding Heating for Year-Round Growing
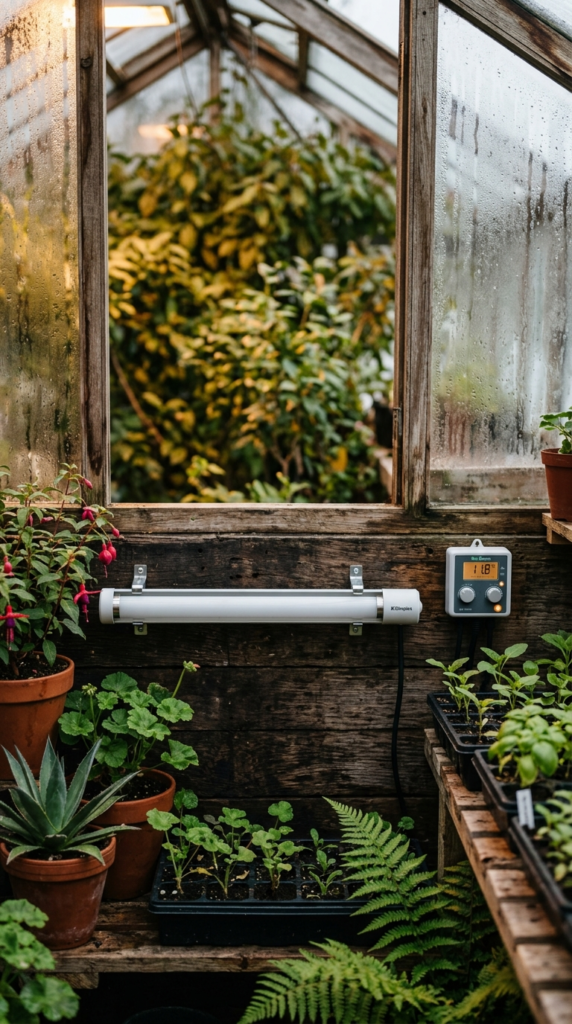
Heating transforms a greenhouse from a season-extender (usable roughly March–October) into a year-round growing asset — allowing you to overwinter tender plants, start seeds in January, grow winter salads and herbs, and protect frost-sensitive plants through the coldest months.
Electric tubular heaters are the most practical choice for a small greenhouse — they’re inexpensive to buy, precisely controllable with a thermostat (set to 5°C for frost-free overwintering, 10°C for tender plant protection, 15°C for year-round growing), and safe to leave unattended. Install them low on the wall (heat rises naturally through the growing space) and use a separate thermostat probe rather than relying on the built-in thermostat for accurate temperature control.
Paraffin heaters require no electricity and provide good emergency backup heating, but they produce moisture as a combustion byproduct which increases humidity and fungal disease risk — fine for frost protection during cold snaps but not ideal for permanent heating.
Heat conservation is equally important as the heat source — a well-insulated greenhouse needs less heat to maintain target temperatures, reducing running costs significantly.
| Insulation Method | Cost | Effectiveness | Installation |
| Bubble wrap lining | Very low | Good (single layer) | Very easy |
| Double bubble wrap | Low | Very good | Easy |
| Polycarbonate lining boards | Medium | Excellent | Moderate |
| Thermal screens (horizontal) | Medium | Very good | Moderate |
💡 Pro Tip: Line the inside of your greenhouse with bubble wrap in autumn — horticultural bubble wrap (larger bubbles than standard packing wrap) is available in wide rolls specifically for greenhouse insulation. Fixed to the inside of the glazing with purpose-made greenhouse clips, it dramatically reduces heat loss and can keep a heated greenhouse at target temperature for a fraction of the running cost of an uninsulated structure.
Explore our heating and insulating a reclaimed window greenhouse for year-round growing for heater sizing, thermostat settings, and insulation installation guides.
A heated greenhouse is one of the most transformative investments in any serious garden — once you’ve overwintered tender plants successfully, you’ll never look back!
15. Maintenance and Long-Term Care
Here’s the thing: a well-maintained reclaimed window greenhouse will last for decades and look better every year as the timber weathers to a beautiful silvery patina and the structure becomes part of the garden’s permanent character. A neglected one deteriorates faster than you expect and becomes a source of frustration rather than pride.
Annual maintenance checklist:
Spring (March–April):
- Deep clean all glass inside and out — algae and dirt on glass reduces light transmission by up to 40%, significantly impacting plant growth
- Check and reapply sealant to any joints showing cracking or gaps
- Inspect all timber for early rot signs — probe suspected soft spots with a screwdriver
- Check all roof fixings and replace any corroded screws
- Apply a fresh coat of exterior wood stain to any weathered timber sections
- Clean staging and shelving with diluted disinfectant before the growing season begins
Autumn (October–November):
- Apply bubble wrap insulation lining
- Check automatic vent openers — replace wax cylinders if they’re no longer responding
- Check door closer spring and hardware
- Clean guttering if fitted
- Empty and store any clay pots that might be damaged by frost
💡 Pro Tip: Keep a greenhouse maintenance log — a simple notebook in the greenhouse where you note any repairs made, products applied, seeds sown, and observations about how the structure performs in different weather conditions. After two or three years, this log gives you an invaluable picture of your specific greenhouse’s behaviour and maintenance needs, making every subsequent maintenance session more targeted and efficient.
Read our annual maintenance guide for reclaimed window greenhouses for a fully detailed seasonal maintenance schedule with product recommendations.
A greenhouse that’s loved and maintained properly becomes one of the most characterful and useful features in any garden — care for it well and it will grow with you for a lifetime!
Frequently Asked Questions
Do I need planning permission to build a greenhouse from old windows?
In most cases in the UK, a garden greenhouse falls within permitted development rights and does not require planning permission, provided it meets certain criteria: it must be within the curtilage of a house, no taller than 4 metres (or 3 metres if within 2 metres of a boundary), not forward of the principal elevation of the house, and not cover more than 50% of the curtilage. However, permitted development rights can be restricted in conservation areas, Areas of Outstanding Natural Beauty, and on listed buildings — always check with your local planning authority before building if you’re in any doubt. In the US and other countries, local building codes and HOA rules vary significantly and should always be checked first.
How long does it take to build a reclaimed window greenhouse?
For a competent DIYer with all materials sourced and a clear plan, a standard 8x6ft reclaimed window greenhouse typically takes 3–5 full working days of construction time, spread across several weekends. The foundation and base frame (day 1), wall frames (day 1–2), roof structure (day 2–3), glazing and door (day 3–4), and weatherproofing and finishing (day 4–5) are the rough stages. Add additional time for sourcing windows (this can take several weeks of patient searching), ground preparation, and interior fit-out. Most builders find the project takes 4–6 weekends from first concrete pour to first plants installed.
What’s the best way to deal with gaps between different-sized window frames?
Gaps between windows of slightly different sizes are inevitable when building with reclaimed frames — the key is addressing them by design rather than by accident. Infill panels of timber boarding, corrugated polycarbonate, or additional glass cut to size all work well for filling gaps between windows. A consistent infill material used throughout (all timber infills, or all polycarbonate infills) gives the structure a coherent, designed appearance rather than the patched look that comes from using different materials for each gap. Planning your infill approach at the design stage, rather than discovering gaps at the building stage, produces the cleanest result.
Can I build a reclaimed window greenhouse against an existing wall or fence?
Yes — a lean-to greenhouse against an existing wall is often the simplest and most structurally efficient design for a reclaimed window build. The wall provides a ready-made back structure that eliminates one complete wall of framing, the thermal mass of a masonry wall retains heat overnight and reduces heating costs, and the sheltered microclimate against a wall is often excellent for growing. Ensure the wall is structurally sound before fixing to it, use appropriate wall fixings for the wall material (masonry anchors for brick and block, coach bolts for timber), and be conscious of any damp-proof course that your fixings shouldn’t penetrate.
How do I stop my reclaimed window greenhouse getting too hot in summer?
Overheating in summer is a common challenge in any greenhouse and is managed through a combination of ventilation, shading, and damping down. Maximise ventilation by opening all vents and the door on hot days (automatic vent openers handle this passively). Apply greenhouse shading paint (a white washable coating applied to the outside of the glazing in spring and washed off in autumn) to reduce direct solar gain through the glass. Damp down the floor (wetting the gravel or concrete floor) in the morning on hot days — evaporation creates humidity that reduces leaf temperature. For persistent overheating problems in a very glazed structure, external roller blinds or internal shade cloth provide the most effective control.
A Few Final Thoughts
Building a greenhouse from old windows is one of those rare DIY projects that rewards you on multiple levels simultaneously — the satisfaction of the build itself, the environmental pleasure of giving beautiful reclaimed materials a new purpose, the creative joy of designing something completely unique to your garden, and ultimately the deep, ongoing reward of a growing space that you made with your own hands and that will produce plants, food, and joy for years to come. Every stage of this project — from the treasure hunt of sourcing windows to the careful craftsmanship of the frame to the deeply satisfying moment the first seedlings go in — is genuinely wonderful when approached with patience, good planning, and the confidence that it absolutely is within your reach. Your reclaimed window greenhouse is waiting to be built — and it will be more beautiful, more characterful, and more personally meaningful than anything you could ever buy. Now go make it happen! 🌿