Raised garden beds are amazing — until you realize how much soil it takes to actually fill one! If you’ve ever priced out enough premium potting mix to fill a 4×8 bed, you know that sticker shock is very real. But here’s the good news: you absolutely do NOT need to spend a fortune to fill your raised beds with rich, productive growing medium. There are smart, budget-savvy methods that experienced gardeners swear by — and they work brilliantly. Ready to find out how to fill raised garden beds cheaply without skimping on results? Let’s dive in!
At a Glance
- The Hugelkultur method lets you fill the bottom half of deep raised beds with logs and branches, dramatically cutting your soil costs.
- Lasagna layering uses alternating organic materials like cardboard, compost, and straw to build a rich growing medium almost entirely for free.
- Many cities and municipalities offer free or heavily discounted compost to residents — it’s one of the most underused gardening freebies out there.
- Buying soil in bulk from a landscape supplier is almost always significantly cheaper per cubic foot than purchasing bagged mixes from a garden center.
- You only need premium growing mix in the top 6–12 inches of your bed — everything below can be organic fill material that breaks down over time.
Why Filling Raised Beds Gets Expensive (And How to Beat It)
Here’s the thing: most people make one critical mistake when filling raised beds — they try to fill the ENTIRE thing with premium bagged potting mix. That’s expensive, unnecessary, and honestly kind of overkill.
A standard 4×8 raised bed at 12 inches deep needs about 32 cubic feet of fill. At $8–$12 per 1.5 cubic foot bag of potting mix, you’re looking at $170–$250+ just for ONE bed. Ouch.
The secret is understanding that plant roots primarily live in the top 6–12 inches of your bed. Everything below that is structural fill — it just needs to be organic, loose, and able to break down over time. It doesn’t need to cost $10 a bag!
💡 Pro Tip: Think of your raised bed like a lasagna — only the top layer needs to be the good stuff. Everything underneath is just building the foundation for long-term soil health.
Once you shift your mindset from “fill it all with premium mix” to “layer smart organic materials,” the cost drops dramatically. We’re talking going from $200+ down to $30–$60 for the same bed. Pretty cool, right?
Learn more about planning your first raised bed setup so you can budget from the very beginning.
Smart planning from day one saves you serious money!
The Hugelkultur Method: Fill From the Bottom Up
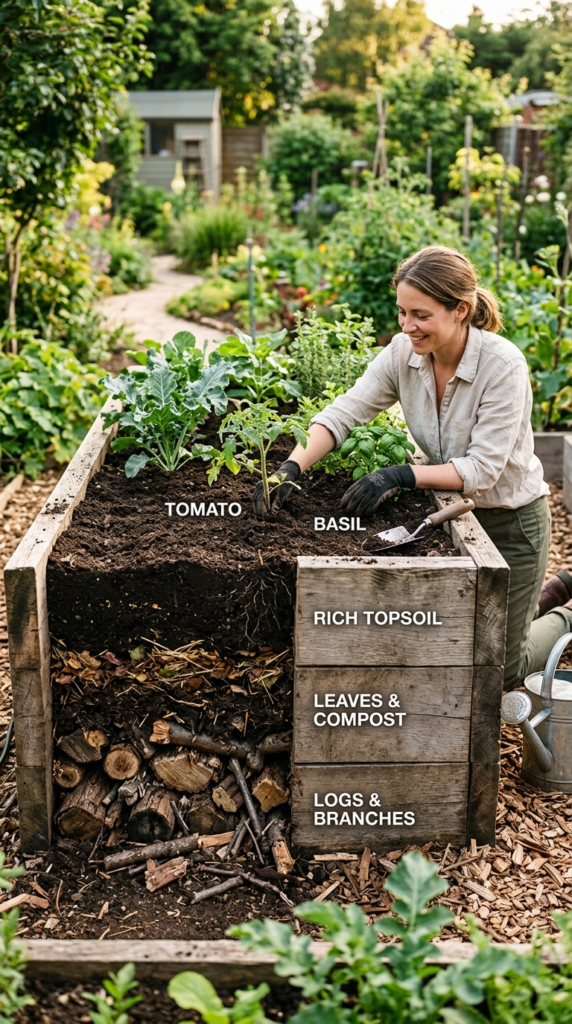
If you’ve never heard of Hugelkultur, get ready to have your mind blown. It’s a centuries-old technique where you fill the base of your raised bed with logs, branches, and woody debris — and it’s completely free if you have access to fallen wood.
Here’s how it works: the wood acts as a slow-release sponge, absorbing moisture and gradually breaking down into rich, nutrient-dense organic matter over several years. Your plants benefit from this decomposition for a long, long time.
To use Hugelkultur in your raised bed:
- Place large logs and thick branches at the very bottom (these break down slowest)
- Layer smaller sticks and twigs on top of those
- Add a thick layer of leaves, grass clippings, or straw over the woody material
- Top with a generous layer of compost
- Finish with your quality growing mix in the top 8–12 inches
The woody fill in a 12-inch deep bed can take up 6–8 inches of depth, meaning you only need to purchase soil for the top portion. That’s a massive saving!
According to The Permaculture Research Institute, Hugelkultur beds actually improve in productivity over time as the buried wood continues to break down.
Check out our guide on Hugelkultur raised beds for beginners for a full step-by-step walkthrough.
This method is as budget-friendly as it gets — and your soil gets better every single year!
Use the Lasagna Layering Technique
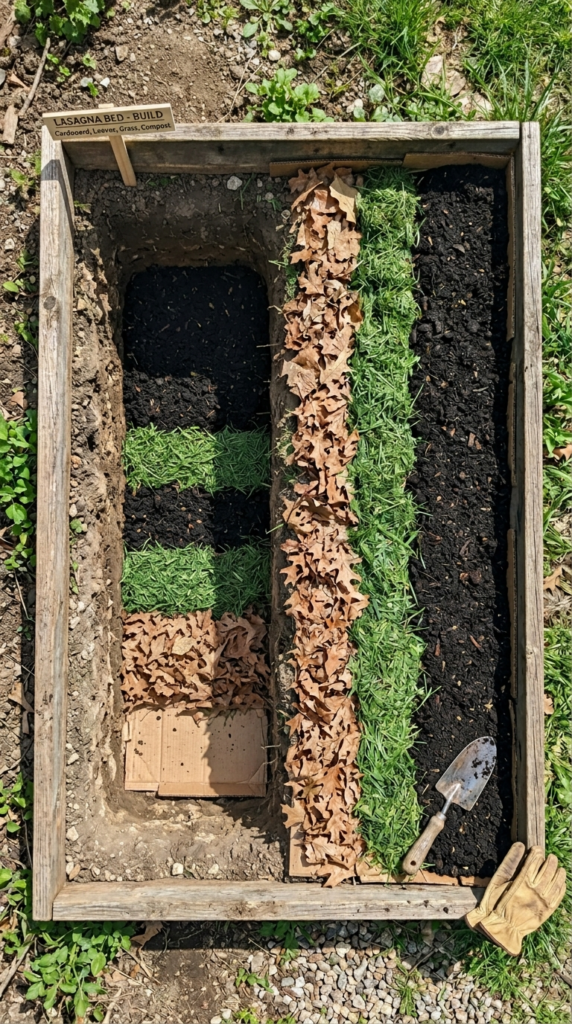
Lasagna gardening (also called sheet mulching) is one of the most beloved methods for filling raised beds cheaply — and for good reason. You’re literally building soil from scratch using layers of organic material that you can often source completely for free.
The idea is simple: alternate “brown” carbon-rich layers (cardboard, straw, dried leaves, newspaper) with “green” nitrogen-rich layers (grass clippings, kitchen scraps, fresh plant trimmings, coffee grounds). These layers break down together, creating beautifully rich compost right inside your bed.
Here’s a basic lasagna stack for a new raised bed:
- Layer 1 (bottom): Cardboard or newspaper — suppresses weeds, attracts worms
- Layer 2: 2–3 inches of straw or dried leaves
- Layer 3: 1–2 inches of grass clippings or kitchen scraps
- Layer 4: 2–3 inches of compost or aged manure
- Repeat layers until near the top
- Top layer: 4–6 inches of quality soil mix for planting
💡 Pro Tip: Lasagna beds are best built in fall and left to “cook” over winter — by spring, the lower layers have broken down into incredible planting medium!
The beauty of this method is that most of the ingredients are things you already have or can get for free. Neighbors’ bagged leaves, coffee shop grounds, cardboard from moving boxes — it’s all gold.
Explore our full lasagna gardening method guide for more layering inspiration.
Free ingredients plus smart layering equals a bed that gets better with every season!
Source Free Compost From Your City
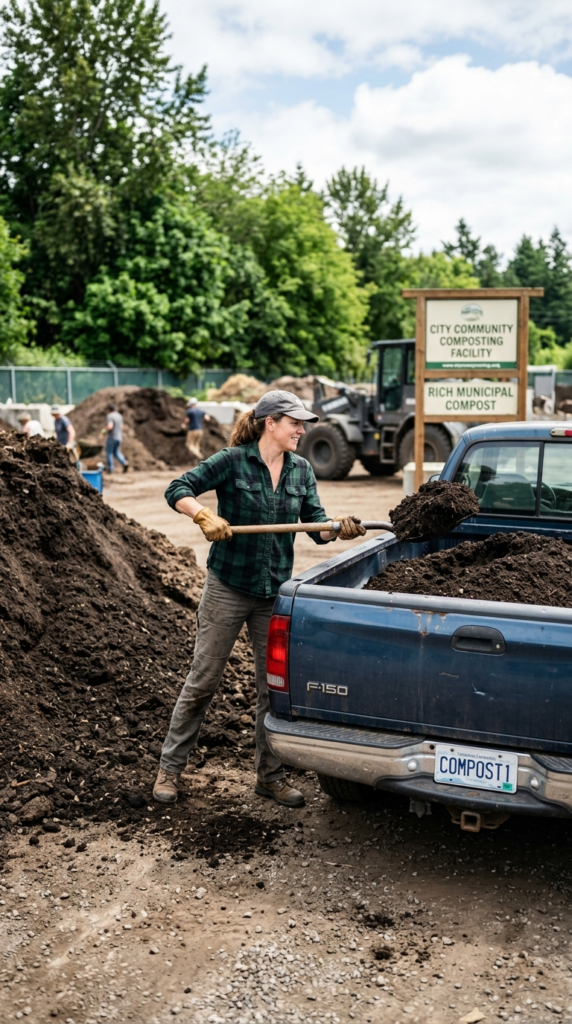
This is one of the most overlooked free gardening resources in existence — and it might be sitting right in your own city. Many municipalities run composting programs where they process yard waste, food scraps, and organic material into finished compost that they offer FREE to residents.
All you usually need is a truck, a few buckets, and maybe a shovel. Some cities even offer curbside delivery of bulk compost for a minimal fee that absolutely blows bagged compost prices out of the water.
Here’s how to find free compost near you:
- Search “[your city name] free compost residents”
- Check your city or county’s public works or waste management website
- Contact your local recycling center — many process yard waste on-site
- Look for community garden organizations that often share bulk compost resources
Municipal compost quality varies, but it’s generally perfectly suitable for filling the lower and middle layers of a raised bed. Pair it with a quality top layer and you have a genuinely productive bed for almost nothing.
The US Composting Council has a handy locator tool to find compost programs near you — definitely bookmark that one.
Find how to use municipal compost in raised beds for tips on assessing and improving free compost quality.
Free compost from your city might just be the biggest gardening hack you’ve never tried!
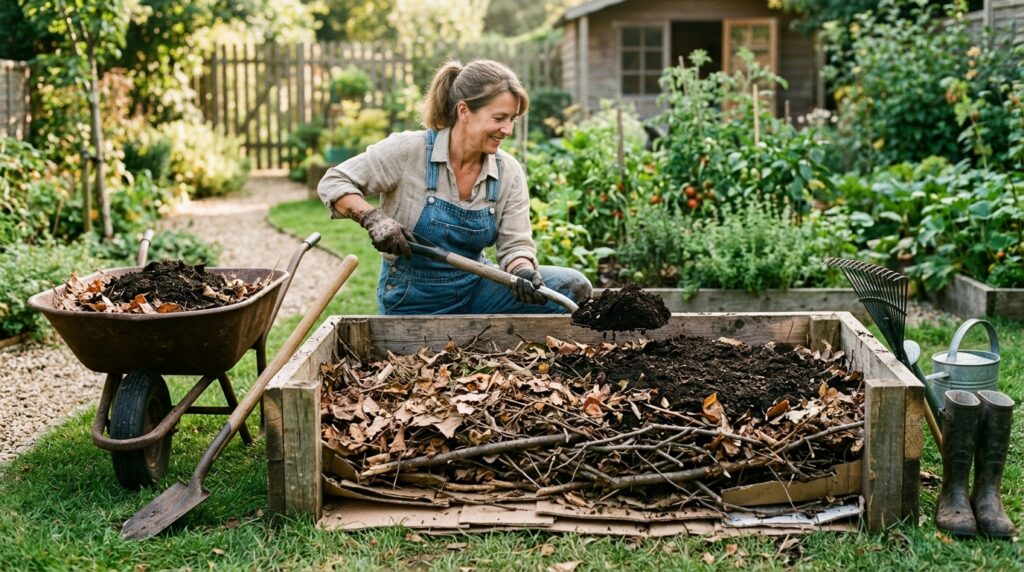
Start Your Own Compost Pile
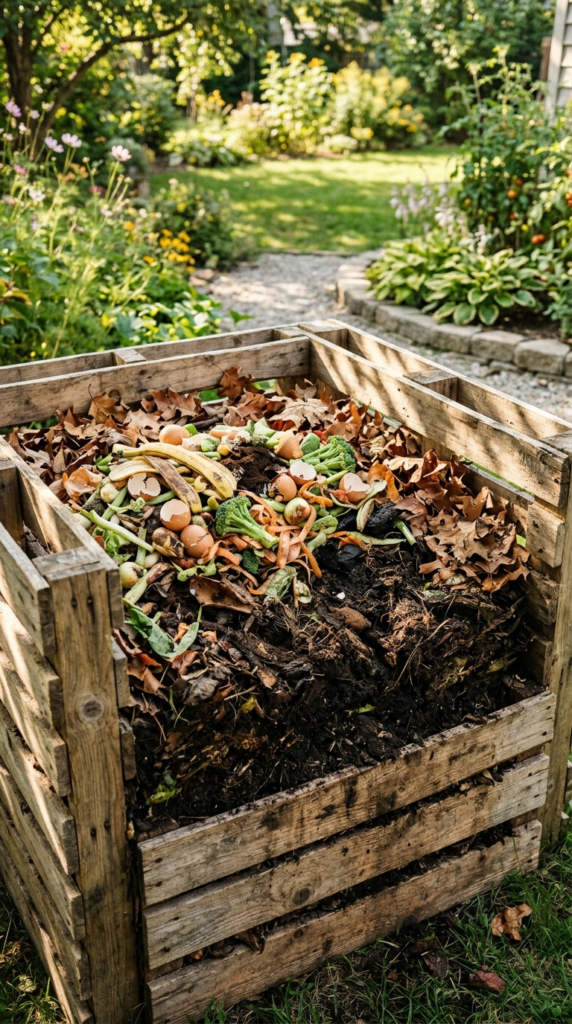
If you’re serious about filling raised garden beds cheaply long-term, starting your own compost pile is the single best investment you can make. It costs almost nothing to set up and turns your kitchen and yard waste into black gold — completely free, endlessly renewable.
You don’t need a fancy bin. A simple three-sided pallet structure, a wire cage, or even just a pile in a corner of your yard works perfectly. Add kitchen scraps (vegetable peels, coffee grounds, eggshells), yard waste (leaves, grass clippings, plant trimmings), and turn it regularly.
💡 Pro Tip: Speed up your compost dramatically by keeping a 3:1 ratio of browns to greens — too many greens and it gets slimy, too many browns and it stalls. Balance is everything!
In as little as 2–3 months with regular turning, or 6–12 months passively, you’ll have rich finished compost to add to your raised beds every single season. That’s free amendments, forever.
Even a small urban balcony can host a worm composting bin (vermicomposting) that produces incredibly rich worm castings — arguably the most potent soil amendment available, and it costs you almost nothing to produce.
The EPA’s composting guide is a fantastic free resource for getting your home system started right.
See our beginner’s guide to starting a home compost system for everything you need to know.
Your kitchen scraps are literally free fertilizer waiting to happen — don’t throw them away!
Use Straw Bales as Cheap Filler
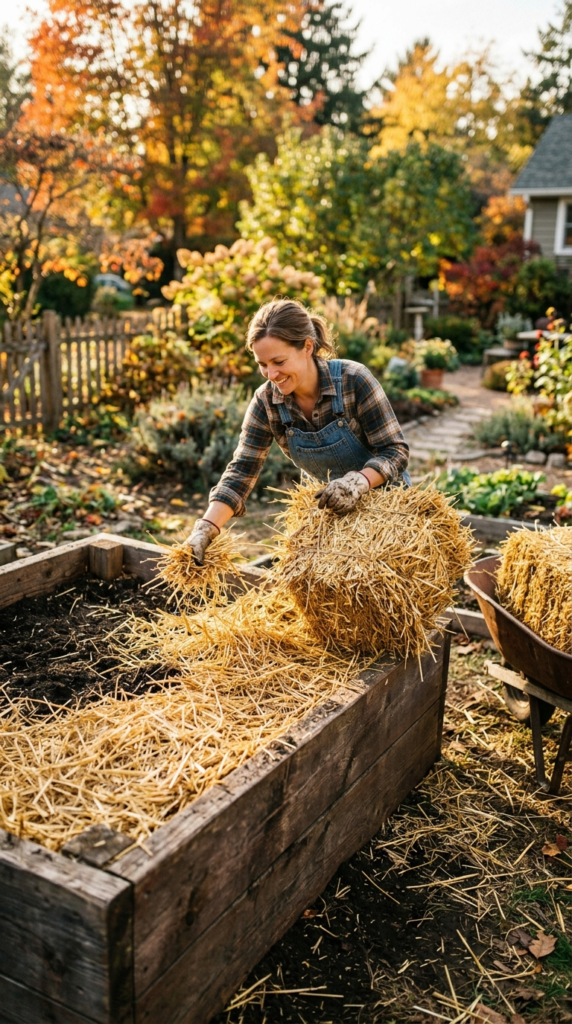
Here’s a budget filler that’s wildly underused: straw bales. A single straw bale costs $5–$10 at most farm stores or agricultural suppliers, and one bale can fill a significant chunk of a large raised bed’s lower section.
Straw breaks down over one to two seasons, adding organic matter and improving soil structure as it decomposes. It’s light, it’s cheap, and it’s surprisingly effective as a bulk filler material in the bottom half of deep beds.
Make sure you’re buying straw, not hay. Hay contains seeds that will sprout and create a weed nightmare inside your bed. Straw is the stem material after grain harvest — it’s virtually seed-free and perfect for this purpose.
Straw is particularly great for:
- Filling the bottom 4–6 inches of deep raised beds (18 inches+)
- Adding bulk to the lasagna layering method
- Creating aeration in lower soil layers before compost is added
- Insulating root zones in cooler climates as it breaks down
Pair straw with compost layers on top and you’ve got a genuinely productive growing environment for a fraction of the cost of filling with purchased soil.
Browse our guide on cheap raised bed filler materials compared for a full cost breakdown.
A $7 straw bale doing the work of $40 worth of soil? Talk about a game-changer!
Grab Free Wood Chips From Arborists
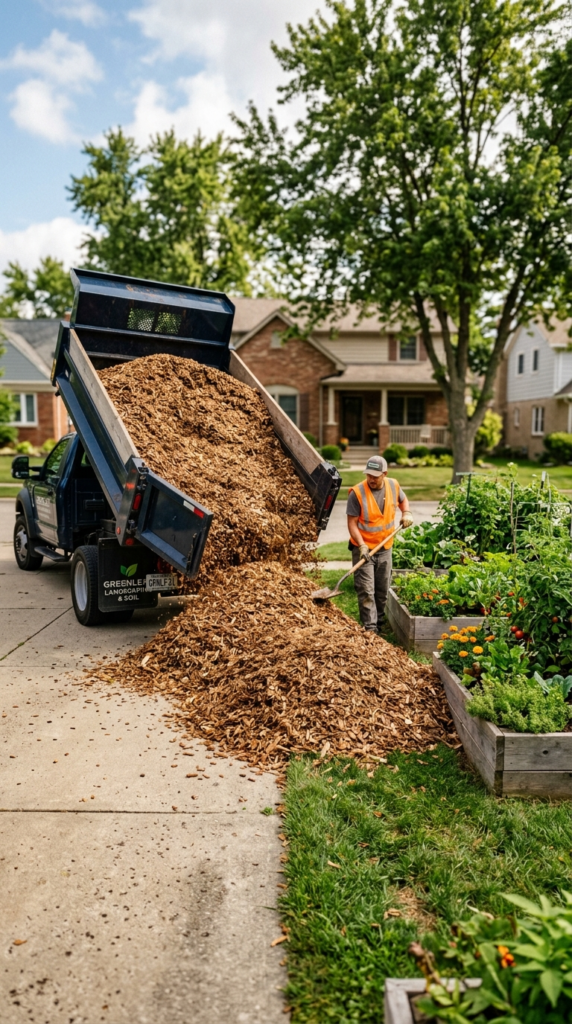
This one blows people’s minds every time. Professional tree trimming companies and arborists are constantly generating mountains of wood chip waste — and most of them will drop a truckload at your house for FREE just to avoid paying dump fees themselves.
You can find these services through the website ChipDrop (getchipdrop.com), which connects arborists with gardeners who want free wood chips. You sign up, they drop chips when they’re in your area — it’s that easy. Loads can range from a few cubic yards to a massive dump, so fair warning: be ready for a LOT of chips!
💡 Pro Tip: Fresh wood chips should go into the bottom layers of your bed or be used as pathways first — let them age 6–12 months before using as a top dressing near plant roots, as fresh chips can temporarily tie up nitrogen in the soil.
Wood chips are fantastic for:
- Bottom fill layers in very deep beds
- Improving long-term drainage as they break down
- Mulching pathways between beds to suppress weeds
- Adding carbon material to compost piles
They’re not a replacement for quality growing soil in the top layer, but as a deep filler? Absolutely unbeatable value — especially at zero dollars.
Explore how to use wood chips in raised beds for tips on aging and applying them correctly.
Free by the truckload — it doesn’t get more budget-friendly than that!
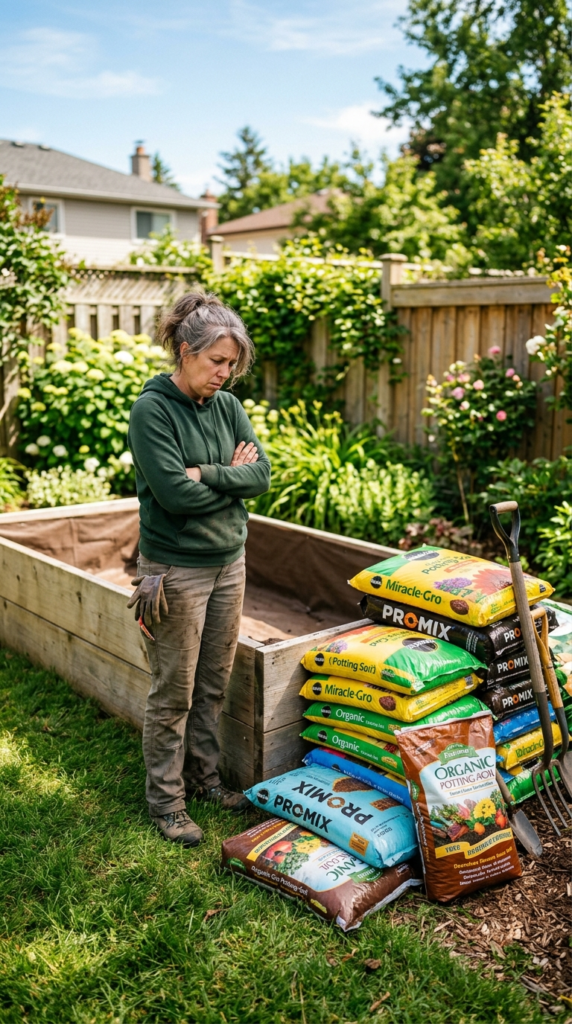
Buy Soil in Bulk, Not Bags

If you DO need to purchase soil, stop buying bags from the garden center immediately. It’s the most expensive possible way to fill a raised bed, and the math is brutal when you actually work it out.
A bulk landscape supplier will sell you a full cubic yard of blended garden mix, compost, or topsoil for $30–$60. That same cubic yard in bagged form from a big box store? Easily $150–$200+. The product is often nearly identical — the markup on bagged goods is enormous.
Here’s a quick cost comparison:
| Source | Cost per Cubic Yard | Notes |
| Bagged potting mix (big box) | $150–$200 | Convenient but pricey |
| Bulk garden mix (landscape yard) | $35–$60 | Requires transport |
| Municipal compost (free program) | $0–$15 | Quality varies |
| Self-made compost | ~$0 | Time investment required |
| Straw bale fill + top layer mix | $10–$40 | Best budget combo |
You’ll need a truck or trailer to haul bulk material, or you can pay a delivery fee that’s still usually far less than the bagged alternative. Many landscape suppliers also let you mix and create a custom blend on-site.
The Fine Gardening magazine recommends calling local landscape suppliers first to compare prices — they often have seasonal sales and deals that aren’t advertised online.
Check out our guide to buying bulk soil for raised garden beds for what to ask and what to look for.
One trip to a bulk supplier and you’ll never go back to bags again!
Mix Your Own Budget Soil Blend
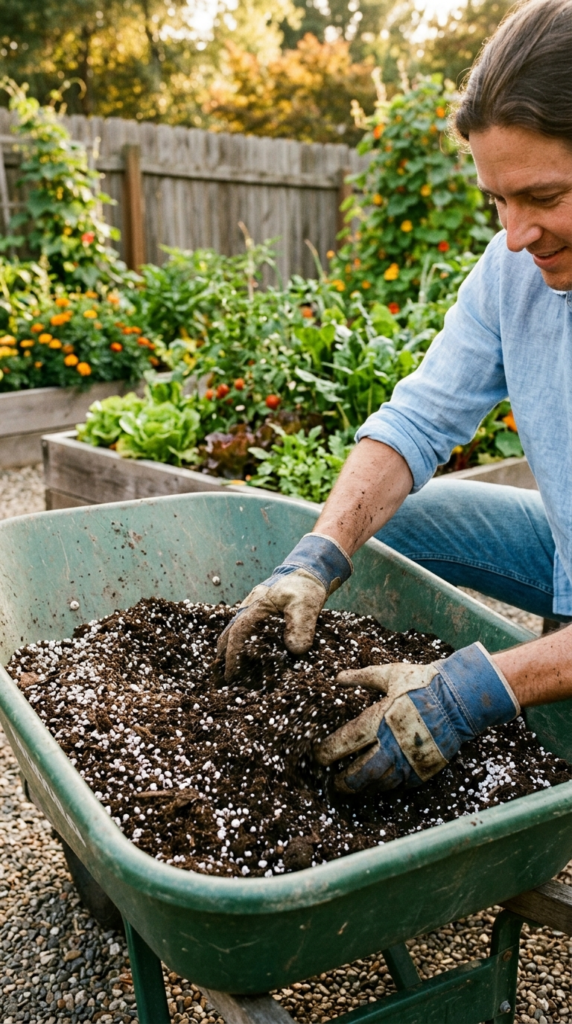
Here’s the deal: you don’t have to buy a premixed “raised bed blend” at all. Mixing your own soil from separate, cheaper components is almost always more affordable AND lets you customize the mix perfectly for what you’re growing.
A tried-and-true budget soil recipe for the top growing layer of your raised bed:
- 1 part topsoil (bulk, cheapest grade)
- 1 part compost (homemade, municipal, or bulk purchased)
- 1 part coarse material — perlite, coarse sand, or aged wood chips
This mirrors the famous “Mel’s Mix” concept from Square Foot Gardening but with cheaper ingredient substitutions. Topsoil provides structure, compost provides nutrition, and the coarse material ensures drainage.
💡 Pro Tip: Skip vermiculite (it’s pricey!) and use coarse builder’s sand or perlite instead — you can buy a large bag at any hardware store for a fraction of the vermiculite cost and it does the same job beautifully.
Total cost for a homemade top-layer mix? Roughly $20–$40 per cubic yard depending on your local prices. Compare that to $60–$80 for a premixed bagged product and the savings are very real.
You can further enrich your DIY mix with free amendments like used coffee grounds (nitrogen), crushed eggshells (calcium), and banana peel compost (potassium). Free nutrients hiding in your kitchen!
See our full breakdown of DIY raised bed soil recipes on a budget for more custom blend ideas.
Mixing your own is easier than you think — and your wallet will absolutely love you for it!
Use Cardboard as a Free Base Layer
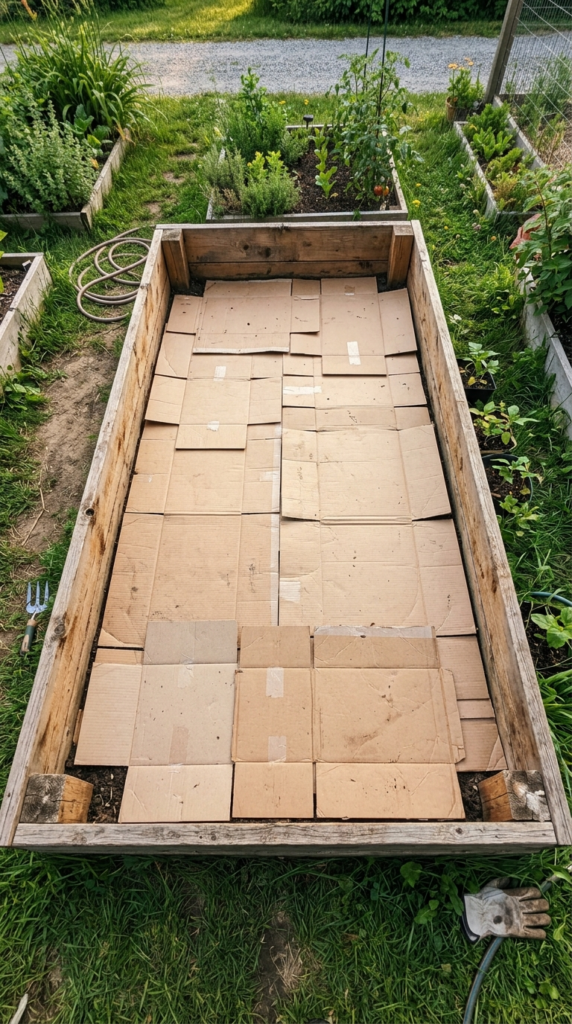
Never underestimate the power of a free cardboard box. Before you add ANY fill material to your raised bed, line the bottom with overlapping cardboard sheets — it’s one of the most powerful free tools in the budget gardener’s toolkit.
Cardboard does several brilliant things at once. It smothers weeds and grass trying to grow up through your bed. It attracts earthworms (they LOVE burrowing through damp cardboard). And it eventually breaks down into organic matter that improves your soil structure.
Grocery stores, appliance shops, moving companies, and liquor stores are incredible sources of free cardboard in large sheets. Just remove any tape or staples and lay it wet so it conforms to the bed shape.
Here’s the beautiful thing about cardboard as a base: it also acts as a slow-release water barrier in the early weeks, helping the lower fill layers retain moisture while they start to break down. It’s doing multiple jobs for literally zero dollars.
For beds placed on soil (not concrete), cardboard is especially effective because it lets you kill existing grass without chemicals and gives worms easy access to your new growing medium.
Pair cardboard with our lasagna layering method for the ultimate low-cost bed foundation.
According to Rodale’s Organic Life, cardboard sheet mulching is one of the most effective no-dig, no-cost techniques for establishing productive new growing spaces.
Free, effective, and eco-friendly — cardboard is the unsung hero of budget raised bed gardening!
Frequently Asked Questions
What is the cheapest way to fill a raised garden bed?
The absolute cheapest method is combining free organic materials — cardboard as a base, then layers of fallen leaves, grass clippings, wood chips, straw, and homemade or municipal compost — topped with a thin layer of quality growing mix. Using the Hugelkultur or lasagna layering method, you can fill a large raised bed for under $30–$50 total.
Can I fill a raised bed with just topsoil?
You can, but straight topsoil alone isn’t ideal — it tends to compact over time, which suffocates roots and reduces drainage. If you use topsoil, always blend it with at least 30–40% compost and some drainage material like perlite or coarse sand. Bulk topsoil amended this way is still far cheaper than bagged garden mixes.
How do I fill raised garden beds cheaply on a concrete surface?
On concrete, you can’t rely on free drainage into native soil below, so depth matters more here. Use the lasagna layering method with straw, cardboard, and wood chips as the bulk of your fill, then top with a quality DIY soil blend. Since roots can’t go deeper than the bed, make sure your top growing layer is at least 8–10 inches of nutrient-rich mix.
Is it safe to use wood chips in raised vegetable beds?
Yes, with one important caveat — aged wood chips are safe and beneficial, but fresh chips can temporarily tie up soil nitrogen as they decompose, which can stress vegetable plants. Use fresh chips only in the bottom fill layers where they won’t be near roots, and let any chips used closer to the surface age for at least 6 months first.
How often do I need to top up a raised bed filled with organic materials?
Because organic materials break down over time, expect your bed to settle 1–3 inches per year in the early years. Top up annually in spring with compost or a fresh soil blend. The good news is that as the lower layers decompose, they’re actively enriching your growing medium — your bed gets better and better over time with minimal annual input cost.
A Few Final Thoughts
Filling raised garden beds cheaply is completely achievable — and once you know these methods, you’ll wonder why you ever considered spending hundreds on bagged soil. The key is thinking in layers and systems rather than just dumping one material in and calling it done. Combine free resources like cardboard, wood chips, straw, and municipal compost with a smart DIY top-layer soil blend, and you’ve got a productive, thriving bed for a fraction of the typical cost. The best part? Many of these organic fill materials actually improve over time, meaning your cheap bed today becomes an incredibly rich growing space in just a season or two. Your dream raised bed garden doesn’t have to drain your wallet — now go make it happen!