What if you could grow fresh, lush herbs on your kitchen counter — no soil, no mess, no garden required — using nothing more than mason jars and a few simple supplies? A mason jar hydroponic herb garden is one of the most satisfying, budget-friendly, and genuinely beautiful DIY projects you can tackle this weekend, and the results will absolutely blow you away. Herbs grown hydroponically in water grow faster, stay fresher, and look stunning lined up on a windowsill or shelf. Ready to build your own? Let’s dive in!
At a Glance
- A mason jar hydroponic herb garden uses a simple water-and-nutrient solution instead of soil, producing herbs that grow faster and stay fresher than traditionally planted ones.
- You need only a few inexpensive supplies — mason jars, net cups, a growing medium like clay pebbles, and hydroponic nutrients — to build a fully functional system for under $30.
- Covering your mason jars with paint, tape, or fabric to block light is critical for preventing algae growth in the water reservoir.
- Most culinary herbs thrive in mason jar hydroponics, with basil, mint, chives, and parsley being the easiest and most rewarding to start with.
- Changing the nutrient solution every one to two weeks and topping off water between changes keeps your herbs growing vigorously and prevents nutrient imbalances.
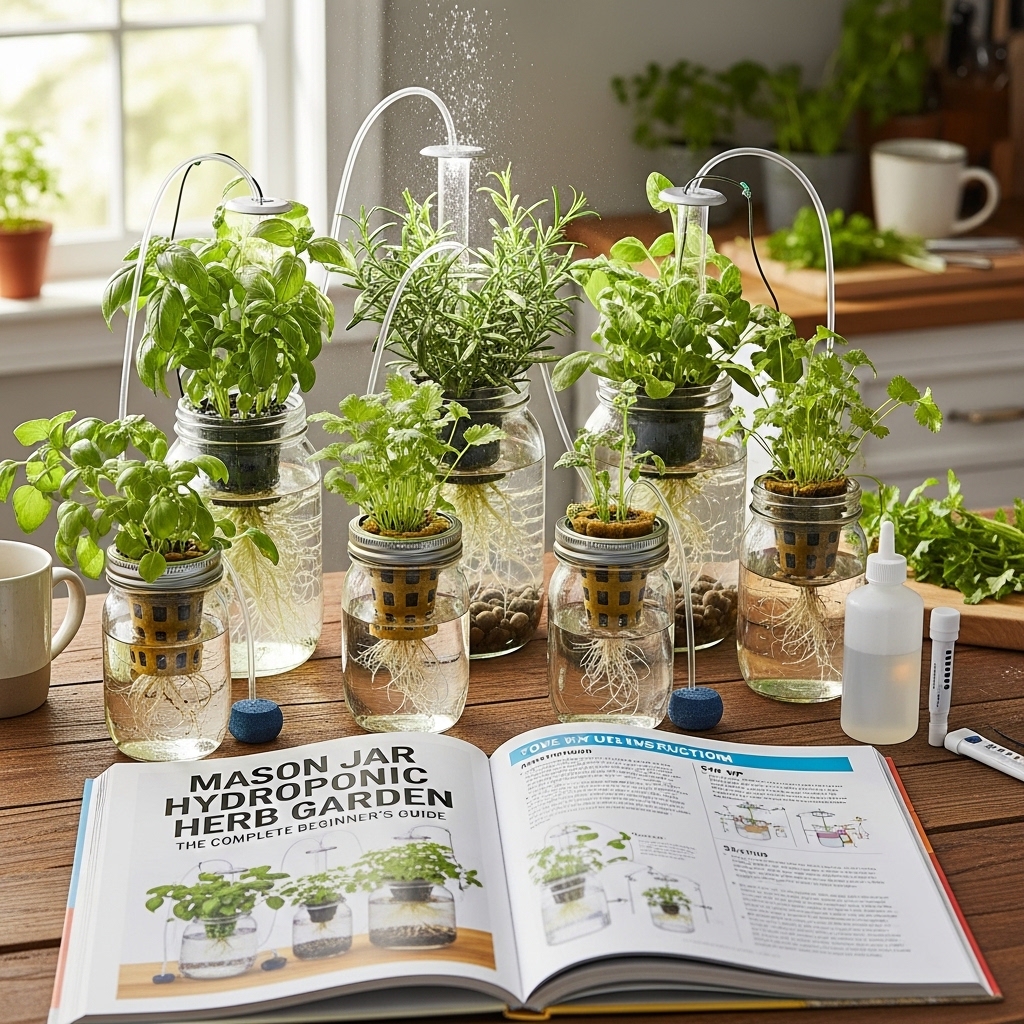
What Is a Mason Jar Hydroponic Herb Garden?

Hydroponics sounds complicated — but the mason jar version is about as simple as gardening gets. Instead of growing herbs in soil, you suspend them in a small net cup over a mason jar filled with water and dissolved nutrients, so the roots hang directly into the solution and drink up everything they need.
It’s a passive hydroponic system, which means there are no pumps, no electricity (beyond optional grow lights), and no moving parts. The plants draw nutrient solution up through their roots by capillary action — nature doing all the heavy lifting while you just top up the water occasionally and harvest your herbs.
The results are genuinely remarkable. Herbs grown in a mason jar hydroponic herb garden typically grow 30–50% faster than soil-grown equivalents, produce more flavorful leaves, and require far less maintenance. No watering schedule to remember, no soil to spill, and no guessing about whether the roots are wet or dry.
💡 Pro Tip: This system is also called Kratky hydroponics — a method developed by Dr. Bernard Kratky at the University of Hawaii — and it’s specifically designed to be as simple and low-tech as possible. It’s the perfect entry point into the world of hydroponics for complete beginners.
Learn more about different hydroponic systems and which one is right for your space to understand how mason jar growing compares to more complex setups.
Visit the University of Hawaii’s Kratky method research page for the science behind this beautifully simple growing technique.
Once you understand how effortless this system really is, you’ll wonder why you ever grew herbs in soil at all!
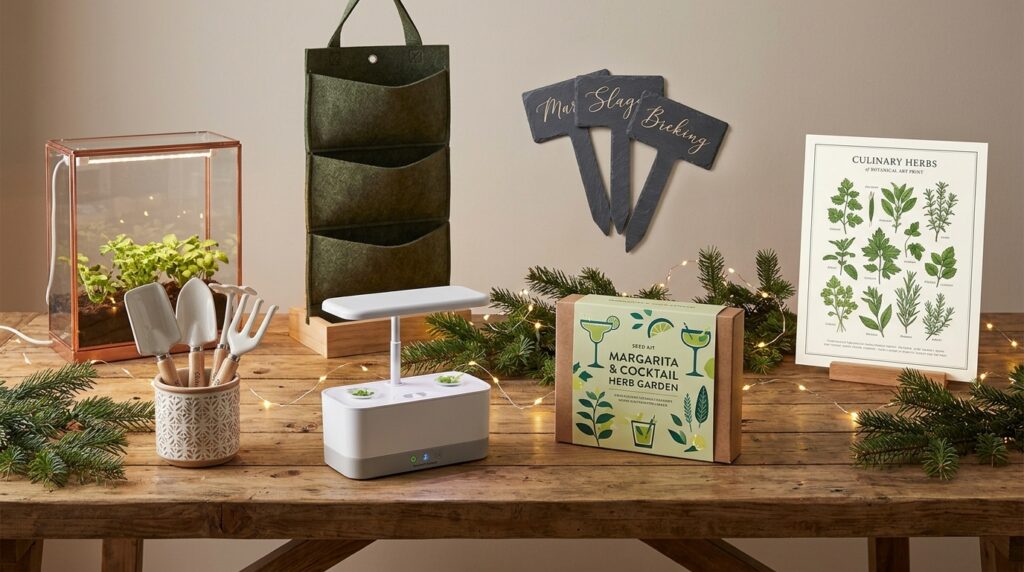
What You Need to Get Started

Here’s the beautiful thing about this project: the full supply list is short, cheap, and available at any garden center or online. You probably already have some of these things at home right now.
The core supplies you need are remarkably accessible. Most people spend between $20 and $35 to set up a complete mason jar hydroponic system for four to six jars — far less than a commercial countertop hydroponic unit, with results that are just as impressive.
Everything you need:
- Wide-mouth mason jars (quart size works best for most herbs)
- Net cups (2-inch diameter fits perfectly in wide-mouth jar openings)
- Clay pebbles / hydroton (the growing medium that holds plants upright)
- Hydroponic liquid nutrients (a basic 3-part or simple herb formula)
- Herb seedlings or cuttings (or seeds if you want to start from scratch)
- Black paint, tape, or fabric (to cover jars and block light)
- pH testing drops or meter (optional but helpful)
- Filtered or distilled water (tap water works if left out overnight)
- A sunny windowsill or LED grow light
| Item | Approximate Cost | Where to Find |
| Wide-mouth mason jars (4-pack) | $8–12 | Grocery store, hardware store |
| Net cups (20-pack) | $4–6 | Garden center, online |
| Clay pebbles (small bag) | $8–12 | Garden center, online |
| Hydroponic nutrients | $10–15 | Garden center, online |
| Black tape or spray paint | $3–6 | Hardware store |
Explore our full hydroponic supplies shopping guide for beginners to find the best products at every budget level.
Getting your supplies together is genuinely half the fun — and once you have them, setup takes less than 30 minutes!
Choosing the Right Mason Jars

Not all mason jars are created equal for hydroponic growing — and getting this right from the start saves you a lot of frustration. The non-negotiable requirement is a wide-mouth opening, because standard narrow-mouth jars won’t accommodate the 2-inch net cups that hold your plants.
Quart-size wide-mouth jars are the sweet spot for most kitchen herbs — they hold enough water to sustain a herb plant for 1–2 weeks between top-ups, and they’re the right height to allow decent root development while keeping the whole setup compact and manageable.
For larger, more vigorous herbs like basil or mint, consider half-gallon wide-mouth jars. These give roots more room to spread and hold significantly more nutrient solution, which means less frequent maintenance. For compact herbs like chives and thyme, standard quart jars are absolutely perfect.
💡 Pro Tip: Tinted mason jars — blue, green, or amber — have a natural advantage over clear ones because they partially block light from reaching the water, reducing algae growth. If you can find them, they save you the step of painting or taping your jars — and they look absolutely beautiful as a display piece too.
See our guide to mason jar herb garden displays and styling ideas for inspiration on making your setup as beautiful as it is functional.
The right jar is the foundation of everything — choose wide-mouth and you’re already set up for success!
Step 1: Prepare Your Jars

This step is shorter than you’d think, but it’s absolutely critical: you need to block light from reaching the water inside your jars. When light hits the nutrient solution, it triggers algae growth — that green slime that clouds the water, competes with your herbs for nutrients, and generally makes the whole thing look and smell unpleasant.
The simplest method is wrapping jars with black electrical tape or washi tape in a solid layer. You can also use black contact paper, dark burlap wrapped around the outside, or a thick coat of chalkboard paint — all of these block enough light to prevent algae while still looking attractive on a shelf or windowsill.
If you want to keep the clear glass aesthetic while still protecting the water, use opaque inner wrapping (like black tape) as the functional layer, then wrap the outside with twine, fabric, or decorative paper for the visual presentation. You get the best of both worlds — protection and beauty.
Make sure the jar lid ring is clean and rust-free, as you’ll be using the ring (without the flat lid insert) to secure the net cup in place over the jar opening. The net cup sits in the ring, which holds it at exactly the right height above the water. Clever, right?
Follow our complete mason jar herb garden setup tutorial with photos for a full visual walkthrough of every preparation step.
Prep your jars right and every other step falls beautifully into place!
Step 2: Mix Your Hydroponic Nutrient Solution

This is the step that sounds scientific but is actually incredibly simple. Hydroponic nutrients come as a concentrated liquid that you dilute into water — think of it like mixing a very precise squash drink for your plants.
For a basic herb nutrient solution, follow the dilution instructions on your specific nutrient bottle — most call for about 1–2 teaspoons of nutrient concentrate per gallon of water. For herbs specifically, use the lower end of the recommended range; herbs prefer a gentler nutrient concentration than vegetables or fruiting plants.
The ideal water pH for most herb hydroponics is between 5.5 and 6.5. If your tap water is heavily alkaline (which you can check with inexpensive pH drops from a garden center), it can slow nutrient absorption. A small splash of lemon juice or pH-down solution brings it into range. This step is optional but genuinely helpful if your herbs seem slow to take off.
💡 Pro Tip: Use filtered or distilled water if you can, or at minimum leave tap water in an open container overnight before mixing your nutrient solution. This allows chlorine to off-gas, which is better for both the nutrients and your herb roots.
Fill each prepared mason jar with nutrient solution, leaving a 1–2 inch air gap between the water surface and the bottom of the net cup. This air gap is crucial — it allows the lower roots to stay submerged while the upper roots access oxygen. As water is consumed, this gap naturally increases, which is exactly what the Kratky method is designed for.
Visit the General Hydroponics nutrient calculator for precise mixing ratios tailored to herbs and leafy greens.
Mix your solution with confidence — your herbs are about to get the most perfectly balanced meal of their lives!
Step 3: Prepare and Insert Your Net Cups

Net cups are the small plastic mesh containers that hold your growing medium and plant roots, suspending the herb above the water so roots can grow down into the nutrient solution while the plant stays supported above it. They’re inexpensive, reusable, and the key structural element of your whole system.
Rinse your net cups and clay pebbles thoroughly before use — clay pebbles (also called hydroton or LECA) often have dust and fine particles that can cloud your nutrient solution if not pre-washed. Rinse them in a colander under running water until the water runs clear, then soak them for an hour in clean water before planting.
Seat the net cup into the mason jar lid ring — the ring holds the cup at exactly the right height, with the bottom of the net cup just touching or barely submerged in the nutrient solution. This is why wide-mouth jars and 2-inch net cups are such a perfect match — the dimensions line up almost exactly without any modification.
- 2-inch net cups fit perfectly in wide-mouth mason jar lid rings ✅
- Clay pebbles / LECA — best overall growing medium for herbs ✅
- Rockwool cubes — great for starting from seed ✅
- Coco coir — good moisture retention but can get messy ⚠️
- Gravel or perlite — works in a pinch but not ideal ⚠️
Compare hydroponic growing media for herbs and find the best option for your setup with our detailed guide.
Net cups and clay pebbles are a genuinely perfect team — simple, effective, and completely reusable for years!
Step 4: Add Growing Medium and Plant Your Herbs
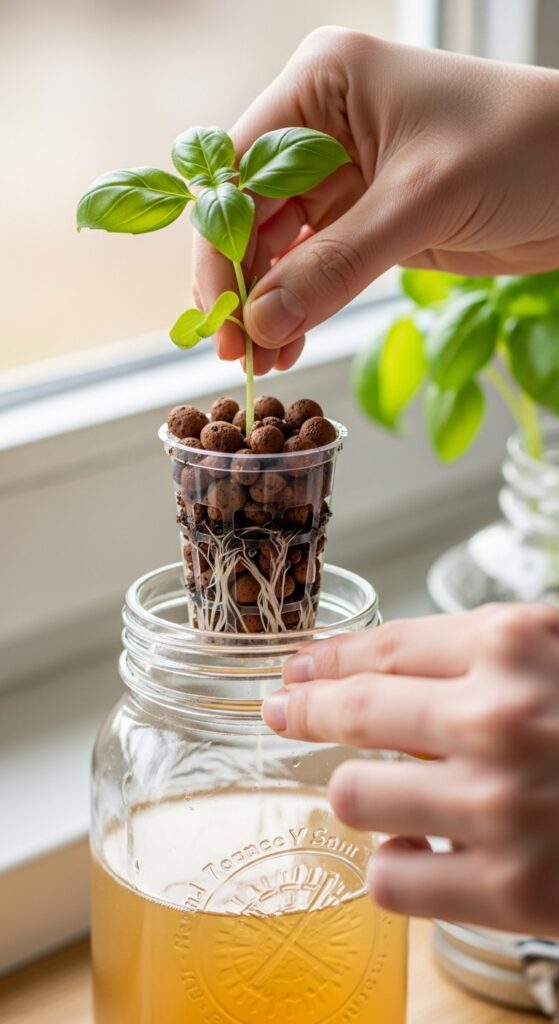
This is the moment your mason jar hydroponic herb garden really comes together — and it’s even more satisfying than it sounds. You have three options for getting herbs into your jars: using seedlings, propagating from cuttings, or starting from seed.
Seedlings are the fastest path to a productive herb garden. Buy small herb transplants from a garden center, gently wash all soil off the roots under lukewarm water (soil in a hydroponic system causes problems), and nestle the clean-rooted plant into your net cup surrounded by clay pebbles. The pebbles hold the plant upright while the roots find their way down to the water.
Herb cuttings work beautifully too — and they’re completely free if you already have herbs growing. Snip a 4–6 inch stem, strip the lower leaves, and place it directly in the net cup with clay pebbles. Give it a week or two and it’ll develop roots right in the nutrient solution. This is how most experienced hydroponic growers propagate mint, basil, and rosemary.
💡 Pro Tip: When planting seedlings, position the root ball just at or slightly below the bottom of the net cup so the roots have immediate access to the nutrient solution. Pack clay pebbles gently around the plant to support it — firm enough to hold it upright, but not so tight that you crush the roots.
Starting from seed takes the most patience but is incredibly rewarding. Place a small rockwool starter cube in the net cup, push the seed into the pre-moistened cube, and keep it lightly covered until germination. Once the seedling has its first true leaves, the roots will find the nutrient solution and take off.
Learn how to propagate herbs from cuttings for your hydroponic mason jar garden to expand your collection for free.
Plant your herbs with care and you’ll be harvesting in just a few weeks — how exciting is that!
Step 5: Set Up Your Light Source

Light is the engine of your mason jar hydroponic herb garden — without adequate light, even the most perfectly mixed nutrient solution won’t produce lush, productive herbs. Getting this right is genuinely the most important decision you’ll make after choosing your jars.
A south-facing windowsill receiving 6+ hours of direct sunlight daily is the gold standard location. In this ideal setup, most herbs will thrive without any supplemental lighting at all. The strong light combined with a perfectly balanced nutrient solution produces herbs that grow noticeably faster than soil equivalents.
If your windows don’t get adequate light — or if you’re in winter when days are short — a full-spectrum LED grow light positioned 6–12 inches above your jars running for 14–16 hours per day will keep your herbs growing vigorously regardless of the season or your window situation. Clip-on grow lights designed for countertops are available for $15–25 and work brilliantly for a small mason jar setup.
- South-facing window, 6+ hours sun: No grow light needed ✅
- East or west-facing window, 4–6 hours: Add grow light for best results ⚠️
- North-facing window or dim room: Grow light essential ❌ (without it)
- Office or interior room: Grow light required, 14–16 hours daily ✅ (with light)
Explore our guide to choosing the best grow lights for small indoor herb gardens to find the right setup for your budget and space.
Nail your lighting setup and your mason jar herbs will reward you with growth that genuinely surprises you!
The Best Herbs for Your Mason Jar Hydroponic Garden
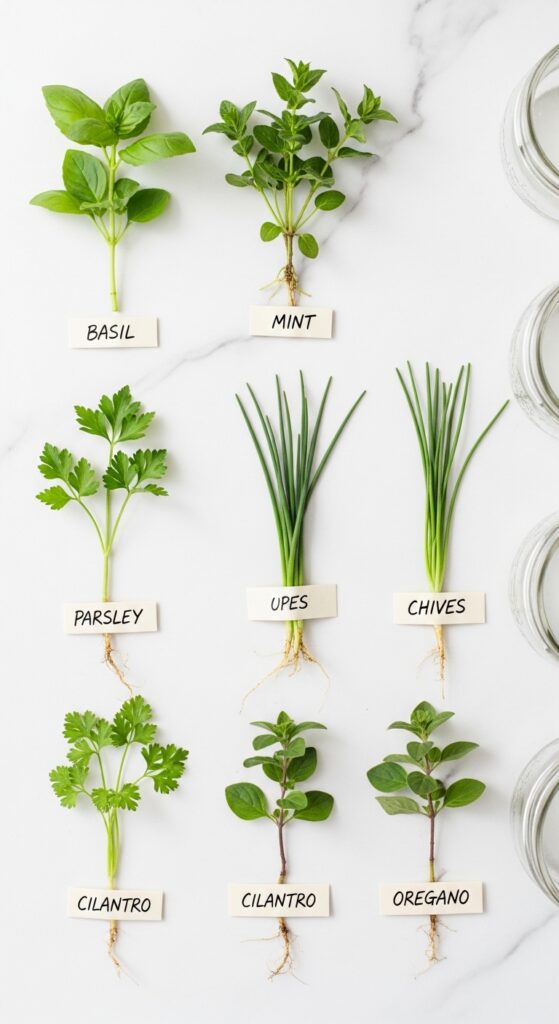
Not every herb is equally suited to mason jar hydroponic growing — and starting with the right species dramatically increases your chances of immediate, satisfying success. The good news is that the most popular culinary herbs are also the ones that perform best in this system.
Basil is arguably the perfect hydroponic herb — it grows explosively fast in nutrient solution, produces enormous, flavorful leaves, and is endlessly useful in the kitchen. It’s the single most rewarding herb to grow hydroponically and a must-have in any mason jar setup.
Mint is another spectacular performer. It’s naturally vigorous and grows so enthusiastically in hydroponic conditions that you’ll need to harvest it frequently to keep it manageable. The roots develop beautifully in water, and the plants stay remarkably fresh and productive for months.
Chives and parsley are both excellent choices for their tolerance of varying light conditions — useful if your windowsill isn’t perfectly sunny. They grow steadily rather than explosively, which makes them great “backbone” herbs in a mixed display.
| Herb | Growth Speed | Light Needs | Difficulty |
| Basil | Very fast | High | Easy |
| Mint | Fast | Moderate | Very easy |
| Chives | Moderate | Low to moderate | Very easy |
| Parsley | Moderate | Moderate | Easy |
| Cilantro | Moderate | Moderate | Easy |
| Oregano | Slow to moderate | High | Easy |
| Thyme | Slow | High | Moderate |
| Rosemary | Slow | Very high | Moderate |
Visit the Hydroponic Herb Garden guide at Epic Gardening for detailed species-by-species hydroponic growing advice from one of the most trusted voices in home growing.
Start with basil and mint, add chives and parsley, and you’ll have the most productive little herb garden you’ve ever owned!
Ongoing Care and Maintenance

Here’s the deal: maintenance on a mason jar hydroponic system is genuinely minimal — which is one of the biggest reasons people love this setup. There’s no daily watering, no soil to check, no complicated schedule to follow. Just a few simple habits kept up every week or two.
Top up the water level when it drops more than an inch or two below the bottom of the net cup, using pre-mixed nutrient solution at the same concentration as your original fill. In warm kitchens with vigorous herb growth, you might top up once a week; in cooler, calmer conditions, every two weeks is typical.
Do a full water change every two to three weeks — pour out the old solution, rinse the jar, and refill with fresh nutrient solution. This prevents salt buildup from the nutrients and keeps the solution balanced and fresh. It takes about five minutes per jar and makes a significant difference to herb health and growth rate.
💡 Pro Tip: When you do your full water change, take the opportunity to check the roots — healthy hydroponic roots are white or light cream-colored and look almost fluffy. Brown, slimy, or foul-smelling roots indicate a problem (usually too much light reaching the water, or a nutrient imbalance) that needs addressing before it progresses.
Harvest frequently — at least once a week for fast growers like basil and mint. Regular harvesting encourages bushier, more productive growth. Always cut just above a leaf node and never take more than a third of the plant at once.
Read our complete guide to maintaining hydroponic herb systems at home for a full maintenance schedule and troubleshooting reference.
Consistent light maintenance keeps your mason jar herb garden looking lush and producing abundantly — it’s surprisingly little work for such big results!
Troubleshooting Common Problems

Every new hydroponic gardener runs into a few hiccups — but the good news is that the most common mason jar hydroponic problems are easy to diagnose and fix. Here’s what to look for and what to do.
Green algae in the water is the most common issue, and it means light is getting into your jars. The fix is simple: add more light-blocking coverage to the outside of your jars and make sure no light reaches the solution from any angle, including the top. A complete water change and a more thorough blackout usually solves it completely within a week.
Yellow or pale leaves typically indicate a nutrient deficiency — either the solution is too dilute, or the pH is off and nutrients aren’t being absorbed properly. Mix a fresh batch of solution at slightly higher concentration, check your pH, and do a complete water change. Most herbs bounce back within a few days.
Brown, slimy roots (called “root rot”) are caused by a combination of warm water temperature, insufficient oxygen, or algae contamination. Rinse roots gently with clean water, do a complete water change with fresh solution, and make absolutely sure no light is reaching the reservoir. Adding a few drops of 3% hydrogen peroxide to the fresh solution can help clear mild root rot.
- Green water / algae: Block more light, change water completely ✅
- Yellow leaves: Refresh nutrient solution, check pH ✅
- Wilting herb: Check water level — probably too low, roots exposed ✅
- Brown slimy roots: Root rot — change water, add H2O2, block all light ✅
- Slow growth: Usually a light issue — increase hours or intensity ✅
Troubleshoot your hydroponic herb garden problems with our complete diagnosis guide for solutions to every common issue.
Every problem has a fix — and solving it makes you a genuinely better hydroponic gardener every single time!
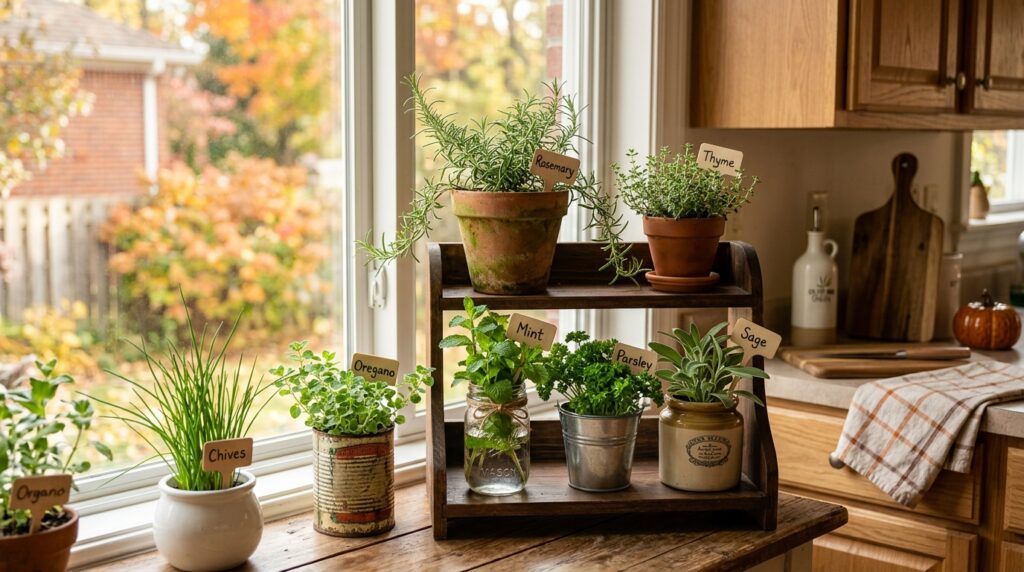
Styling Your Mason Jar Herb Garden for Maximum Visual Impact

Your mason jar hydroponic herb garden doesn’t just have to be functional — it can be genuinely gorgeous. A few simple styling decisions transform a row of utility jars into a display worthy of a kitchen design magazine.
Consistent color or intentional variation in your jar coverings is the first and most impactful styling choice. Paint all jars the same matte color — sage green, navy, white, or terracotta — for a cohesive, designed look. Or intentionally vary the colors within a coordinated palette for an eclectic-but-curated feel. Either approach looks vastly more intentional than random colored tape.
Arrange jars on a wooden tray or slate board to contain the display and make it feel like a composed vignette rather than a random collection of jars. This makes it easy to move the whole display to the window for light and back to the counter while cooking — practical and polished at once.
💡 Pro Tip: Add small hand-lettered wooden tags or laser-engraved herb markers beside each jar rather than labeling the jars themselves. This keeps the jar aesthetic clean and lets you change or rearrange herbs without needing new labels — a subtle but genuinely elegant finishing touch.
Vary the heights of your jars by placing some on small wooden risers, upturned terracotta saucers, or stacked books to create visual layering. A flat row of identical heights looks static; a gently varied height arrangement looks dynamic, abundant, and beautifully alive.
Get inspired by our creative mason jar herb garden styling and display ideas for even more presentation inspiration.
A beautifully styled mason jar herb garden is one of the most impactful things you can add to your kitchen — functional, fragrant, and genuinely stunning!
Frequently Asked Questions
How long does it take to grow herbs in a mason jar hydroponic garden?
Growth speed depends on the herb and your light source, but most herbs show visible root development within 1–2 weeks and are harvestable within 3–6 weeks. Basil and mint are the fastest performers — you can often take your first small harvest in as little as 2–3 weeks. Slower herbs like rosemary and thyme take longer but are absolutely worth the wait.
Do I need special hydroponic nutrients, or can I use regular plant fertilizer?
You really do want proper hydroponic liquid nutrients for best results. Regular soil fertilizers lack some of the elements that hydroponic plants need (since they’d normally get them from soil microbes) and can cause imbalances in your solution. Hydroponic nutrient solutions are formulated to provide everything a plant needs in water form. A basic bottle costs $10–15 and lasts for months of growing.
How often do I need to change the water in my mason jar hydroponic herb garden?
Top up with fresh nutrient solution whenever the water drops significantly — roughly once a week for vigorous growers. Do a complete water change every 2–3 weeks, which means pouring out the old solution, rinsing the jar, and refilling with freshly mixed nutrient solution. This full change prevents salt buildup and keeps your herbs growing at their best.
Can I grow herbs from seed in a mason jar hydroponic setup?
Absolutely! Use small rockwool starter cubes placed in your net cup and keep them moist with diluted nutrient solution until germination. Once the seedling develops its first true leaves and visible root tips, the Kratky method takes over and roots find their way into the jar solution naturally. Starting from seed takes 2–4 weeks longer than using transplants, but it’s deeply satisfying and very cost-effective.
Why are my hydroponic herb roots turning brown?
Brown roots in a mason jar hydroponic system are almost always caused by one of two things: light penetrating the jar and causing algae growth (which damages roots), or warm water temperature reducing oxygen levels. First, check that your jars are completely light-blocked. Then do a complete water change, gently rinse the roots with clean water, and add 2–3 drops of 3% hydrogen peroxide per cup of fresh solution to help clear the infection. Cooler room temperatures also help significantly.
A Few Final Thoughts
A mason jar hydroponic herb garden is genuinely one of the most rewarding DIY projects a home cook or urban gardener can take on — the setup is simple, the cost is minimal, and the results are spectacular. Within weeks you’ll have lush, fast-growing herbs that you grew yourself, in water, on your kitchen windowsill, with almost no maintenance. Every time you snip fresh basil into a pasta dish or mint into a drink, you’ll feel a completely disproportionate amount of satisfaction — and rightly so! Hydroponic growing might sound technical, but the Kratky mason jar method proves that the most effective systems are often the simplest ones. Whether you start with one jar of basil or line up a whole windowsill of herbs, the journey from empty jar to thriving herb garden is one you’ll be genuinely proud of. Now go make it happen!