
Imagine reaching directly from your chopping board to snip fresh basil, thyme, or chives without leaving the kitchen — no trip to the garden, no wilting supermarket packets, just intensely fragrant herbs at the exact moment you need them. A spice rack repurposed as a kitchen herb garden makes this possible in even the smallest apartment kitchen, turning a few inches of unused wall space into a genuinely productive, beautiful growing display. The 24 ideas ahead range from magnetic jar systems on the fridge door to tiered timber spice shelves lined with individual herb pots, covering every kitchen size, light condition, and skill level. Some of these will change how you cook entirely. Let’s dive in!
Why Spice Rack Herb Garden Ideas for Kitchen Are Worth Your Time
A kitchen herb garden does something that a garden bed or balcony container cannot: it integrates growing food directly into the room where that food is prepared and cooked. The psychological effect of this proximity is significant — gardeners who grow herbs in the kitchen consistently report using them far more frequently in cooking than those who grow herbs outdoors, simply because the barrier to use is reduced to arm’s reach.
Practically, the economics are compelling. A single pot of supermarket basil costs £1.50 and typically collapses within a week. A basil plant properly grown and maintained in a kitchen spice rack setup costs less than £3, lasts for months with correct care, and produces ten to twenty times the yield. Over a growing season, a well-maintained kitchen herb rack can save £80–£150 in fresh herb purchases for a family that cooks regularly.
Here’s a fact that surprises many indoor gardeners: most culinary herbs do not actually require direct sunlight to survive in a kitchen — they require bright, indirect light for 4–6 hours daily, which a well-positioned kitchen shelf near a south-facing or east-facing window provides easily. The myth that herbs demand a full south-facing windowsill discourages many people from trying, and it simply isn’t true for mint, chives, parsley, and coriander.
This approach is ideal for apartment dwellers, flat renters with no outdoor space, busy home cooks who want fresh flavour without a garden, and complete beginners who’ve never grown anything before.
1. Magnetic Spice Jar Herb System on the Fridge
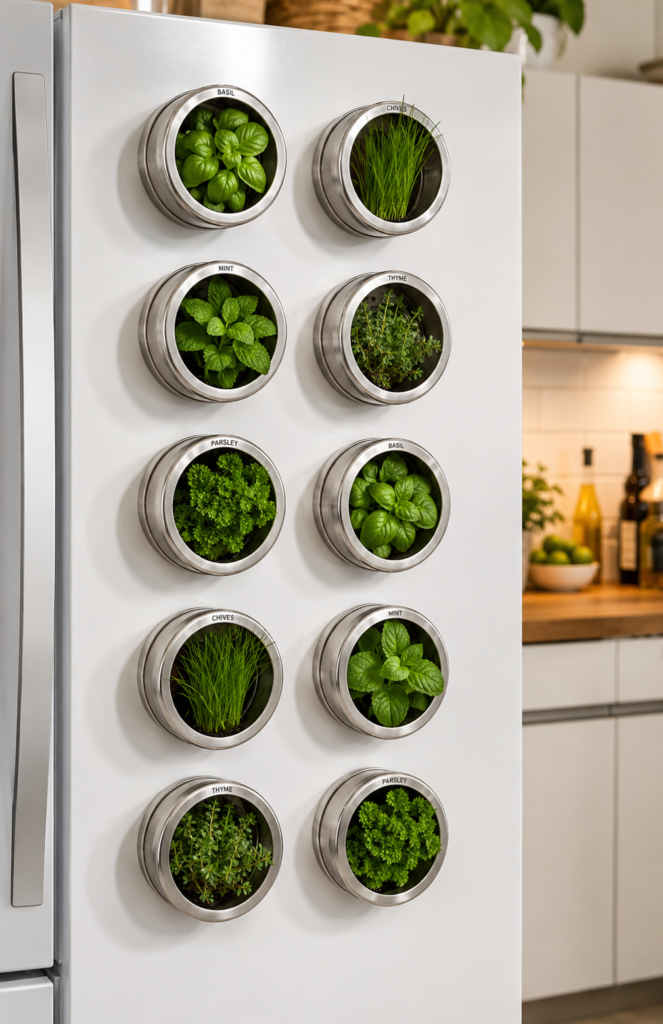
Magnetic spice jars converted into herb planters use the largest vertical surface in most kitchens — the fridge door — and turn it into a living herb wall that takes up precisely zero counter or shelf space.
Use wide-mouth magnetic spice jars with a minimum 6cm diameter (narrower jars constrict root growth too severely for anything beyond microgreens). Pierce two small drainage holes in the base of each jar using a nail and small hammer, then place a 1cm layer of fine gravel before filling with a 50/50 mix of herb compost and perlite. The magnetic backing must be rated to hold at least 300g — filled jars are heavier than most people anticipate, and under-rated magnets fail suddenly, dropping pots and soil.
Position the fridge where it receives the most ambient kitchen light — ideally adjacent to a window. Compact herbs that genuinely thrive in the restricted jar volume include chives, dwarf basil ‘Minette’, mint (kept strictly isolated from others), and coriander. Avoid rosemary and sage, whose root systems outgrow small jars within four to six weeks and become pot-bound and unproductive.
💡 Pro Tip: Rotate your magnetic jars 180 degrees every three days so all sides of the plant receive equal light exposure — without this simple rotation, the fridge-facing side becomes pale and leggy within two weeks while the kitchen-facing side stays compact and productive.
Explore magnetic jar kitchen herb garden setup ideas and learn how to grow herbs successfully indoors in small containers via Gardeners’ World.
Once your magnetic herb system is set up, reaching for fresh herbs becomes as automatic as opening the fridge itself.
2. Tiered Timber Wall-Mounted Spice Rack With Pots
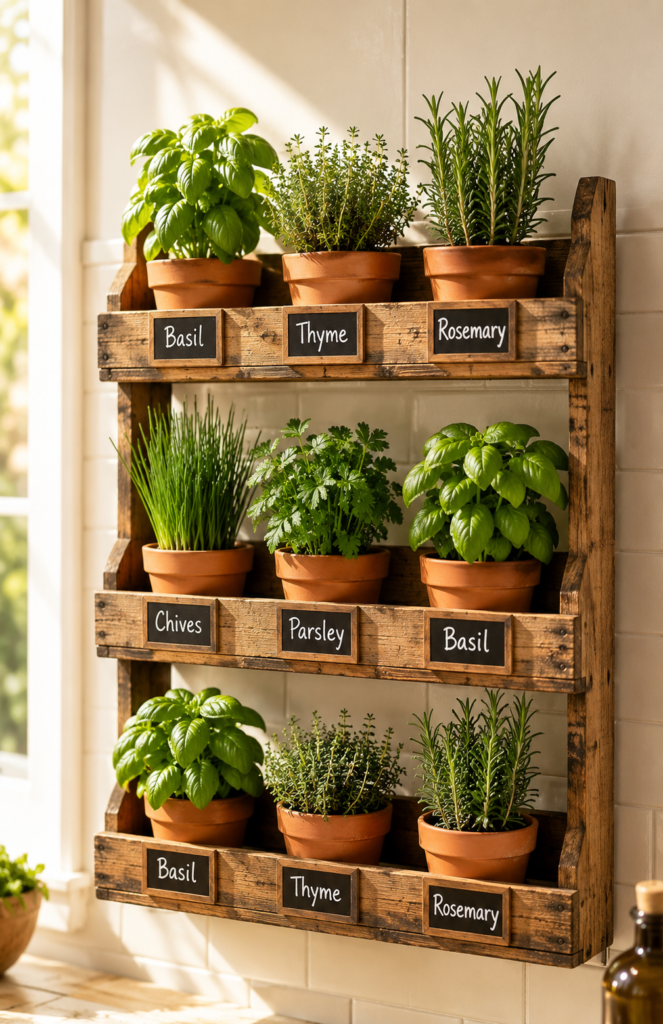
A tiered timber wall rack transforms a blank kitchen wall into a structured, organised herb garden that holds eight to twelve individual plants in a display that looks genuinely designed rather than improvised.
Build or purchase a three-tier wall-mounted rack with shelves minimum 12cm deep — shallower shelves allow pots to tip forward when bumped, which is a genuine safety concern with terracotta pots above a cooking area. Use 10cm terracotta pots — this size accommodates most culinary herb root systems for three to four months before repotting is needed, and the material’s porosity helps regulate moisture in the typically warm, slightly dry atmosphere of a kitchen.
Fill each pot with a specialist herb compost — not standard multi-purpose, which retains too much moisture and causes root rot in the warm, low-airflow conditions of a kitchen. Mount the rack on the wall adjacent to the kitchen window at eye height for ease of harvesting, and use two masonry anchors rated to the full loaded weight. Arrange herbs by harvest frequency: those used daily (chives, basil, parsley) at the most accessible middle tier; less-used herbs (rosemary, sage, thyme) on upper and lower shelves.
Best herbs for tiered spice rack herb garden ideas:
- Chives — fast-growing, regrows readily after cutting
- Dwarf basil ‘Minette’ — compact, intensely fragrant, kitchen scale
- Flat-leaf parsley — prolific, tolerates lower light than most herbs
- Thyme ‘Silver Queen’ — slow-growing, space-efficient, aromatic
Discover tiered wall rack kitchen herb garden displays and read expert guidance on growing herbs indoors year-round from the RHS.
A well-arranged tiered herb rack is one of those kitchen features that guests notice and ask about immediately.
3. Windowsill Spice Jar Herb Row
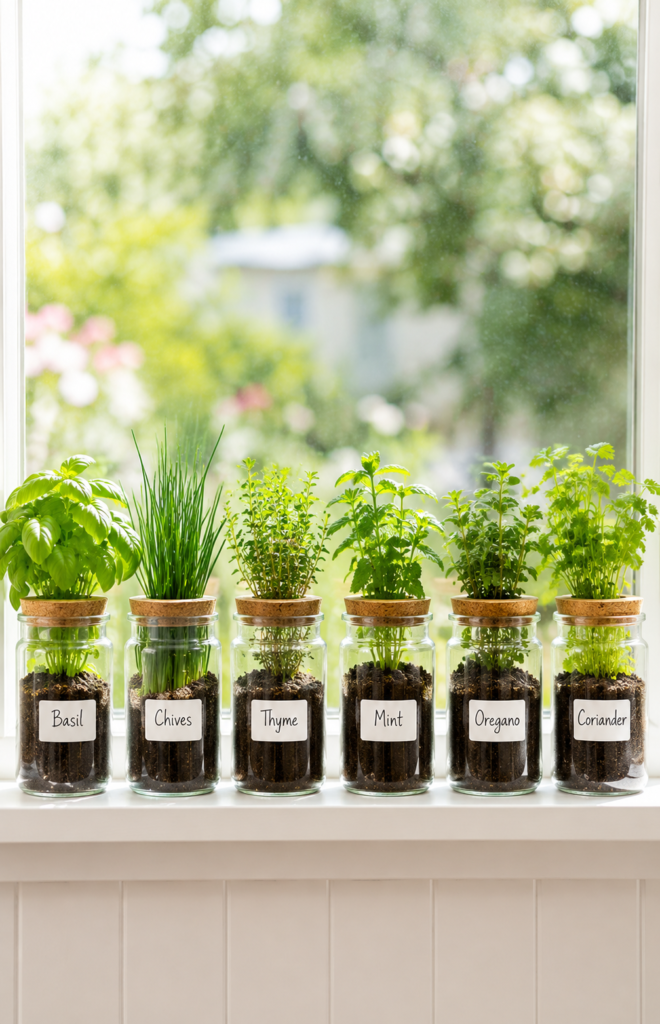
A row of matching glass spice jars on the windowsill creates the most space-efficient and aesthetically cohesive kitchen herb display possible — the uniform containers create visual order that makes even a small collection look curated and intentional.
Use wide-mouth glass spice jars with a minimum 7cm diameter. Remove the original lids entirely and drill two to three drainage holes in the base of each jar using a diamond-tipped glass drill bit — standard metal bits shatter glass. If drilling seems daunting, place a 3cm layer of activated charcoal at the jar base instead of creating drainage holes; activated charcoal absorbs toxic anaerobic gases produced by waterlogged soil and extends the survival time of herbs in undrained glass containers significantly, though genuine drainage remains superior.
Fill with a peat-free herb-specific compost and plant one herb per jar. Position the row in the brightest available kitchen windowsill, ideally south or east-facing — herbs in glass containers on a windowsill need a minimum of 4 hours of direct or bright indirect light daily to maintain compact, productive growth. Rotate the row 180 degrees weekly so the window-facing and room-facing sides receive balanced light.
💡 Pro Tip: Place a small saucer under each glass jar — even with drainage holes, the condensation that forms on glass containers on a cool windowsill can damage painted or varnished sill surfaces over weeks of daily watering.
Browse windowsill spice jar herb garden setup guides and read how to grow herbs on a kitchen windowsill successfully from The Old Farmer’s Almanac.
Six identical jars in a row turns your windowsill into the most functional and beautiful part of your kitchen.
4. Self-Watering Herb Planter Insert for Spice Racks
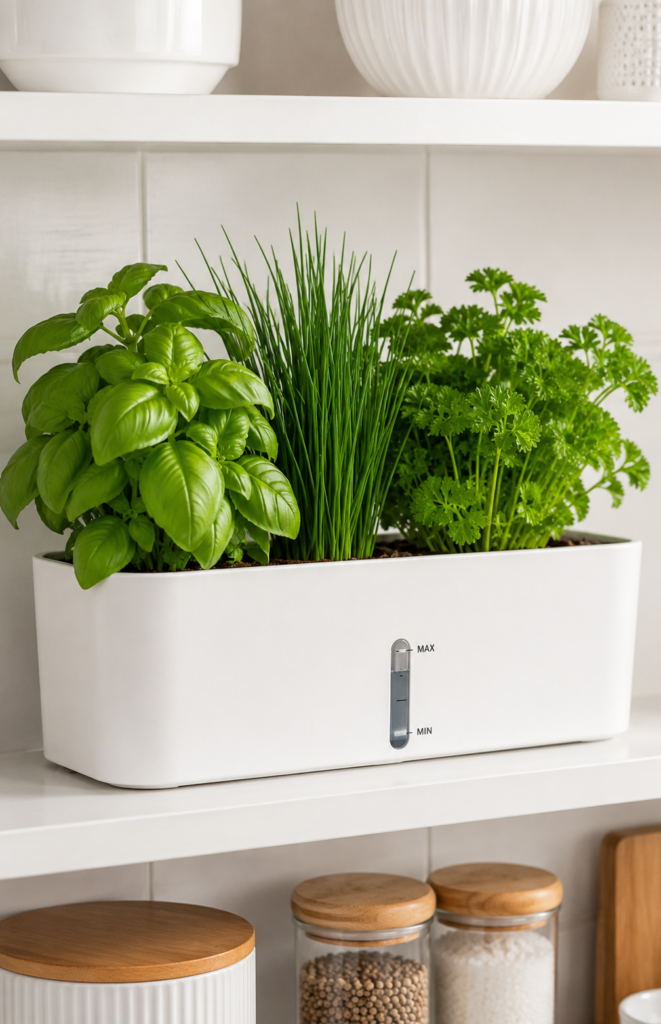
Self-watering herb planter inserts solve the single greatest challenge of spice rack herb garden ideas for kitchen use — the tendency to either overwater or neglect herbs during busy weeks — by creating a sub-irrigation reservoir that herbs draw from at their own pace.
Self-watering planters work via a wicking mechanism: a reservoir in the base holds water, and a wick draws moisture upward into the compost as the herb’s roots demand it. This eliminates both overwatering (the cause of the vast majority of indoor herb deaths) and the stress of irregular watering schedules. Look for inserts with a minimum 48-hour reservoir capacity — smaller reservoirs need refilling daily, which defeats the purpose. Window garden inserts designed specifically for kitchen use are widely available in sizes to fit standard 30cm and 60cm shelves.
Fill with a peat-free herb compost — the wicking mechanism works best with a lighter, more open compost structure; heavy soil mixes compact in self-watering systems and impede the capillary action that the whole system depends upon. Plant three to four herbs per 30cm insert. A weekly refill of the reservoir is all that’s required for most kitchens, increasing to every three to four days in very warm or dry kitchen environments.
Discover self-watering herb planter ideas for kitchen shelves and learn how self-watering planters work and which herbs suit them from the University of Florida Extension.
A self-watering insert makes maintaining a kitchen herb garden genuinely achievable for the busiest household.
5. Copper Pipe Hanging Herb Display Above the Counter
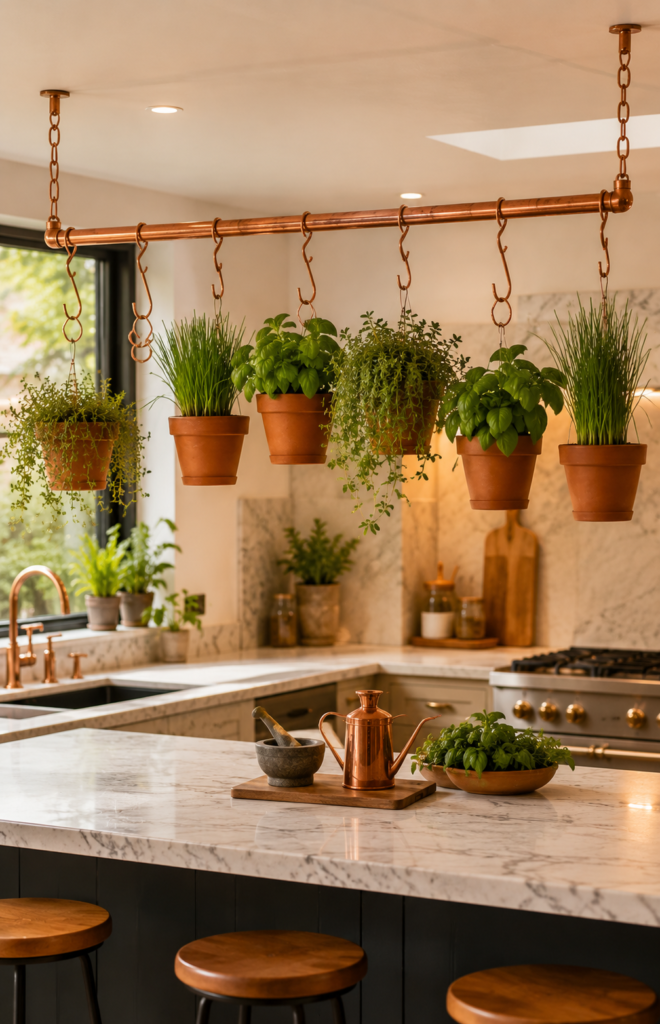
A suspended copper pipe rail above the kitchen counter uses the entirely wasted space between the worktop and ceiling to grow herbs at the perfect harvesting height — directly above the surface where you prepare food.
Use a 22mm copper pipe cut to the width of your counter (or a section spanning two ceiling hooks). Suspend it using adjustable steel cable or heavy-duty chain attached to ceiling anchors rated to at least 10kg. Hang terracotta pots from the pipe using large copper S-hooks, placing a saucer under each pot wired firmly in position to prevent water dripping onto the counter below — a non-negotiable safety consideration in a cooking space.
Trailing thyme, compact chives, and dwarf basil are ideal for hanging pots in this position. Position the rail where it receives kitchen window light — hanging herbs more than 1.5 metres from the nearest window in a kitchen will produce weak, pale growth even in herb varieties that tolerate low light. The copper pipe develops a beautiful natural verdigris patina over months, which only improves the aesthetic.
💡 Pro Tip: Wire each saucer to the S-hook using thin copper wire wrapped twice around the hook neck — this prevents the saucer from sliding off during everyday kitchen movement and catching on pot rims, which inevitably tips the whole pot eventually.
Explore hanging herb display ideas for above kitchen counters and read expert advice on growing herbs in hanging containers indoors from Better Homes & Gardens.
A copper pipe herb rail above your counter is the kind of kitchen feature that makes everyday cooking feel like you’re working in a proper chef’s kitchen.
6. Mason Jar Spice Rack Herb Garden on Timber Board
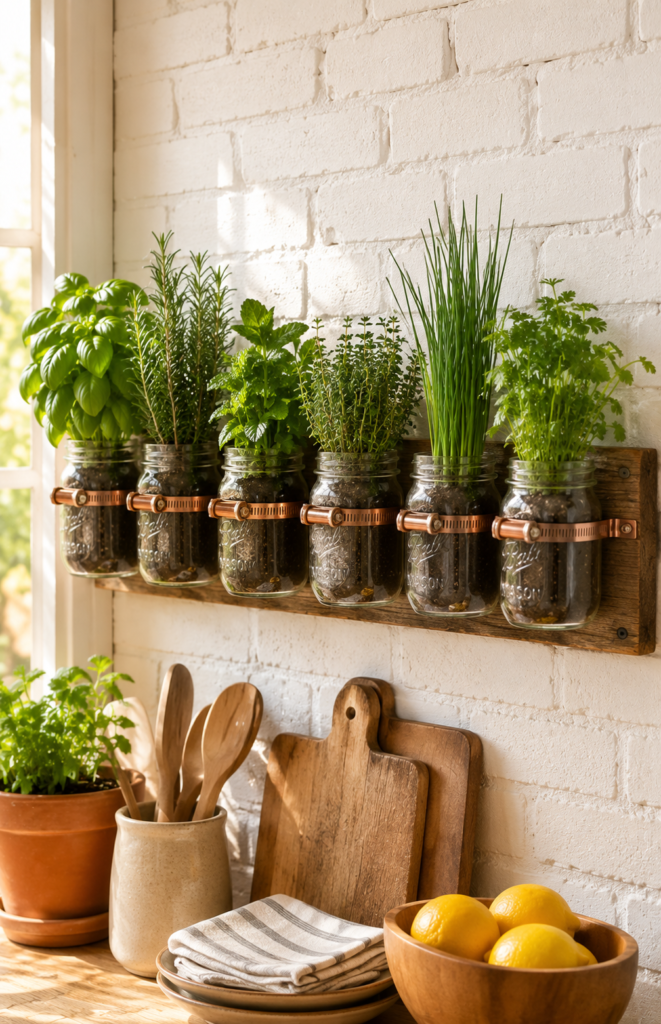
A row of mason jars mounted in copper hose clamps on a reclaimed timber board is the most popular kitchen herb garden display on social media for good reason — it’s genuinely beautiful, entirely functional, and costs under £20 to build from scratch.
Mount U-shaped pipe clips (copper jubilee clips in 60–70mm size fit standard mason jar diameters perfectly) to a 120cm × 15cm length of reclaimed timber using 25mm exterior screws. Fix the board to the kitchen wall using four masonry anchors rated to at least 8kg total load. Prepare each mason jar with two drainage holes drilled using a diamond-tipped glass bit, then fill with a 50/50 mix of herb compost and perlite.
The most important consideration for mason jar herb displays is watering discipline. Glass retains moisture far longer than terracotta, and the enclosed environment of a kitchen warms the glass, accelerating evaporation from the plant but not from the soil — this means the compost surface looks dry while the roots are still adequately moist. Check by pressing your finger 2cm into the compost: water only when it feels dry at that depth, never based on surface appearance alone.
Discover mason jar herb garden wall ideas for kitchens and read how to grow herbs in glass jars indoors from Penn State Extension.
A mason jar herb board mounted at eye height is the kitchen upgrade that costs almost nothing and changes how you cook everything.
7. Repurposed Vintage Spice Tin Herb Planter Row
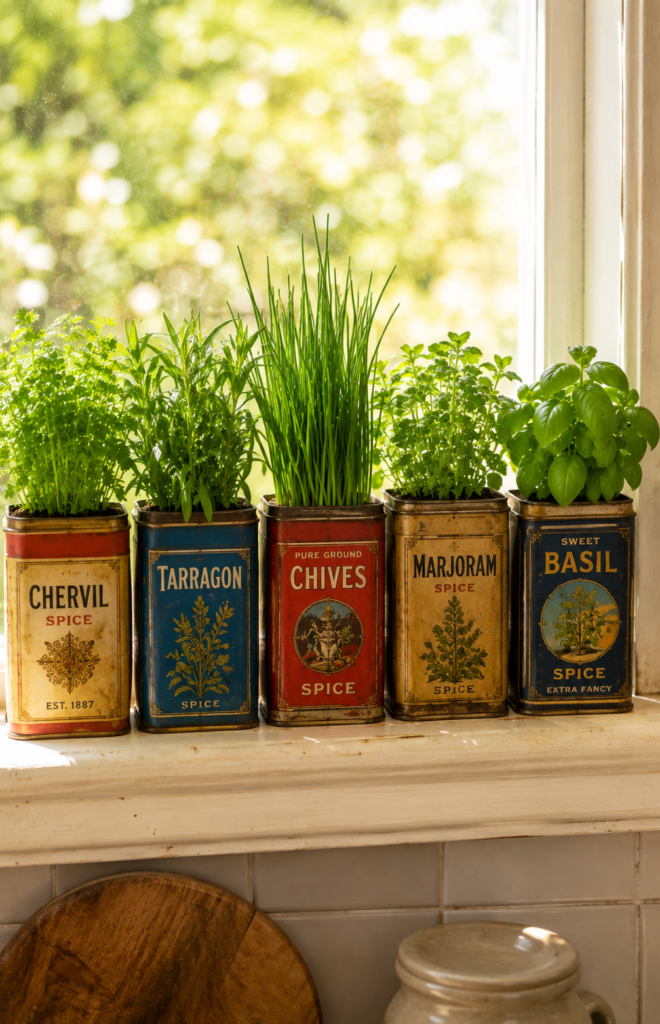
Vintage spice tins repurposed as herb planters bring an irreplaceable charm to kitchen herb gardening — the original spice labelling creates a pleasing irony when used to grow living herbs, and the patinated metal and faded graphics look genuinely beautiful on a kitchen shelf or windowsill.
Source genuine vintage spice tins from antique markets, charity shops, and online vintage retailers — French and German lithographed tins from the mid-20th century are particularly beautiful and cost £1–£5 each. Pierce three to four drainage holes in the base of each tin using a hammer and nail. The shallow depth of most spice tins (typically 8–10cm) suits compact, shallow-rooted herbs best: chervil, dwarf marjoram, tarragon, and chives all perform well in this limited depth.
Fill with herb-specific compost rather than standard potting mix — the narrow tin walls heat up quickly in a kitchen environment, and the additional drainage capacity of herb compost prevents moisture retention that causes root rot in warm, confined metal containers. Water sparingly — small tins dry out faster than you’d expect but also suffer from overwatering more severely than larger containers because there’s simply no buffer of compost volume to absorb excess water safely.
What works vs. What to avoid:
- ✅ Chervil, tarragon, dwarf marjoram — shallow-rooted, compact
- ✅ Drainage holes in every tin — non-negotiable
- ❌ Rosemary or sage — root systems outgrow tin depth within weeks
- ❌ Overwatering glass or metal containers — causes root rot faster than terracotta
Browse vintage tin herb planter ideas for kitchen displays and learn growing unusual culinary herbs like tarragon and chervil indoors via Gardeners’ World.
Vintage spice tins growing living herbs create a kitchen display with more personality than anything a shop could ever sell you.
8. Floating Shelf Spice Rack Herb Garden With Grow Light
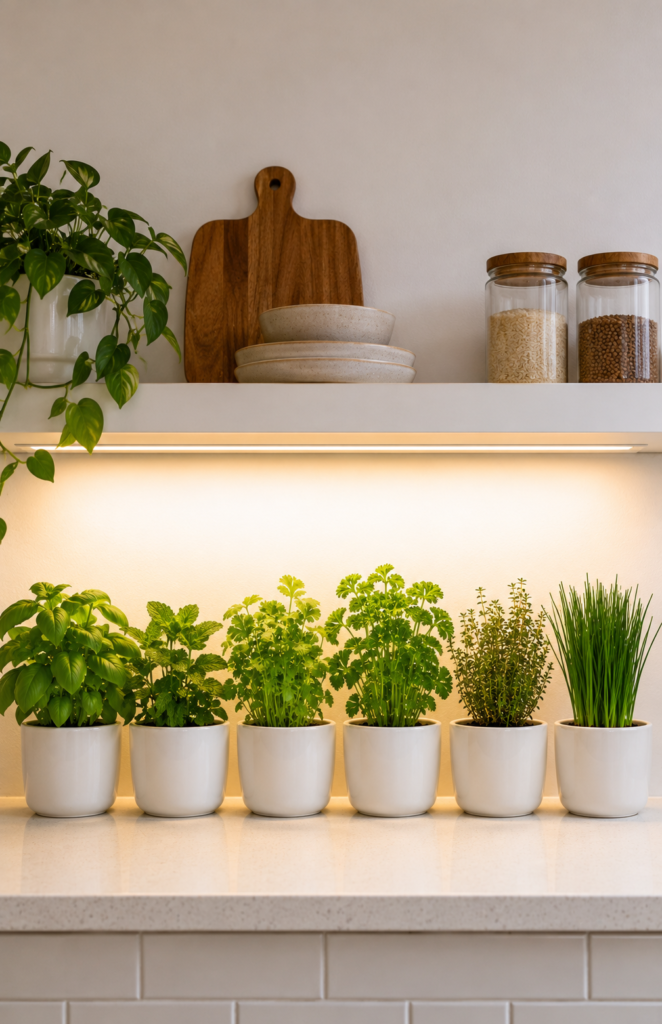
Adding an LED grow light strip to the underside of a floating kitchen shelf creates a fully self-contained herb growing station that works in any kitchen — including north-facing ones that receive insufficient natural light to sustain herbs through winter.
Use a full-spectrum LED strip light (6000K colour temperature — this replicates daylight and supports photosynthesis most effectively) mounted to the underside of the shelf with the adhesive backing provided. Position herb pots 15–20cm below the light strip — closer causes photoinhibition (bleaching and leaf burn), further reduces light intensity below the threshold needed for compact growth. Plug into a 24-hour timer set to deliver 14–16 hours of light daily; herbs require a dark period to rest, and continuous light actually reduces growth and causes leaf stress.
This setup is genuinely transformative for north-facing kitchens. Chives, parsley, coriander, and mint all grow healthily under quality LED grow lighting at the specified distance and duration — they won’t know they’re not on a south-facing windowsill. Basil requires slightly more light intensity and benefits from positioning directly beneath the centre of the strip rather than at the edges where lux levels drop.
💡 Pro Tip: Choose a grow light strip rated for the full visible spectrum (400–700nm wavelength range) rather than a pink/purple “blurple” grow light — full-spectrum white light supports growth equally well and doesn’t make your kitchen look like a photography darkroom.
Explore grow light herb garden ideas for kitchen shelves and read how to use artificial grow lights for indoor herbs from the University of Florida Extension.
A grow-light shelf transforms the darkest kitchen corner into a year-round herb garden that performs as well as a south-facing windowsill.
9. Ladder-Style Kitchen Spice Rack Herb Stand
A small A-frame ladder stand in a kitchen corner provides three to five growing levels in a floor footprint of just 40cm × 50cm — making it one of the most space-efficient freestanding spice rack herb garden ideas for kitchen spaces where wall fixings aren’t an option.
Purchase or build a small A-frame display ladder in 60–80cm height. Paint with a water-based eggshell paint (more durable than emulsion in the humid kitchen environment) in white, sage, or natural timber for the aesthetic you want. Each rung holds two to three 8–10cm terracotta pots — use pot clips (small C-shaped metal clips that grip the rung and the pot rim) to prevent pots from sliding if the ladder is nudged.
Position the ladder adjacent to the brightest available kitchen window and rotate the entire structure 180 degrees every week so both sides receive balanced light. The multi-level structure allows you to position light-hungry herbs (basil, rosemary) on the top two rungs nearest the window’s light source, and shade-tolerant herbs (mint, chives, parsley) on the lower rungs where light intensity is naturally lower.
Discover kitchen ladder herb stand ideas and planting guides and explore which culinary herbs grow well in low-light indoor conditions from Missouri Botanical Garden.
A ladder herb stand is the most portable kitchen herb garden solution — move it to follow the best light without any wall fixings or rearranging.
10. Upcycled Colander Spice Rack Herb Basket
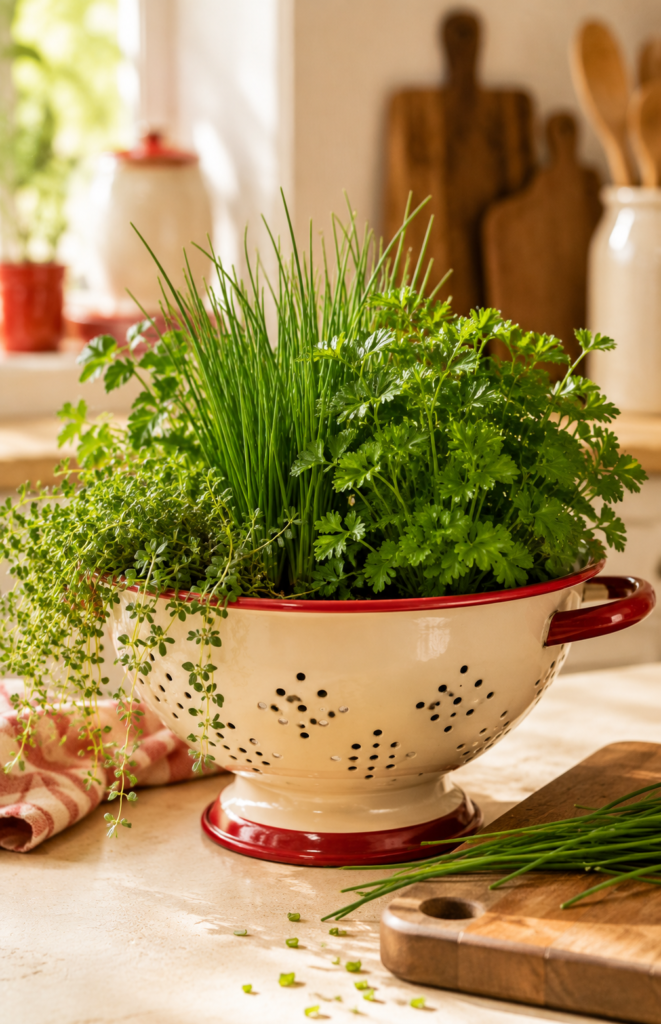
A vintage enamel colander repurposed as a kitchen counter herb basket is the most immediately charming spice rack herb garden idea that requires zero DIY skill — its drainage holes are already there, its kitchen provenance is completely fitting, and it costs almost nothing.
Select a large colander (28–32cm diameter) from a charity shop or market stall — original cooking use means it’s perfectly food-safe, and the existing perforations provide ideal drainage. Place a saucer beneath it to catch drainage water on the counter. Fill with a free-draining herb compost mixed with 20% perlite, and plant three complementary herbs in the shared space: flat-leaf parsley at the centre (it tolerates the slightly more root competition), chives at one side, and trailing thyme draping over the colander’s rim.
Position on the counter section that receives the most kitchen window light — direct sun through a kitchen window is ideal for this display, but 4 hours of bright indirect light is the realistic minimum for keeping three herbs producing adequately. Harvest from all three plants regularly — cutting herbs back by one-third encourages bushy, compact growth that stays within the colander’s generous but not unlimited space.
💡 Pro Tip: Replace one herb in the colander every six to eight weeks rather than all three simultaneously — this staggers the plants’ growth cycles so the display always has at least two productive, established herbs while the newest planting catches up.
Browse colander herb planter ideas for kitchen counters and read growing mixed herbs together in shared containers from the RHS.
A colander full of fresh herbs on the kitchen counter is one of those details that makes even the smallest kitchen feel like a serious cook’s space.
11. Pegboard Spice Rack Herb Garden Wall
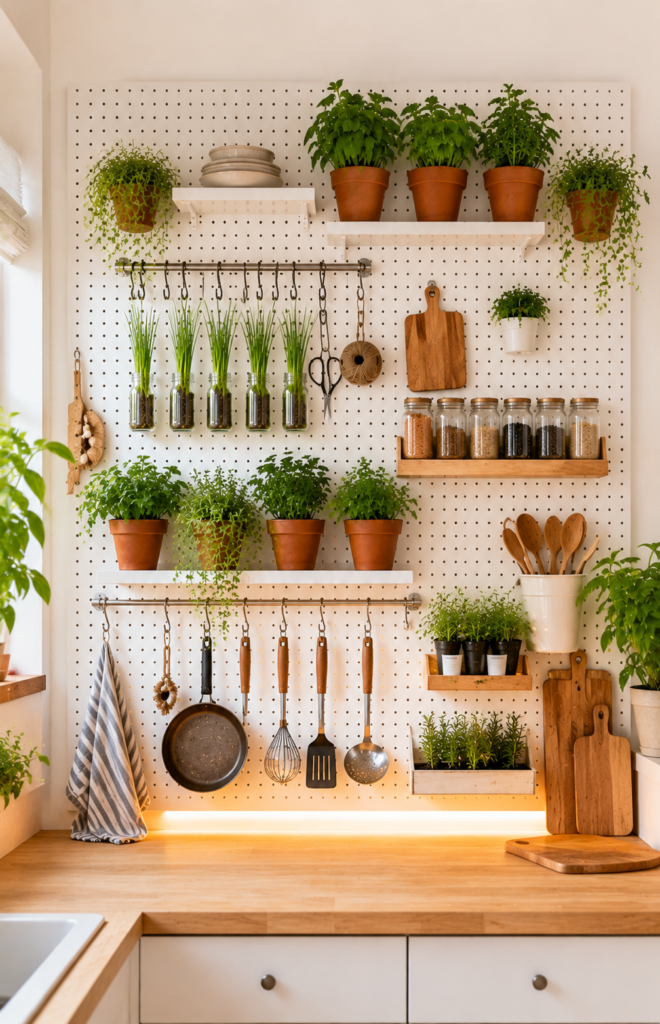
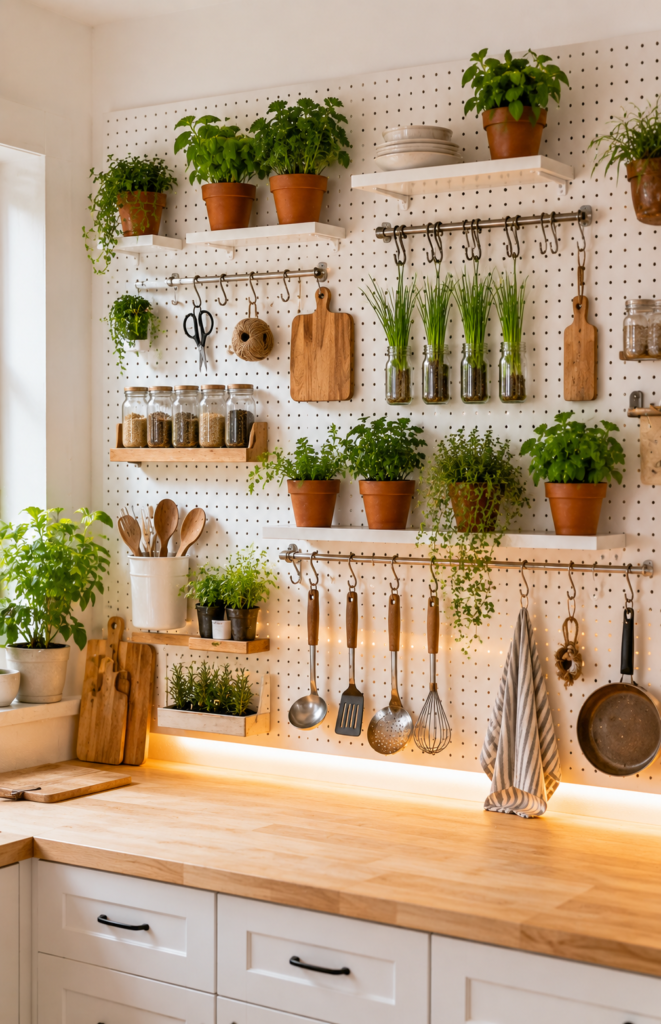
A pegboard herb wall is the most adaptable spice rack herb garden idea for the kitchen — the modular hook system allows you to rearrange, add, and remove herb pots as your collection evolves, without drilling a single additional hole in the wall.
Mount a 120cm × 60cm white-painted pegboard on the kitchen wall using standoff fixings that hold it 3cm clear of the wall surface — this gap is essential for the hooks to engage properly and for airflow behind the board. Use purpose-built pegboard planter hooks (available from specialist retailers) that hold small terracotta or ceramic pots firmly even when bumped. Combine herb pot hooks with a few small flat shelves for taller pots and decorative kitchen items to create a display that’s functional for both gardening and everyday kitchen use.
The pegboard’s full width should receive adequate light from adjacent windows — if your kitchen has limited natural light, fix a slim LED grow light strip along the top edge of the pegboard angled downward at 30 degrees, which illuminates all pots without creating harsh shadows. Herbs that grow particularly well in the warm, consistent temperature of a kitchen pegboard include basil, chives, dwarf sage, and Greek oregano.
Discover kitchen pegboard herb garden wall display ideas and read how to create a productive kitchen herb garden indoors from Better Homes & Gardens.
A pegboard herb wall makes your kitchen tools and your kitchen garden part of the same beautifully organised display.
12. Recycled Glass Bottle Hydroponic Herb Garden
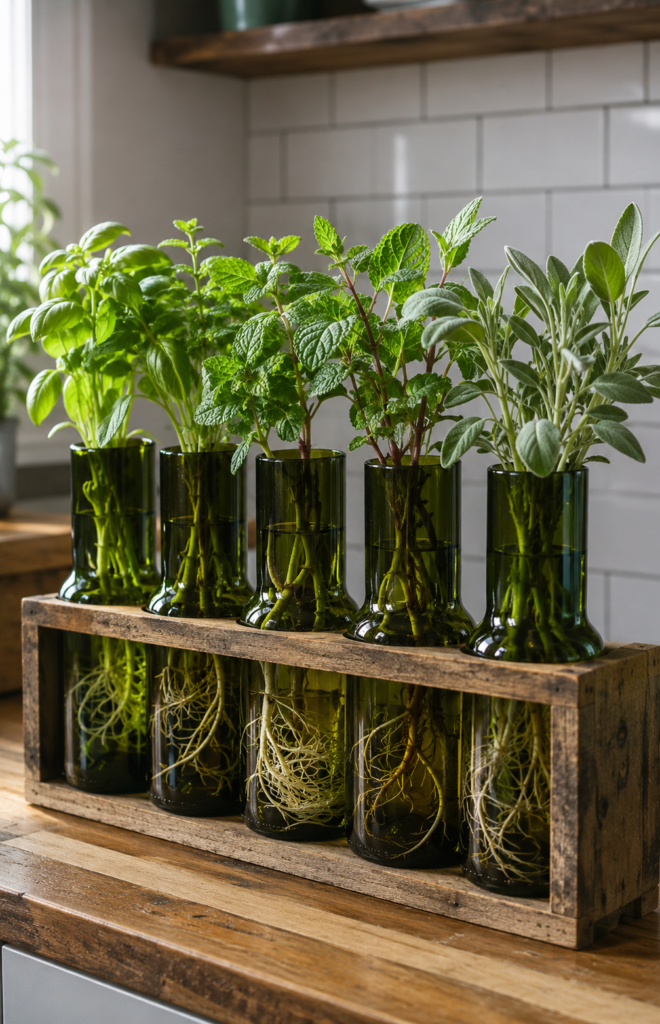
Growing herbs hydroponically in repurposed glass bottles is the most minimal of all spice rack herb garden ideas — no soil, no mess, and the visible root system developing in clean water creates a display that’s as scientifically fascinating as it is visually beautiful.
Cut wine or water bottles to approximately 12–15cm height using a glass-cutting tool or bottle-cutter kit (available inexpensively online). Sand the cut edge smooth with wet-and-dry sandpaper to remove sharpness. Fill with clean water, add a few drops of hydroponic nutrient solution (a specialist product designed for soilless growing — essential, as plain water without nutrients produces slow, pale growth), and place herb cuttings directly in the water. Change the water completely once a week to prevent algae growth and maintain oxygen levels in the root zone.
Basil, mint, and sage root readily from cuttings placed in water — take 8–10cm stem cuttings from a healthy garden plant or shop-bought herb, strip the lower leaves to prevent rotting in the water, and expect visible root development within 10–14 days. Once roots reach 3–4cm in length, the herb is actively growing and can be harvested lightly. These herbs grow more slowly in pure hydroponics than in compost, but the display is self-contained, clean, and genuinely striking on a kitchen counter.
Best herbs for glass bottle hydroponics:
- Mint — roots in 7–10 days, grows vigorously in water
- Basil — roots in 10–14 days, requires bright light
- Sage — roots in 14–21 days, very low maintenance once established
- Lemon balm — roots rapidly, intensely fragrant
Browse hydroponic herb garden ideas for kitchen counters and learn how to grow herbs from cuttings in water from the University of Florida Extension.
A row of green glass bottle herb gardens on the kitchen counter is the most conversation-starting plant display you can create indoors.
13. Hanging Macramé Kitchen Herb Planter
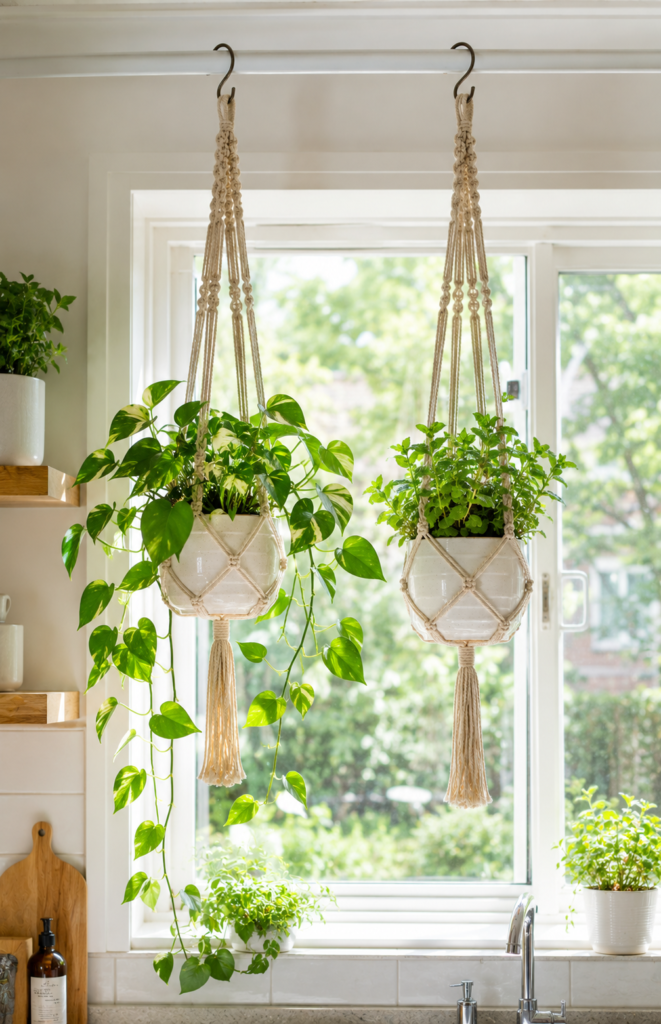
Macramé herb hangers suspended from a ceiling hook above the kitchen window capture the brightest available light in the room while keeping herbs at eye height for convenient harvesting — the ideal combination for a kitchen spice rack herb garden idea that requires zero shelf or counter space.
Use a ceiling hook rated to 5kg minimum — a filled ceramic pot and macramé hanger combined weighs more than most people estimate. Fix the hook into a ceiling joist rather than just plasterboard, using a stud finder to locate the joist position before drilling. Choose ceramic pots with drainage holes and fix a firmly wired saucer beneath each to prevent water from dripping onto the floor or counter below.
Mint (Mentha spearmata or ‘Moroccan’ mint) is the single best herb for kitchen macramé hangers — it tolerates the slightly variable temperature and airflow of hanging positions better than most herbs, grows enthusiastically from a compact plug plant, and the fragrance it releases as you brush past the hanger is genuinely pleasant in a cooking space. Keep mint in its own isolated hanger — its roots will attempt to colonise any shared compost within weeks.
💡 Pro Tip: Use a spray bottle to mist the foliage of hanging kitchen herbs every two days — the air directly beneath a ceiling in a kitchen is consistently drier and warmer than at counter level, and foliage misting compensates for the humidity deficit without overwatering the compost.
Explore macramé herb hanger ideas for kitchen growing spaces and read caring for herbs in hanging containers indoors from The Sill.
A macramé herb hanger in a bright kitchen window is one of those small additions that transforms the entire atmosphere of the room.
14. Chalkboard Label Ceramic Spice Rack Herb Set
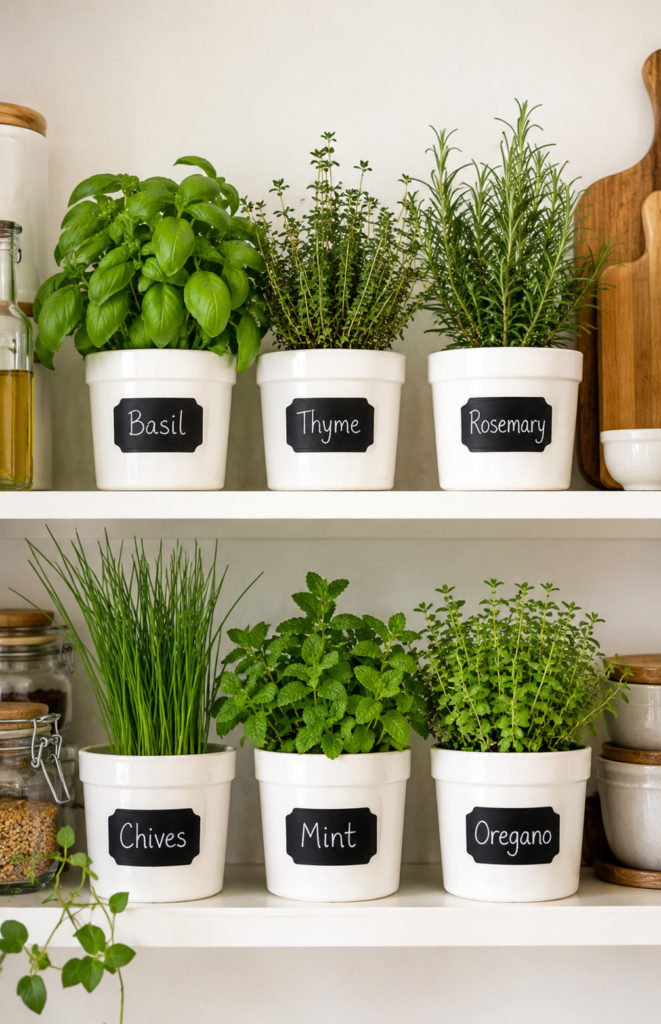
Matching ceramic pots with integrated chalkboard label panels create the most visually coherent kitchen herb display — the uniform design unifies a collection of different herbs into a single, composed arrangement that looks like it was designed by a professional kitchen stylist.
Matching herb pot sets are available from kitchen retailers and online, but the DIY approach produces more personalised results: purchase identical white ceramic pots (10cm, smooth exterior), apply a rectangle of chalkboard paint to one face using two thin coats, curing for 48 hours before writing. Write herb names with a quality chalk pen rather than regular chalk — chalk pen lines are far crisper and don’t smudge with the condensation that forms on pots after watering.
Fill each pot with herb-specific peat-free compost and plant individual herbs. The critical pro insight for matching ceramic sets: ceramics are non-porous and retain moisture significantly longer than terracotta — check for water need by feeling the compost rather than watering on a schedule. Different herbs within the set will have different water requirements even in identical pots: rosemary needs to dry between waterings, chives prefer consistently moist conditions, and basil sits somewhere between. Water each pot individually based on its herb’s needs rather than watering the whole row at once.
Discover chalkboard label ceramic herb pot ideas for kitchen organisation and explore expert indoor herb growing tips for ceramic containers via Gardeners’ World.
A matching ceramic herb set arranged on a kitchen shelf is one of those displays that makes the space feel considered, calm, and genuinely pleasant to cook in.
15. Industrial Pipe Spice Rack Herb Display
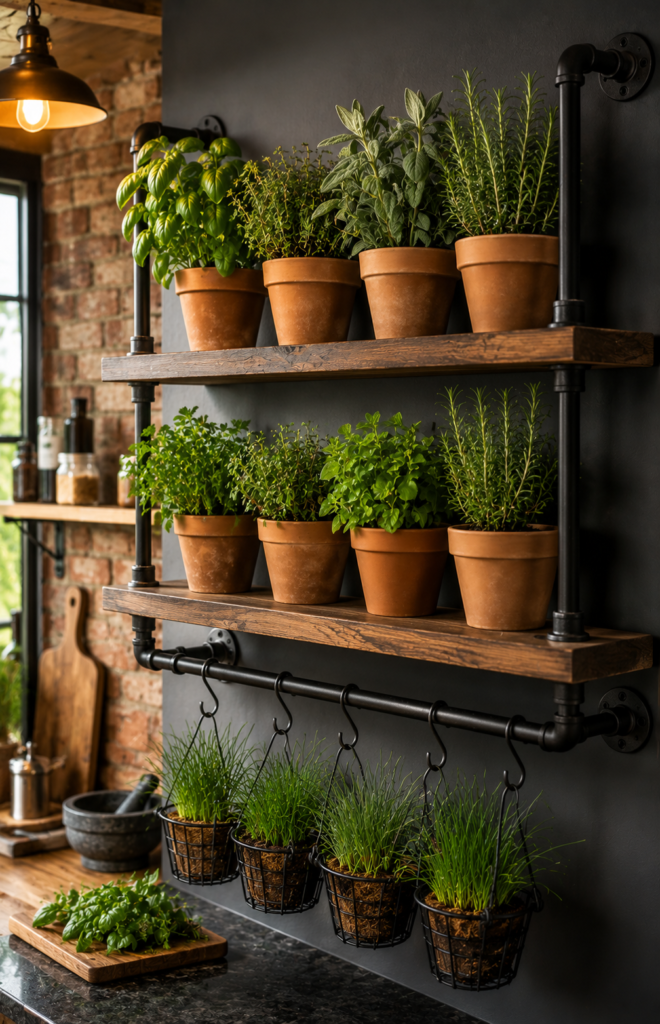
Black iron pipe shelving brings an industrial character to spice rack herb garden ideas for kitchen spaces that suits contemporary, dark-palette kitchens beautifully — the combination of matte black metal and warm timber creates a framework that makes herbs look like deliberate design elements rather than afterthoughts.
Construct shelves using standard 15mm iron pipe, flange mounts, elbow fittings, and timber shelf boards (20mm oak or walnut for warmth and durability). The pipe framework attaches directly to the wall via flange plates screwed into masonry anchors. This system is entirely modular — you can extend shelves, add hook rails, or reconfigure the layout without specialist tools. Seal the timber boards with a food-safe oil finish (Danish oil or raw linseed oil) before use, since the shelves will contact herb pots that drip water regularly.
Position the pipe herb display on the wall adjacent to or opposite the main kitchen window. Rosemary, sage, and thyme — the most structurally beautiful herbs — suit the angular, architectural character of this display best. Their silver-green and purple-grey foliage tones work particularly well against matte black pipe. Basil at the centre adds a pop of vivid green that anchors the composition.
💡 Pro Tip: Spray the iron pipe fittings with a clear matte lacquer before installation — raw iron pipe rusts in kitchen humidity within months, but lacquered pipe maintains its matte black finish indefinitely without any further maintenance.
Browse industrial pipe kitchen herb shelf display ideas and read how to build and maintain a kitchen herb wall display from Better Homes & Gardens.
An industrial pipe herb display makes your kitchen wall as interesting as your food.
16. Terrarium-Style Glass Cloche Herb Display
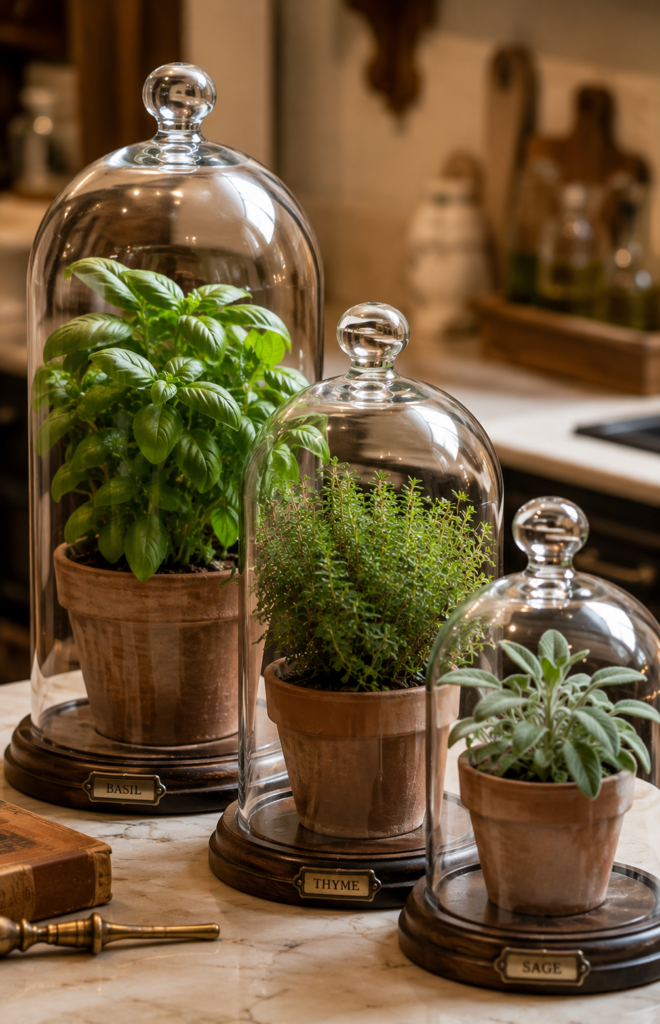
Glass cloches placed over individual herb pots create a micro-climate that dramatically increases the humidity and warmth around each plant — addressing the two conditions most kitchens fail to provide and most culinary herbs genuinely need.
Use glass bell cloches in three descending sizes (15cm, 20cm, and 25cm diameter) placed over individual herb pots with a 4cm drainage saucer beneath each pot. The cloche traps transpired moisture from the plant and soil and recirculates it, maintaining a humidity level of 50–70% even in a centrally heated kitchen in winter — far above the 20–30% typical of heated interiors, which stresses basil and coriander most severely.
Remove each cloche for three to four hours daily to allow fresh air circulation and prevent the build-up of excessive moisture and potential fungal issues. This ventilation window also allows you to harvest from the plant, which is a practical necessity. Basil responds most dramatically to the cloche treatment — kept under glass in a warm kitchen spot, it produces leaves with a significantly more intense fragrance and flavour than uncovered plants in the same position.
Discover glass cloche herb garden ideas for kitchen counters and learn why humidity matters for growing herbs indoors from the RHS.
Glass cloches turn herb growing into a small act of kitchen theatre that’s beautiful to look at and genuinely effective for the plants inside.
17. Wooden Drawer Insert Herb Garden Tray
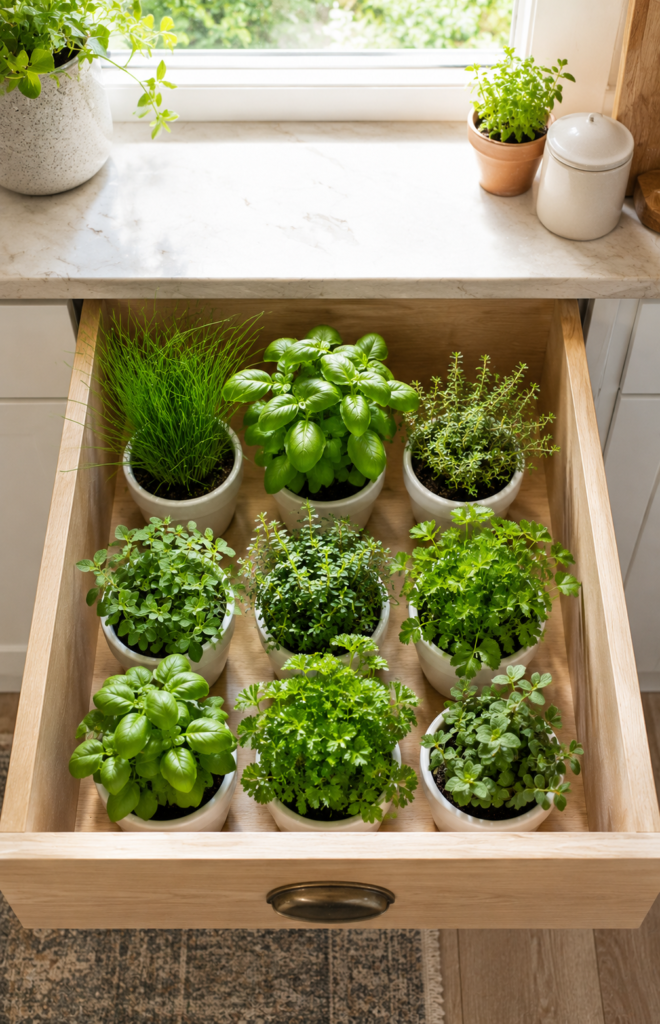
Converting an existing kitchen drawer into a portable herb garden tray is the most ingenious space-saving solution for apartment kitchens — the drawer slides away neatly when company comes, but lives on the windowsill during everyday cooking.
Use a shallow kitchen drawer (a utensil drawer typically 8–10cm deep is ideal) and line the interior with a waterproof rubber shelf liner cut to fit precisely. Place individual 8cm herb pots in a grid arrangement inside the drawer — this size fits neatly in two rows in most standard drawer widths. The liner catches any drainage water, and the shallow, contained depth of the drawer keeps the pots stable and prevents tipping during movement.
Position the herb drawer on the kitchen windowsill during daylight hours and slide it back into the drawer unit for cooking or when the worktop is needed. This portability makes it the most flexible spice rack herb garden idea on this list. For this system to work sustainably, the herbs must receive a minimum of 4 hours of bright window light daily — if the drawer spends more time inside the unit than on the windowsill, the herbs will decline within two to three weeks.
Best herbs for the portable drawer herb tray:
- Chives — tolerates brief shade periods, regrows rapidly
- Dwarf basil ‘Minette’ — compact habit, stays within pot boundaries
- Greek oregano — slow-growing, doesn’t outgrow small pots
- Flat-leaf parsley — prolific, tolerates inconsistent light better than most
Browse kitchen drawer herb garden tray ideas for small spaces and read practical tips for growing herbs indoors with limited light from Penn State Extension.
A portable herb drawer gives your kitchen all the benefits of a windowsill herb garden without permanently sacrificing the worktop space.
18. Copper Spice Tin Herb Garden Row on Magnetic Strip
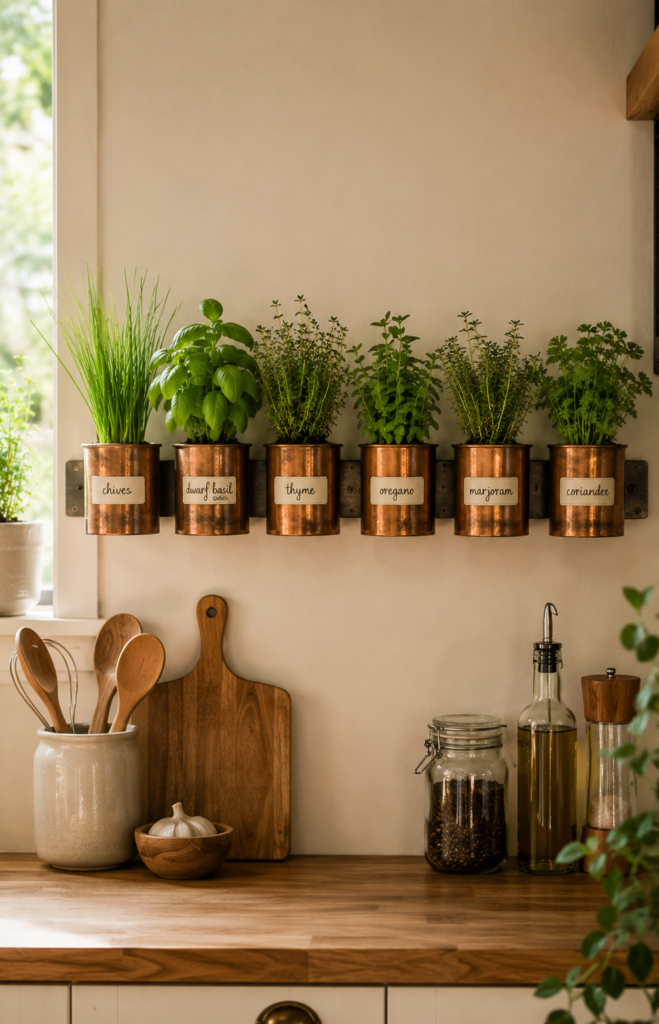
A magnetic steel strip with small copper-finish spice tins creates a wall-mounted herb garden that eliminates both shelf and counter use entirely — and the burnished copper aesthetic against a kitchen wall is genuinely striking in a way that standard white plastic pot systems cannot achieve.
Fix a 60–90cm magnetic steel kitchen strip to the wall using the supplied screws and masonry anchors — these strips are standard kitchen accessories rated for significant weight. Use small tins with magnetic bases (many are sold specifically for this purpose, or apply self-adhesive neodymium magnets to the base of standard small tins). Pierce two drainage holes in each tin base, and glue a small disc of felt to the magnetic base to prevent the magnet from scratching the strip surface when repositioned.
The strict limitation of this system is container depth — most magnetic spice tins are 6–8cm deep, which suits only the shallowest-rooted herbs. Chives, dwarf basil, Greek oregano, and thyme are genuinely productive in this depth. Label each tin with a copper-coloured chalk pen for a cohesive, premium aesthetic. Position the strip where it receives the most ambient kitchen light — within 1 metre of a window is ideal for the compact herbs best suited to this system.
💡 Pro Tip: Rotate the entire row of tins by swapping their magnetic positions every week — moving the end tins to the centre and vice versa ensures even light distribution across all six herbs without needing to adjust anything more than their position on the strip.
Explore magnetic strip herb garden ideas for kitchen walls and learn which compact herbs grow well in very small containers indoors from The Old Farmer’s Almanac.
A copper magnetic strip herb row is the kitchen upgrade that takes 30 minutes to install and looks like it was designed by a professional kitchen stylist.
19. Wicker Tray Portable Herb Garden Collection
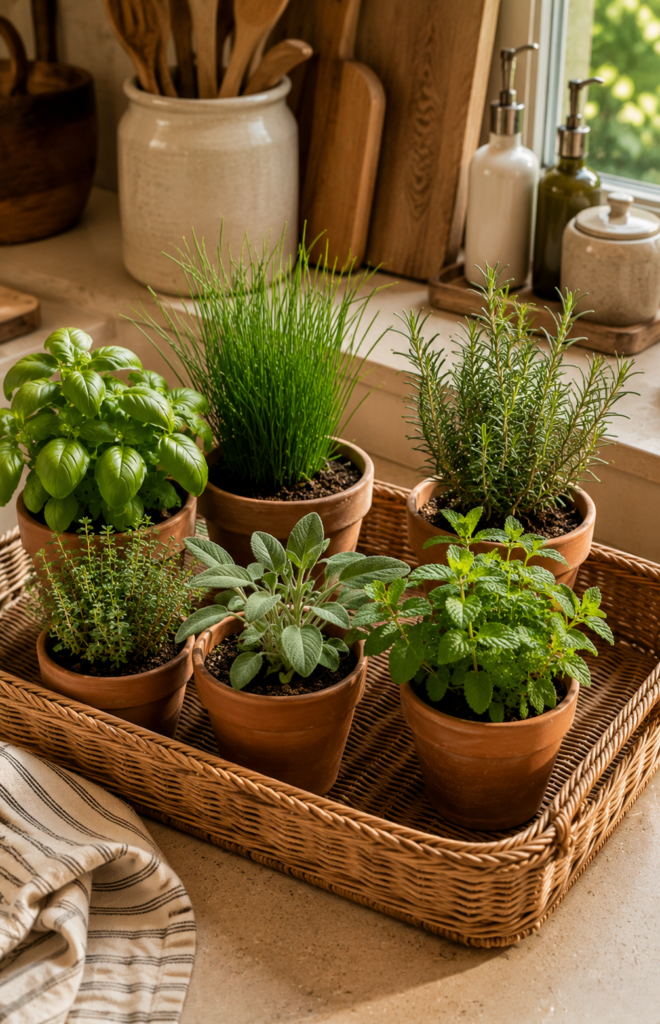
A wicker tray as a portable herb garden organiser is one of the oldest and most elegant solutions in kitchen gardening — it unifies a collection of different-sized herb pots into a single cohesive display, contains drainage water, and allows the entire herb garden to be moved to the windowsill or outside in seconds.
Choose a rectangular wicker tray large enough to hold six 10cm terracotta pots with comfortable spacing between them — approximately 45cm × 30cm is ideal for this pot size and quantity. Line the tray with a square of thick rubber shelf liner (trim to fit) to protect the wicker from water damage and catch any drainage from the pots. The rubber lining also prevents pots from sliding when the tray is moved, which is a surprisingly important practical detail.
Arrange the pots loosely in the tray rather than in a rigid grid — allow them to sit at slightly different angles and heights using small cork mats under individual pots to vary the levels. This casual arrangement looks far more natural and inviting than a perfectly regimented row. Move the entire tray to the sunniest kitchen window position during daytime, then slide it back to a cooler counter area in the evening — the portability is what makes the wicker tray system genuinely superior to fixed shelf displays for maximising the light that kitchen herbs receive.
Browse wicker tray herb garden collection ideas for kitchen counters and read how to arrange and maintain a collection of kitchen herbs from the RHS.
A wicker tray of herbs on a kitchen counter is the kind of display that makes every meal preparation feel a little more intentional and beautiful.
20. Slatted Timber Spice Rack Windowsill Herb Trough
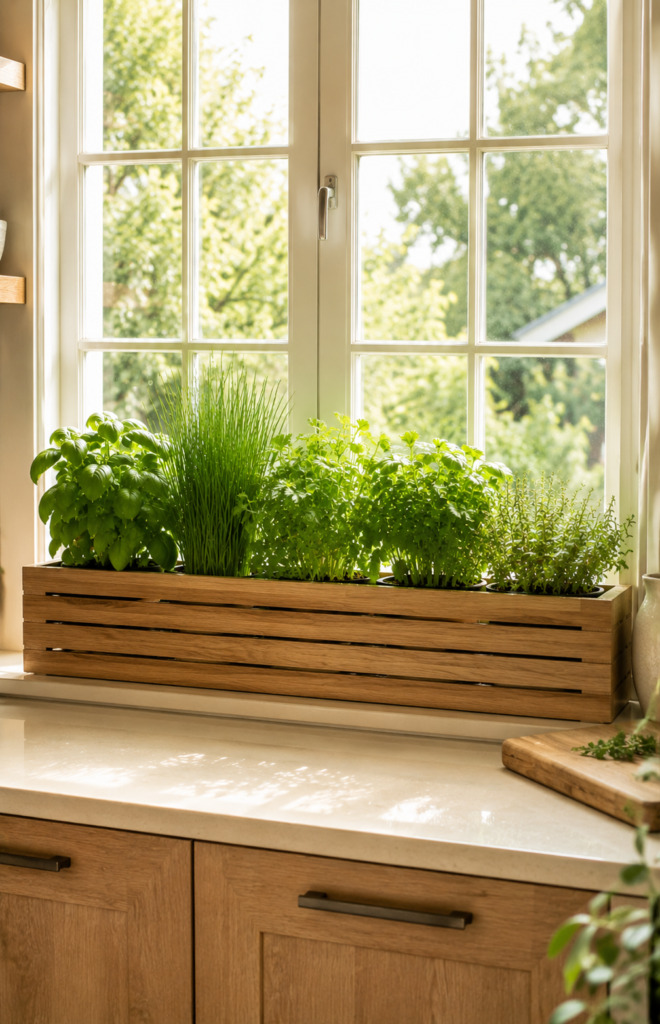
A custom-built slatted timber trough spanning the full width of a kitchen windowsill creates the most productive and maximally lit herb garden possible — every centimetre of the brightest position in the kitchen is used for growing, with no wasted space.
Build the trough to the precise width of your windowsill using 18mm exterior-grade ply for the base and sides, lined with pond liner and drained with a row of 10mm drainage holes. The trough depth should be minimum 15cm — this accommodates the root systems of most culinary herbs through a full season without becoming pot-bound. Fill with a specialist herb compost mixed with 25% horticultural grit for excellent drainage in what will be a well-lit, warm position.
Plant in a single continuous row, arranging herbs by eventual height: tall rosemary and sage at the back, medium parsley and basil in the middle, low chives and compact thyme at the front. This height graduation ensures smaller plants are never shaded by larger neighbours despite all sitting in the same bright light source. Harvest regularly from the front herbs in particular — frequent cutting keeps compact herbs from sprawling into their neighbours.
💡 Pro Tip: Fit a slim tray or sheet of clear perspex beneath the trough before placing on the windowsill — this protects the sill finish from drainage water staining, which is particularly important on painted windowsills where repeated water exposure causes paint to lift within weeks.
Discover custom windowsill herb trough ideas for full-width kitchen displays and learn how to build a simple timber herb planter for indoor use via Gardeners’ World.
A full-width windowsill herb trough is the single most productive kitchen herb installation you can build — it uses the best light in the room completely and wastes nothing.
21. Hexagonal Wall-Mounted Herb Pod Display
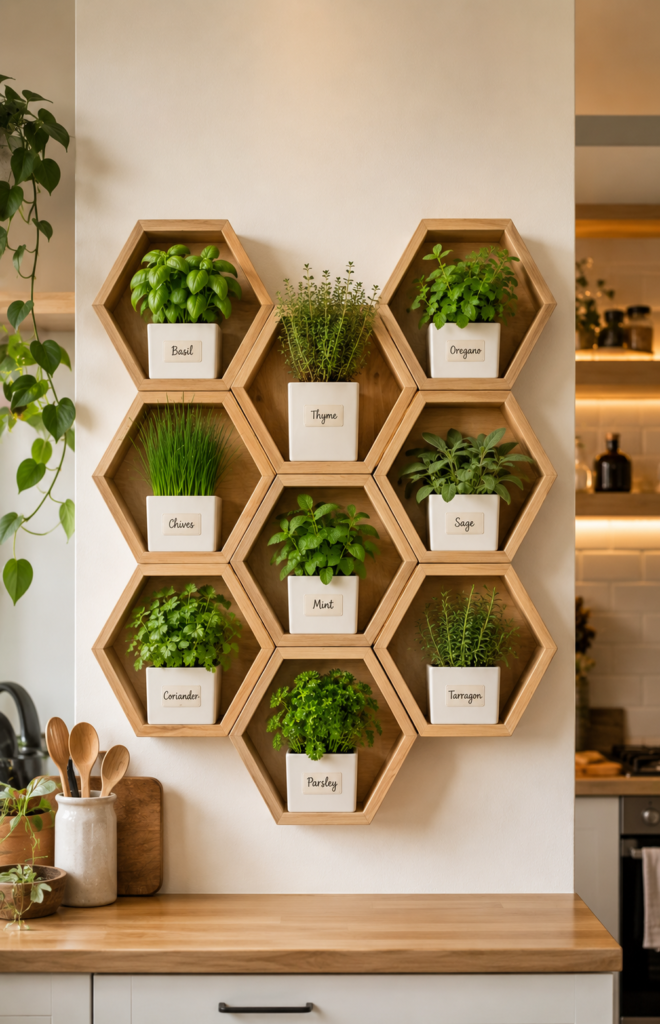
Hexagonal wall pods arranged in a honeycomb pattern create one of the most graphically striking spice rack herb garden ideas for kitchen walls — the geometric arrangement transforms a collection of small herb plants into a unified installation that functions like living wall art.
Hexagonal plywood shelving units are available flat-packed from furniture retailers or can be cut from 18mm plywood using a jigsaw and a printed hexagonal template. Each hexagon should be approximately 20cm across the face to accommodate a 9cm square ceramic pot. Arrange nine hexagons in a three-three-three honeycomb pattern on the kitchen wall, fixing each with two masonry anchors, and staggering the arrangement so no hexagon aligns flatly with its neighbour in a grid — the offset stagger is what creates the honeycomb visual effect.
Each hexagon holds one herb in a compact square ceramic pot, allowing nine different herbs to grow in a wall footprint of approximately 80cm × 60cm. Rotate the pots within the display every few days to ensure even light distribution — the hexagons at the edges receive different ambient light levels than those at the centre. Herbs that stay compact and ornamental at the small pot size — thyme, oregano, chives, tarragon, dwarf basil — work best in this display format.
Discover hexagonal herb pod wall display ideas for kitchens and read how to grow nine different culinary herbs in a small kitchen space from Penn State Extension.
A hexagonal herb honeycomb on your kitchen wall will make every visitor stop and look — it’s the intersection of art installation and functional kitchen garden.
22. Vertical Pocket Felt Planter Kitchen Herb Wall
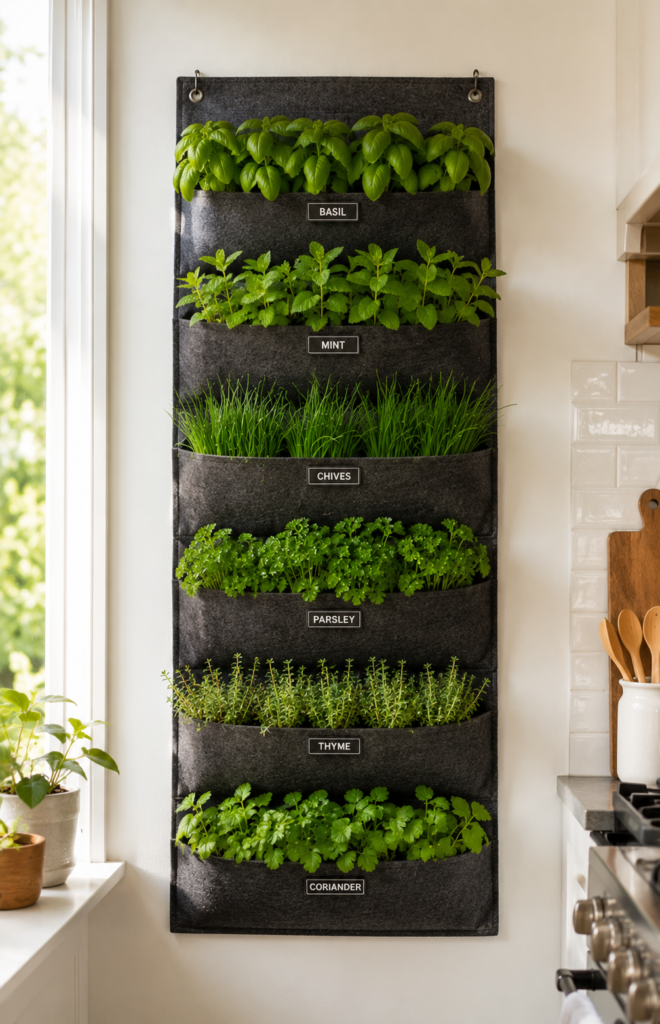
A vertical felt pocket planter hung on the kitchen wall holds six to twelve individual herb plants in a single hanging unit that takes up zero floor, counter, or shelf space — making it the most space-efficient fixed kitchen herb garden solution in this entire list.
Purchase a wall garden felt pocket planter designed specifically for indoor use (outdoor versions are made from heavier-duty felt with wider pockets not suited to small kitchen herb pots). Look for versions with pocket depths of at least 12cm — shallower pockets dry out faster than herbs can absorb moisture and produce stunted, stressed growth. Hang using two picture hooks rated to the fully watered weight of all pockets combined.
Fill each pocket with a lightweight herb compost mixed with perlite — standard multi-purpose compost is too heavy for felt pocket planters and compacts over time, impeding both drainage and root development. The felt material wicks moisture naturally, which can cause faster drying than expected; check pocket moisture every one to two days in a warm kitchen environment by gently squeezing the pocket exterior. If the felt feels dry to the touch, water immediately and thoroughly.
💡 Pro Tip: Water felt pocket planters with a long-spouted watering can directly into each pocket opening, pausing 30 seconds between each pocket to allow water to absorb before continuing down the panel — rushing this process causes water to run straight through before the compost absorbs it adequately.
Browse felt pocket planter kitchen herb wall display ideas and learn how to grow herbs vertically indoors on a kitchen wall from Better Homes & Gardens.
A felt pocket herb wall turns a blank kitchen surface into the most productive square metre of growing space in your home.
23. Terracotta Pot Spice Rack Herb Collection With Macramé Hanger Tags
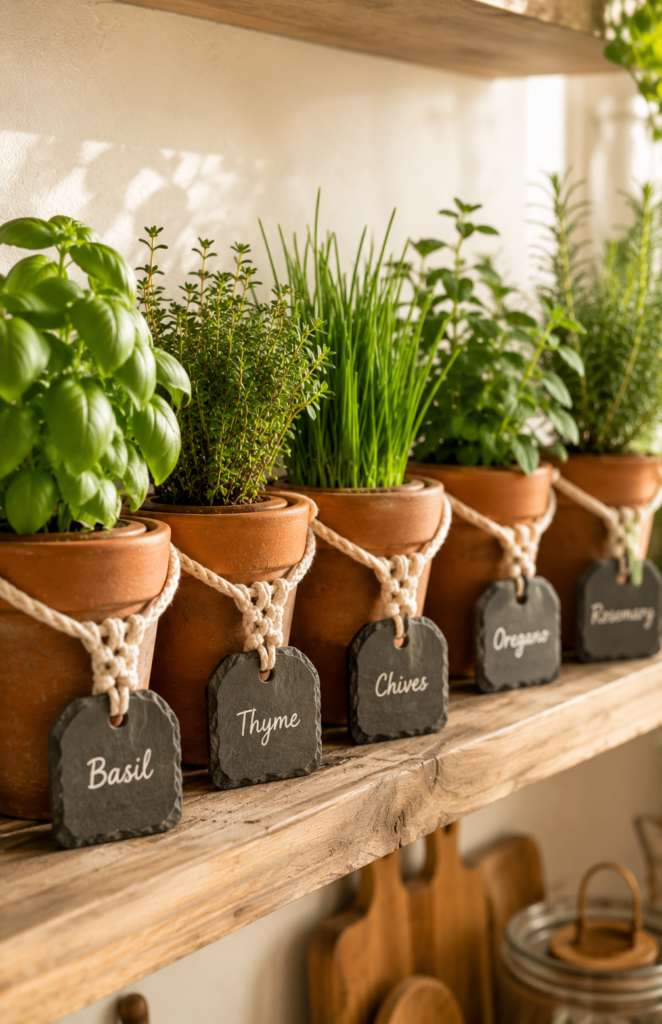
Attaching small macramé-style identifying tags to individual terracotta herb pots transforms a functional kitchen herb collection into a styled display — the handmade detail elevates simple terracotta and living herbs into something that looks genuinely artisan rather than practical.
Create macramé tags using 3mm natural cotton cord cut to 25cm lengths, tied into a simple lark’s head knot around the pot rim with a small slate or wooden disc label suspended from the knot. Write herb names on the label using a chalk pen or fine waterproof marker. This entire preparation takes about ten minutes per pot, requires no craft skills beyond a basic knot, and the result is a display that people consistently compliment on its handmade, considered quality.
The terracotta pots themselves require no modification beyond confirming drainage holes are present and unobstructed. Use a high-quality herb compost and plant one herb per pot at the correct spacing for the mature plant size: rosemary and sage in 12cm pots minimum; chives, thyme, and oregano in 10cm pots. Arrange the collection in descending height order from left to right, with the tallest rosemary or sage at the left and lowest chives at the right — this visual organisation makes the display easier to navigate when harvesting in the middle of cooking.
Discover terracotta herb pot display ideas with artisan styling for kitchens and read how to identify, label, and organise a kitchen herb collection from The Old Farmer’s Almanac.
A set of terracotta herb pots with hand-tied macramé tags is the kind of kitchen detail that looks as though it took far more effort than it actually did.
24. Reclaimed Wood Spice Rack Herb Shelf With Rope Hanging
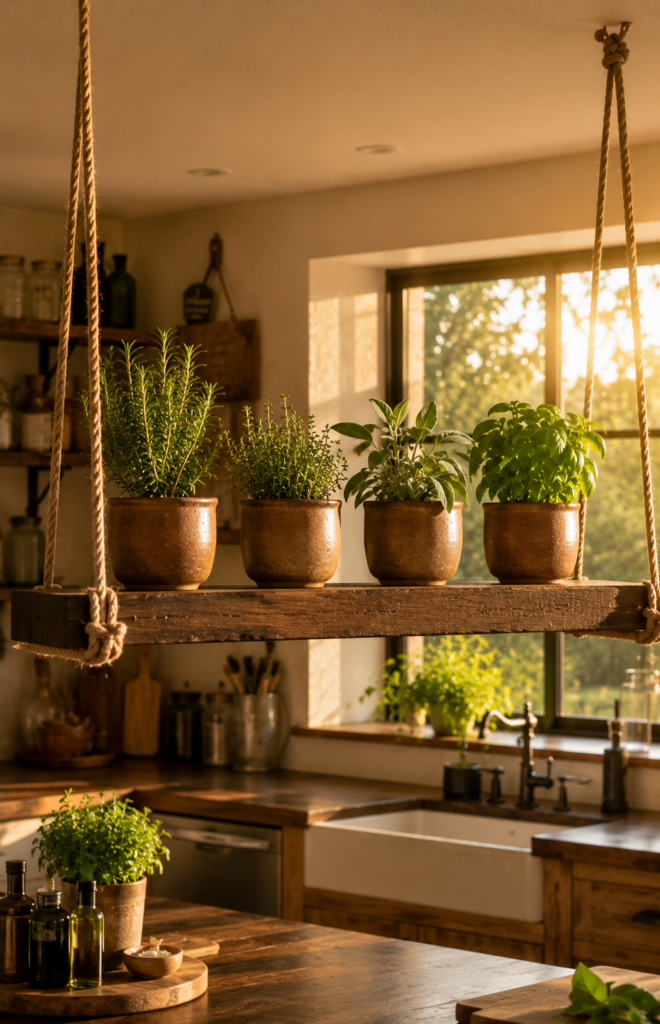
A single reclaimed timber plank suspended from the kitchen ceiling on thick hemp rope creates a floating herb shelf with extraordinary visual impact — it draws the eye upward, adds architectural interest to the kitchen, and positions herbs at the brightest available ceiling-height light zone.
Use a reclaimed oak or pine plank minimum 30mm thick (thinner planks flex and bounce, which stresses plant pots and looks unstable) and 90–120cm length. Drill two holes at each end of the plank for the rope to pass through and knot beneath, supporting the shelf’s weight through the rope rather than the knot alone. Use 18mm natural hemp or sisal rope — thick rope reads as architectural rather than makeshift, and the natural material complements reclaimed timber beautifully.
Attach the rope to ceiling hooks fixed into structural joists — this load-bearing point is non-negotiable, as a fully planted shelf at full water weight can reach 8–10kg. Place a clear rubber grip mat on the shelf surface to prevent ceramic pots from sliding. This display is best positioned near a kitchen window where it receives the maximum natural light without creating a trip hazard at head height — hanging the shelf at 180cm+ above the floor keeps it well clear of everyday kitchen movement.
💡 Pro Tip: Seal the underside of the reclaimed timber shelf with a food-safe beeswax polish rather than varnish — beeswax protects against the occasional water drip from pots without creating a reflective lacquered surface that looks incongruous with the natural rope and reclaimed wood character of the display.
Explore suspended rope kitchen herb shelf ideas for ceiling installation and read how to safely install ceiling-mounted plant shelves in kitchens from Better Homes & Gardens.
A reclaimed timber shelf suspended on hemp rope is the kitchen centrepiece that makes the whole room feel like it was designed with real intention.
Getting Started With Spice Rack Herb Garden Ideas for Kitchen
The simplest possible first step: buy one pot of supermarket basil, one 12cm terracotta pot, one small bag of herb compost, and one bottle of liquid herb fertiliser. Re-pot the basil from its flimsy plastic supermarket container into the terracotta pot with fresh compost, place it on the brightest windowsill your kitchen has, and water only when the top 2cm of compost feels dry. That’s it. Your kitchen herb garden has begun, today, for under £8.
The mistake that kills more kitchen herb gardens than any other is overwatering. Kitchen environments are warmer than most rooms, and plants on windowsills or shelves can look wilted from heat and dry air when the compost is actually still adequately moist. Always check by touch — finger 2cm into the compost — rather than watering on a schedule or based on surface appearance. Overwatering is the cause behind yellowing leaves, collapsing stems, and the “mysterious herb death” that so many beginners experience.
For your first spice rack herb garden setup: one tiered timber wall rack, one bag of herb-specific compost, and three plug plants — basil, chives, and flat-leaf parsley. These three herbs cover the majority of everyday cooking needs, grow reliably in kitchen conditions, and are forgiving for beginners still learning their watering instincts.
Expect the re-potted herbs to look slightly stressed for the first five to seven days — this is normal transplant adjustment. By week two, you’ll see new growth, and by week four, a genuinely productive kitchen herb collection that changes how you cook every day.
Frequently Asked Questions
How much light do herbs need for a spice rack herb garden in a kitchen?
Most culinary herbs need a minimum of 4–6 hours of bright light daily for productive growth. South or east-facing kitchen windows are the best positions — they provide the direct or bright indirect light that basil, rosemary, thyme, and chives require. In kitchens with less than 4 hours of natural light, a full-spectrum LED grow light strip (6000K, positioned 15–20cm above the herbs, running for 14–16 hours daily) completely compensates for the deficit and allows year-round herb growing regardless of window orientation.
Why do my kitchen herbs keep dying even when I water them regularly?
The most common cause is overwatering rather than underwatering — even in a warm kitchen environment. Herbs in small containers with drainage holes need their compost to partially dry between waterings; consistently wet compost suffocates roots and causes the yellowing, wilting collapse that looks identical to drought stress. The second most common cause is insufficient light — herbs placed more than 1.5 metres from a kitchen window in a room without grow lighting decline slowly but inevitably regardless of watering care. Check both variables before replacing the plant.
Can I grow basil indoors on a kitchen spice rack year-round?
Basil is the most light-hungry common kitchen herb and is genuinely challenging to maintain through winter without supplementary grow lighting. From April through September, a south-facing kitchen windowsill provides adequate natural light for productive basil growth. From October through March, most UK and northern European kitchens provide insufficient natural light for basil without a full-spectrum LED grow light positioned 15–20cm above the plant for 14 hours daily. With that grow light in place, yes — year-round basil production on a kitchen herb rack is entirely achievable.
What are the best herbs to grow together on a kitchen spice rack?
Herbs that share water and light requirements grow well together on the same shelf or in shared containers. Group 1 — Mediterranean herbs (rosemary, thyme, sage, oregano, marjoram): drought-tolerant, full sun, let dry between waterings. Group 2 — moist-soil herbs (basil, parsley, chives, coriander): prefer consistently moist but well-drained compost, tolerate slightly lower light. Keep mint in its own isolated container regardless of location — its roots colonise shared compost aggressively and deprive all neighbouring herbs within weeks. Never mix Group 1 and Group 2 herbs in the same container.
How often should I harvest herbs from my kitchen spice rack herb garden?
Harvest frequently rather than occasionally — this is the most important care technique for kitchen herbs and the one most beginners underestimate. For leafy herbs like basil and parsley, harvesting one-third of the plant every 7–10 days stimulates vigorous new growth and prevents premature flowering (bolting), which causes flavour to decline sharply. For woody herbs like thyme and rosemary, light harvesting every two to three weeks maintains compact, bushy growth. Never harvest more than one-third of any plant at a single cutting — removing more than this stresses the root system and significantly slows recovery.
A Few Final Thoughts
These 24 spice rack herb garden ideas for kitchen spaces prove that fresh herbs from your own growing collection are achievable for every cook, in every kitchen, regardless of size, light, or experience level. The most important thing isn’t which system you choose — it’s simply starting with one herb, one container, and one windowsill and building from there. Even a single pot of home-grown chives, snipped fresh over a scrambled egg, is a different experience entirely from dried herbs in a jar. Spice rack herb garden ideas for kitchen use reward consistency over complexity — regular harvesting, attentive watering, and adequate light produce results that outperform any supermarket herb packet indefinitely. One pot, one kitchen window, one good pot of herb compost — your kitchen herb garden adventure starts right now.
Published on Greenbotanicalgarden.com | Category: Kitchen Herb Gardens | Indoor Herb Growing