
Most staircase projects stall out because people picture a full weekend of sawing and staining before they’ve even bought materials, when in reality half these builds take under two hours with basic tools. I built my first staircase planter box from scrap fence boards on a Saturday afternoon three summers ago, and it’s outlasted two “temporary” store-bought versions since. This list covers 20 DIY staircase garden ideas you can genuinely finish in a weekend, each with the specific materials, tools, and build steps that separate a project that gets done from one that sits half-finished in the garage. Ready? Let’s explore all 20 of them.
Quick Answer: For a true one-afternoon build, drilled bucket planters or crate boxes need almost no tools and finish in under two hours. For a fuller weekend project, a tiered step ladder planter or built-in step-riser boxes take a full day but deliver the most dramatic transformation. Beginners should start with pre-made containers before attempting any cutting projects.
Why DIY Staircase Gardens Are Worth Your Time
Building your own staircase planters costs a fraction of buying matching pre-made sets, and most of these projects use materials you can source secondhand or from a single hardware store trip. In practice, a $30-40 materials budget covers most builds on this list, compared to $150-300 for equivalent purchased planter sets.
The practical benefits go beyond savings. A DIY build can be sized exactly to your specific steps, which store-bought containers rarely match precisely, and simple repairs (a cracked board, a loose bracket) become easy fixes rather than reasons to replace the whole piece. The lesser-known fact most beginners miss: pre-drilling wood before screwing it together prevents the splitting that ruins more first-time projects than any actual design mistake.
This approach is ideal for anyone comfortable with basic tools, renters looking for a project they can take with them, and gardeners who want a staircase display sized precisely to their actual steps rather than a generic fit.
At a Glance
- Drilled bucket and crate planters need no cutting tools and finish in under two hours.
- Step-riser window boxes attach directly to stair fronts for a built-in, seamless look.
- A basic cordless drill and a miter or hand saw cover nearly every build on this list.
- Reclaimed pallet wood cuts material costs by 60-80% compared to new lumber.
- Tiered ladder planters deliver the most visual drama for a single weekend’s work.
20 DIY Staircase Projects Compared
| Project | Skill Level | Build Time | Tools Needed | Est. Cost |
| Drilled Bucket Planters | Beginner | 1-2 hrs | Drill | $15-25 |
| Wooden Crate Boxes | Beginner | 1-2 hrs | Staple gun | $10-20 |
| Step-Riser Window Boxes | Intermediate | 4-6 hrs | Saw, drill | $40-60 |
| Pallet Wood Planters | Intermediate | 3-5 hrs | Saw, drill, pry bar | $10-30 |
| Hanging Rail Planters | Beginner | 2-3 hrs | Drill | $25-40 |
| Tiered Ladder Planter | Advanced | 6-8 hrs | Saw, drill, sander | $50-80 |
| PVC Pipe Vertical Planter | Intermediate | 3-4 hrs | Saw, drill | $20-35 |
| Cinder Block Step Planters | Beginner | 2-3 hrs | None (stacking) | $15-25 |
| Repurposed Drawer Planters | Beginner | 2-3 hrs | Drill | $0-15 |
| Rope-Hung Coco Baskets | Beginner | 1-2 hrs | None | $20-30 |
| Concrete Trough Molds | Advanced | 6-8 hrs (+ cure) | Mixing tools | $25-40 |
| Wine Barrel Half Planters | Beginner | 1-2 hrs | Drill | $30-50 |
| Gutter Trough Planters | Intermediate | 3-4 hrs | Saw, drill | $20-35 |
| Stacked Terracotta Tower | Beginner | 1 hr | None | $20-30 |
| Chalk-Painted Tin Cans | Beginner | 1-2 hrs | Hammer, nail | $5-15 |
| Vertical Pallet Garden | Advanced | 5-7 hrs | Saw, drill, staple gun | $20-40 |
| Rustic Log Slice Planters | Intermediate | 3-4 hrs | Drill, chisel | $10-25 |
| Built-In Corner Shelf Planters | Advanced | 6-8 hrs | Saw, drill, level | $40-60 |
| Copper Pipe Plant Stands | Intermediate | 3-5 hrs | Pipe cutter | $30-50 |
| Repurposed Ladder Shelf Planter | Intermediate | 3-4 hrs | Drill, sander | $20-35 |
1. Drilled Bucket Planters for a No-Skill First Build
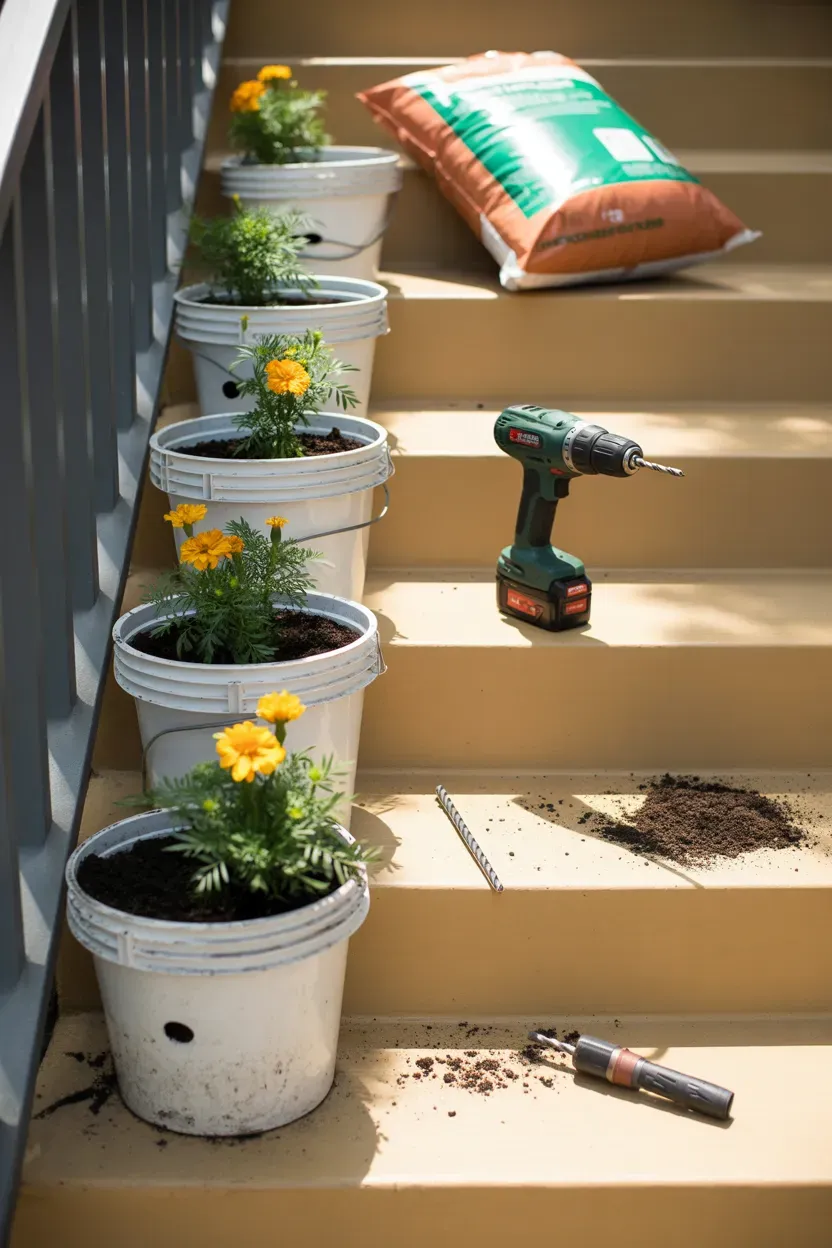
Five-gallon buckets, often free from restaurants or hardware stores, become functional planters in under 20 minutes with nothing but a drill.
You need a cordless drill with a 3/8-inch bit, 4-6 buckets, and potting soil. Drill 5-6 drainage holes evenly across the bottom of each bucket, then fill with soil and plant directly. Paint the exterior with exterior spray paint first if you want a cleaner look than raw plastic.
Pro Tip: Drill the holes at a slight angle rather than straight down — angled holes drain more effectively and clog less often with compacted soil over time.
Internal link: choosing the right drainage setup for DIY containers External link: RHS guide to essential container drainage principles
This is the single easiest project on the entire list, genuinely finishable before lunch.
2. Wooden Crate Boxes for Rustic One-Afternoon Charm
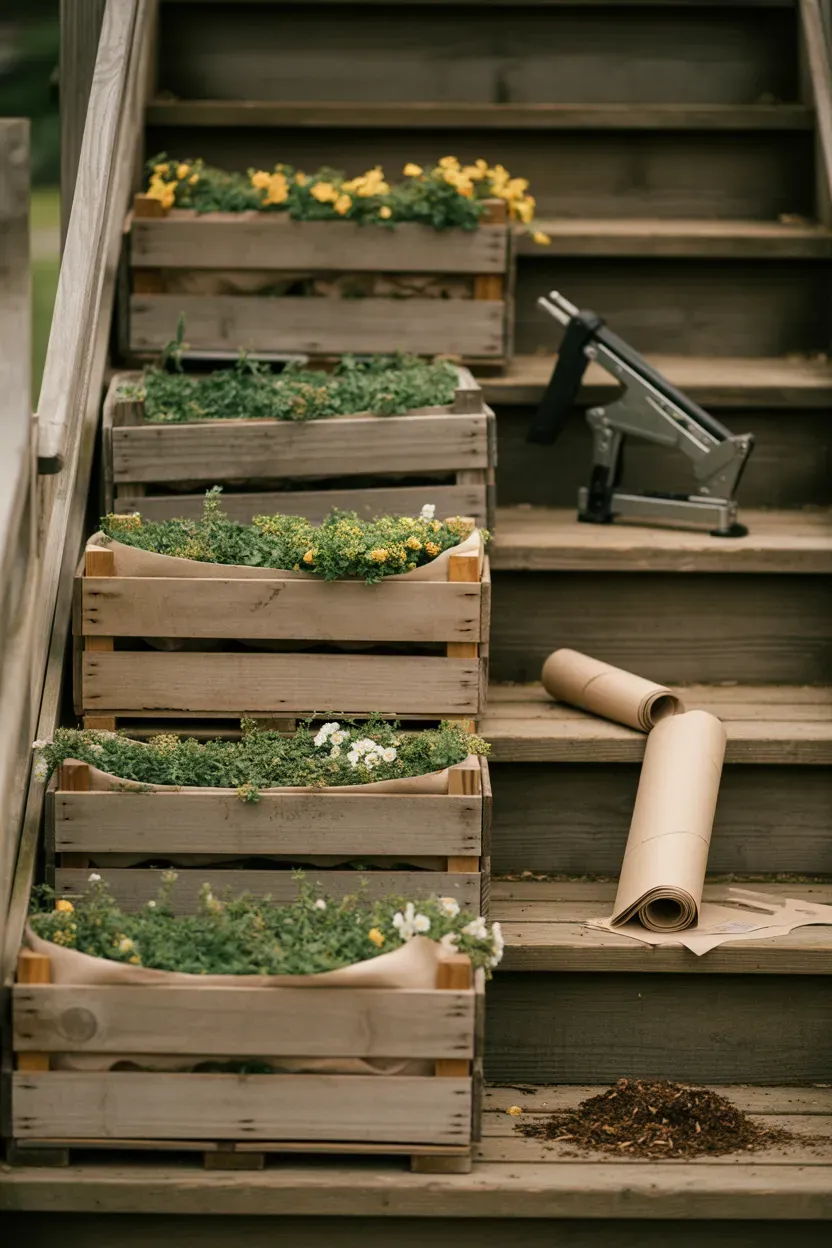
Wooden crates need almost no building at all — just a liner and soil — making this the fastest rustic-look project on the list.
You need 3-4 wooden crates (often free from grocery stores), a staple gun, landscape fabric, and soil. Staple the fabric to the inside of each crate, trimming excess, then fill with potting mix. Skip the liner and the crates will rot within a season of regular watering, so don’t shortcut this step.
Internal link: repurposing free and found materials for garden projects External link: Gardeners’ World’s guide to lining wooden planters properly
3. Step-Riser Window Boxes for a Built-In, Seamless Look
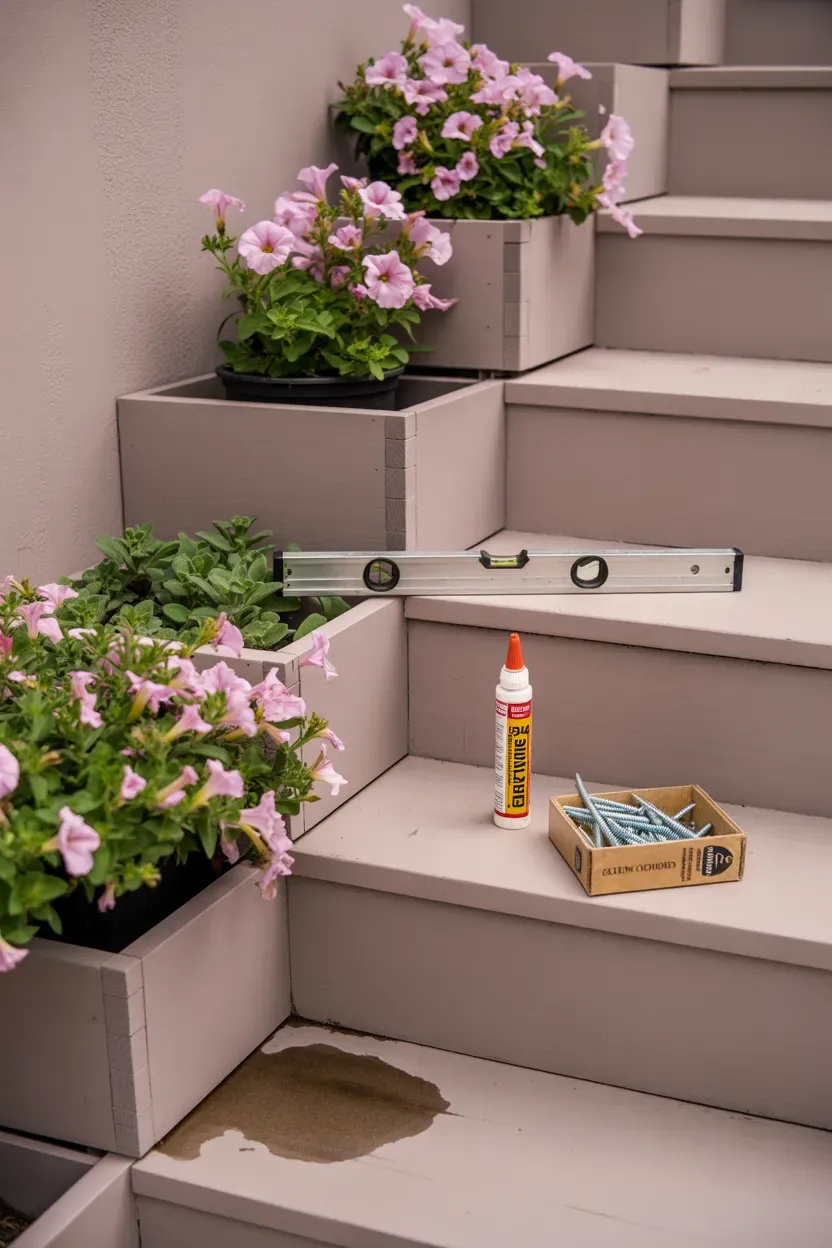
Attaching a window box directly to each stair riser creates the illusion of a built-in feature, giving a far more polished, permanent look than any freestanding pot arrangement.
You need cedar or pine boards, wood screws, exterior wood glue, L-brackets, a saw, and a drill. Cut boards to match your riser width, assemble into simple rectangular boxes, drill drainage holes in the bottom, then mount to the risers with L-brackets, checking each is level before securing.
Pro Tip: Line the inside of each box with a plastic liner or landscape fabric even on sealed wood — direct soil contact still traps moisture against the wood grain and shortens the box’s lifespan by several years.
Internal link: building custom window boxes for outdoor stairs External link: BHG’s window box building and mounting instructions
This is the project most likely to make guests ask who installed your staircase garden.
4. Pallet Wood Planters for Budget Reclaimed Style
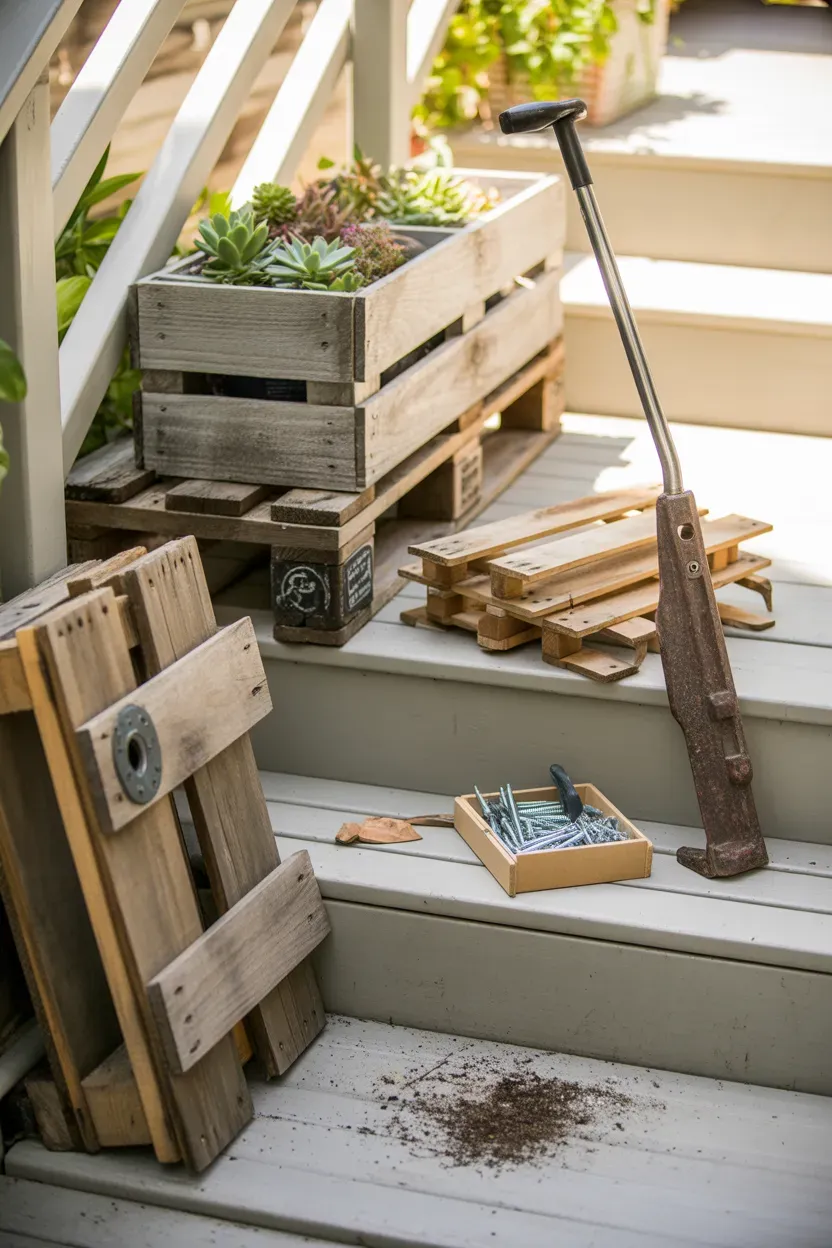
Free pallets, widely available behind hardware stores and shipping depots, provide enough wood for several planter boxes once disassembled, cutting material costs to nearly nothing.
You need a pallet, a pry bar or reciprocating saw for disassembly, a hand saw, a drill, and wood screws. Pry apart the pallet slats carefully to avoid splitting, cut to your desired box dimensions, then assemble into simple box shapes and add drainage holes. Sand any rough edges before planting to avoid splinters during future maintenance.
What works vs. what to avoid:
- Works: pallets stamped “HT” (heat-treated, safe for garden use)
- Avoid: pallets stamped “MB” (methyl bromide treated, not safe for planters)
Internal link: identifying safe pallet wood for garden projects External link: Penn State Extension’s guidance on reclaimed wood safety in gardens
5. Hanging Rail Planters for Zero Floor Space Used
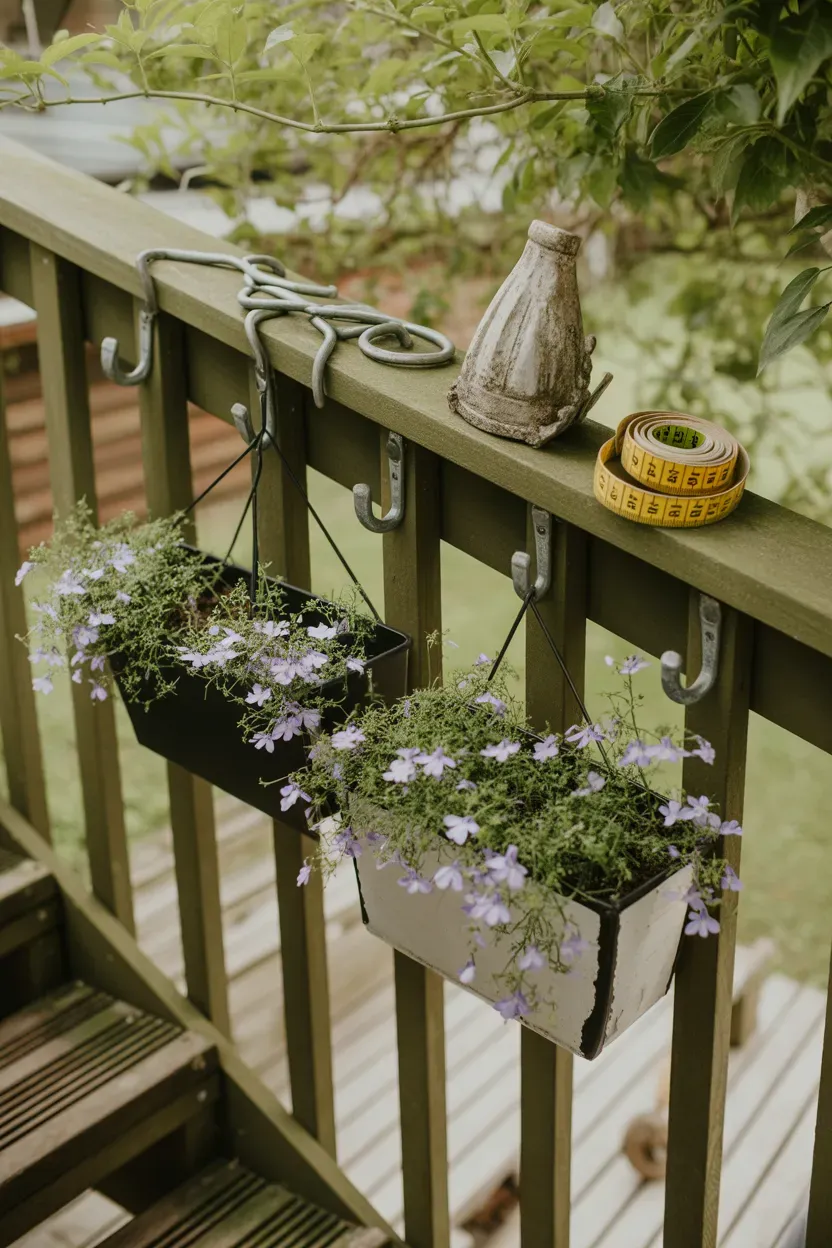
Hanging planter boxes mounted to a railing use zero step space, which makes this the right project for narrow staircases where floor-standing pots would create a tripping hazard.
You need lightweight plastic or resin planter boxes, galvanized S-hooks or bracket hangers, and a drill if your railing needs pilot holes for hardware. Measure your railing’s width and depth before buying boxes to ensure a secure, non-wobbly fit, and check the weight rating of your hooks against a soil-and-water-filled box, which can weigh 15-20 pounds once planted.
Internal link: space-saving container ideas for narrow staircases External link: Gardeners’ World’s guide to secure railing planter installation
6. Tiered Ladder Planter for the Weekend’s Biggest Project
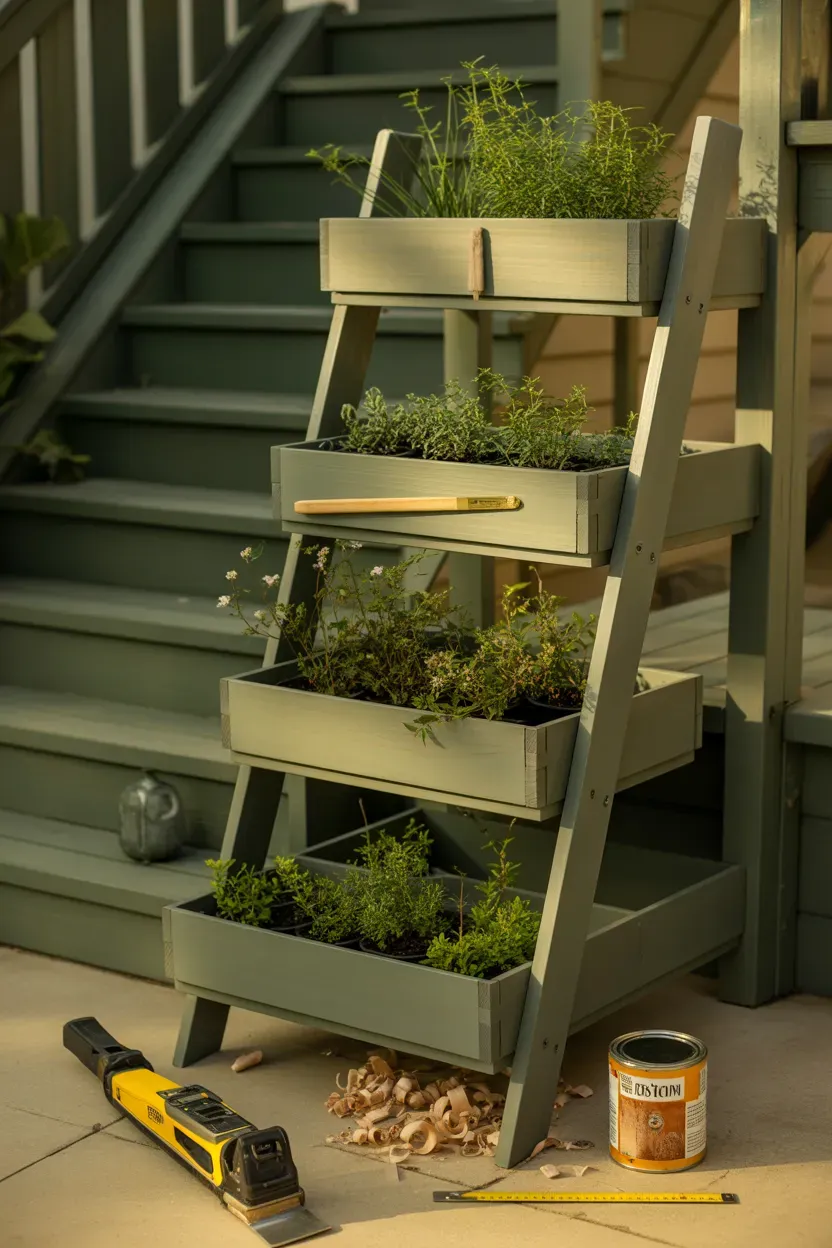
A freestanding tiered ladder planter is the most involved build on this list, but it delivers the biggest single visual impact and can be positioned right alongside a staircase for maximum effect.
You need 2×4 lumber for the frame, plywood or slat boards for shelves, wood screws, a saw, a drill, sandpaper, and exterior stain or sealant. Build a simple A-frame ladder structure with 3-4 staggered shelf levels, sand all edges smooth, then apply two coats of exterior sealant before adding potted plants to each level.
Pro Tip: Seal all cut edges, not just the visible surfaces — unsealed end-grain wood absorbs moisture fastest and is where rot typically starts first on outdoor builds.
Internal link: building tiered plant stands for vertical garden displays External link: Almanac’s guide to weatherproofing outdoor wood projects
Budget a full day for this one, but the payoff is a genuine focal point.
7. PVC Pipe Vertical Planter for Modern Space-Saving Design
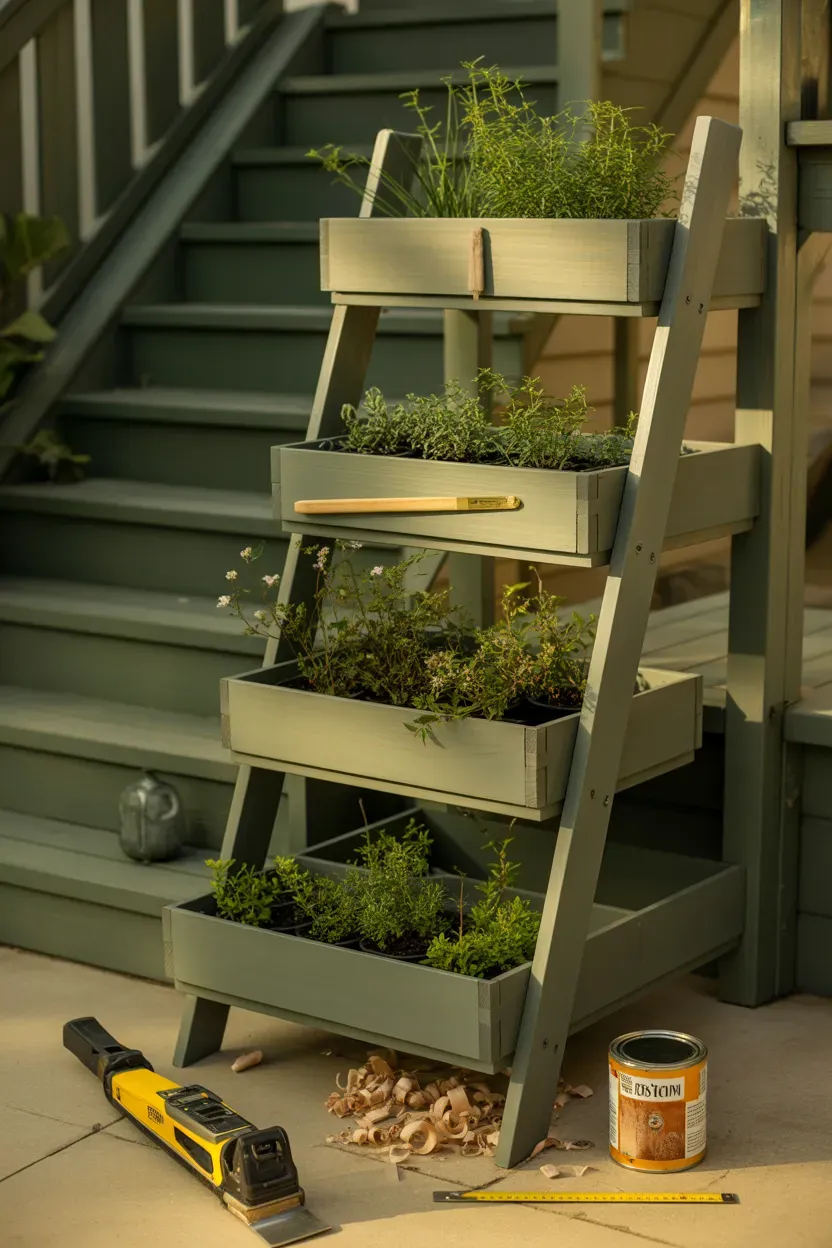
PVC pipe, cut and mounted at an angle, creates a genuinely modern vertical planter that uses almost no floor space and costs very little in materials.
You need 4-inch PVC pipe, a pipe cutter or hand saw, end caps, mounting brackets, and spray paint if you want a finished color rather than raw white pipe. Cut pipe into 12-18 inch sections, cut an angled opening along one side for planting, cap the bottom, and mount to a wall or fence beside the staircase at a slight downward angle for drainage.
Internal link: vertical gardening techniques for tight spaces External link: University of Florida Extension’s vertical container gardening notes
8. Cinder Block Step Planters for a Tool-Free Weekend Build
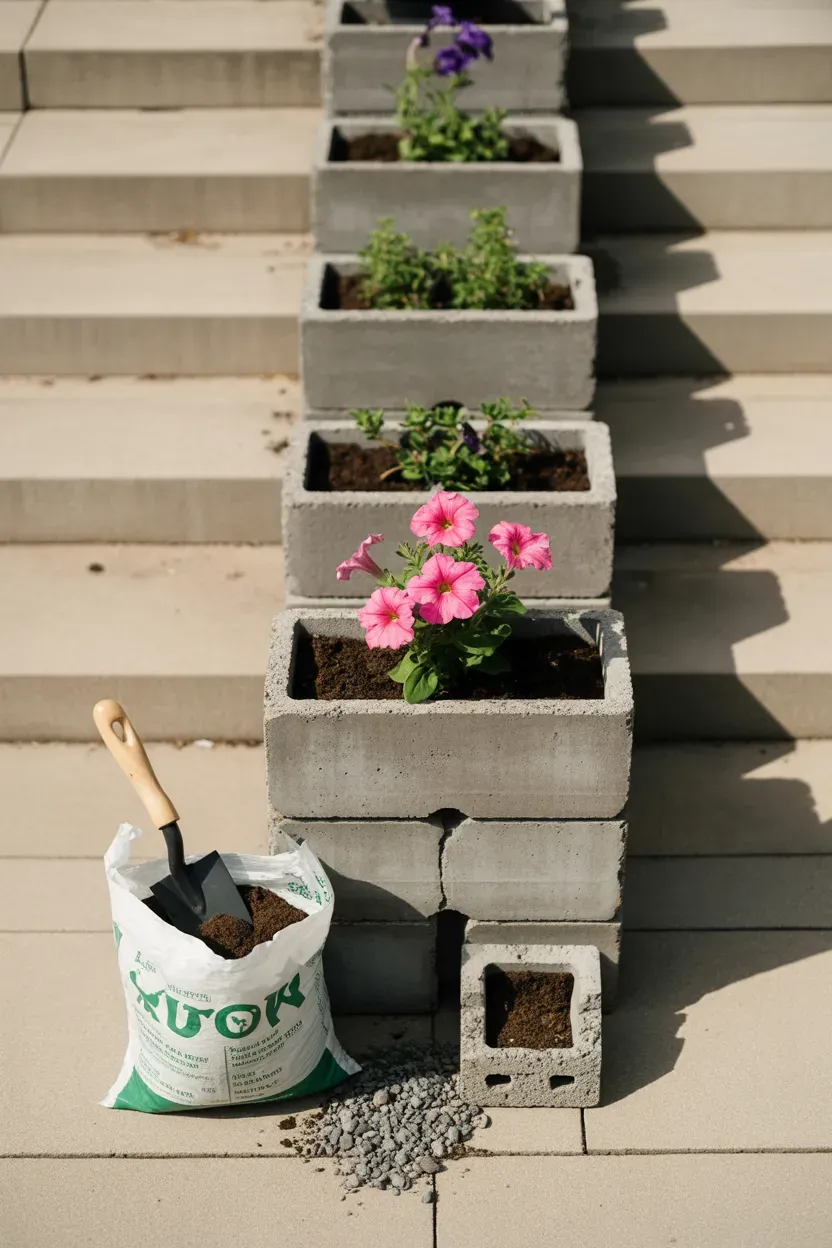
Cinder blocks require literally no tools beyond a bag of soil and a trowel, making this the only project on the list a total beginner can finish in under an hour.
You need standard cinder blocks (often free or under $2 each) and potting soil. Simply stack the blocks in your desired pattern along the staircase, fill the open cavities with soil, and plant directly. Paint them first with exterior masonry paint if you want more visual polish than raw gray concrete.
Internal link: no-tool container gardening for absolute beginners External link: BHG’s guide to using cinder blocks as planters
If you own zero tools, this is the project to start with.
9. Repurposed Drawer Planters for Free Vintage Character
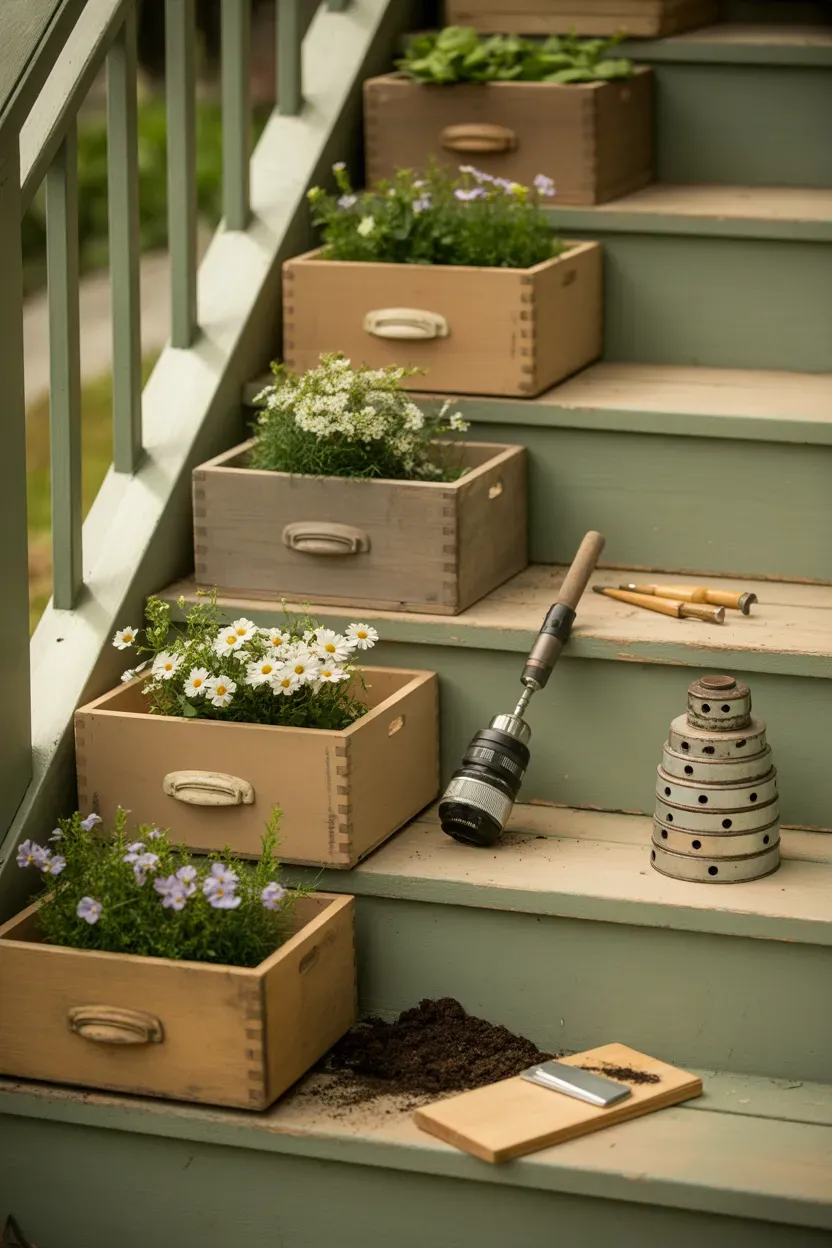
Old dresser drawers destined for the curb make surprisingly good planters, often costing nothing if sourced from a curbside find or a family piece being replaced.
You need a drawer (any size), a drill with a large bit for drainage holes, and landscape fabric if the wood is in rough shape. Drill 6-8 drainage holes across the bottom, line with fabric if needed, and fill with soil. Leave any original hardware attached for character rather than removing it.
Pro Tip: Elevate the drawer slightly on small wood scraps or bricks rather than setting it flat on a step — this keeps the bottom from sitting in standing water after rain, which rots unsealed wood fast.
Internal link: turning furniture pieces into garden planters External link: SF Gate Home Guide’s tips for converting furniture into planters
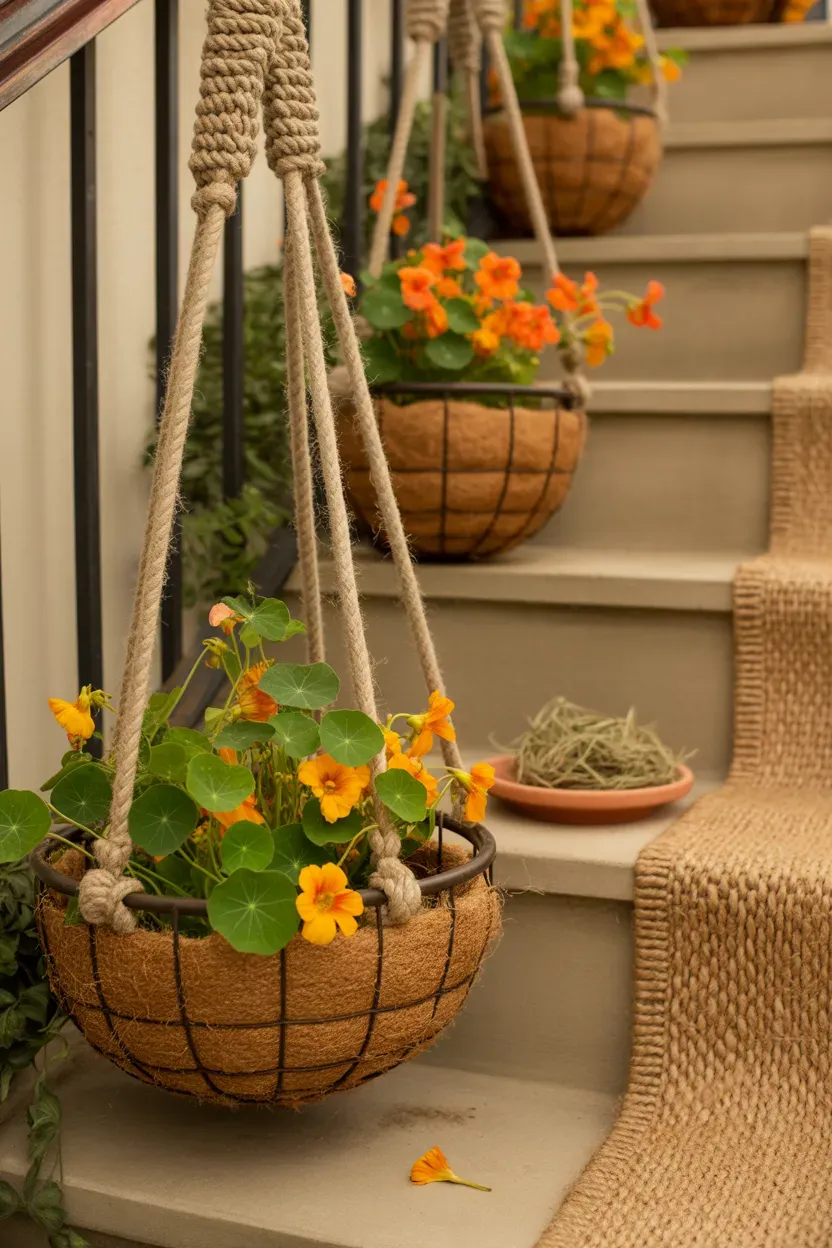
10. Rope-Hung Coco Baskets for a Bohemian Finish
Pre-formed wire baskets with coco fiber liners need no building at all — just tying and hanging — making this a genuinely tool-free project with a distinctly natural, bohemian look.
You need wire hanging baskets with coco liners, thick jute or hemp rope, and mounting hooks. Tie a secure hanging loop through each basket’s attachment points using a simple square knot, then hang from hooks mounted along the staircase structure at varying heights for visual interest.
Internal link: bohemian and natural-material garden styling ideas External link: RHS guide to coco-liner hanging basket care
11. Concrete Trough Molds for a Modern Handmade Look
Casting your own concrete trough planters takes the most patience of any project here, since curing time extends well beyond the actual building, but the result looks like an expensive designer piece.
You need quick-set concrete mix, a rectangular mold (a cardboard box lined with plastic works), a smaller box for the interior cavity, mixing tools, and a full 24-48 hours of cure time before unmolding. Mix concrete to a thick, oatmeal-like consistency, pour between the nested molds, insert a dowel for drainage holes before it sets, and let cure fully before removing the forms.
Internal link: casting concrete planters for outdoor garden use External link: Almanac’s guide to DIY concrete garden projects
Start this Friday evening so the cure time doesn’t eat into your actual weekend.
12. Wine Barrel Half Planters for Instant Established Character
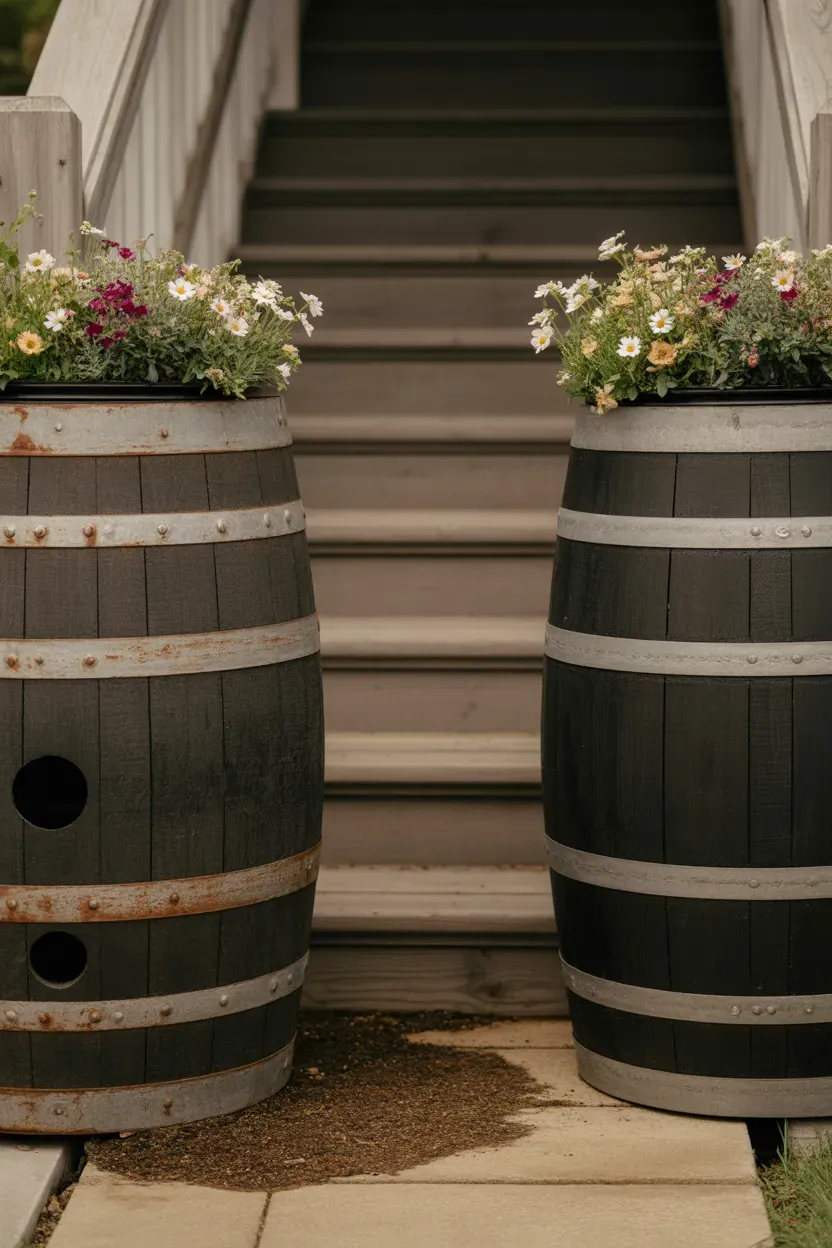
Half wine barrels, sold pre-cut at most garden centers for $30-50, need only drainage holes drilled before planting, giving an instantly established, substantial look without weeks of building.
You need a half barrel, a drill with a large bit, and landscape fabric if the wood shows gaps between staves. Drill 4-6 drainage holes in the bottom, add a layer of gravel for extra drainage, then fill with soil. Position a matching pair at the base of the staircase for a formal, symmetrical entrance.
Internal link: large statement planters for staircase entrances External link: Missouri Botanical Garden’s guide to large wooden container gardening
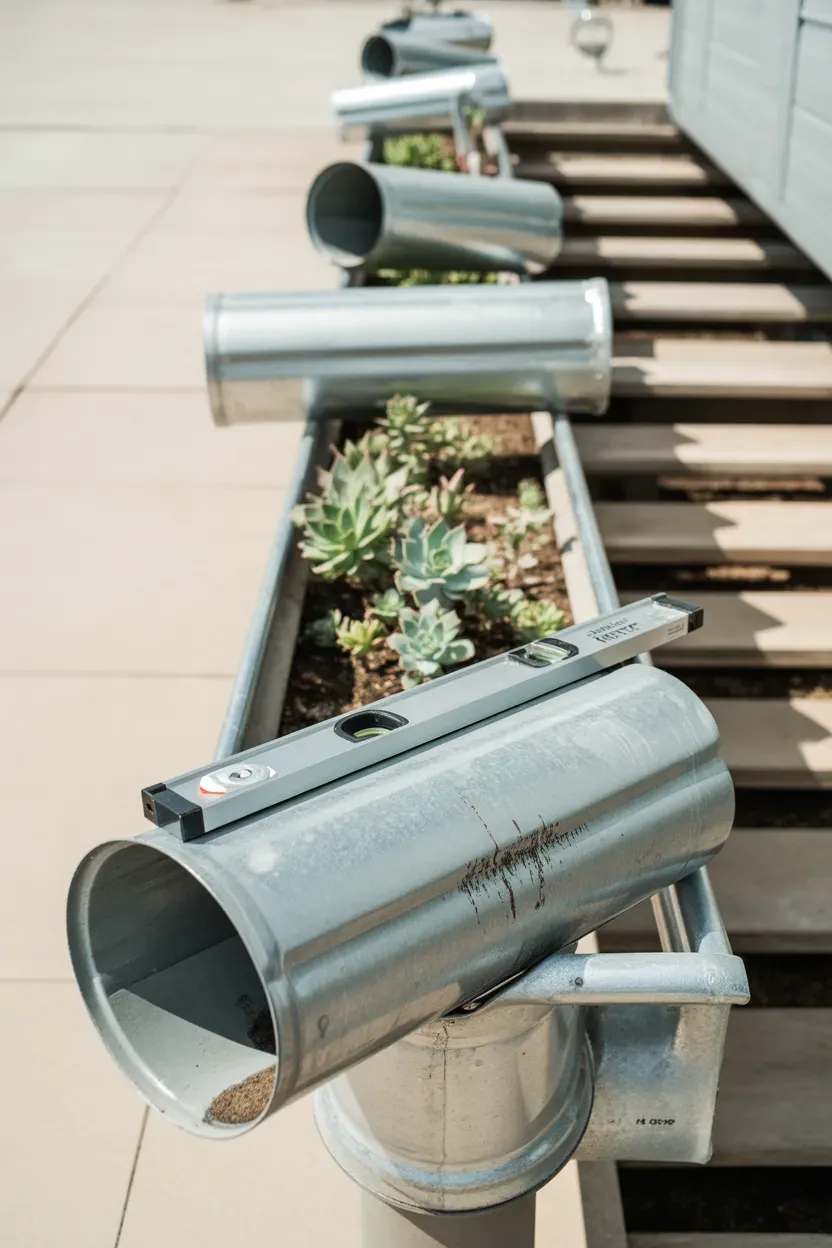
13. Gutter Trough Planters for Narrow Step-Edge Fits
Cut sections of rain gutter, capped at both ends, create a narrow trough perfectly suited to slim step edges where a standard round pot wouldn’t fit.
You need a length of vinyl or metal gutter, end caps, gutter mounting brackets, a saw, and a drill for drainage holes. Cut the gutter into sections matching your step width, seal the end caps with exterior caulk, drill drainage holes every 4-6 inches along the bottom, then mount using standard gutter brackets.
Pro Tip: Choose vinyl gutter over metal if your staircase gets full sun — metal gutters heat up significantly in direct sunlight and can scorch shallow plant roots close to the trough walls.
Internal link: narrow container solutions for tight step edges External link: Gardeners’ World’s guide to shallow trough planting
14. Stacked Terracotta Tower for a Five-Minute Assembly
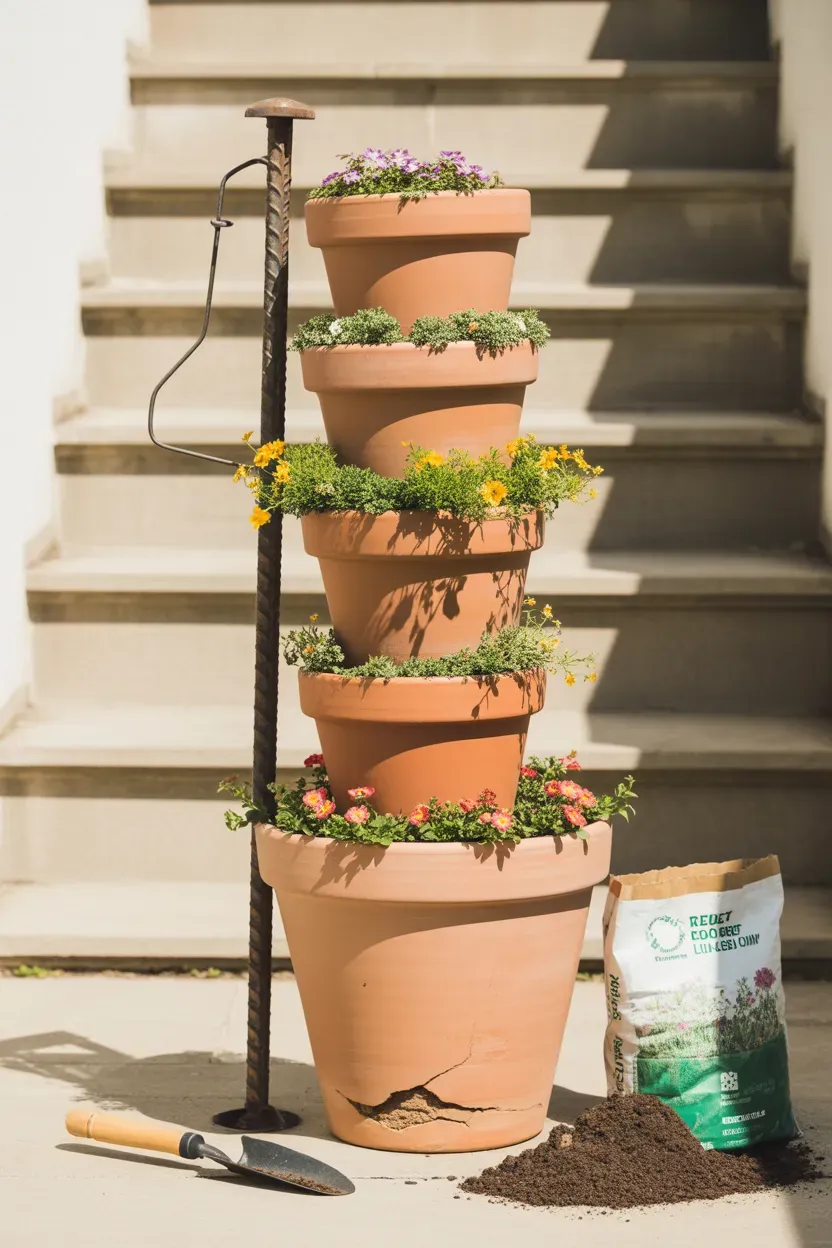
Stacking terracotta pots of decreasing size around a central rebar stake creates a whimsical tower that takes about as long to build as it does to explain.
You need 4-5 terracotta pots in graduated sizes, a length of rebar or a thick wooden stake, and soil. Drive the stake into the ground first, thread the largest pot down over it, fill with soil, then repeat with progressively smaller pots stacked at slight angles so each tier has room to plant.
Internal link: creative stacking techniques for vertical container gardens External link: BHG’s guide to building a stacked pot tower
15. Chalk-Painted Tin Cans for a $5 Full-Staircase Project
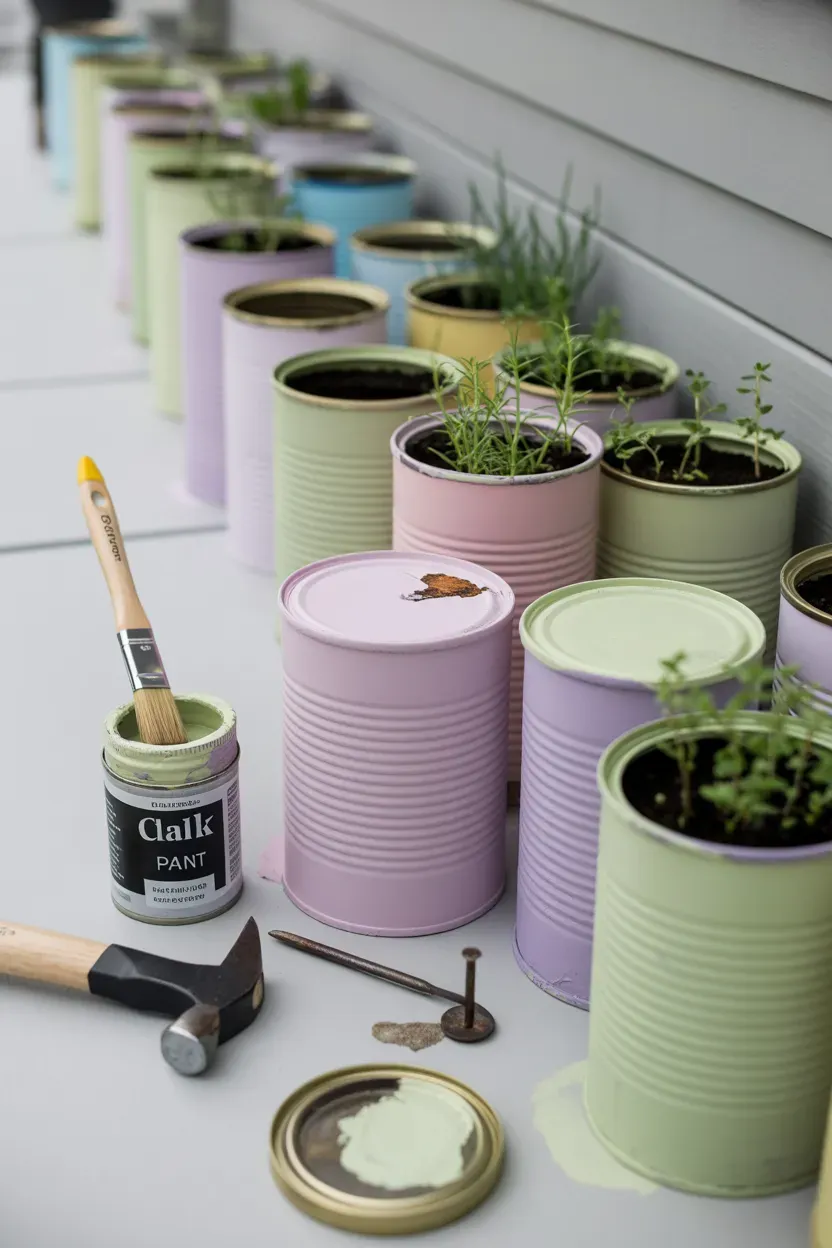
Washed tin cans from the recycling bin, hammered with drainage holes and painted, make a genuinely charming and essentially free planter set for small herbs or succulents.
You need clean tin cans, a hammer and nail for drainage holes, chalk paint, and a paintbrush. Hammer 4-5 holes through the bottom of each can, apply 2 coats of chalk paint in your chosen color, let dry fully, then fill with soil and small plant starts.
Internal link: upcycled container ideas from household recycling External link: Almanac’s guide to painting and prepping recycled containers
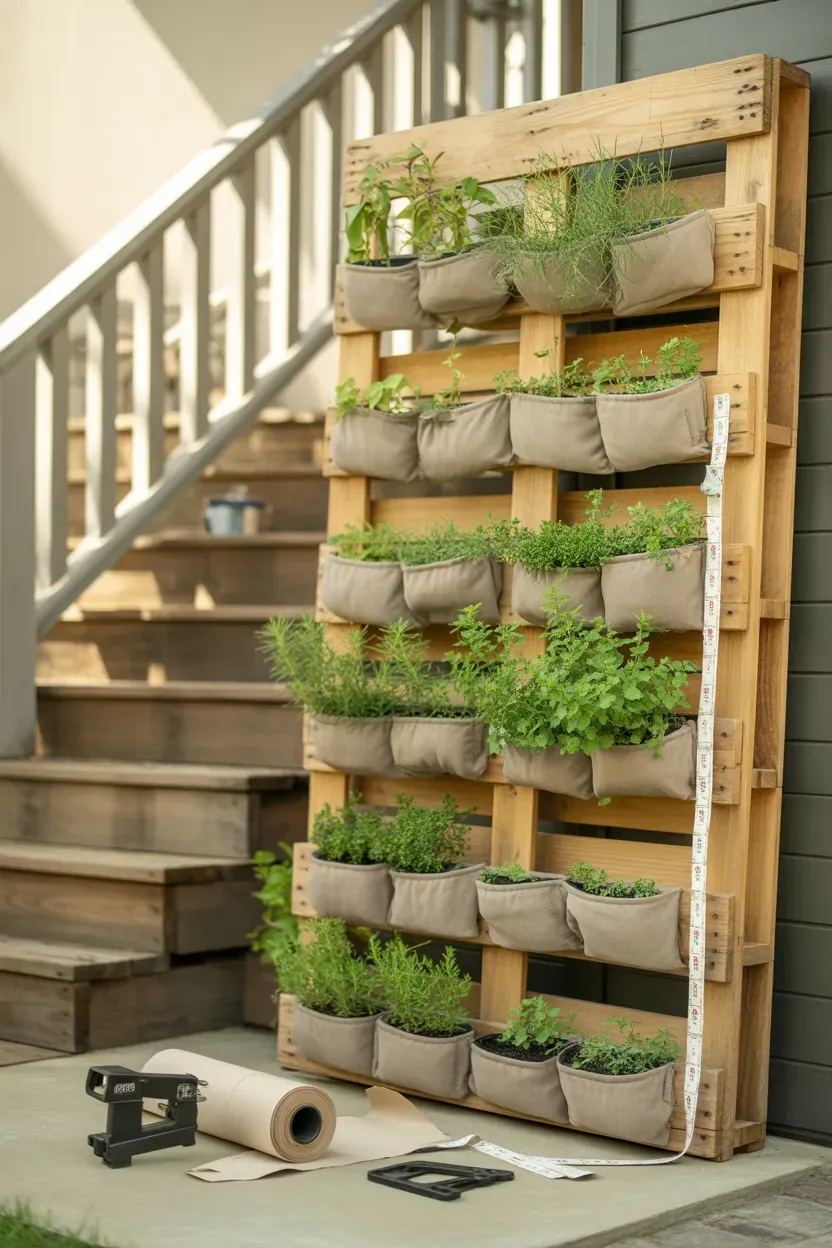
16. Vertical Pallet Garden for Maximum Plants in Minimum Space
A single upright pallet, fitted with fabric pockets across its slats, holds more individual plants in the same footprint than any other project on this list.
You need a heat-treated pallet, heavy landscape fabric, a staple gun, wall mounting brackets, and a drill. Staple fabric pockets across each row of slats, let the pallet lie flat and fill with soil for about two weeks to let roots establish, then mount it upright against a wall or fence beside the staircase.
Pro Tip: Water a newly planted vertical pallet garden from the top down and let it lie flat for the first 2 weeks — mounting it upright immediately after planting often causes soil to wash out of the lower pockets before roots can hold it in place.
Internal link: building a vertical pallet garden for herbs and small plants External link: University of Florida Extension’s vertical garden growing notes
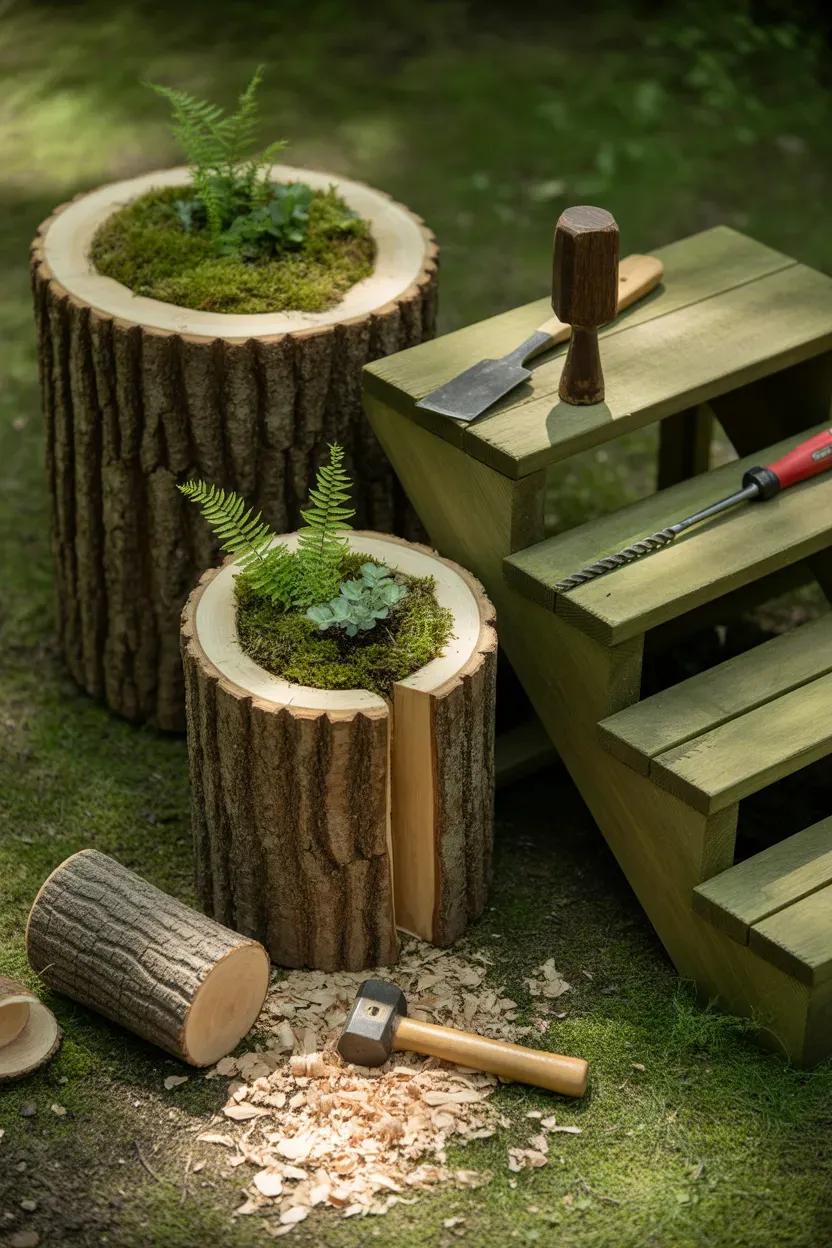
17. Rustic Log Slice Planters for a Woodland-Inspired Build
Hollowing a section of fallen log into a natural planter takes real elbow grease but produces something no store-bought container can replicate.
You need a log section (8-12 inches in diameter), a drill with a large spade bit, a chisel and mallet, and sandpaper. Drill a series of overlapping holes to rough out the interior cavity, then clean up the edges with the chisel, sand the rim smooth, and drill 2-3 drainage holes through the remaining base.
Internal link: natural material planters for woodland garden style External link: SF Gate Home Guide’s guide to hollowing log planters
18. Built-In Corner Shelf Planters for a Permanent Feature
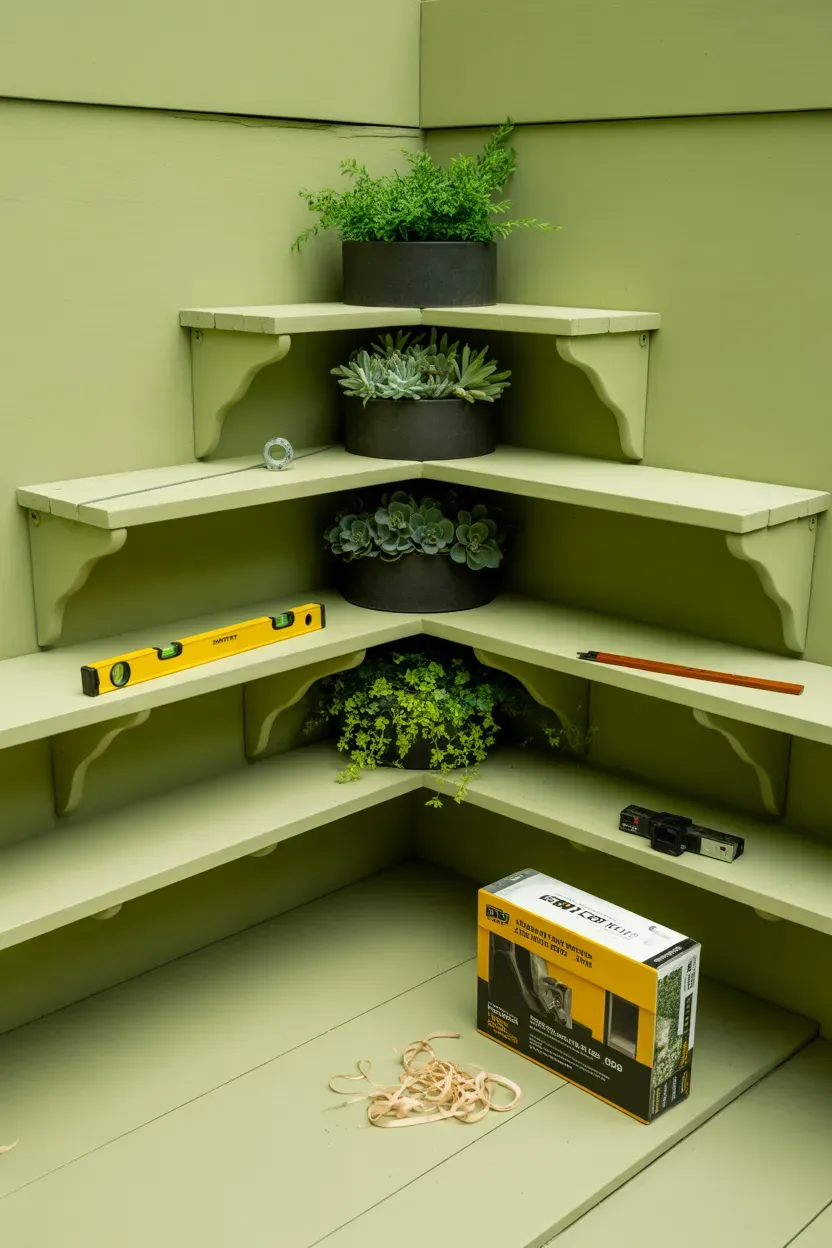
Building a permanent corner shelf unit at a staircase landing is the most architecturally involved project here, essentially adding built-in furniture rather than just a planter.
You need plywood or solid boards, wood screws, heavy-duty wall anchors or brackets rated for the combined weight of pots and soil, a saw, a drill, and a level. Cut boards to fit the corner space, assemble into staggered shelf levels, then secure firmly into wall studs (not just drywall) since the finished weight with planted pots can exceed 50-60 pounds.
Internal link: structural considerations for built-in garden shelving External link: BHG’s guide to building secure wall-mounted shelving
Check your wall anchor weight rating twice before mounting — this is the one project where a mistake here really matters.
19. Copper Pipe Plant Stands for an Industrial-Chic Accent
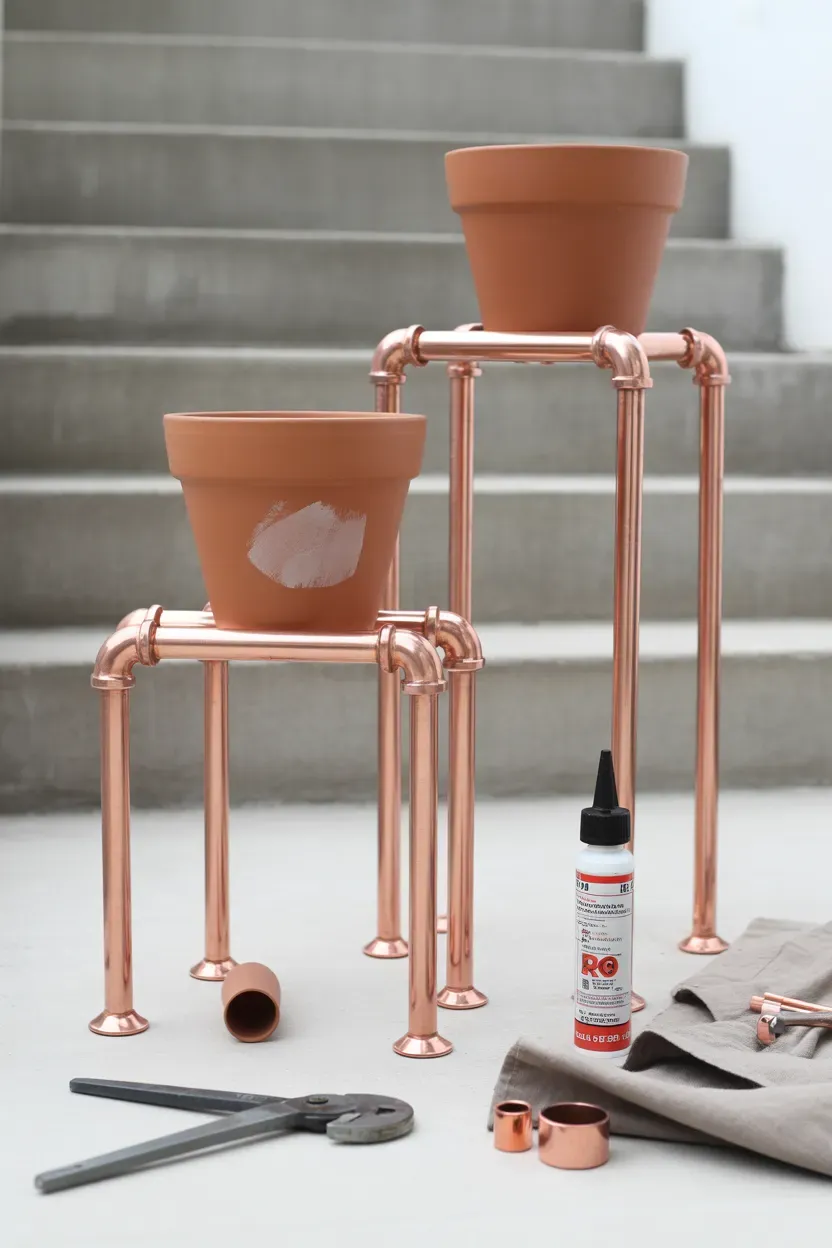
Copper pipe, cut and fitted into simple geometric stands, brings a genuinely modern, industrial-chic accent to a staircase for less than the cost of a single designer plant stand.
You need 1/2-inch copper pipe, copper elbow and T-fittings, a pipe cutter, and pipe adhesive or a small torch for soldering (adhesive is easier for beginners). Cut pipe into matching leg lengths, dry-fit the frame first to check stability, then glue or solder the joints and let cure before adding a pot on top.
Internal link: modern industrial-style plant stand projects External link: RHS guide to selecting stands and supports for potted plants
20. Repurposed Ladder Shelf Planter for Instant Vintage Height
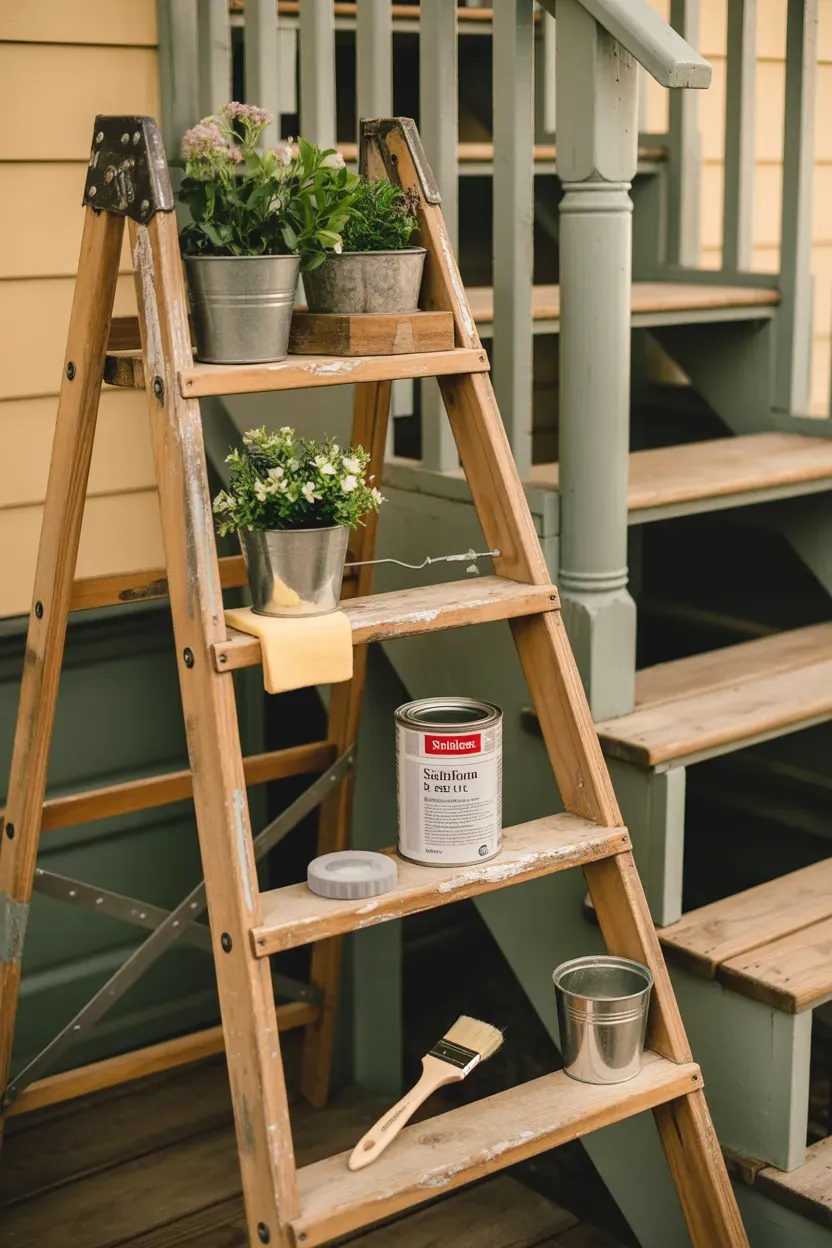
An old wooden step ladder, whether thrifted or pulled from storage, converts into an instant tiered plant display with essentially no building required beyond a light sanding and sealant.
You need an A-frame wooden step ladder in stable condition, sandpaper, and exterior sealant or paint. Sand any rough or splintering areas smooth, apply 1-2 coats of exterior sealant to protect the wood from weather, then set pots directly on each rung, using the widest pots on the bottom steps for stability.
Pro Tip: Test the ladder’s stability on your actual staircase surface before loading it with planted pots — an uneven or sloped step surface can make a top-heavy ladder display genuinely tip-prone.
Internal link: repurposing furniture for tiered garden displays External link: Gardeners’ World’s guide to tiered plant stand styling
This project takes the least building of anything on the list but delivers real vintage charm.
Getting Started With DIY Staircase Gardens
The easiest first step is picking a no-tool or low-tool project like drilled buckets or stacked cinder blocks before attempting anything that involves cutting lumber — build confidence with a quick win before tackling a full-day project. The most common beginner mistake is skipping drainage holes entirely or drilling too few, which leads to waterlogged soil and root rot within a few weeks regardless of how well-built the planter looks.
For your first build, get one project’s specific materials list (don’t buy for multiple projects at once), a basic cordless drill if you don’t already own one, and enough soil and plants to fill what you build immediately, since empty planters left overnight often get forgotten.
Realistically, expect the simplest projects (buckets, crates, cinder blocks) to be plantable the same day, while builds involving cutting and assembly, like window boxes or the tiered ladder planter, take a full weekend day including drying or curing time.
Frequently Asked Questions
What tools do I need for a DIY staircase garden project?
Most projects on this list only require a cordless drill; more involved builds like window boxes or tiered planters also need a saw and basic wood screws. Beginners can complete several genuinely tool-free projects, like cinder block or rope-hung basket planters, using nothing but a bag of soil and a trowel.
How much does a DIY staircase garden cost compared to buying pre-made?
Most DIY projects on this list run $15-40 in materials, compared to $150-300 for equivalent pre-made planter sets from garden centers. Reclaimed materials like pallets, crates, or found furniture can push costs even lower, sometimes under $10 for a full staircase display.
Is reclaimed pallet wood safe to use for planters?
Yes, as long as the pallet is stamped “HT” for heat-treated rather than “MB” for methyl bromide fumigation, which isn’t safe for garden use. Check the stamp on the pallet’s block before disassembling it, and avoid any pallet with unclear or missing markings.
How long does it take to build a DIY staircase planter?
Simple no-tool projects like drilled buckets or cinder block stacks take under two hours total, while more involved builds like window boxes or the tiered ladder planter need a full 4-8 hour day including drying time. Concrete trough projects need an additional 24-48 hours of cure time before use.
What’s the easiest DIY staircase garden project for a complete beginner?
Drilled bucket planters and stacked cinder blocks are the easiest, requiring no cutting and minimal tools beyond a drill or none at all. Both can be completed and planted within an hour or two, making them the best starting point before attempting projects that involve saws or wall mounting.
A Few Final Thoughts
Any one of these 20 DIY staircase garden ideas proves that a genuinely impressive staircase transformation doesn’t require advanced carpentry skills or a big weekend commitment. Start with a no-tool or low-tool project to build confidence, then work up to the bigger builds like the tiered ladder planter once you’ve got a successful first project under your belt. The materials for most of these ideas can be sourced free or nearly free if you’re willing to check curbsides, hardware store scrap bins, and secondhand shops before buying new. Pick one project this weekend, gather the specific materials list, and you’ll likely have a finished, planted staircase display before Sunday evening.