
There’s a moment every gardener hits — usually staring at a blank rectangle of lawn — where the plants matter less than the plan. A garden with a strong layout looks intentional and full even with modest planting, while a garden with no layout looks scattered no matter how many flowers you cram in. In this guide I’m walking through 22 garden layout ideas that work in real yards, from tiny patios to sprawling backyards, with the exact spacing and structure that makes each one succeed. Ready? Let’s explore all 22 of them.
Why Garden Layout Ideas Are Worth Your Time
A good layout is the difference between a garden that photographs well in July and one that still looks intentional in November, because structure — not just flower color — is what carries a space through the seasons. In practice, gardeners consistently find that a well-planned layout actually reduces long-term maintenance, since plants grouped by water and light needs stop competing with each other.
What makes layout planning especially rewarding is that it’s largely free — repositioning existing plants, adding a curved edge, or repeating a shape three times costs nothing but time. A lesser-known fact: repetition, not variety, is what makes professional-looking gardens feel cohesive; using the same plant or shape three or more times throughout a space reads as “designed” even to people who can’t say why.
This list is ideal for beginners staring at an empty yard, renters wanting a layout they can take ideas from without commitment, and busy homeowners who want a garden that looks good with less trial and error.
At a Glance
- A circular cutting garden turns a corner of lawn into a nonstop supply of fresh flowers for the house.
- Repeating the same three plants in a curved border instantly makes a bed look professionally designed.
- A herb spiral packs a dozen herbs with different water needs into one 4-foot circle.
- Tiered hillside terraces turn a frustrating slope into your most productive growing space.
- A moon garden of white and silver blooms is a layout most people never think to try — and it glows at dusk.
Classic English Cottage Border
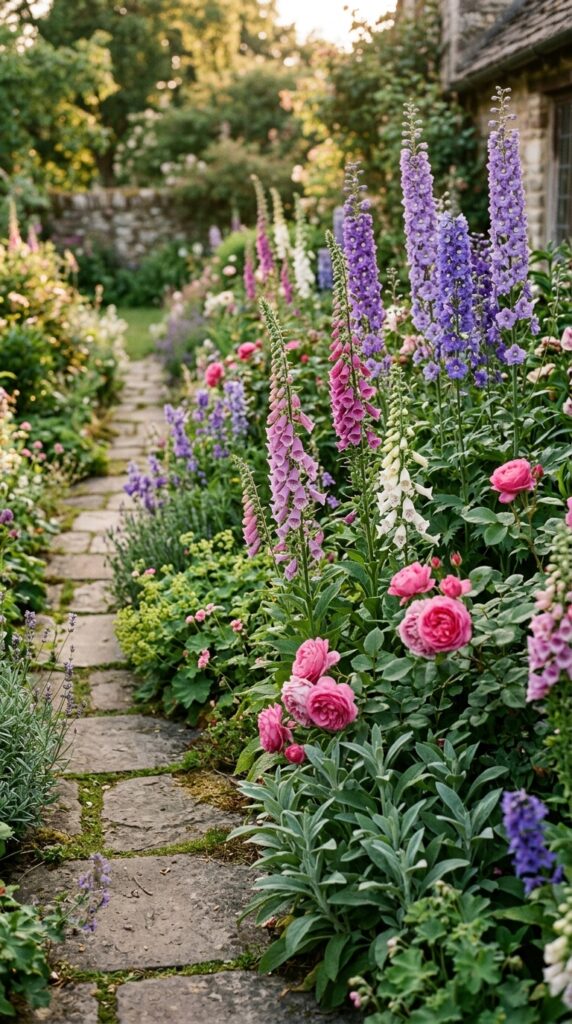
A cottage border layers tall, medium, and low plants in loose, informal drifts rather than straight rows, creating a full, romantic look along a fence, path, or wall.
Plant tall spires like delphinium or foxglove at the back, mid-height bloomers like roses and phlox in the middle, and low fillers like catmint or lady’s mantle at the front edge — a 3-tier height structure is what keeps it from reading as messy. Space plants closer than seed packets suggest (about 25% tighter) so foliage overlaps and no bare soil shows by midsummer.
The common mistake is planting in straight lines within each height tier; stagger plants in loose zigzags instead so the border reads as naturally drifted rather than gridded.
💡 Pro Tip: Plant in odd numbers (3, 5, 7) of each variety — odd groupings look intentional to the eye in a way even numbers never quite do.
Explore companion pairings in our cottage garden plant list, and see Gardeners’ World’s border planning guide for seasonal succession tips. This layout rewards a little patience — it looks best in its second full year.
Symmetrical Formal Parterre
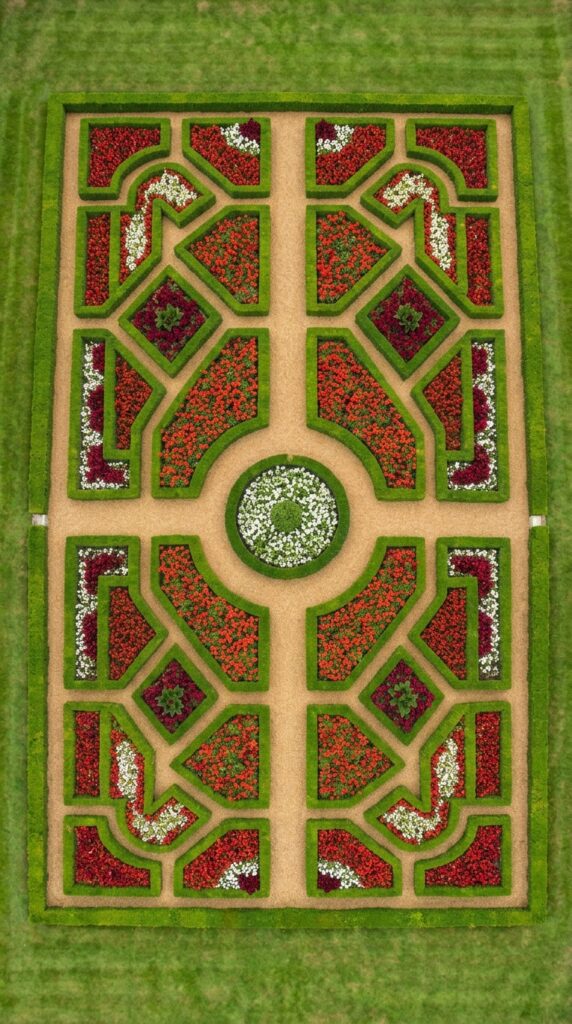
A formal parterre uses low clipped hedges to outline geometric shapes — squares, diamonds, or rectangles — with flowers or gravel filling the enclosed spaces, creating a symmetrical, architectural layout.
Use dwarf boxwood or germander for the hedge outlines, planted 12–18 inches apart in a straight line so the hedge reads as one continuous shape once it fills in after a season or two. Lay the design out with string and stakes before planting to guarantee true symmetry, then fill enclosed sections with a single repeating flower color rather than a mix, which keeps the formal effect intact.
Best plants for parterre hedging: dwarf boxwood, dwarf yaupon holly, germander, or dwarf lavender for a softer look.
This layout needs regular shearing — twice a year minimum — to stay crisp, so it’s better suited to gardeners who enjoy that kind of maintenance rhythm than those wanting a hands-off bed.
See our guide to hedge shaping for beginners, and check the RHS parterre design guide for historical layout templates. A well-kept parterre turns even a small front yard into a genuine focal point.
Circular Cutting Garden Bed
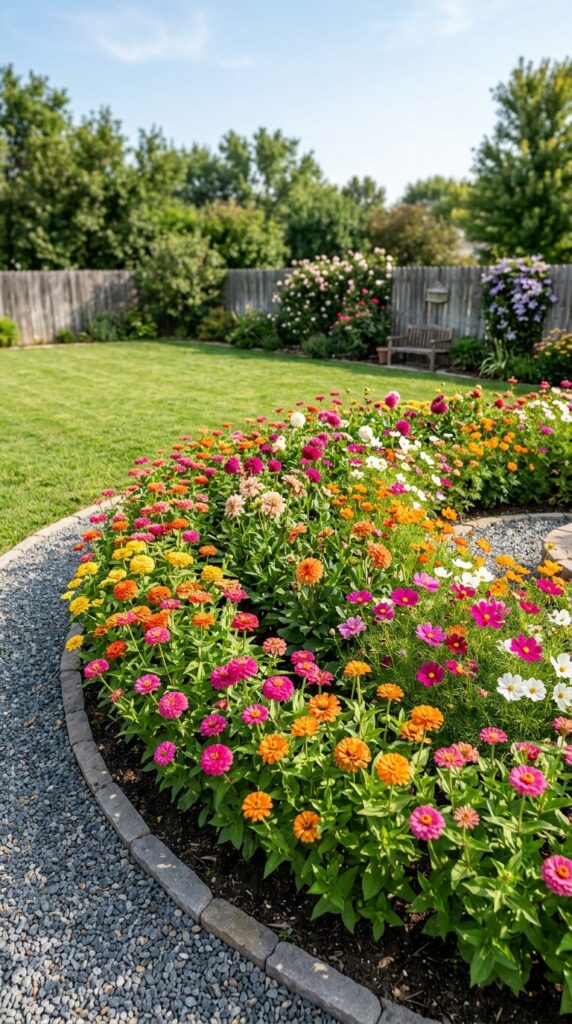
A circular cutting garden dedicates one contained bed — often 8 to 12 feet across — entirely to flowers grown for cutting, arranged in short rows radiating from or crossing the circle so you can harvest without trampling other blooms.
Plant fast, prolific bloomers like zinnias, cosmos, dahlias, and sunflowers in rows spaced 12 inches apart, leaving narrow foot paths between rows for harvesting access. Full sun (6+ hours) and rich, well-draining soil are essential since cutting flowers are heavy feeders that need consistent energy to keep reblooming.
The pro insight most beginners miss: cut generously and often, not sparingly. Regular cutting is what triggers most annuals in this bed to keep producing new blooms — an uncut cutting garden actually produces fewer flowers over the season.
💡 Pro Tip: Place the circular bed somewhere you’ll walk past daily — proximity is what actually gets you cutting flowers regularly instead of letting them go to seed.
See our full cutting garden variety guide, and check the Almanac’s cutting garden layout notes for succession planting timing. A well-tended cutting circle can supply fresh bouquets from June through frost.
Raised Bed Kitchen Garden Grid
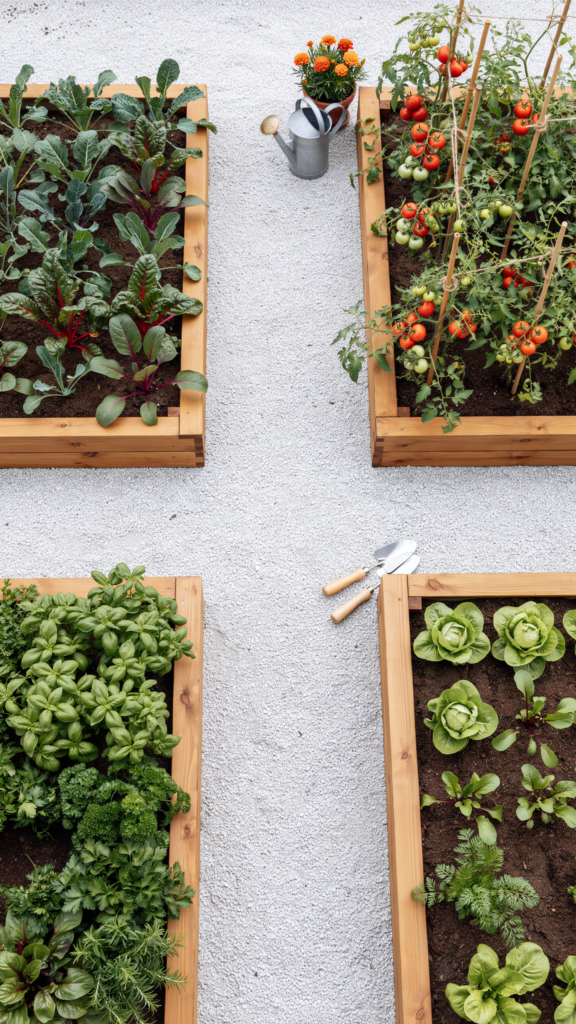
A grid of raised beds — typically four to six rectangular boxes arranged with paths between — turns vegetable growing into an organized, easy-to-maintain system rather than one sprawling in-ground plot.
Build beds 4 feet wide (so you can reach the center from either side without stepping in) and space them with 18–24 inch gravel or mulch paths between. Fill with a mix of topsoil, compost, and aged manure, and orient the grid so all beds get equal sun exposure rather than shading each other.
This layout makes crop rotation simple — assign each bed a plant family and rotate which bed grows what each year, which cuts down on soil-borne disease significantly.
Best layout for beginners: four 4×8 beds in a simple square grid; advanced growers can add a fifth bed for a dedicated herb or flower section.
Learn bed-building specifics in our raised bed construction guide, and see Penn State Extension’s crop rotation planning for family groupings. This layout scales easily if you want to add more beds later.
Curved Island Bed

An island bed sits in the middle of open lawn rather than against a wall, meaning it needs to look good from every angle — which changes how you plant it compared to a standard border.
Plant the tallest specimens near the center of the bed rather than at the back, tapering down to shorter plants around the entire perimeter so no side looks unfinished. Use a curved, organic outline (a kidney or teardrop shape works well) rather than a straight-edged rectangle, since curves read more naturally in open lawn space.
The common mistake is treating an island bed like a border and putting all the tall plants on one side — from the opposite angle, the bed looks bald and lopsided.
💡 Pro Tip: Walk a full circle around the bed’s location before planting and mark your primary viewing angles — even in an all-sides bed, most people will see it from one or two spots more often, so weight slightly taller color toward those views.
See our guide to island bed shaping, and check BHG’s island bed design ideas for size proportions. A well-shaped island bed becomes the visual anchor of an entire backyard.
Layered Foundation Planting
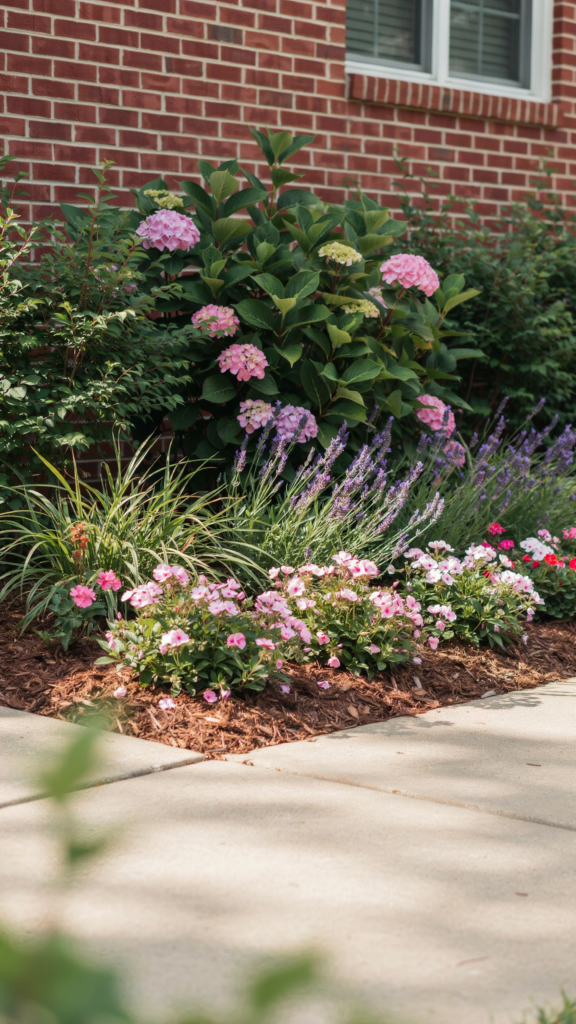
Foundation planting softens the base of a house with a layered bed running along the wall, using a tiered height structure so the planting doesn’t block windows or hide architectural details.
Place taller shrubs at least 3 feet from the wall (to allow for growth and airflow) and away from windows, then step down to mid-height shrubs and finally low groundcover or flowers at the very front edge. Keep total bed width in proportion to the house — a narrow 2-foot strip looks stingy against a large facade, while 5–6 feet reads as intentional.
The pro insight: leave sightlines to windows and doors open. Foundation planting should frame the house, not swallow it — prune or choose dwarf varieties near any window that plants might eventually block.
Layer structure: tall evergreen shrubs (back) → flowering mid-height shrubs (middle) → low groundcover or annuals (front edge).
Explore shrub choices in our foundation planting shrub guide, and see the Missouri Botanical Garden’s foundation design notes for regional shrub sizing. This layout is often the single biggest curb-appeal upgrade available to a homeowner.
Herb Spiral
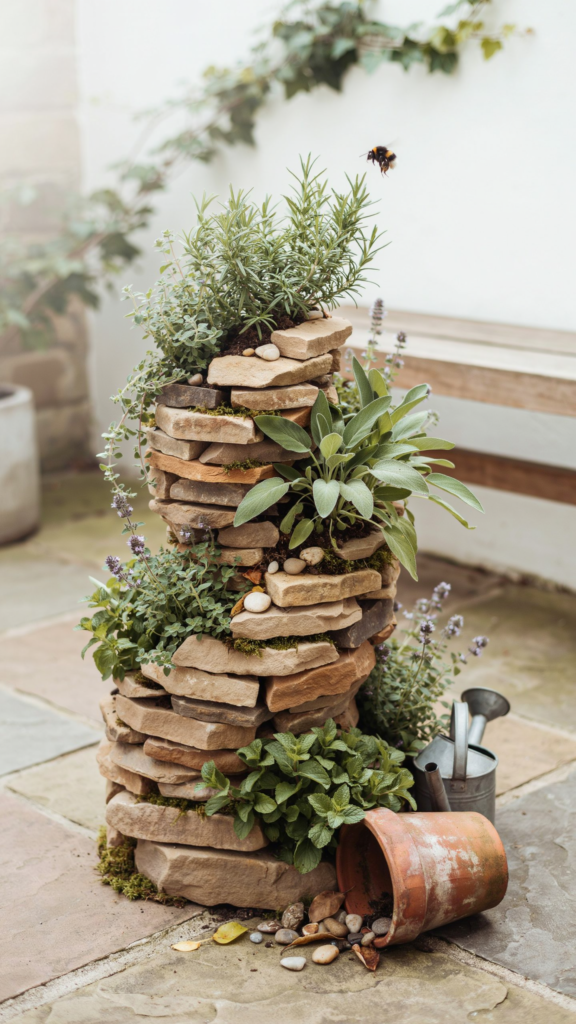
A herb spiral stacks soil and stone into a rising spiral shape, creating multiple microclimates — dry and sunny at the top, cool and moist at the base — in one compact 4-foot-diameter footprint.
Build the spiral with stacked stone or brick rising to about 3 feet at the center, filling with well-draining soil mixed with sand near the top and richer, moisture-retentive soil near the base. Plant drought-loving herbs like rosemary, thyme, and oregano at the sunny top, and moisture-loving herbs like mint, parsley, and chives near the shaded, damper bottom.
The common mistake is filling the whole spiral with the same soil mix, which defeats the purpose — the microclimate effect only works if drainage genuinely differs from top to bottom.
💡 Pro Tip: Plant mint at the very base in its own buried container even within the spiral — mint spreads aggressively and will take over the whole structure within a season if left unchecked.
See our full herb spiral building guide, and check gardenersworld.com’s herb spiral instructions for stone sourcing tips. It’s one of the most space-efficient layouts on this entire list.
Gravel Garden with Stepping Stones

A gravel garden replaces lawn or mulched beds with a layer of decorative gravel, punctuated by flat stepping stones for a path and drought-tolerant plants growing directly through the gravel surface.
Lay landscape fabric or a weed barrier first, then top with 2–3 inches of gravel, setting stepping stones directly into the gravel bed at natural walking-stride intervals (about 24–28 inches apart). Plant through cut holes in the fabric, favoring Mediterranean and drought-tolerant species like lavender, sedum, and ornamental grasses that thrive in the reflected heat gravel produces.
This layout drastically cuts watering and weeding — gravel suppresses most weeds on its own and reduces evaporation from the soil beneath compared to bare mulch.
Best plants for gravel gardens: lavender, sedum, Russian sage, and ornamental grasses like blue fescue.
Learn about gravel selection in our hardscaping materials guide, and see the Almanac’s gravel garden notes for regional plant recommendations. This layout is a strong choice for anyone tired of mowing.
Moon Garden

A moon garden plants exclusively white and pale silver flowers and foliage, designed specifically to be viewed in the evening or under moonlight when white blooms reflect available light far more than any other color.
Choose plants like white cosmos, moonflower vine, white nicotiana, and silver-leafed dusty miller, positioning the bed somewhere you’ll actually sit outside in the evening — near a patio or bedroom window works well. Group white flowers densely rather than sparsely, since the glowing effect depends on mass, not individual blooms.
The lesser-known detail here: many moon garden plants, like moonflower and nicotiana, release their strongest fragrance specifically at night to attract moths, so the layout rewards both sight and smell after sundown.
Explore fragrant night-bloomer options in our evening garden fragrance guide, and check thesill.com’s white garden plant list for container-friendly options. A moon garden turns a summer evening on the patio into something genuinely worth sitting outside for.
Drought-Tolerant Xeriscape Layout
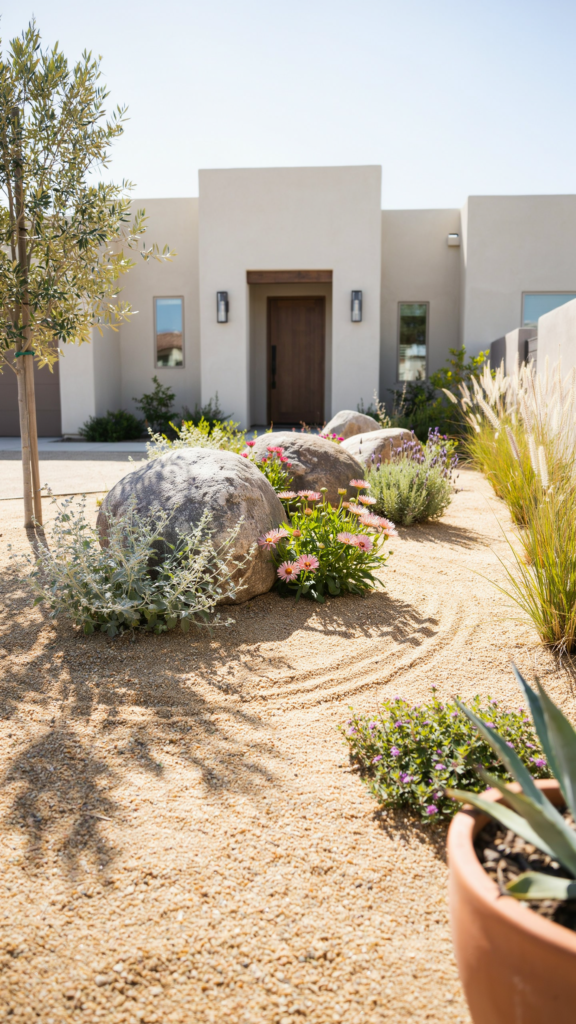
A xeriscape layout groups plants entirely by water need into zones, replacing thirsty lawn with gravel, boulders, and low-water plants arranged so no zone waters more than it needs.
Cluster true drought-tolerant plants — yarrow, sedum, lavender, Russian sage — into one zone that receives minimal irrigation, and keep any higher-water plants (like a small vegetable patch) in a separate zone near the house where hand-watering is convenient. Use boulders and gravel as structural elements that need zero water at all, breaking up plant clusters visually.
The common mistake is scattering a few drought-tolerant plants throughout a still-thirsty lawn-based layout — true water savings only happen when the whole layout, not just the plant choice, is redesigned around water zones.
💡 Pro Tip: Group plants by water need before you group them by color or bloom time — mismatched water needs in the same bed is the number one reason xeriscape conversions fail in year one.
See our full lawn-to-xeriscape conversion guide, and check extension.ufl.edu’s xeriscaping principles for zone planning specifics. This layout can cut outdoor water use dramatically once established.
Woodland Shade Garden Path
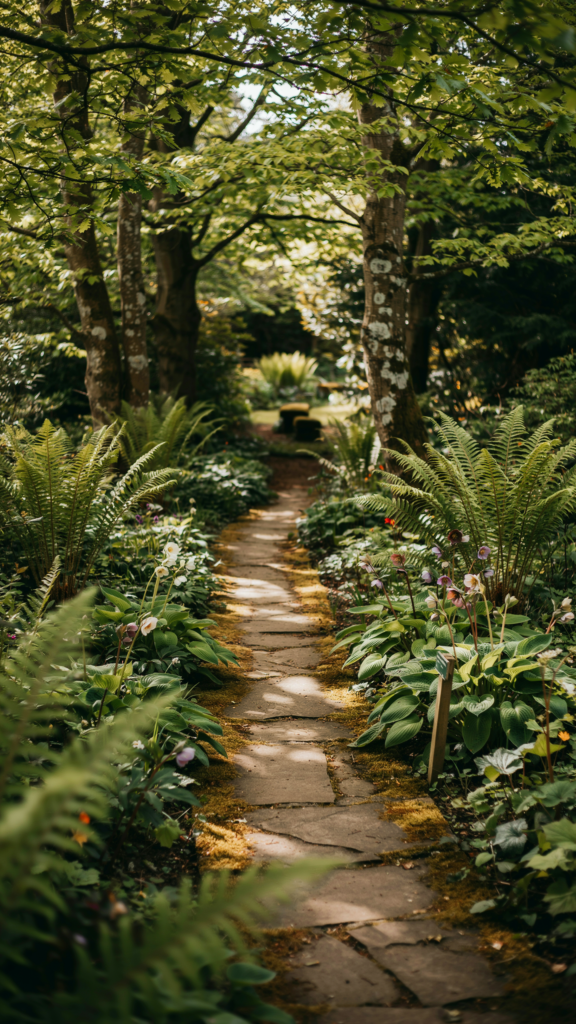
A woodland shade path winds through the shadiest part of a yard, using texture and foliage contrast — since flowers are scarcer in shade — with a curved, natural walking path as the organizing spine.
Plant broad-leafed hostas, feathery ferns, and low hellebores in overlapping drifts along both sides of a mulched or stepping-stone path, relying on leaf shape and shades of green rather than bright bloom color for visual interest. Curve the path rather than running it straight, since curves in shade gardens create a sense of discovery that a straight sightline eliminates.
The pro insight: shade gardens actually need more, not less, soil preparation than sunny beds, since tree roots compete heavily for both water and nutrients — work in extra compost when planting.
Best texture combinations: broad hosta leaves + fine fern fronds + upright hellebore foliage for maximum contrast.
Explore full plant pairings in our shade garden plant guide, and see the RHS shade planting guide for tree-root planting tips. This layout turns a yard’s most overlooked corner into its most peaceful one.
Tiered Hillside Terraces
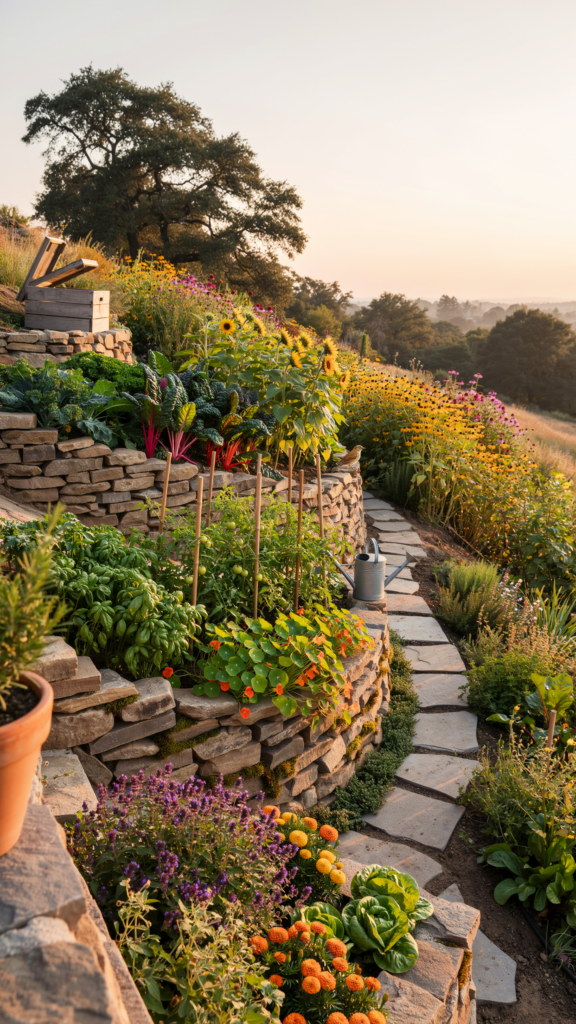
Tiered terraces convert a sloped yard — usually unusable for traditional beds because of erosion and runoff — into a series of stacked, level planting steps held in place by retaining walls.
Build each terrace with a retaining wall of stone, brick, or timber roughly 12–18 inches tall, backfilling with quality topsoil so each level is genuinely flat and won’t wash out in heavy rain. Space terraces so each has enough depth (at least 2 feet) for real planting rather than a narrow, unusable ledge.
This layout solves the single biggest problem of hillside gardens — soil erosion — since each terrace catches and holds water instead of letting it run straight downhill.
Beginner vs. advanced version: Beginners should start with two or three simple timber terraces; advanced gardeners can build stone terraces with integrated drainage pipes for steeper, more demanding slopes.
Learn retaining wall basics in our hillside garden construction guide, and check sfgate.com’s terracing how-to for slope-grading advice. A well-built terrace turns your yard’s most frustrating feature into its most productive.
Rectangular Raised Bed Rows
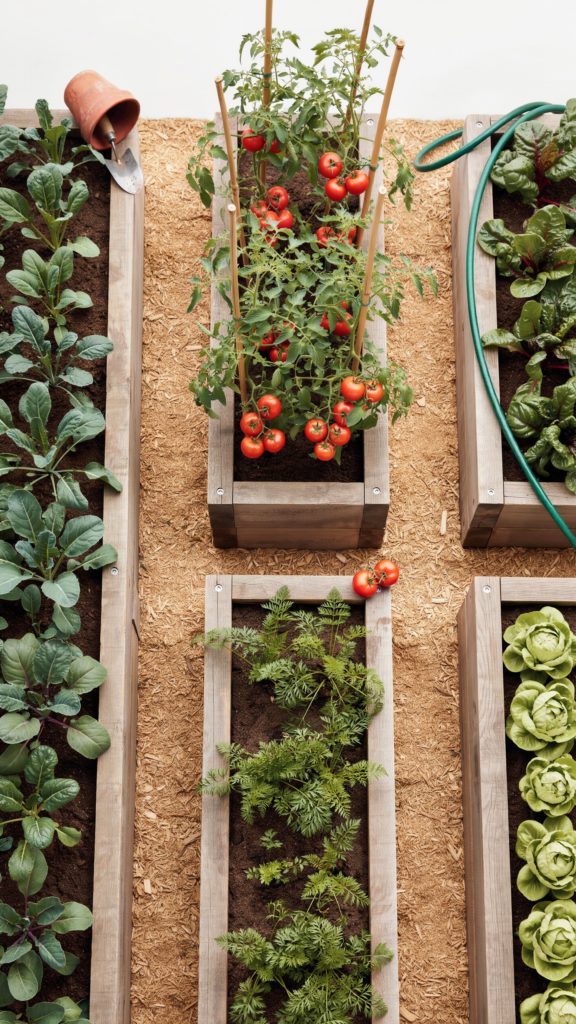
Row-style raised beds line up in parallel rectangles, an intentionally simple layout that prioritizes maximum growing space and easy mechanical access (wheelbarrows, hoses) over visual complexity.
Build beds no wider than 4 feet so both sides remain reachable, running them the long way north to south when possible so all rows get equal sun exposure through the day. Leave paths of at least 24 inches between rows — wide enough for a wheelbarrow — and mulch the paths heavily to cut down on weeding between beds.
The common mistake is spacing rows too tightly to save space; this backfires by shading neighboring beds as plants mature and making harvest access genuinely difficult by midsummer.
Explore bed sizing math in our vegetable garden planning calculator guide, and see extension.psu.edu’s row spacing recommendations for specific crops. This is the most efficient layout for anyone prioritizing yield over ornamental appeal.
Keyhole Garden Bed
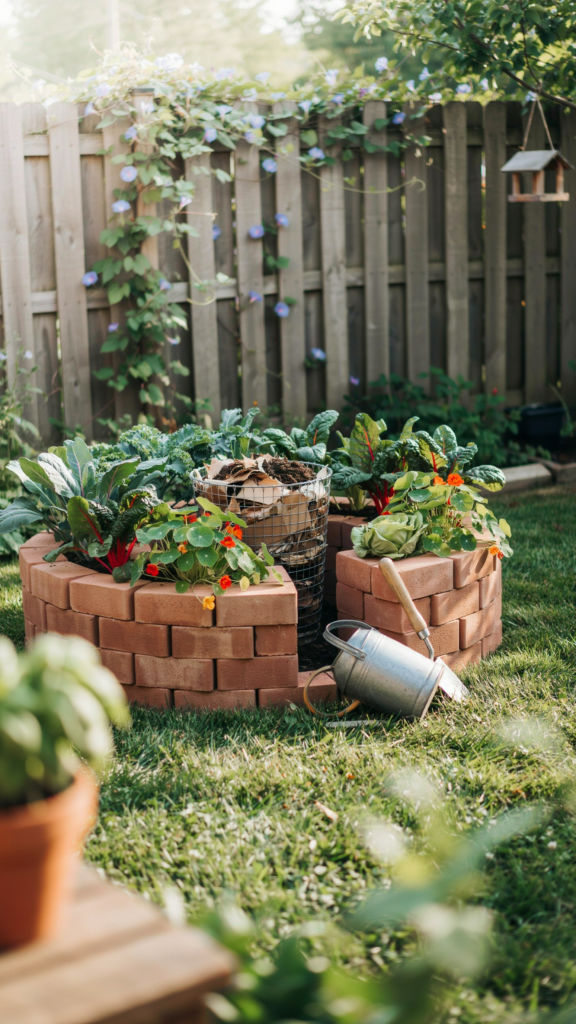
A keyhole garden is a circular raised bed with a wedge cut out of one side (like a keyhole) so you can walk into the center, where a compost basket feeds nutrients and moisture outward to the surrounding soil continuously.
Build the circular bed roughly 6 feet in diameter with raised walls 2–3 feet tall, placing a wire compost basket at the very center and cutting a narrow wedge path from the outer edge to that basket. Fill with layered soil and compost around the central basket, then add kitchen scraps and water directly into the basket regularly, which slowly distributes nutrients through the whole bed.
The pro insight: this layout is genuinely one of the most drought-resistant designs available, since the raised walls and central composting core retain moisture far longer than a flat, open bed in hot climates.
💡 Pro Tip: Line the inside of the raised wall with cardboard before filling with soil — it suppresses weeds from the sides and breaks down slowly, adding organic matter as it decomposes.
See our keyhole garden building tutorial, and check the Almanac’s keyhole garden overview for climate suitability notes.
Mixed Perennial Border with Repetition
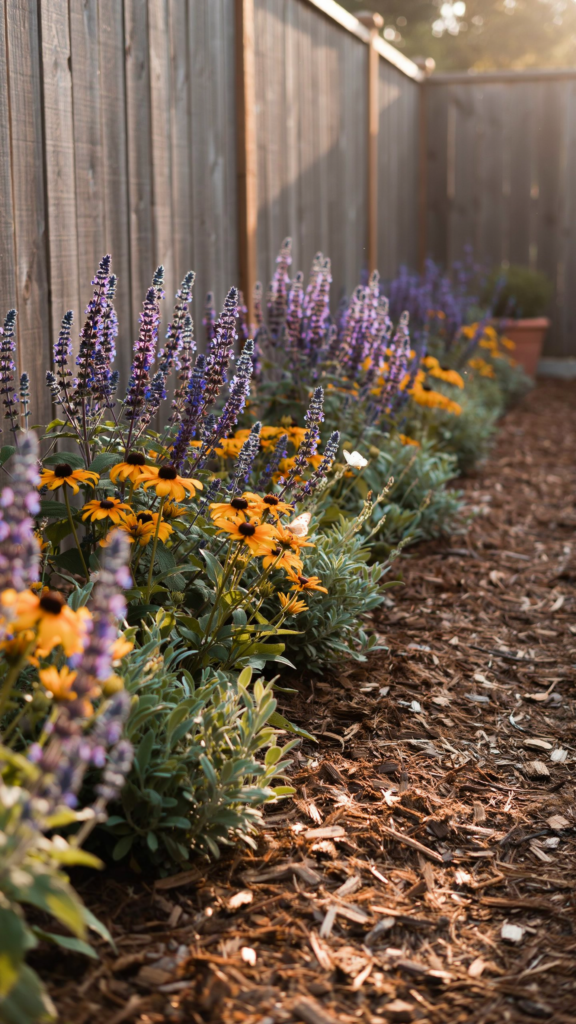
A repetition border deliberately plants the same three to five perennial varieties in clusters repeated at intervals down a long bed, rather than using dozens of different plants scattered once each.
Choose three anchor plants with different bloom times but a shared color scheme — for example, salvia, rudbeckia, and ornamental grass — and plant each in groups of 3–5, repeating those same groupings every 6–8 feet along the border’s length. This rhythm is what professional designers rely on most heavily, since the eye reads repeated shapes and colors as cohesive even in a long, complex bed.
The common mistake beginners make is buying one of everything at the nursery — a border with 20 different single plants looks busy and unplanned no matter how nice each individual plant is.
Best plants for repetition borders: ornamental grasses, salvia, coneflower, and catmint all repeat well due to long bloom windows and consistent form.
Learn the design principle further in our guide to border rhythm and repetition, and see BHG’s perennial border design basics for color scheme ideas.
Container Garden Cluster on Patio
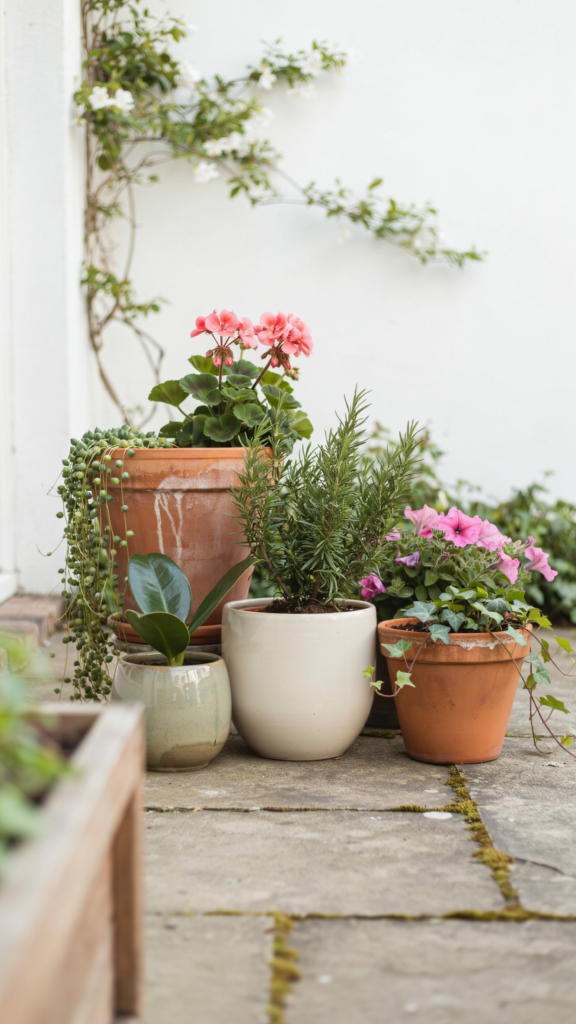
A container cluster groups multiple pots of varying heights and sizes together rather than spacing them evenly apart, creating the visual density of a garden bed on a patio, balcony, or small paved area with no in-ground planting at all.
Use an odd number of pots (3, 5, or 7) in at least three different heights, using plant stands or overturned crates to boost shorter pots to varied levels. Group pots with similar water needs together regardless of plant type, since mismatched watering schedules within one cluster leads to some pots being chronically over- or under-watered.
This layout is ideal for renters or anyone with no yard, since the entire “garden” can be rearranged or moved in an afternoon.
Cluster structure: one tall anchor plant (back), two to three mid-height plants (middle), one to two trailing plants (front edge, spilling over pot rims).
See our container grouping design guide, and check thesill.com’s container clustering tips for pot material pairing. A well-arranged cluster can look as full as an in-ground bed within one season.
Cottage Garden Picket Fence Border
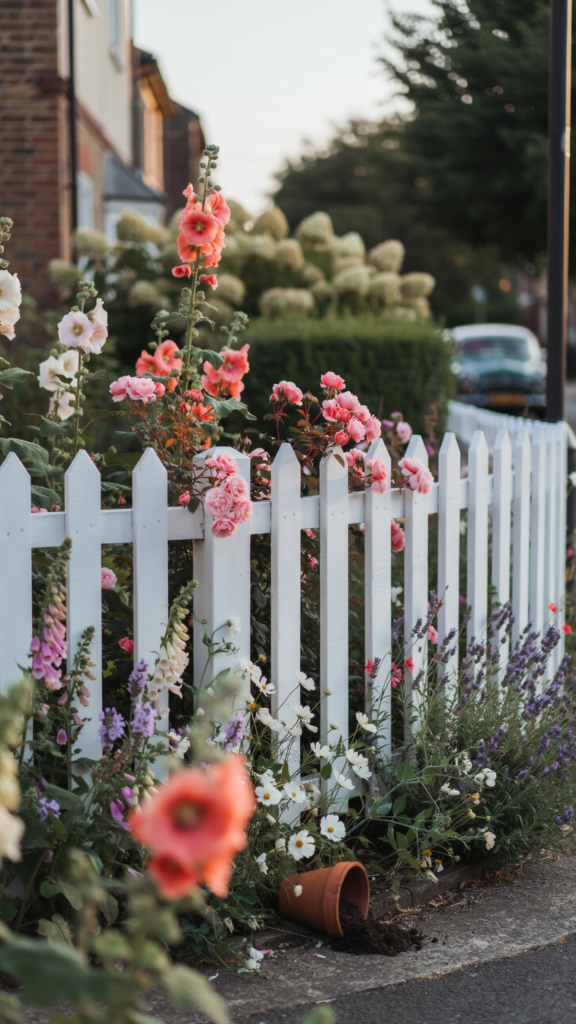
A picket fence border uses the fence itself as the backbone of the layout, training tall climbers up the fence while a dense, informal bed fills the ground in front — a classic front-yard layout that reads as instantly welcoming.
Plant climbing roses or clematis directly at fence posts, tying growth loosely to the pickets as it climbs, then fill the bed in front with self-seeding cottage staples like hollyhocks, foxglove, and cosmos in loose, informal drifts. Keep the tallest ground plants (hollyhocks especially) near the fence line so they don’t block the lower border plants from view.
The pro insight: let a few plants self-seed and wander slightly outside the “planned” spots — a cottage border that looks too controlled loses the relaxed charm that defines the style.
Explore climbing rose training methods in our vertical rose training guide, and check gardenersworld.com’s cottage fence border ideas for regional variety suggestions. This layout consistently ranks among the most complimented front-yard styles by neighbors and passersby alike.
Zen Rock Garden Layout

A zen rock garden uses raked gravel, a small number of large stones, and sparse plantings of moss or low evergreens, prioritizing negative space and stillness over abundance — the opposite instinct of most garden layouts.
Select an odd number of large stones (3 or 5) as the focal points, positioning them off-center rather than symmetrically, then rake fine gravel around them in flowing lines that suggest water. Keep plantings minimal and restrained — a single dwarf Japanese maple or a patch of moss is often enough; resist the urge to add more.
The common mistake is over-planting a space meant to read as calm and spare — every additional element should be questioned rather than automatically added.
💡 Pro Tip: Rake the gravel in the same direction consistently — inconsistent raking patterns break the sense of intentional stillness this layout depends on.
See our guide to Japanese garden design principles, and check the RHS Japanese garden overview for stone placement traditions. This layout works especially well in small, enclosed courtyard spaces.
Rainbow Bloom Succession Border

A succession border is planned around bloom timing rather than just color, using a layout where different sections take over visual interest in sequence — spring bulbs, then early-summer perennials, then late-summer bloomers — so the bed never has a dead period.
Map the border into rough thirds by bloom season: interplant spring bulbs like tulips throughout, add early perennials like peonies and iris in one zone, and reserve space for late bloomers like asters and sedum that peak in fall. Plant later bloomers’ foliage to fill in and mask the dying leaves of the earlier bloomers — this succession only works if the layout accounts for foliage, not just flowers.
Beginner vs. advanced version: Beginners should plan for three overlapping bloom seasons; advanced gardeners can layer in four with careful attention to which plants’ dying foliage gets hidden by which neighbors.
Explore a full seasonal planting calendar in our bloom succession planning guide, and see the Almanac’s seasonal bloom charts for regional timing. This is the layout that keeps a border interesting from April through October.
Native Pollinator Meadow Patch

A meadow patch converts a section of lawn — even a modest 10×10 foot area — into a naturalized planting of native wildflowers and grasses, laid out loosely rather than in rows to mimic how these plants grow in the wild.
Choose regionally native species (coneflower, milkweed, native asters, and native grasses are widely adaptable) and broadcast-sow or plant in irregular, overlapping clusters rather than a grid, since a natural meadow layout has no visible pattern by design. Mow or cut back the whole patch once a year in late winter to mimic natural disturbance and prevent woody plants from taking over.
The common mistake is expecting an instant, tidy result — a meadow patch typically looks sparse and weedy in year one before filling in fully by year two or three.
Explore native plant sourcing in our regional native plant guide, and check extension.ufl.edu’s pollinator meadow establishment guide for regional seed mix recommendations. This layout does the most measurable good for local pollinators of anything on this list.
Vertical Layered Small-Space Garden
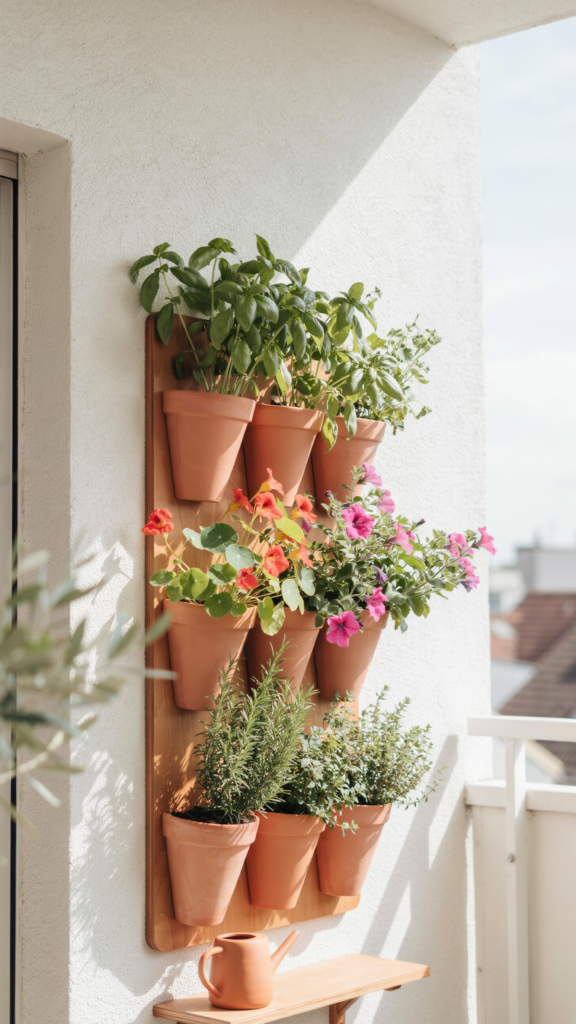
A vertical layout stacks planting pockets, shelves, or trellised containers up a wall rather than out across the ground, making it the highest-yield layout available for a small balcony or narrow side yard with little horizontal space.
Mount a tiered planting system or simple shelving to a sturdy wall or railing, placing sun-loving herbs and trailing flowers in upper tiers and shade-tolerant plants like lettuce or ferns lower down where the wall itself casts shade. Check weight capacity before mounting — soil-filled pockets are heavier than they look, and a poorly secured vertical system is a real safety risk.
The pro insight: vertical systems dry out faster than ground-level beds because of increased air exposure on all sides, so plan for more frequent watering, ideally with a simple drip line if the system is large.
💡 Pro Tip: Put your thirstiest plants at the bottom tiers — water naturally drains downward through a vertical system, so lower pockets stay moister longer than upper ones.
See our small-space vertical gardening guide, and check thesill.com’s vertical garden system reviews for mounting hardware options.
Circular Rose Garden with Center Focal Point

A circular rose garden radiates wedge-shaped rose beds outward from a central focal point — a sundial, birdbath, or small statue — creating a formal, symmetrical layout that reads as a genuine destination within a larger yard.
Lay out the circle with the focal point dead center, dividing the surrounding ring into 4, 6, or 8 equal wedge-shaped beds separated by narrow gravel or grass paths radiating outward. Plant one rose variety per wedge for a clean, repeated look, or mix two alternating colors between wedges for a pinwheel effect — but avoid more than two colors, which muddies the symmetry.
The common mistake is skipping the central focal point entirely; without it, the radiating design loses its organizing anchor and just looks like disconnected beds.
Best rose types for this layout: compact shrub roses or floribundas, which stay tidy and full without the leggy growth of climbing varieties.
Learn rose spacing specifics in our rose garden planning guide, and check the RHS rose garden design notes for wedge-bed proportions. A well-executed circular rose garden becomes the single most photographed spot in the yard.
Getting Started With Garden Layout Ideas
The easiest first step is sketching your yard’s existing sun and shade patterns on paper before choosing a layout — most layout mistakes come from picking a beautiful design that doesn’t match your actual light conditions, not from poor plant choice.
The most common beginner mistake is trying to combine too many layout styles in one small yard — a formal parterre next to a wild meadow patch fights itself visually. Pick one primary style and let it dominate. For your first purchase, buy a bundle of garden stakes and string to physically map your chosen layout on the ground before digging anything, plus one flat of your anchor plant to test spacing in real life before committing to the full bed.
Realistically, most layouts look intentional but sparse in their first season and genuinely full by the second, once plants have filled in and any repeated groupings have matured into a cohesive rhythm.
Frequently Asked Questions
What is the easiest garden layout for a total beginner?
A container garden cluster on a patio is the lowest-risk starting point — nothing needs to be dug, plants can be repositioned freely, and mistakes cost only the price of moving a pot rather than redoing an in-ground bed.
How do I plan a garden layout for a small backyard?
Start by mapping sun exposure through the day, then choose one layout style suited to that light rather than combining several — a raised bed grid or a vertical layout typically makes the most of limited square footage in small yards.
Can I combine multiple garden layout ideas in one yard?
Yes, but it works best when one layout serves as the “spine” (like a curved border or a fence-line planting) while smaller elements, like a herb spiral or a container cluster, sit as secondary features rather than competing focal points.
How much does it cost to redo a garden layout?
Costs vary enormously by scale — a container cluster can start under $100, while a raised bed grid or hillside terracing project with retaining walls often runs into the several-hundred to low-thousand dollar range depending on materials and whether labor is hired.
How do I keep a new garden layout looking good in year one while plants are still small?
Use fast-growing annuals like cosmos or zinnias as temporary fillers between young perennials in the first season — they fill visual gaps while slower perennials establish their root systems and reach mature size by year two.
A Few Final Thoughts
These 22 garden layout ideas prove that a genuinely stunning garden depends far more on structure and repetition than on rare or expensive plants — most of these designs can be built with plants already sold at any local nursery. What ties them together is intention: choosing a shape, a rhythm, or a focal point and letting the layout do the heavy lifting that a random assortment of plants never quite manages. Whether you start small with a container cluster on a patio or commit to a full circular rose garden, the payoff is a space that feels planned and cared for from the very first season. One sketch, one stake, one shovel of soil — your garden layout starts today.