
That first flush of lupine spikes is one of the best payoffs in the early-summer garden, and it’s also one of the shortest — those tall, colorful towers fade fast once the heat sets in. What you do in the two or three weeks right after bloom has an outsized effect on whether your lupines come back strong next year, reseed themselves generously, or just quietly peter out. I let a bed go untouched my first summer growing them, assuming they’d “handle it,” and ended up with a patchy, weak stand the following spring that took two years to recover. There are 6 things worth doing once those flowers start to fade, and none of them take more than a few minutes per plant. Ready? Let’s explore all 6 of them.
Quick Answer
After lupines finish blooming, deadhead most of the spent spikes to encourage reblooming and prevent the plant from exhausting itself on seed production, while leaving a few pods if you want self-sown seedlings. Beyond that, cutting back yellowed foliage, dividing crowded clumps, and feeding the roots are the main tasks that set up a stronger bloom next year.
Why Post-Bloom Lupine Care Is Worth Your Time
Lupines put an enormous amount of energy into that first bloom, and what happens right after matters more than most gardeners expect. In practice, a plant left to set seed on every single spike tends to look worn out and sparse by midsummer, because it’s pouring resources into seed development instead of root and foliage growth.
Lupines are also relatively short-lived perennials — often three to five years in a given spot — so post-bloom care around dividing and feeding does real work in extending how long a stand stays productive. Skipping it tends to show up as a gradual decline rather than a dramatic one, which makes it easy to miss until a bed that used to be full is suddenly thin.
There’s a genuine trade-off between deadheading for a second bloom and letting pods mature for self-sowing, and it’s worth deciding on purpose rather than by default. What actually works, in my experience, is a middle path: deadhead most spikes, but deliberately leave two or three per plant to mature into seed.
The one limitation to be honest about: lupines dislike being moved or disturbed once established, so division has to be done carefully and isn’t guaranteed to succeed with older, larger taproots.
At a Glance
- Deadhead most spikes within a week or two of fading for a shot at reblooming
- Leave a few pods if you want volunteer seedlings next season
- Cut back yellowed foliage, not green leaves, once it browns naturally
- Divide only young, multi-crowned clumps — mature taproots resent disturbance
- Feed lightly after bloom rather than with a heavy nitrogen application
Comparing the 6 Post-Bloom Tasks
| Task | Timing | Effort | Tools Needed | Main Benefit |
| Deadhead spikes | Right after fading | Low | Pruning shears | Possible rebloom |
| Leave seed pods | Same window, selective | None | None | Self-sowing |
| Collect seed | Pods dry, tan-brown | Low | Shears, envelope | Seed for next year |
| Cut back foliage | After it yellows | Low | Shears | Tidy, disease control |
| Divide clumps | Early fall | Moderate | Fork, spade | More plants |
| Feed and mulch | After bloom, light | Low | Fertilizer, mulch | Root recovery |
Deadhead Spent Flower Spikes to Encourage a Second Bloom
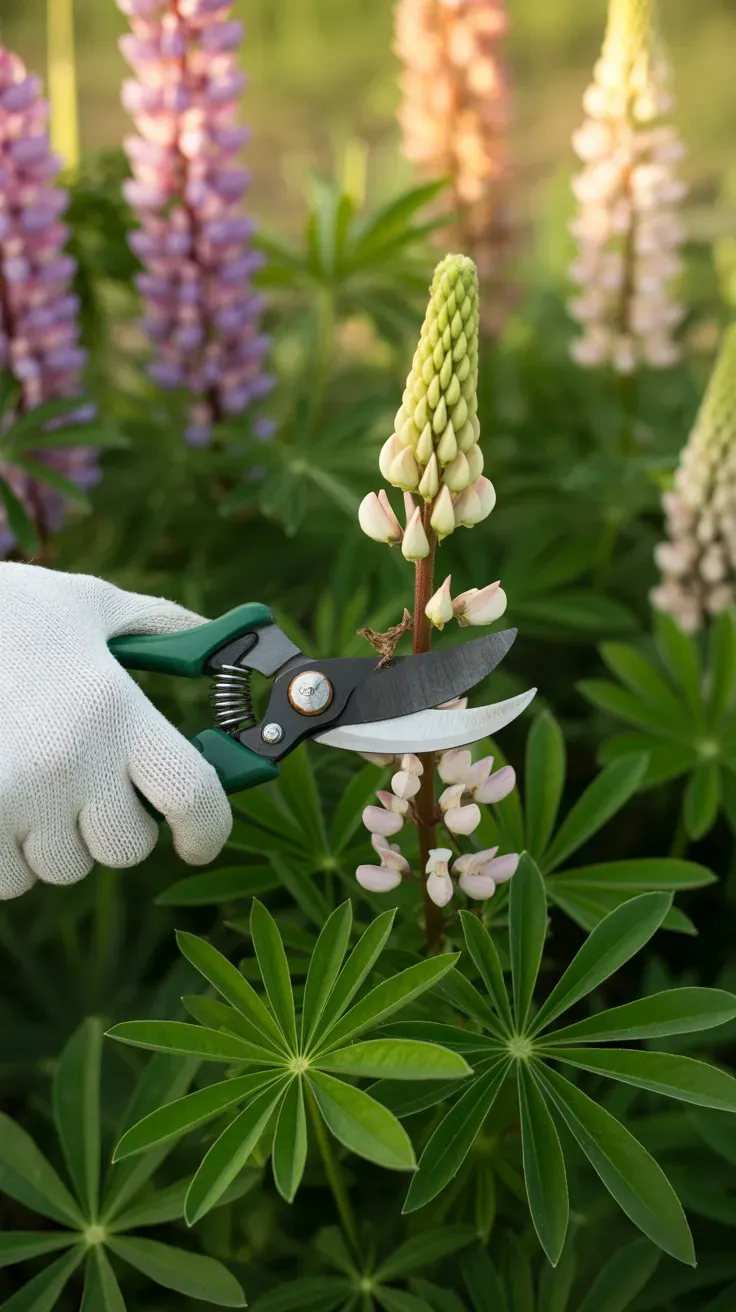
Deadheading is the single most useful thing you can do in the first week or two after bloom.
Cut spent spikes down to just above the first set of healthy leaves as soon as the flowers fade and before pods start swelling. This stops the plant from redirecting energy into seed production and, in many lupine varieties, prompts a smaller secondary flush of blooms a few weeks later.
Work through the bed spike by spike rather than shearing the whole plant at once, since some spikes fade earlier than others and you don’t want to cut healthy buds still opening lower down.
Pro Tip: Cut at a slight angle just above a leaf node rather than straight across bare stem — it sheds water better and reduces the chance of stem rot setting in at the cut.
The Royal Horticultural Society’s lupine care guide covers deadheading timing across different lupine cultivars in more detail. For more on extending bloom time in perennial beds, see our guide to deadheading for a second flush.
A few minutes of deadheading now often means a welcome second round of color in a few weeks.
🛒 Shop This Idea
- Micro-tip bypass pruning shears — precise enough for cutting individual spikes without disturbing nearby buds. Shop on Amazon →
- Lupine seed mix, mixed color perennial — for gardeners planning to fill in gaps or start a new bed nearby. Shop on Amazon →
- Kneeling garden pad with handles — practical for the repetitive low bending this task involves. Shop on Amazon →
- Balanced slow-release perennial fertilizer — supports the energy the plant redirects toward reblooming after deadheading. Shop on Amazon →
- Garden trug basket for cut stems — a nice-to-have for collecting spent spikes as you work down the row. Shop on Amazon →
Leave a Few Seed Pods to Self-Sow
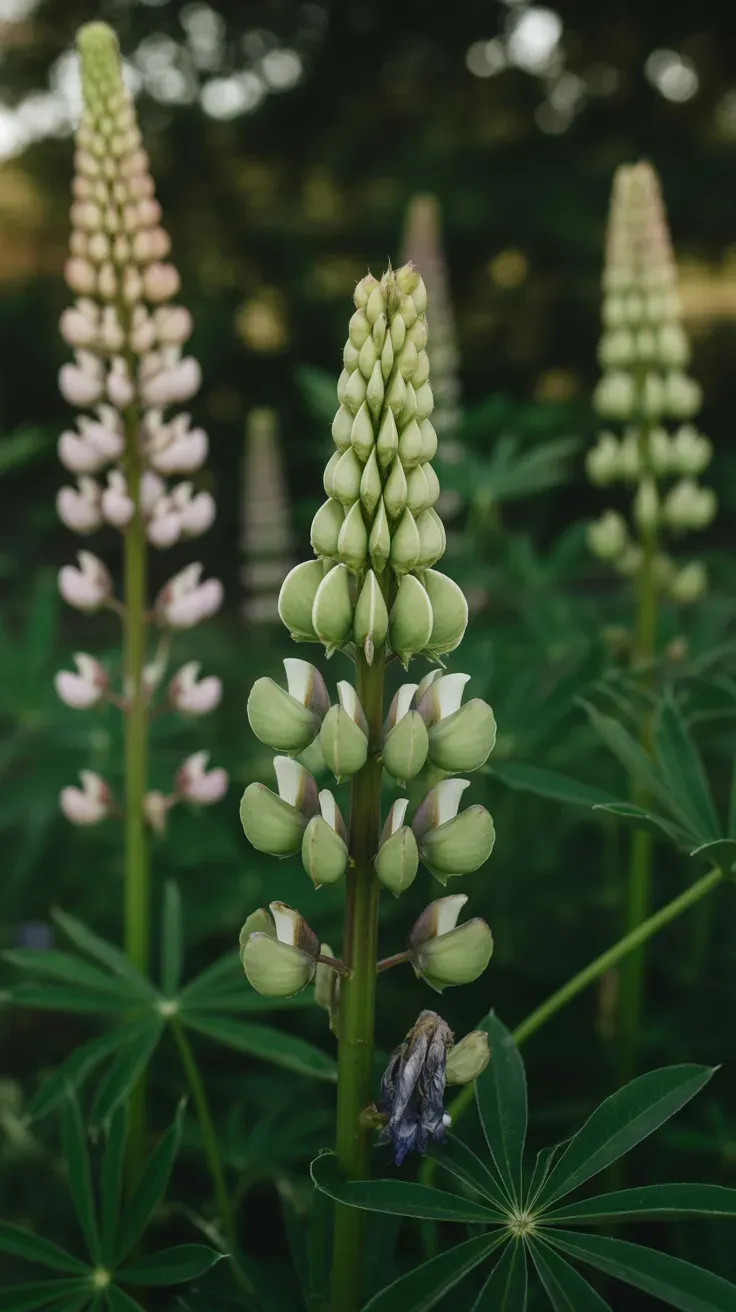
Not every spike needs deadheading — leaving a few on purpose has its own payoff.
Choose two or three of the strongest, earliest-blooming spikes per plant and let their pods mature fully instead of cutting them back. As those pods dry and eventually split, they scatter seed nearby, which is often how a modest lupine patch turns into a fuller drift over a couple of seasons with no extra work.
This matters most for gardeners who want a more naturalized, cottage-style look, since self-sown lupines tend to fill gaps more organically than anything deliberately transplanted.
- Choose 2–3 strong spikes per plant, not the weakest ones
- Mark them if your bed is busy, so you don’t accidentally cut them
- Expect seedlings the following spring, not immediately
- Thin volunteer seedlings the next year if they come up too thick
The Missouri Botanical Garden’s plant finder has good background on lupine seed dispersal and germination timing. Our guide to naturalizing a cottage garden bed covers more self-sowing perennials worth this same approach.
A little restraint with the shears now can fill in a bed for free later.
🛒 Shop This Idea
- Colorful garden marker flags, pack of 50 — handy for tagging which spikes to leave alone among the rest you’re deadheading. Shop on Amazon →
- Wide-brim sun hat for gardening — practical for the close, low-to-the-ground checking this task involves over several weeks. Shop on Amazon →
- Organic compost soil amendment, bagged — top-dressing around left-to-seed plants supports strong pod development. Shop on Amazon →
- Fine-mist garden watering can — keeps developing pods from stressing during a dry spell before they mature. Shop on Amazon →
- Botanical garden journal, hardcover — a nice-to-have for tracking which spikes you left and where seedlings appear next spring. Shop on Amazon →
Collect and Save Lupine Seeds for Next Season
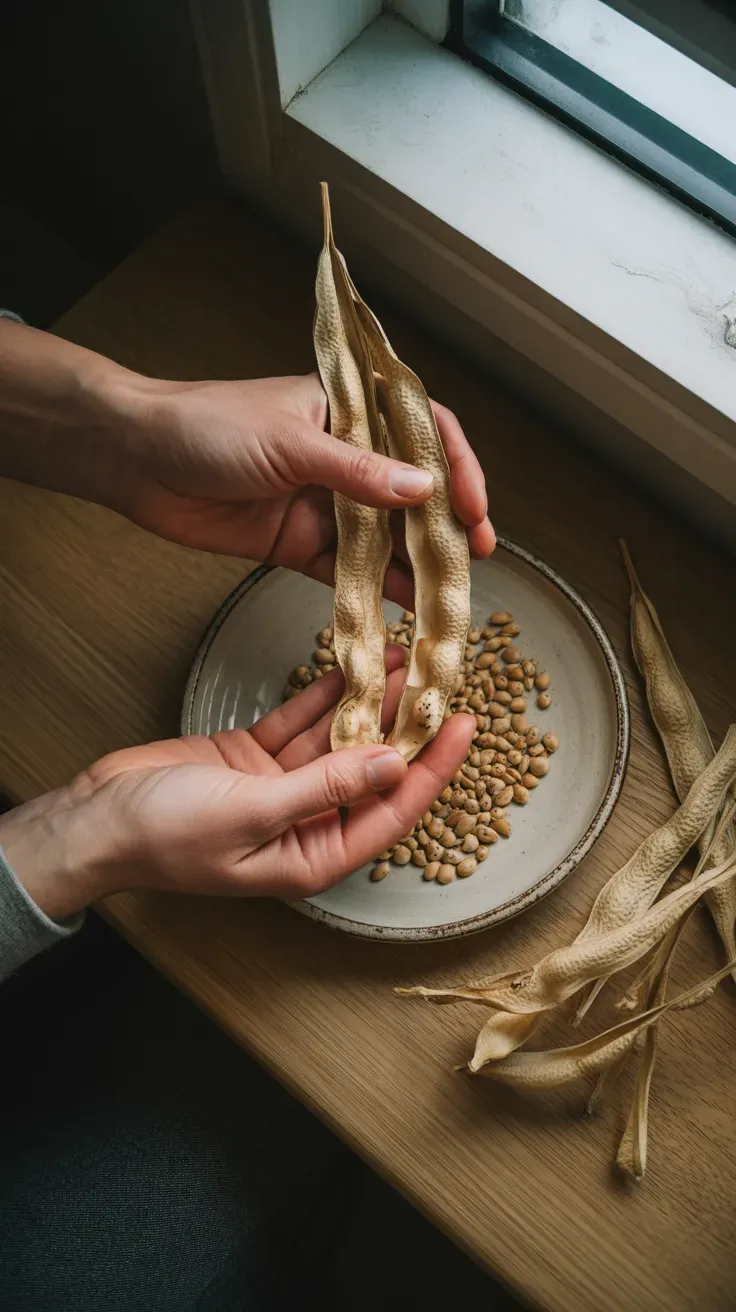
If you’d rather control exactly where next year’s lupines go, collecting seed is the more deliberate alternative to letting pods scatter on their own.
Wait until pods turn tan or brown and feel dry and papery, usually a few weeks after the flower fades — pick too early and the seed inside won’t be viable. Snip whole pods into a paper bag rather than a plastic one, since plastic traps moisture and invites mold before you get around to shelling them.
Once dry, split the pods open by hand or gently crush them, then separate the round, hard seeds from the husk. Store cleaned seed in a labeled paper envelope somewhere cool and dry until you’re ready to sow in fall or the following spring.
Pro Tip: Lupine seed coats are naturally tough, which is great for storage but means germination improves noticeably if you nick the coat lightly with sandpaper or soak seeds overnight before sowing.
The Almanac’s guide to seed saving has general timing and storage tips that apply well to lupine. Our guide to starting perennials from seed covers the germination side once you’re ready to sow.
A single afternoon of seed collecting can stock an entire new bed for next year.
🛒 Shop This Idea
- Kraft paper seed envelopes, 100-pack — sized right for cleaned lupine seed, breathable enough to avoid mold. Shop on Amazon →
- Fine mesh seed cleaning sieve set — makes separating seed from pod husk faster and cleaner. Shop on Amazon →
- Fine-grit sandpaper sheets — useful for lightly nicking tough lupine seed coats before sowing. Shop on Amazon →
- Airtight seed storage box with dividers — keeps saved seed organized and dry between harvest and sowing. Shop on Amazon →
- Waterproof garden labels and pen set — a nice-to-have for marking envelopes with the harvest date and variety. Shop on Amazon →
Cut Back Yellowed Foliage
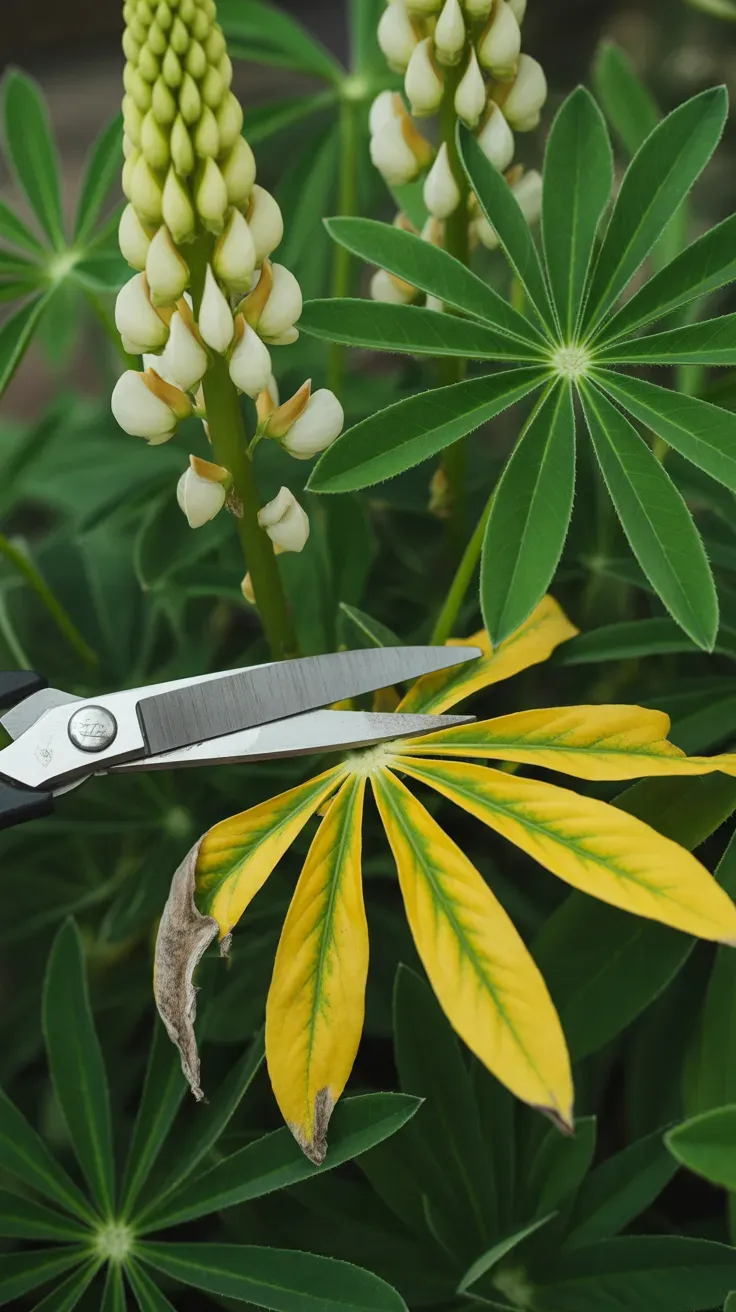
Foliage cleanup is easy to skip, but it noticeably affects how a lupine handles late summer.
Once individual leaves yellow and dry on their own, usually as temperatures climb in mid to late summer, snip them off at the base rather than pulling, which can disturb the shallow crown. Leave any leaves that are still green, even if they look a bit tired, since they’re still contributing to the plant’s energy reserves.
Removing yellowed foliage also improves airflow around the crown, which matters because lupines are prone to powdery mildew in humid, still conditions later in the season.
- Snip yellowed leaves at the base, don’t pull
- Leave all green foliage in place
- Improves airflow and reduces mildew risk
- Repeat every couple of weeks through late summer as needed
The University of Florida IFAS Extension has good general guidance on powdery mildew prevention through airflow and sanitation. Our guide to preventing powdery mildew in perennial beds covers the same principle across other susceptible plants.
A tidier crown going into late summer handles heat and humidity noticeably better.
🛒 Shop This Idea
- Fine-tip garden snips — sized well for trimming individual yellowed leaves without disturbing the crown. Shop on Amazon →
- Neem oil concentrate, ready-to-mix — a common preventive for powdery mildew once airflow alone isn’t enough. Shop on Amazon →
- Compost-safe garden waste bin — practical for collecting trimmed foliage as you work through a bed. Shop on Amazon →
- Garden kneeler with side pockets — keeps snips and gloves handy during a longer foliage cleanup session. Shop on Amazon →
- Breathable garden gloves, set of 2 pairs — a nice-to-have for comfortable handling during warm late-summer trimming. Shop on Amazon →
Divide Overcrowded Lupine Clumps
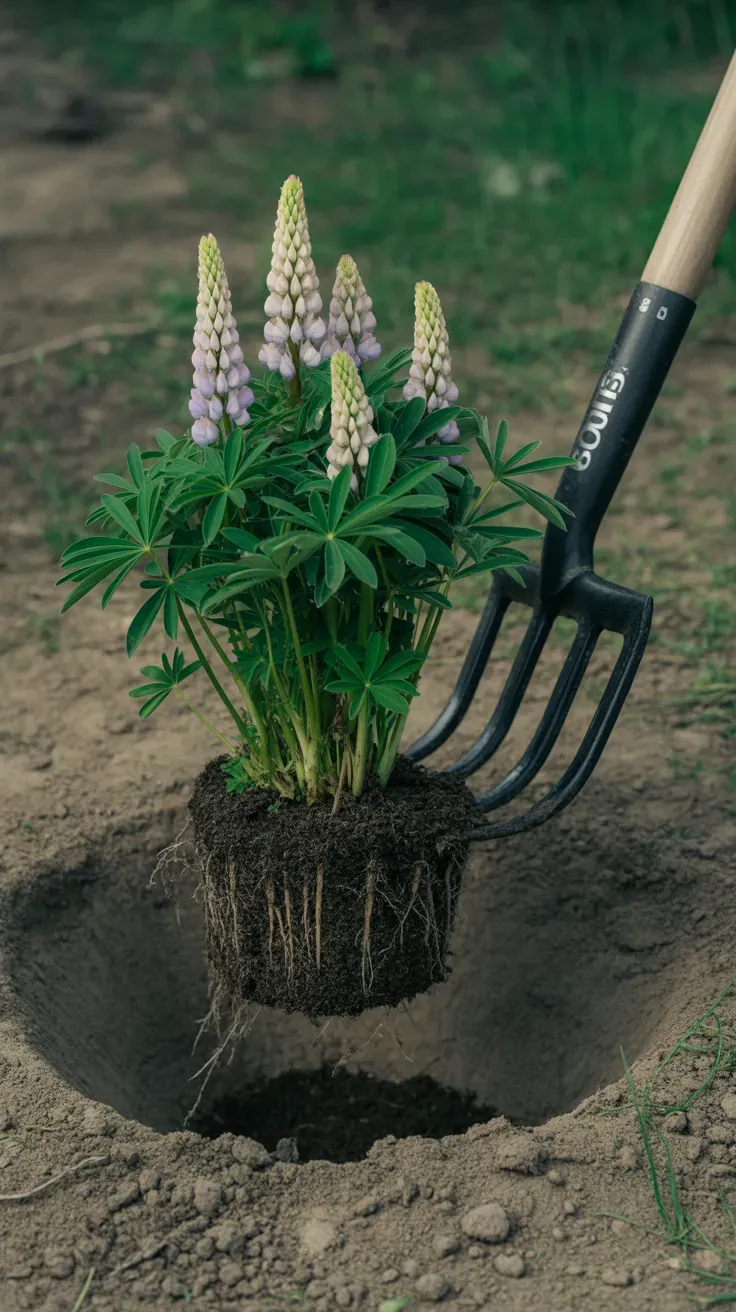
Division is the trickiest of the six tasks, but it’s worth attempting on the right plants.
Lupines develop a long taproot that resents disturbance, so division only really works well on younger plants that have formed multiple distinct crowns rather than a single deep root. In early fall, once the heat has passed, gently lift a multi-crowned clump with a garden fork and separate the crowns by hand, keeping as much root intact as possible on each division.
Replant divisions immediately at the same depth they were growing, water well, and expect a slower first season while the roots reestablish — don’t judge success by bloom count the following spring alone.
Pro Tip: If a clump is a single thick taproot with no separate crowns, leave it alone entirely; forcing a division on a plant that hasn’t naturally formed multiple crowns usually kills it rather than multiplying it.
The Gardener’s World division guide covers taproot perennials and which ones tolerate division well. Our guide to dividing perennials in fall has a broader rundown of which plants handle this step best.
Done selectively, division turns one strong clump into several for next season.
🛒 Shop This Idea
- Garden fork with padded handle — the right tool for lifting a lupine clump without slicing through the crown. Shop on Amazon →
- Root stimulator transplant solution — supports newly divided crowns while roots reestablish. Shop on Amazon →
- Hand trowel with serrated edge — useful for separating tangled root crowns cleanly by hand. Shop on Amazon →
- Bagged garden soil amendment blend — backfilling divisions with amended soil helps them settle in faster. Shop on Amazon →
- Reusable plant pots, 1-gallon, set of 6 — a nice-to-have if you want to pot up a few divisions to give away or hold over. Shop on Amazon →
Feed and Mulch to Support Root Recovery
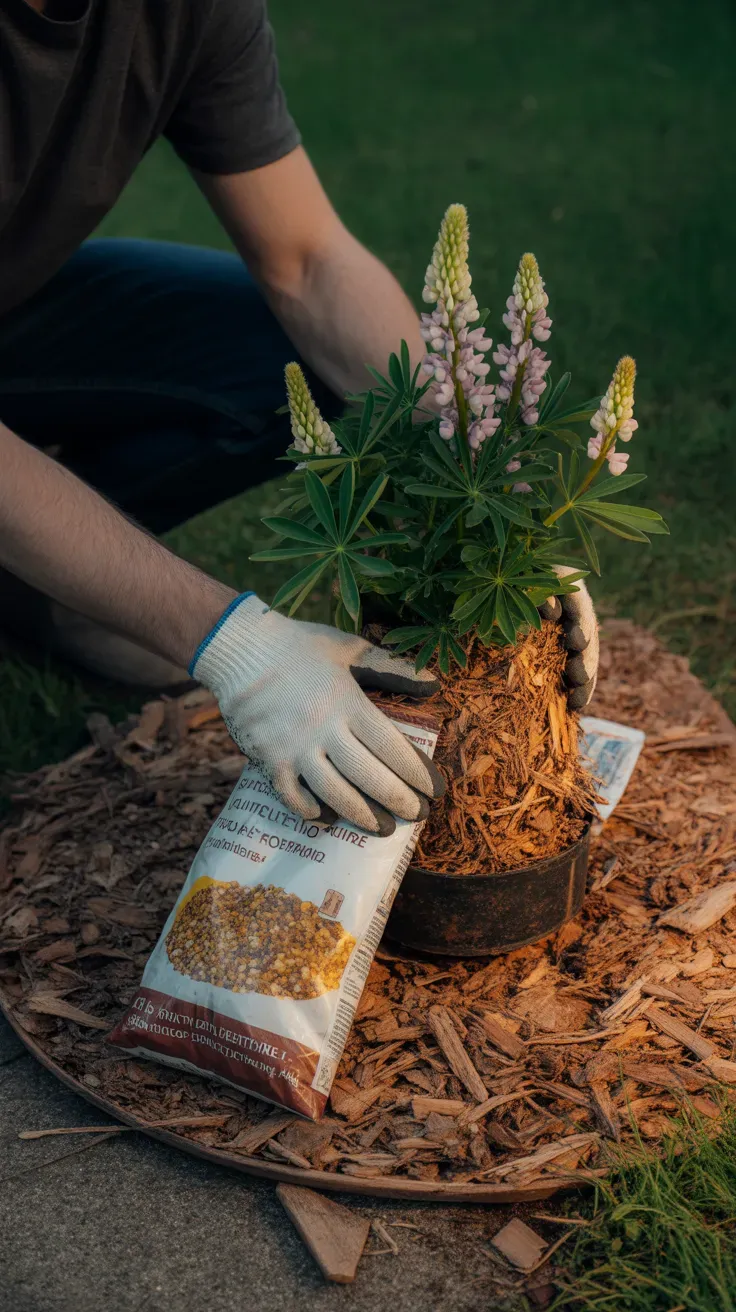
The last step ties everything else together by giving the plant what it needs to recover.
After deadheading and any cleanup, work a light application of balanced, low-nitrogen fertilizer into the soil around the base — too much nitrogen pushes leafy growth at the expense of root strength and next year’s bloom. Follow with a thin layer of mulch, about an inch or two, to keep soil temperatures steady and moisture more consistent through the rest of summer.
Avoid piling mulch directly against the crown, which can trap moisture and encourage the same rot issues that cause more lupine losses than most gardeners realize.
The BHG gardening guide has solid general guidance on post-bloom perennial feeding ratios. Our guide to mulching perennial beds correctly covers the crown-clearance detail in more depth.
A light feed and a modest mulch layer close out the post-bloom routine and set the stage for next spring.
🛒 Shop This Idea
- Low-nitrogen balanced perennial fertilizer — matches what lupines actually need after bloom without pushing excess leaf growth. Shop on Amazon →
- Shredded bark mulch, bagged — holds moisture and moderates soil temperature through late summer. Shop on Amazon →
- Hand cultivator fork tool — useful for working fertilizer into the soil surface without disturbing roots. Shop on Amazon →
- Rain gauge for garden beds — helps track whether mulched beds are getting consistent moisture through summer. Shop on Amazon →
- Wide garden spreader scoop — a nice-to-have for applying mulch evenly around multiple plants at once. Shop on Amazon →
Getting Started With Post-Bloom Lupine Care
The easiest first step is simply deadheading spikes as soon as they fade this week — it’s the single task with the biggest and fastest payoff, and it takes only a few minutes per plant. The most common beginner mistake is waiting too long, which lets the plant tip its energy toward seed production before you’ve decided whether you actually wanted that.
For your first purchase, a sharp, small pair of bypass pruners handles both the deadheading and the later foliage cleanup, so it’s the one tool worth buying before anything else on this list.
Realistically, you can start deadheading the day the first flowers fade, and you’ll know within a few weeks whether your variety reblooms. The bigger payoff — stronger plants and fuller beds from saved or self-sown seed — shows up next spring.
- Micro-tip bypass pruning shears — the single most useful first purchase for both deadheading and later foliage cleanup. Shop on Amazon →
Frequently Asked Questions
What do you do with lupines after they finish blooming?
Deadhead most of the spent flower spikes to encourage a possible second bloom and prevent the plant from exhausting itself on seed, while leaving a few pods if you want self-sown seedlings. Beyond that, cut back yellowed foliage as it appears and feed lightly to support root recovery.
Should you cut lupines all the way down after blooming?
No — cut only the spent flower spikes down to the first healthy leaves, and leave the green foliage in place since it’s still feeding the plant. Full foliage cutback only happens once leaves yellow and die back naturally, not right after bloom.
Will lupines bloom again if you deadhead them?
Many lupine varieties will produce a smaller secondary flush of blooms a few weeks after deadheading, though it’s typically shorter and less dramatic than the first bloom. Results vary by variety and how much heat stress the plant is under.
How do you collect lupine seeds after blooming?
Let a few pods mature on the plant until they turn tan-brown and feel dry, then snip them into a paper bag to finish drying before shelling out the seed. Store cleaned seed in a labeled paper envelope somewhere cool and dry until sowing.
When should you divide lupine plants?
Early fall, once summer heat has passed, is the best window, and it only works well on younger plants that have formed multiple distinct crowns rather than one single taproot. Forcing a division on a single-taproot plant usually does more harm than good.
A Few Final Thoughts
Post-bloom care is where a lot of the real work of growing good lupines happens, even though it gets far less attention than the flowering itself. Of these 6 things to do, deadheading and a light fall feeding matter most for most gardeners, while seed saving and division are worth adding once you’re comfortable with the basics. None of it takes much time, but done consistently, it’s the difference between a lupine bed that fades after a year or two and one that gets fuller and stronger every season. Give your spent spikes some attention this week, and next spring’s bloom will show it.