
There’s a specific kind of magic that happens when a garden stops looking like “plants in dirt” and starts looking like a space with personality — and almost always, that shift comes from decor, not more flowers. You don’t need a big budget or a truck full of supplies to get there; some of the most charming garden touches come from things already sitting in your garage or recycling bin. In this guide I’m walking through 31 DIY garden decor ideas, with the exact materials and steps to actually make each one work in your own space. Ready? Let’s explore all 31 of them.
Why DIY Garden Decor Is Worth Your Time
Garden decor is where a space stops being generic and starts being genuinely yours — two people can grow the same tomatoes and marigolds, but no two painted birdhouses or upcycled planters ever look identical. In practice, gardeners consistently find that decor projects using repurposed materials (old ladders, broken pots, tin cans) cost a fraction of store-bought garden ornaments while holding up just as well outdoors.
What makes DIY decor especially rewarding is the immediate payoff — unlike a perennial bed that takes two seasons to mature, a painted planter or a wind chime is finished and enjoyable the same afternoon you make it. A lesser-known fact: broken terracotta pots are more valuable cracked than whole in the garden world, since “pot shard” projects (stacked totem planters, mosaic stepping stones, shard borders) are some of the most popular DIY builds around.
This list is ideal for beginners who want low-risk, low-cost projects, renters wanting decor they can take with them, and anyone who’d rather spend an afternoon making something than shopping for it.
At a Glance
- A teacup fairy garden turns a single broken teacup into a tiny scene you can rebuild seasonally.
- Painted rock plant markers solve the “wait, what did I plant here?” problem for under $5.
- A vertical pallet herb wall grows a dozen herbs in the footprint of a single pot.
- Wine bottle tiki torches repurpose empties into functional evening lighting.
- A mosaic stepping stone path turns broken pottery into a permanent, one-of-a-kind walkway.
Painted Terracotta Pot Set
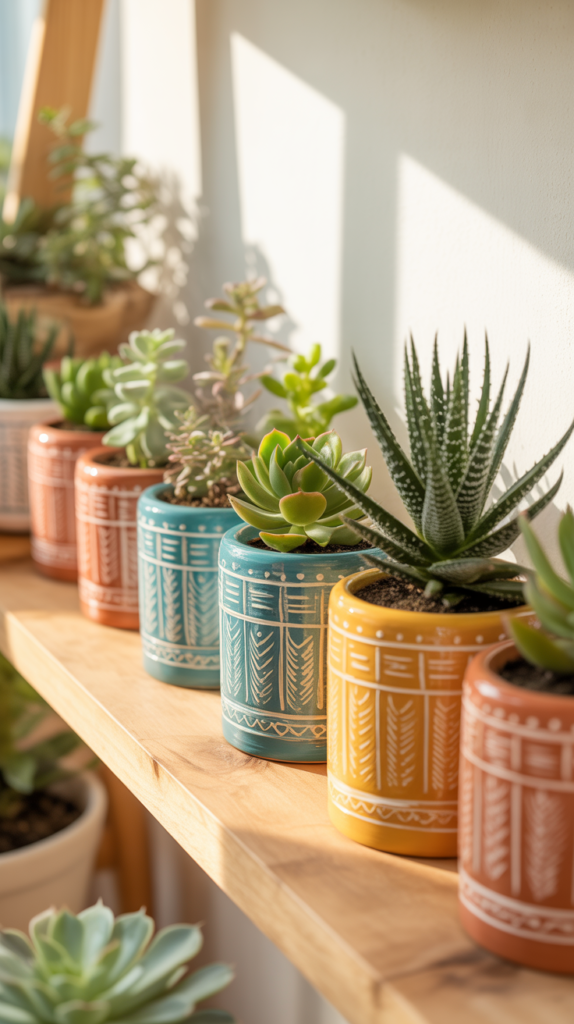
A painted terracotta pot set is the fastest way to turn plain nursery pots into something that looks intentionally chosen, and it works on pots you likely already own.
You’ll need unglazed terracotta pots, outdoor acrylic paint, painter’s tape for clean lines, and a matte outdoor sealant. Clean and dry pots fully before painting — any dust or moisture causes acrylic to peel within weeks outdoors. Paint in thin layers rather than one thick coat, letting each dry fully, then seal with two coats of outdoor sealant once the design is finished.
The common mistake is skipping the sealant step entirely — unsealed acrylic paint on terracotta chips and fades within a single rainy season, undoing hours of work.
💡 Pro Tip: Paint the inside rim of the pot too, about an inch down — it hides soil splash marks and makes the whole piece look more finished from any angle.
See our full guide to painting terracotta safely for plants, and check the RHS guide to container gardening basics for pairing plants to pot size. A matching painted set instantly upgrades even the simplest windowsill.
Wine Bottle Tiki Torches

Wine bottle tiki torches repurpose empty bottles into functional outdoor lighting, giving evening garden gatherings warm ambient light without buying anything new.
You’ll need empty wine bottles, a torch wick kit (widely sold online, includes the wick and metal collar), citronella torch fuel, and a garden stake or bottle-neck ground spike. Thread the wick kit through the bottle neck, fill with citronella fuel to about three-quarters full, and either stake the bottle directly into a garden bed or set it on a flat surface near seating.
The pro insight: citronella fuel evaporates faster in bottles left uncapped in full sun, so store extra fuel separately and only fill bottles the day you plan to use them for the strongest mosquito-repelling effect.
This project doubles as an easy way to use up bottles from a dinner party rather than recycling them immediately. See our patio lighting ideas roundup, and check BHG’s outdoor torch safety guidelines for safe placement distances from plants and structures.
Mosaic Stepping Stone Path
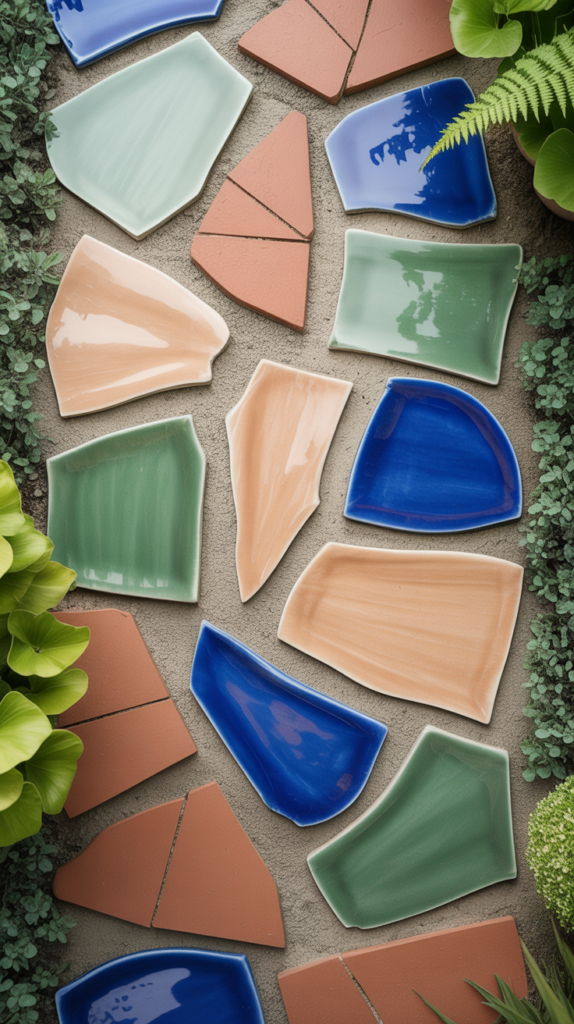
A mosaic stepping stone turns broken pottery, old tile, or sea glass into a permanent, genuinely one-of-a-kind piece of your garden path — and it’s the best use for that pot you’ve already cracked.
You’ll need a round stepping stone mold (or a repurposed cake pan), quick-setting concrete mix, broken tile or pottery pieces, and tile adhesive or grout. Pour concrete into the mold, press pottery pieces into the wet surface in your chosen pattern, and let it cure fully (usually 24–48 hours) before grouting between the pieces to lock everything in place.
The common mistake is pressing pieces in too shallow — anything not embedded at least halfway into the wet concrete will pop loose within a season of foot traffic and weather.
Best materials for mosaics: broken terracotta, ceramic tile scraps, sea glass, or old dinnerware — avoid thin glass, which can crack underfoot.
Learn full mold and curing techniques in our concrete stepping stone tutorial, and see sfgate.com’s DIY hardscaping guide for concrete mix ratios.
Upcycled Ladder Plant Stand
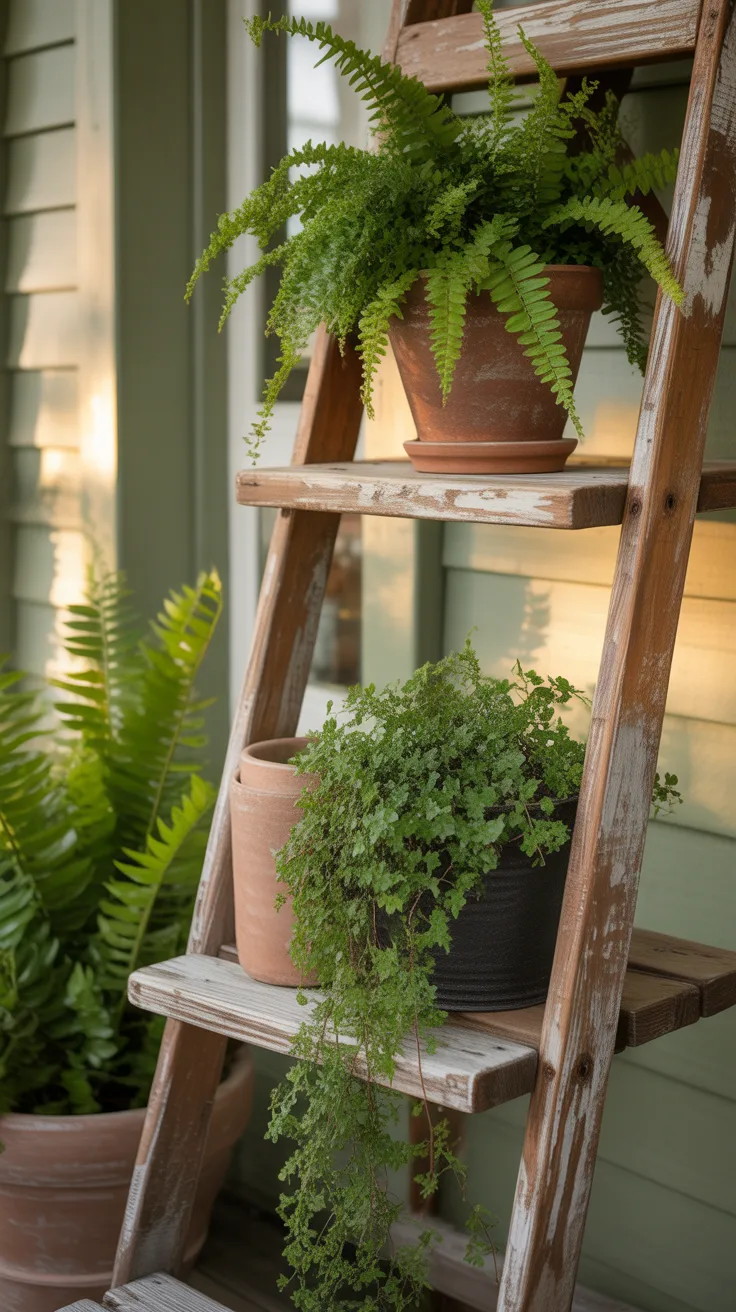
An old wooden ladder, leaned against a wall or fence, instantly becomes a multi-tiered plant stand that displays far more pots in far less floor space than a flat shelf.
Find a wooden A-frame or straight ladder at a thrift store or garage sale — slight wobble or peeling paint actually adds character, but check that rungs are structurally sound before loading it with weight. Lean it at a stable angle against a solid wall, then place pots directly on the rungs, putting your heaviest, largest pots on the lowest, sturdiest steps.
The pro insight most people miss: stagger plant heights so trailing plants (like pothos or ivy) sit on upper rungs where their vines can cascade down past the lower pots, creating real depth rather than a flat row of plants.
Explore more vertical display ideas in our small-space plant display guide, and check gardenersworld.com’s upcycled furniture planter ideas for weatherproofing wood. This is one of the fastest ways to add visual height to a flat porch or patio.
Painted Rock Plant Markers
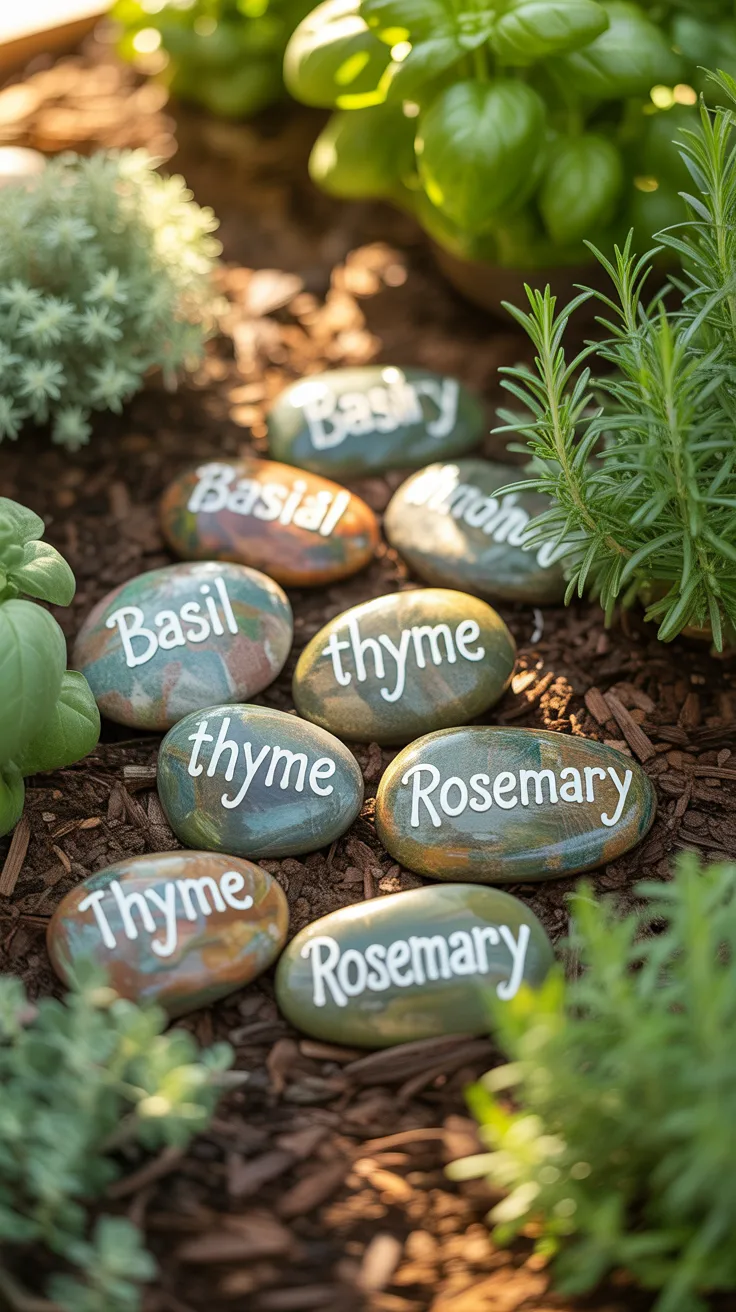
Painted rock plant markers solve the classic “what did I plant here again?” problem for less than the cost of a coffee, using materials many people already have.
Collect smooth, flat rocks from your yard or a craft store, clean and dry them fully, then paint plant names using acrylic paint pens (which write more precisely than a brush) directly onto the rock’s smoothest face. Once dry, seal with a clear outdoor spray sealant to prevent fading and water damage from sprinklers or rain.
The common mistake is using regular craft paint markers instead of acrylic paint pens — regular markers fade and wash off within weeks of outdoor exposure, while acrylic-based ones hold color through a full season.
💡 Pro Tip: Paint the plant’s harvest date or expected bloom month on the back of each rock — it turns a simple label into a useful garden log you’ll actually reference.
See our full guide to labeling a vegetable garden, and check the Almanac’s garden journaling tips for tracking planting dates effectively.
Vertical Pallet Herb Wall
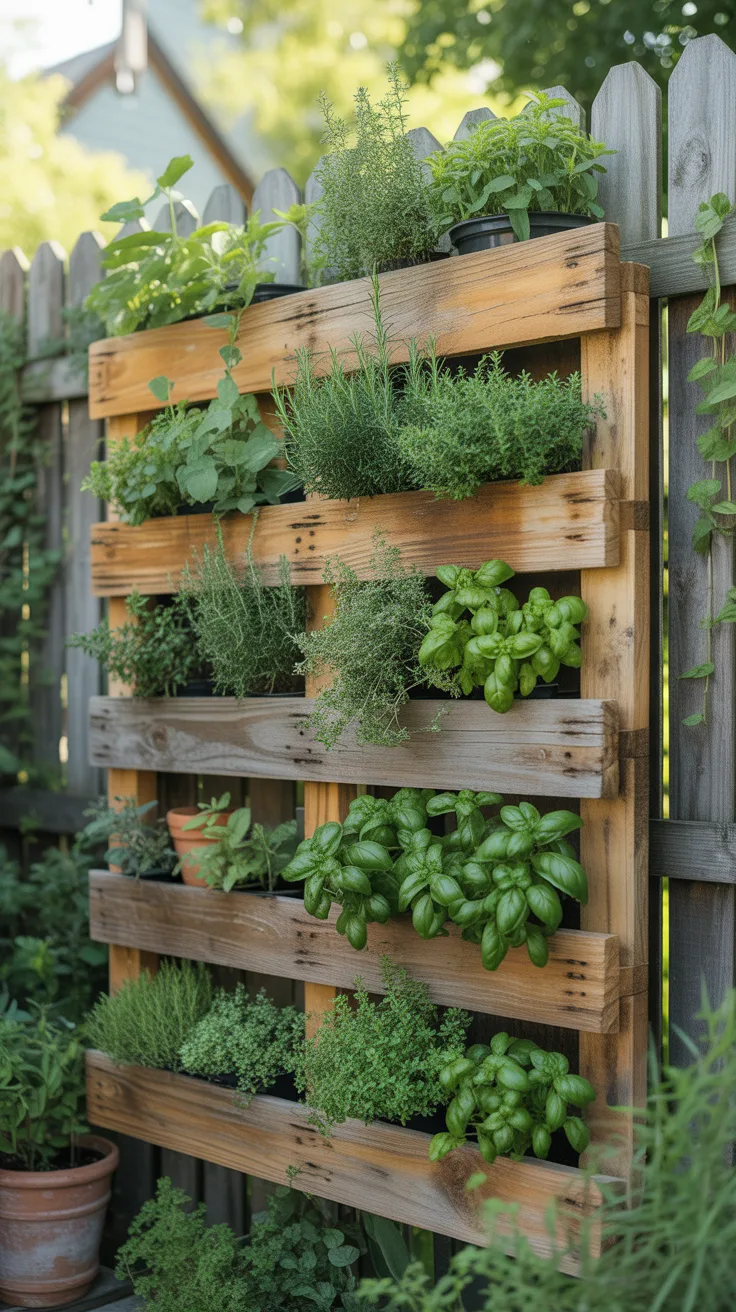
A vertical pallet herb wall turns a single free shipping pallet into growing space for a dozen or more herbs, using almost no floor footprint at all.
Find an untreated wooden pallet (avoid ones marked “MB,” which indicates chemical fumigation), sand any rough edges, and staple landscape fabric across the back and bottom of each slatted pocket to hold soil in. Stand the pallet upright and let it settle for a few days before mounting vertically to a fence or wall, then fill each pocket with potting mix and plant.
The pro insight: plant the pallet while it’s lying flat, and let it stay horizontal for about two weeks before standing it upright — this gives roots time to establish enough to hold soil in place once gravity takes over.
Best herbs for pallet walls: thyme, oregano, and creeping rosemary root shallowly and tolerate the compact pockets far better than deep-rooted herbs like dill.
Learn full build steps in our pallet garden construction guide, and check extension.psu.edu’s pallet safety notes for identifying food-safe pallets.
Teacup Fairy Garden
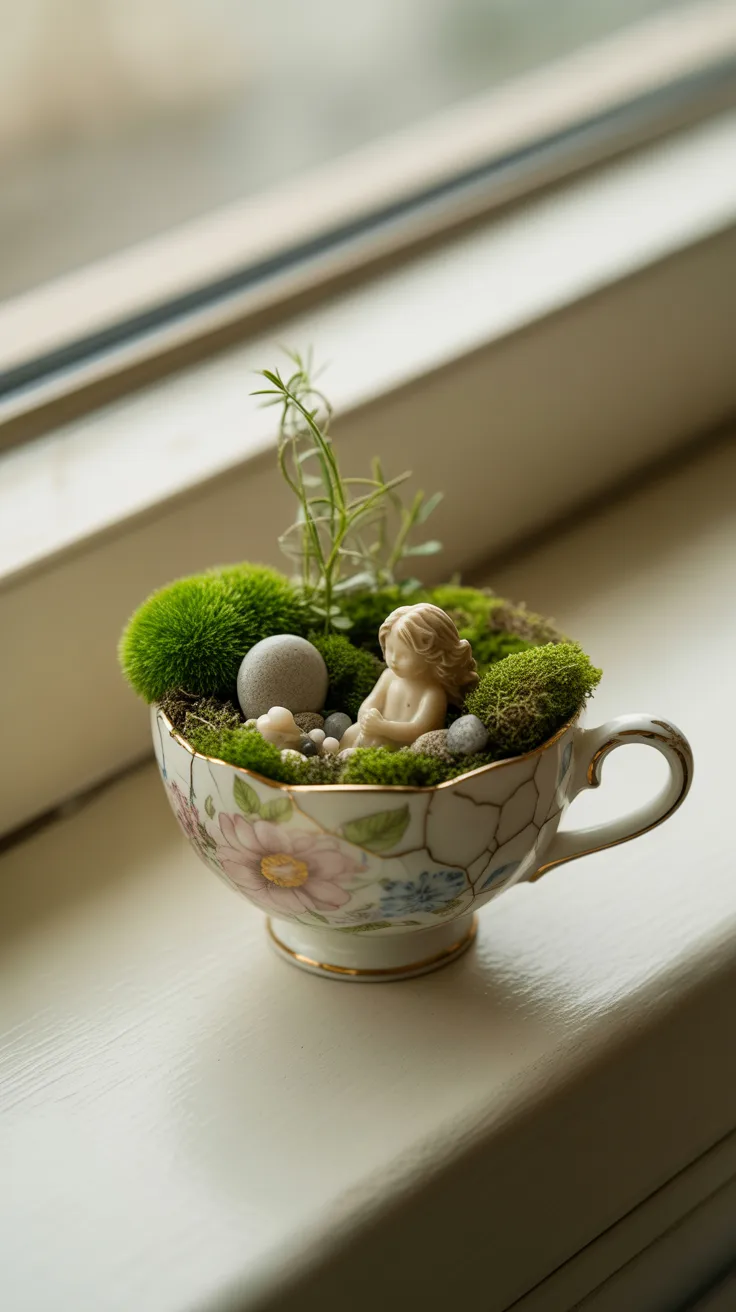
A teacup fairy garden gives a chipped or broken vintage teacup new life as a tiny, whimsical scene — genuinely one of the best small-space or gift-worthy DIY projects on this list.
You’ll need a teacup (a small crack or chip is fine, but avoid ones that no longer hold soil), a small drainage layer of pebbles, a well-draining succulent or moss-friendly potting mix, and tiny decor elements like miniature figurines or pebbles. Layer pebbles at the bottom for drainage since teacups rarely have drainage holes, then add soil and plant a single small succulent or a patch of moss, finishing with your miniature decor arranged to scale.
The common mistake is overwatering — without drainage holes, a teacup garden needs only a few teaspoons of water every week or two, and standing water will rot roots within days.
Explore more tiny-container ideas in our miniature garden container guide, and check thesill.com’s no-drainage container watering tips for exact watering amounts. This project makes a genuinely lovely handmade gift.
Tin Can Herb Planters
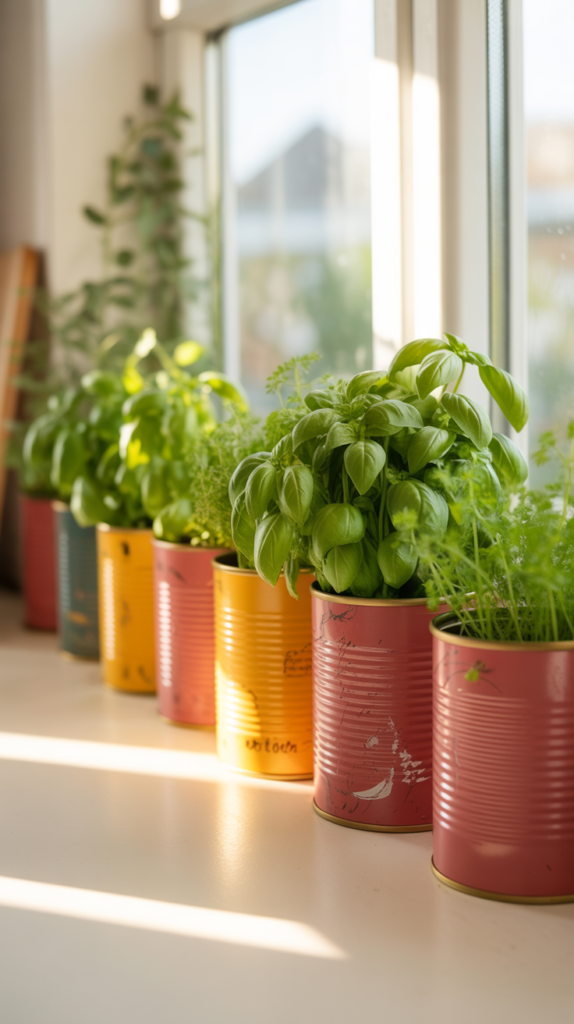
Tin can planters turn empty soup or vegetable cans into a matching set of herb pots for free, and they’re small enough to line a sunny windowsill without crowding it.
Clean cans thoroughly, remove any sharp edges from the lid rim with pliers, and drill 2–3 drainage holes in the bottom using a metal drill bit — this step is non-negotiable, since tin cans without drainage will drown herb roots within a week. Paint the outside with metal-safe spray paint or wrap with twine, fabric, or washi tape for a no-paint option, then fill with a well-draining potting mix suited to herbs.
The pro insight: line the inside bottom of the can with a thin layer of gravel or broken pottery before adding soil — it helps compensate for the small drainage holes and keeps roots from sitting in trapped water.
💡 Pro Tip: Punch drainage holes from the inside out, not outside in — it prevents the sharp, jagged metal edge from ending up on the outside where hands touch the can.
See our windowsill herb garden guide, and check gardenersworld.com’s container drainage basics for sizing drainage holes correctly.
Rustic Twig Garden Trellis
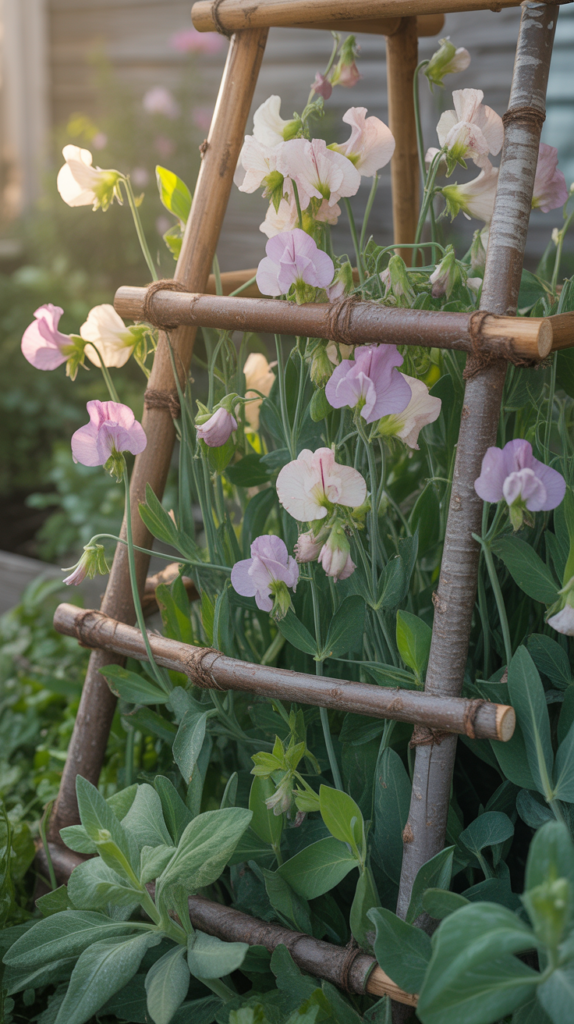
A twig trellis gives climbing plants like sweet peas or small clematis a support structure that costs nothing beyond fallen branches already in your yard.
Gather straight branches roughly ½–1 inch thick and 4–6 feet long, favoring flexible woods like willow or birch that bend without snapping. Push several branches vertically into the soil in a fan or teepee shape, then weave thinner, more flexible twigs horizontally between them and secure joints with garden twine or thin wire.
The common mistake is using green, freshly cut wood without letting it dry slightly first — very green wood can actually re-root and sprout unpredictably rather than staying as a stable structural support.
Best branches for trellis building: willow and birch (flexible), paired with sturdier oak or maple branches (structural uprights).
Learn weaving techniques in our natural garden structure guide, and check the RHS guide to plant supports for weight-bearing tips by climbing plant type.
Hanging Mason Jar Herb Garden
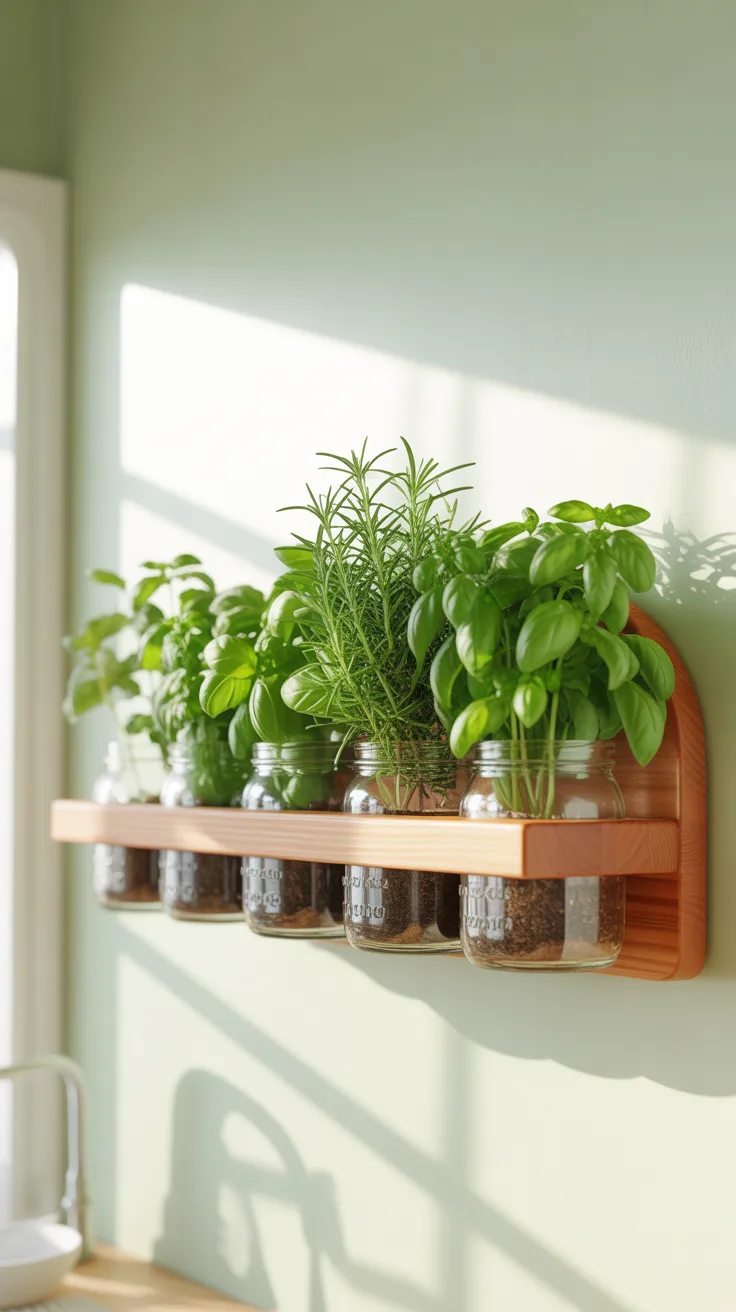
A hanging mason jar garden mounts glass jars in a wooden rack or hose clamps on a wall, giving herbs a display that doubles as functional kitchen decor near a sunny window.
You’ll need wide-mouth mason jars, a wooden board, and hose clamps or a pre-made jar rack (widely available online), plus a well-draining potting mix. Since mason jars have no drainage, add a 1-inch layer of pebbles at the bottom before soil, and secure jars to the mounting board using hose clamps sized to the jar’s neck width.
The pro insight: mount the rack somewhere you’ll water regularly rather than a hard-to-reach spot — glass jars without drainage need more careful, frequent light watering than potted herbs, and an inconvenient location leads to root rot from either neglect or overcompensation.
This project works especially well in kitchens, since fresh herbs stay within arm’s reach of the cutting board. See our indoor herb garden watering guide, and check thesill.com’s no-drainage container care for jar-specific watering schedules.
Painted Wine Cork Plant Markers
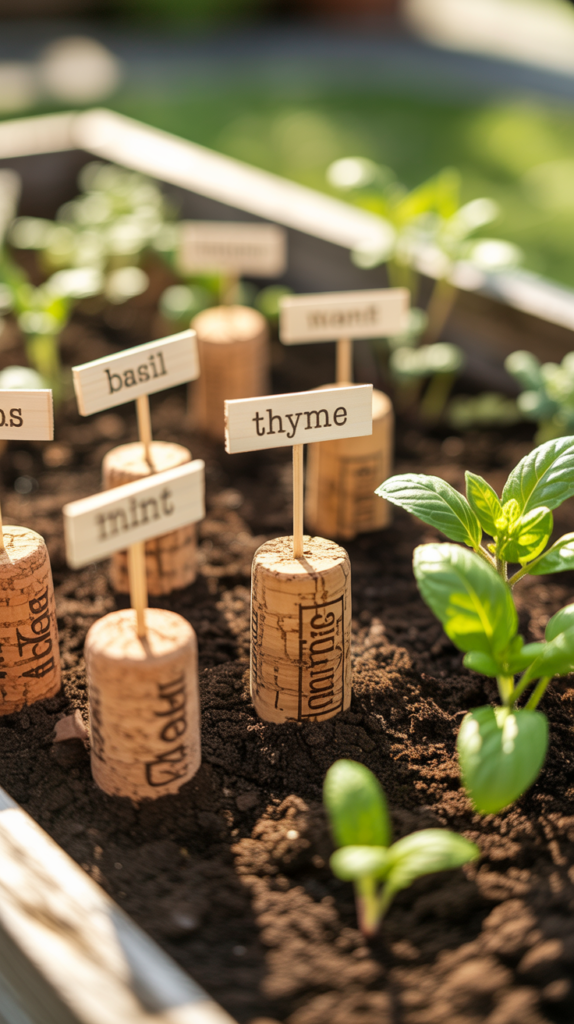
Wine cork markers repurpose used corks into small, charming plant labels — a natural next step if you’re already saving corks from the tiki torch project above.
You’ll need used wine corks, wooden toothpicks or skewers, a paint pen, and a small drill bit or awl to create a starter hole. Drill a small hole into the flat end of each cork, insert a toothpick with wood glue for a secure fit, and write the plant name on the cork’s side using a paint pen once the glue has dried.
The common mistake is inserting the toothpick without a pilot hole — corks split easily under pressure, and a pre-drilled hole prevents cracking that would otherwise ruin the cork.
Explore more small-scale garden labeling ideas in our budget plant marker roundup, and check the Almanac’s seed-to-harvest tracking tips for what info is worth labeling. It’s a genuinely satisfying use for corks that would otherwise just pile up in a drawer.
DIY Concrete Leaf Stepping Stones
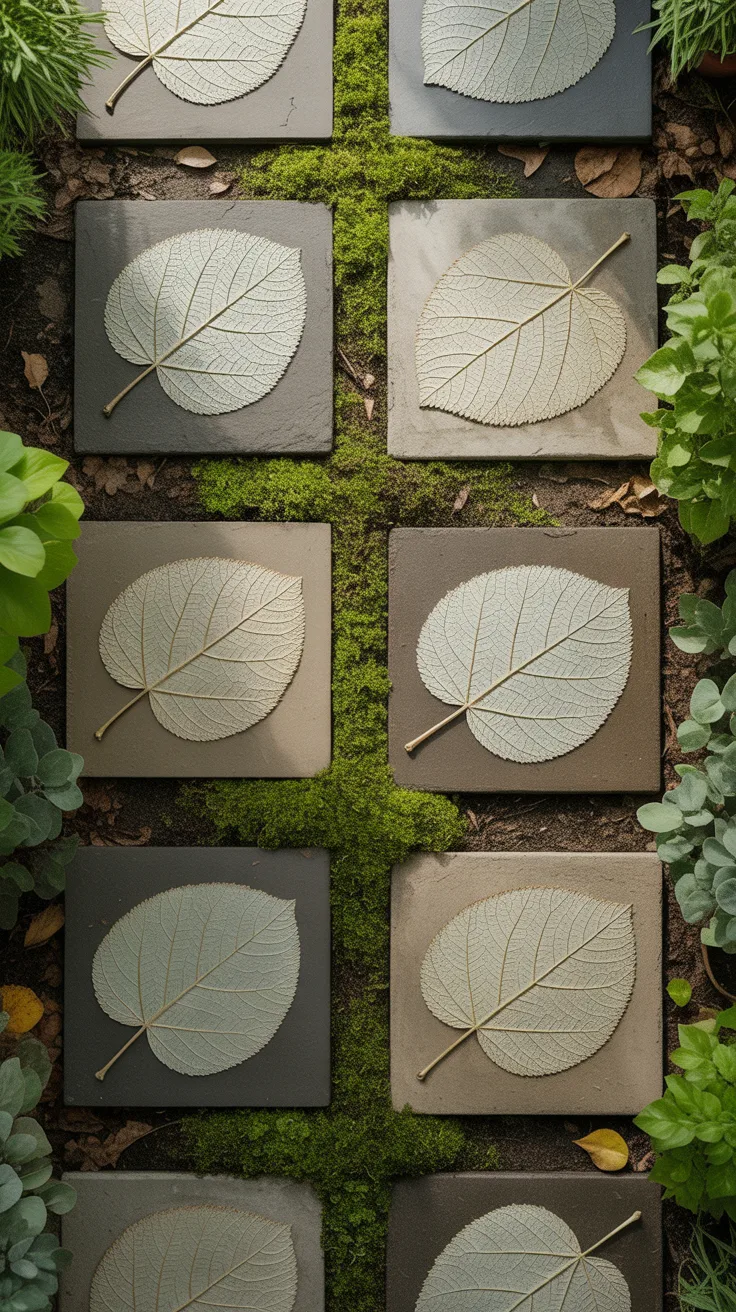
Leaf-imprinted stepping stones cast the natural vein texture of a real leaf directly into concrete, creating a stone that looks hand-carved but requires no artistic skill at all.
You’ll need quick-set concrete mix, a large sturdy leaf (rhubarb and hosta leaves work especially well due to their size and deep veining), a mound of sand to shape the concrete over, and plastic sheeting. Mound damp sand into a rounded dome, lay plastic over it, then press a leaf face-down onto wet concrete poured over the mound so the veined underside presses a detailed imprint.
The pro insight: choose a leaf with deep, pronounced veins rather than a smooth or waxy one — smooth leaves like magnolia leave almost no visible texture once the concrete cures.
💡 Pro Tip: Peel the leaf away once the concrete is firm but not fully cured (usually 12–18 hours) — waiting until full cure makes the leaf nearly impossible to remove without damaging the imprint.
See our full leaf-casting stepping stone tutorial, and check sfgate.com’s DIY concrete casting basics for mix ratios and curing times.
Recycled Bottle Cap Wind Chime
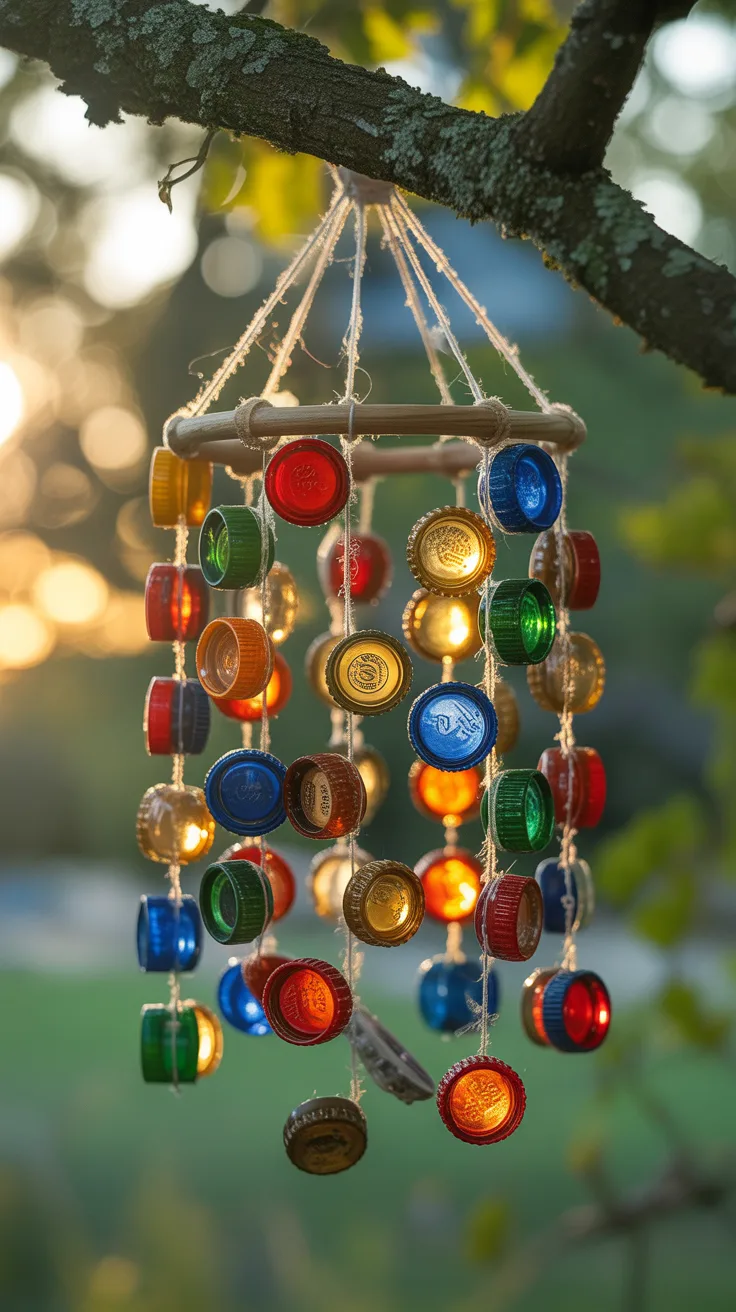
A bottle cap wind chime gives a genuinely satisfying metallic clink in the wind and uses up caps that would otherwise go straight into recycling.
Collect 15–20 clean bottle caps, drill a small hole through the center of each with a fine metal bit (clamp caps down first — they spin and slip easily), and thread them onto fishing line or thin wire in staggered lengths tied to a wooden ring or branch base. Space caps close enough on each strand that they touch and clink in a breeze, but not so tightly packed that they can’t swing freely.
The common mistake is using string instead of fishing line — string absorbs rain and rots within a season outdoors, while fishing line holds up through repeated wet weather.
Best bottle caps for sound variety: mix metal caps with a few plastic ones for a layered, less uniform chime tone.
Explore more upcycled garden sound projects in our DIY garden wind chime roundup, and check BHG’s outdoor upcycling project ideas for weatherproofing metal pieces.
Upcycled Tire Swing Planter
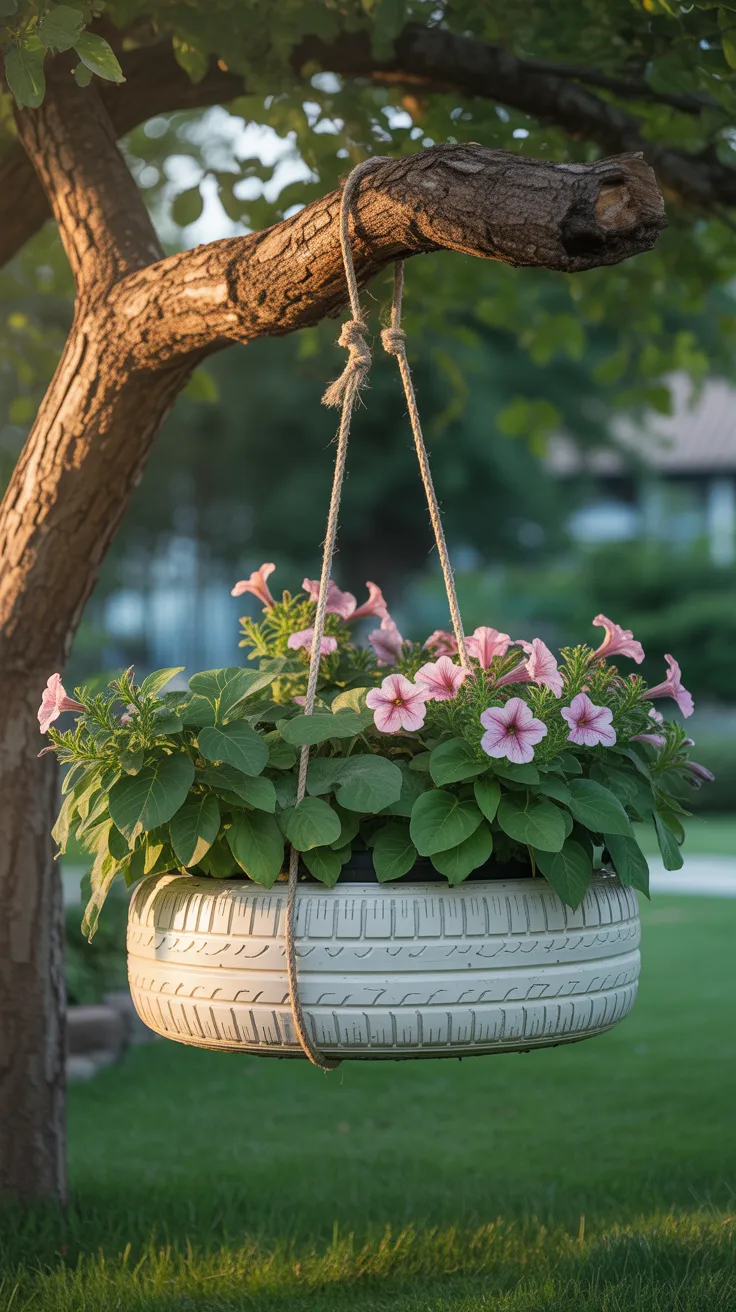
A tire planter turns an old car tire — hanging or ground-level — into a large, sturdy, and genuinely free planting container that holds far more soil volume than most store-bought pots.
For a hanging version, drill three evenly spaced holes near the top edge and thread rope or chain through for suspension; for a ground version, simply set the tire flat and fill it directly. Clean the tire thoroughly, paint the exterior with rubber-safe outdoor paint if desired, and drill a few drainage holes in the lowest point of the tire’s inner well before adding soil.
The pro insight: line the inside of a hanging tire planter with landscape fabric before adding soil — it prevents soil from spilling through gaps between the tire and any drainage holes as the planter swings.
This project is a great way to give an old tire real second life instead of hauling it to a disposal site. See our large container planting guide, and check extension.ufl.edu’s guidance on repurposed planting containers for soil volume and drainage.
Driftwood Plant Display Shelf
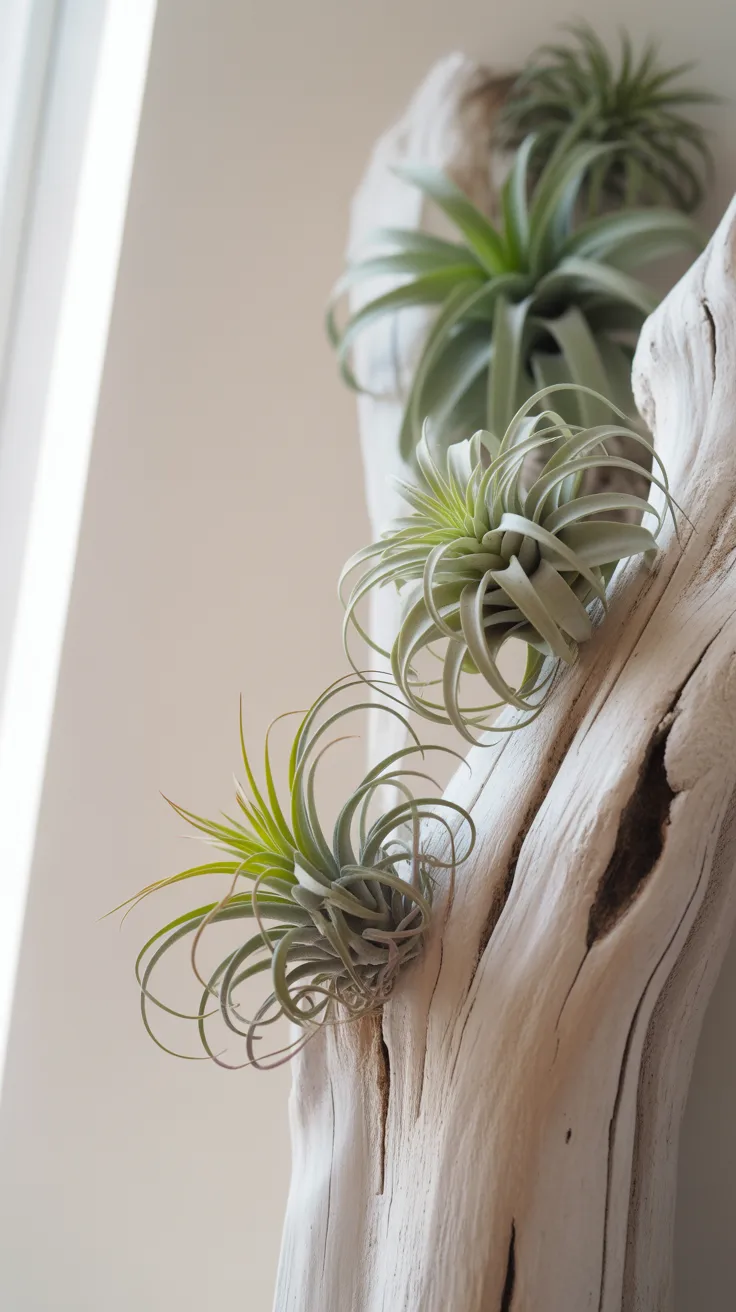
Driftwood displays use the natural crevices and knots in a weathered piece of wood as built-in planting pockets for air plants, which need no soil at all.
Find or purchase a piece of driftwood with visible crevices, cracks, or hollows large enough to nestle a small air plant into, and mount it to a wall using picture-hanging hardware rated for its weight. Tuck air plants directly into the natural pockets — no soil or container needed — and mist them 2–3 times a week rather than watering at the roots.
The common mistake is choosing driftwood with only shallow, flat surfaces — air plants need a crevice deep enough to sit securely without falling out when the piece is jostled or during misting.
💡 Pro Tip: Soak new air plants in room-temperature water for 20–30 minutes before mounting — a fully hydrated plant establishes into its new spot far better than a dry one straight from the store.
See our full guide to air plant care and display, and check the RHS air plant growing notes for humidity requirements.
Repurposed Ladder Trellis for Climbing Vines
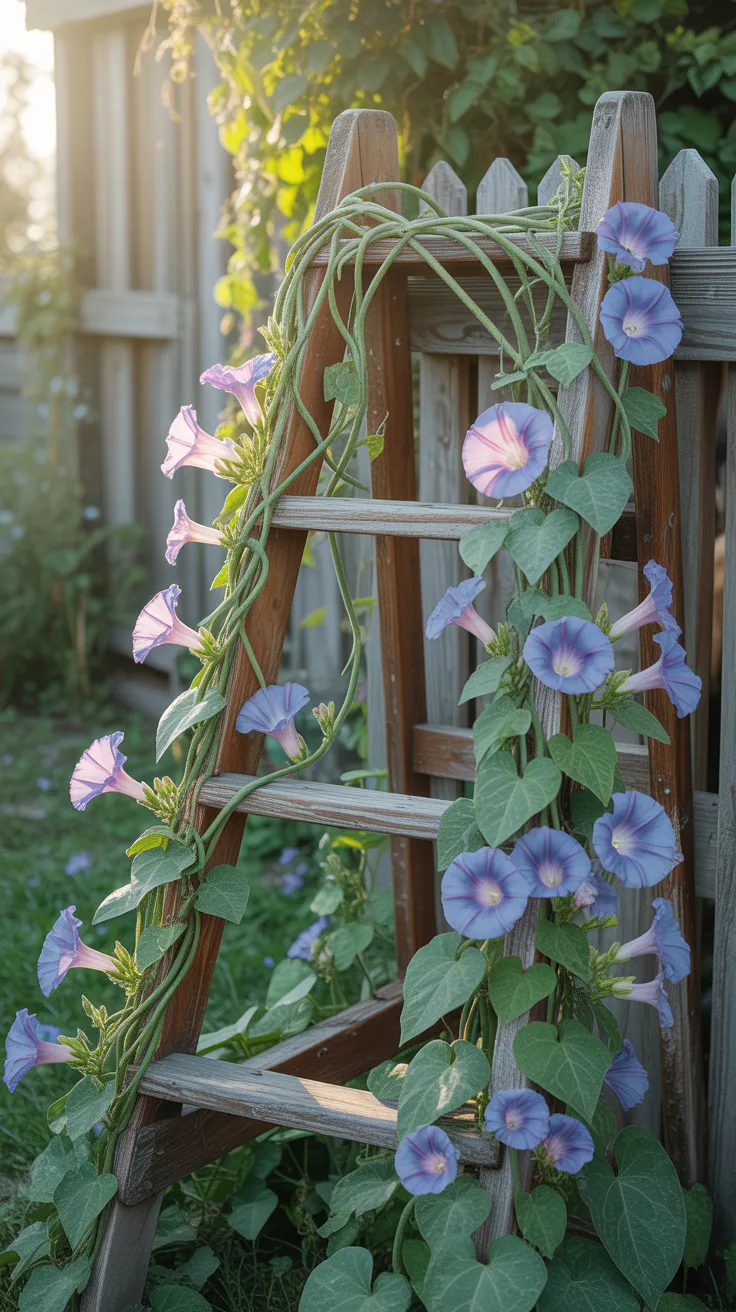
A second life for an old ladder: laid flat and leaned at an angle against a fence, its rungs become instant, ready-made support for climbing vines like morning glory or sweet peas.
Secure the ladder firmly against a fence or wall at roughly a 60-degree angle so it can’t shift under the weight of mature vines, then plant climbers at the base and gently guide young growth onto the lowest rung to start. As vines grow, they’ll wrap the rungs naturally with minimal additional training needed.
The pro insight: choose a ladder with rungs spaced 10–12 inches apart if possible — wider spacing gives twining vines less to grip initially and slows early establishment.
Best climbers for ladder trellises: morning glory, sweet peas, and black-eyed Susan vine all twine readily around narrow wooden rungs without extra tying.
Explore more repurposed vertical supports in our upcycled trellis idea guide, and check gardenersworld.com’s climbing plant support guide for species-specific training tips.
Glow-in-the-Dark Painted Garden Border
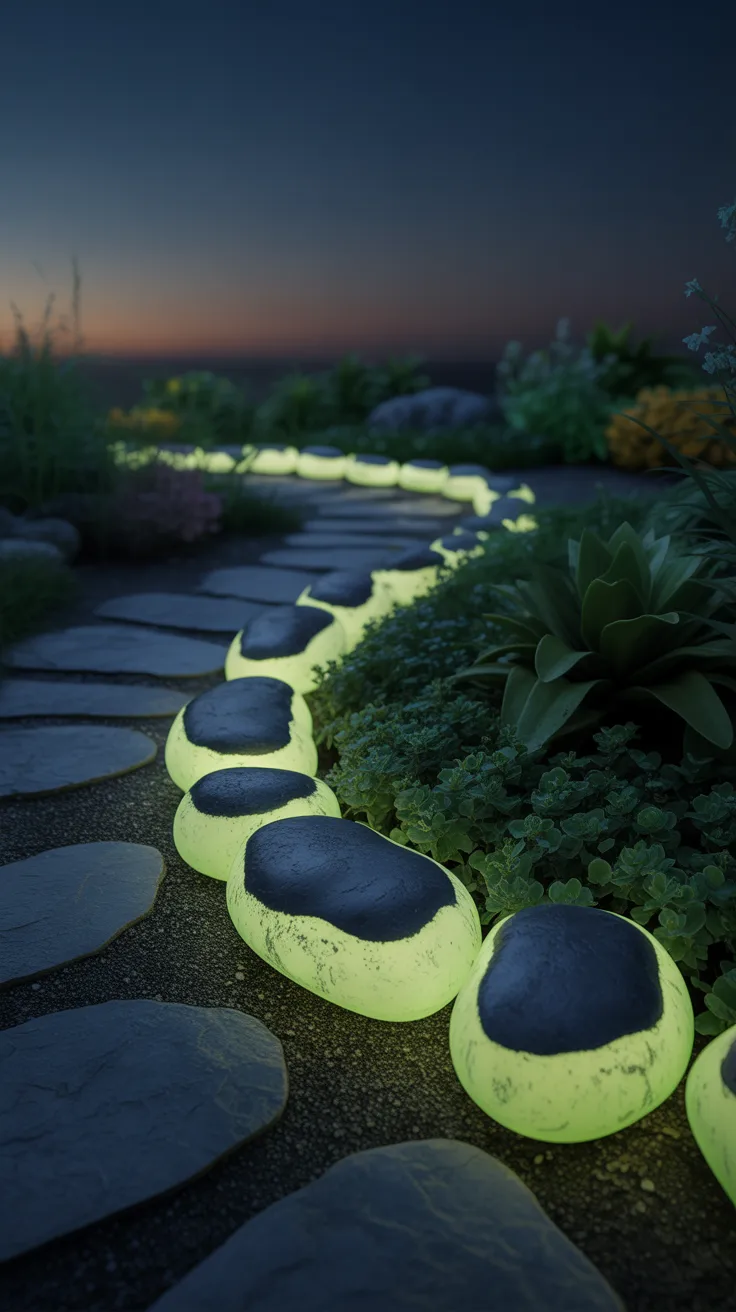
A glow-in-the-dark border paints ordinary edging stones or pebbles with photoluminescent paint, giving a path or bed edge a soft, functional glow after dark without any wiring or electricity.
Use smooth, clean stones or purchase inexpensive edging pavers, and apply 2–3 coats of glow-in-the-dark outdoor paint, letting each coat dry fully — thin coats charge and glow far better than one thick layer. Place finished stones along a path edge or bed border where they’ll get direct sun exposure during the day, since the paint needs daylight charging to glow at night.
The common mistake is placing glow stones in full shade — without several hours of direct sun daily, the paint never charges enough to produce a visible glow after dark.
Explore more low-tech garden lighting alternatives in our solar and glow garden lighting guide, and check BHG’s outdoor path lighting ideas for combining glow stones with solar lights.
Upcycled Colander Hanging Planter
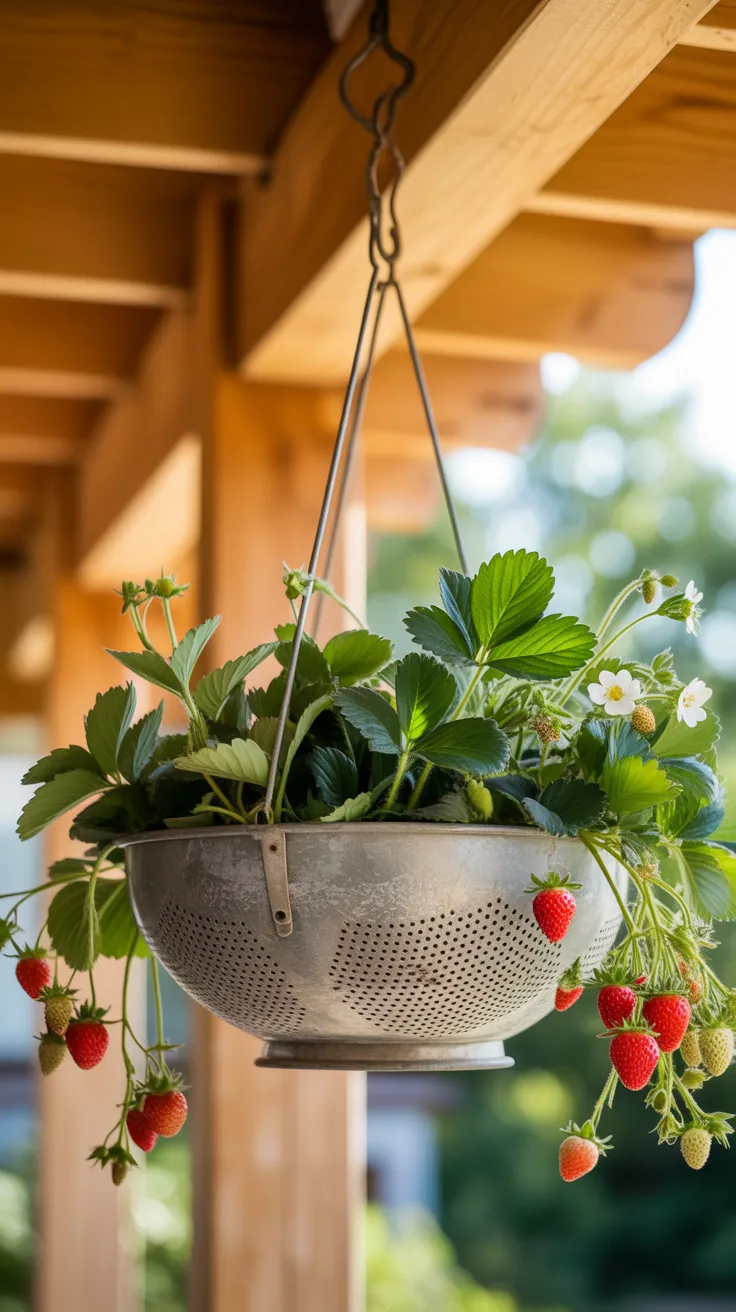
An old kitchen colander already has drainage built in — its holes make it one of the easiest kitchen items to repurpose into a hanging planter with zero extra drilling required.
Find a metal or plastic colander with a handle or hanging loop, line the inside with a layer of sphagnum moss or coconut coir to keep soil from sifting through the larger holes, and fill with potting mix. Hang from a porch beam or hook using its existing handles, or attach chain through the handle holes if it doesn’t already hang.
The pro insight: the many drainage holes mean colander planters dry out noticeably faster than a standard pot, so plant it with drought-tolerant trailing plants like strawberries or nasturtiums rather than moisture-loving species.
Best plants for colander planters: strawberries, nasturtiums, and trailing petunias handle the fast-draining setup well.
See our guide to fast-draining container planting, and check thesill.com’s hanging basket watering tips for adjusting watering frequency.
DIY Solar Mason Jar Lights
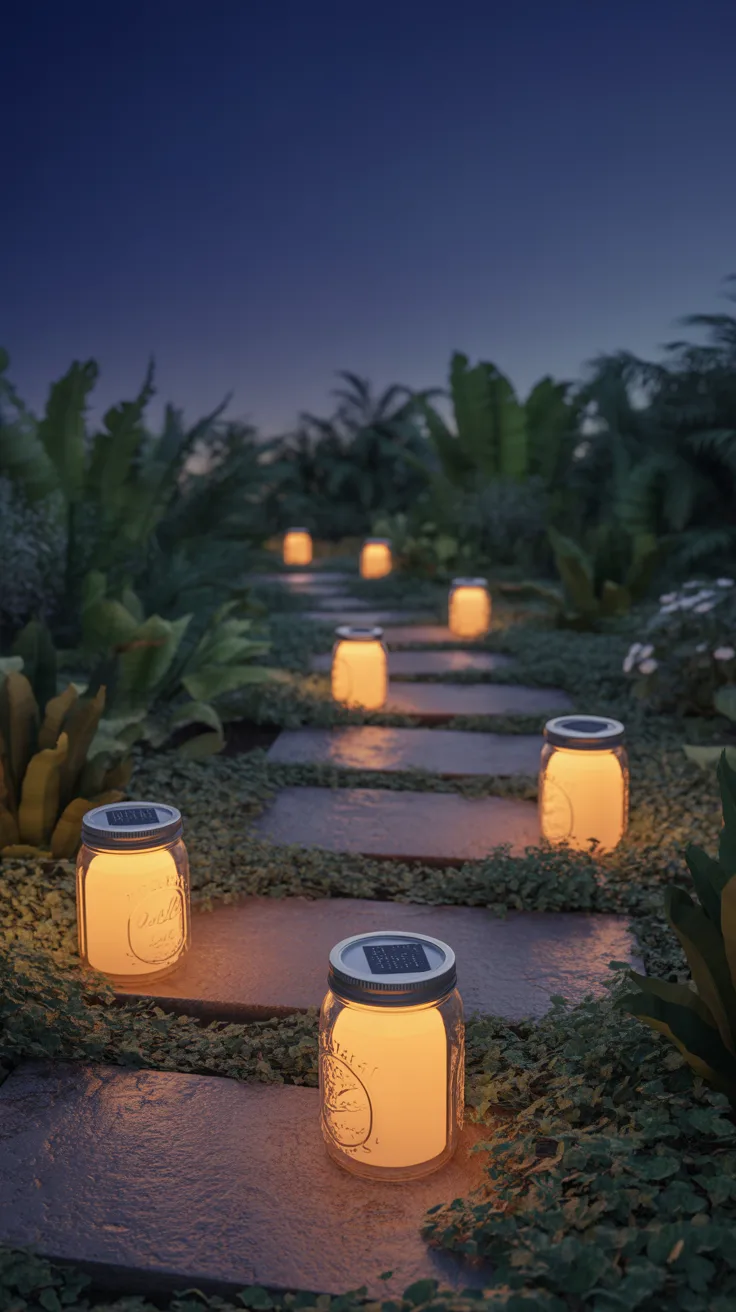
Solar mason jar lights combine an inexpensive solar garden light stake with a mason jar to create a softly glowing lantern that charges itself with zero wiring.
Buy small solar light stakes (the kind normally pushed directly into soil) and unscrew just the solar light cap from its stake. Screw that solar cap directly onto a mason jar lid ring, then set the assembled jar wherever you want light — hanging from a hook, sitting on a step, or lining a path.
The pro insight: place jars where they’ll get direct sun for at least 6 hours during the day; a jar tucked in shade under other plants looks charming but will barely glow after dark since the solar panel needs real daylight exposure to charge fully.
💡 Pro Tip: Add a strand of battery-free fairy lights inside the jar in addition to the solar cap for a fuller glow — the solar cap alone lights the jar’s top, while interior fairy lights illuminate the glass from within.
See our solar garden lighting comparison guide, and check the Almanac’s solar light placement tips for maximizing charge time.
Painted Birdhouse Garden Accent
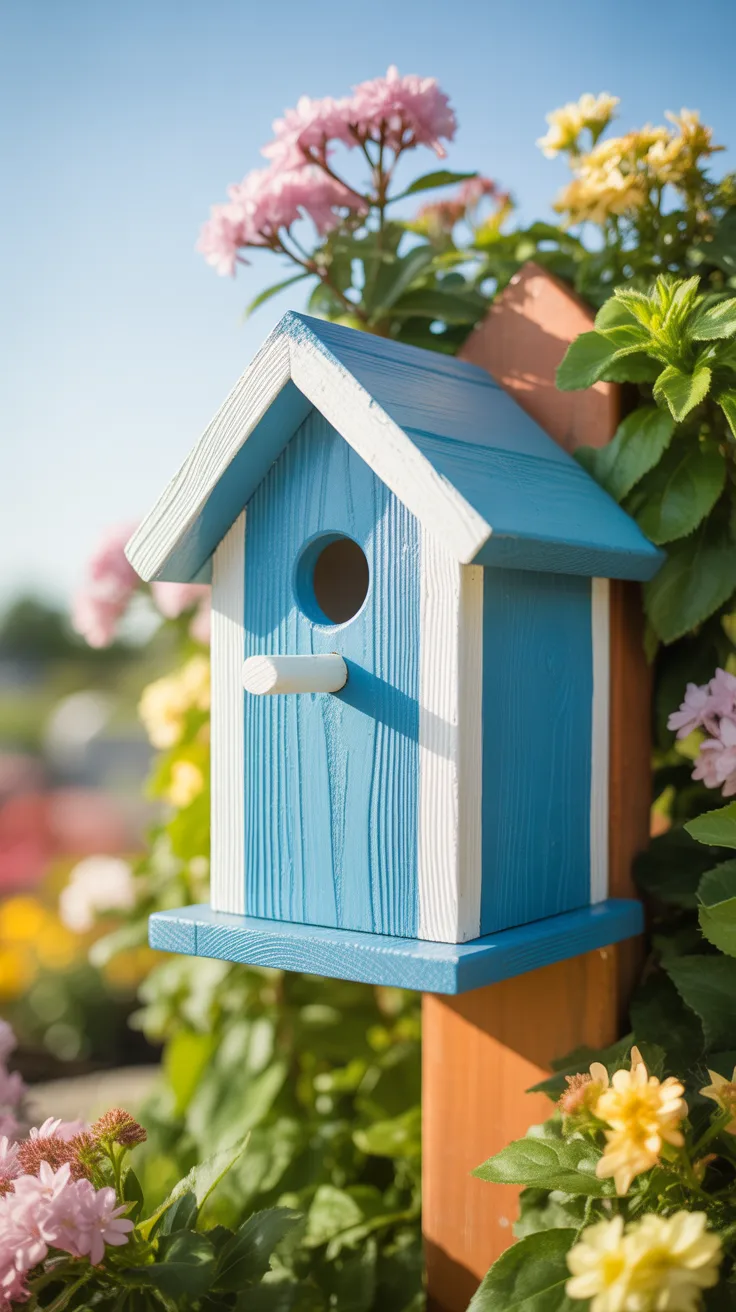
A painted birdhouse adds height, color, and a genuine ecological benefit to a garden bed, giving small birds shelter while doubling as a decor focal point.
Buy an unfinished wooden birdhouse kit or use an existing one, and paint the exterior with outdoor acrylic or latex paint — never paint the interior, entrance hole, or perch, since paint fumes and residue can be harmful to nesting birds. Mount it on a post or tree at least 5–6 feet off the ground, angled slightly downward to help keep rain out of the entrance hole.
The common mistake is placing the entrance hole facing direct prevailing winds or full afternoon sun — both make the interior too hot or drafty for birds to actually nest inside, even if the birdhouse looks perfect.
Explore bird-friendly garden design in our guide to wildlife-friendly garden features, and check the Missouri Botanical Garden’s birdhouse placement guide for hole-size specifics by bird species.
Repurposed Dresser Drawer Planter Box
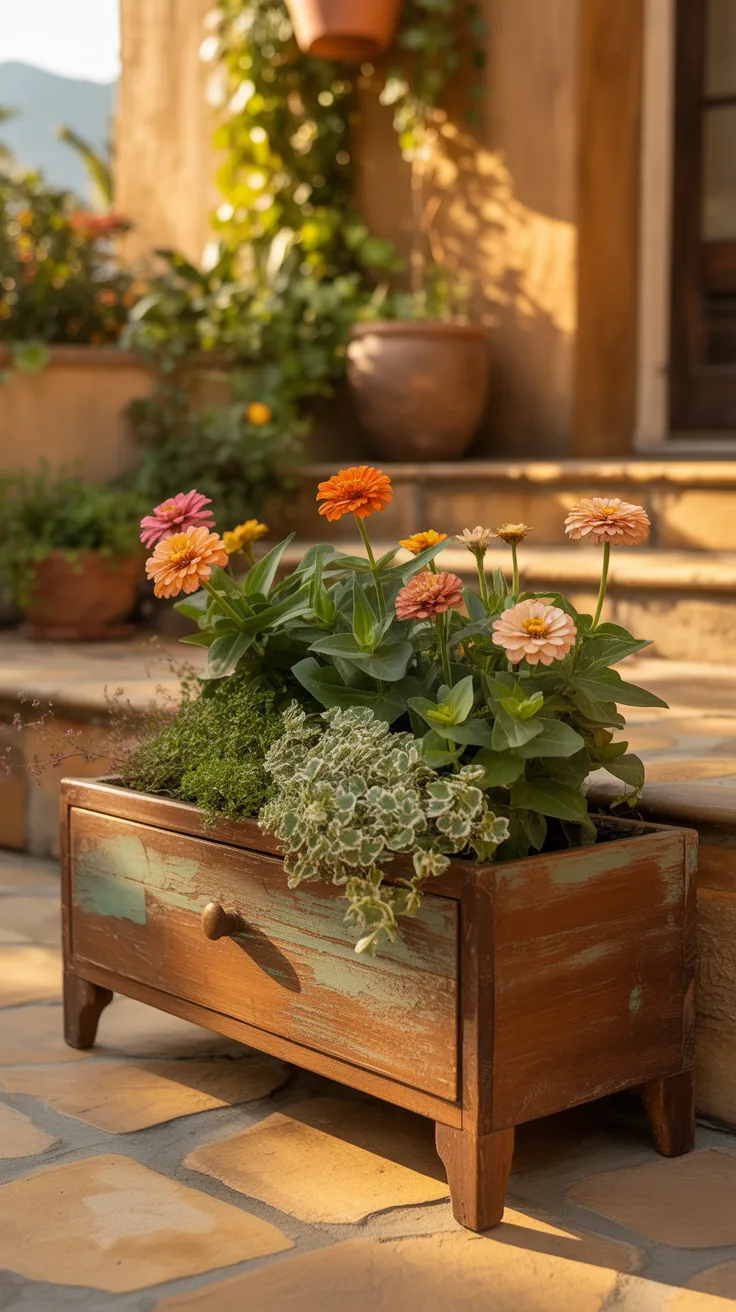
An old dresser drawer, pulled from a piece of furniture headed for the curb, makes a genuinely striking rustic planter box with far more personality than a standard rectangular container.
Drill several drainage holes in the bottom of the drawer, and line the interior with landscape fabric if the wood shows signs of rot, to extend its lifespan outdoors. Seal any exposed raw wood with an exterior wood sealant, then fill with potting mix and plant — shallow-rooted annuals like zinnias or marigolds suit a drawer’s typically limited depth better than deep-rooted vegetables.
The pro insight: raise the drawer slightly off the ground on bricks or wood scraps so it doesn’t sit in standing water, which is what actually rots repurposed wood furniture fastest outdoors, more than rain exposure itself.
Explore more upcycled furniture planter ideas in our repurposed furniture planter guide, and check the RHS wood preservation guide for safe outdoor sealants.
DIY Rope-Wrapped Hanging Planter
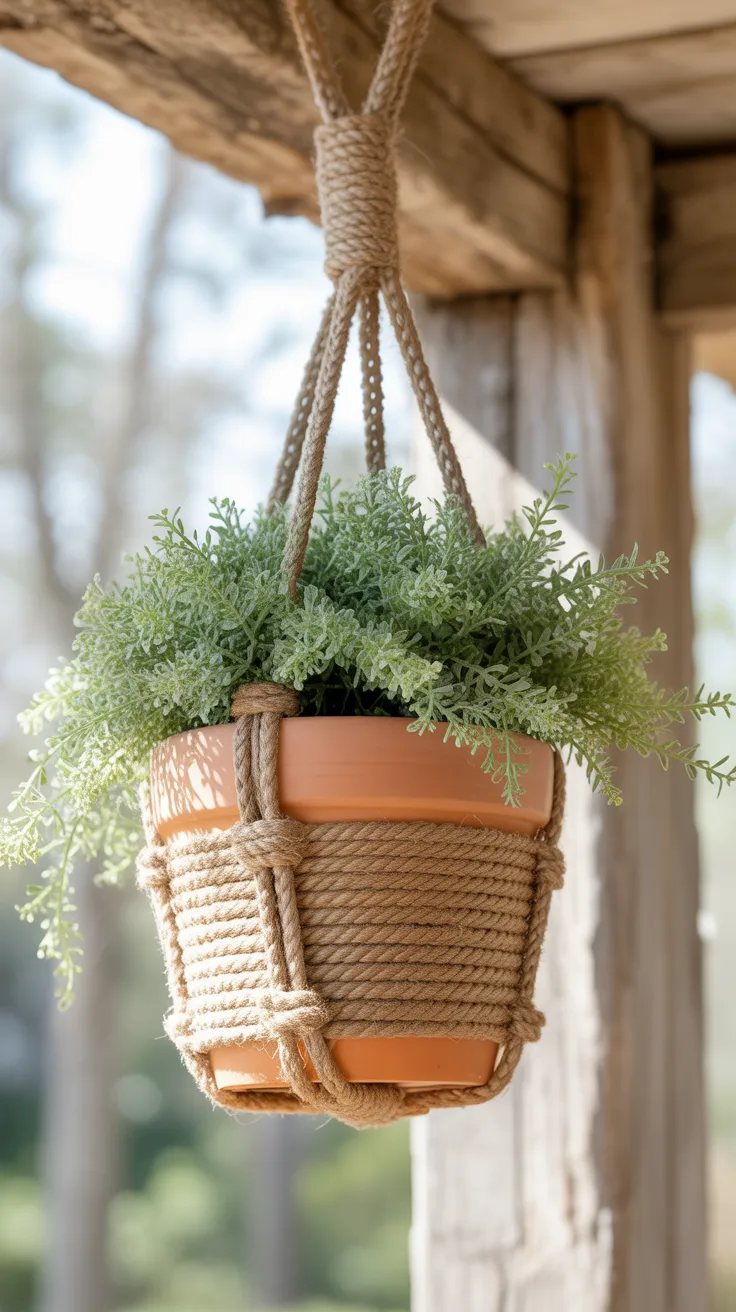
Wrapping a plain pot in natural jute or cotton rope turns a basic terracotta or plastic planter into a textured, boho-style hanging piece without any macrame knot skills required.
You’ll need a plain pot, natural jute or cotton rope, hot glue or craft glue, and rope or chain for hanging. Starting at the base, wrap rope tightly around the pot in a continuous spiral, securing with dabs of hot glue every few wraps to keep it from unraveling, and finish by gluing the end neatly at the pot’s rim.
The pro insight: use a slightly damp rope while wrapping — it conforms to the pot’s curve more smoothly than dry rope, which tends to kink and leave visible gaps.
Rope options: jute for a rustic, natural look; cotton rope for a softer, more refined finish.
See our full boho planter styling guide, and check thesill.com’s plant styling ideas for pairing trailing plants with textured pots.
Chalkboard Garden Sign
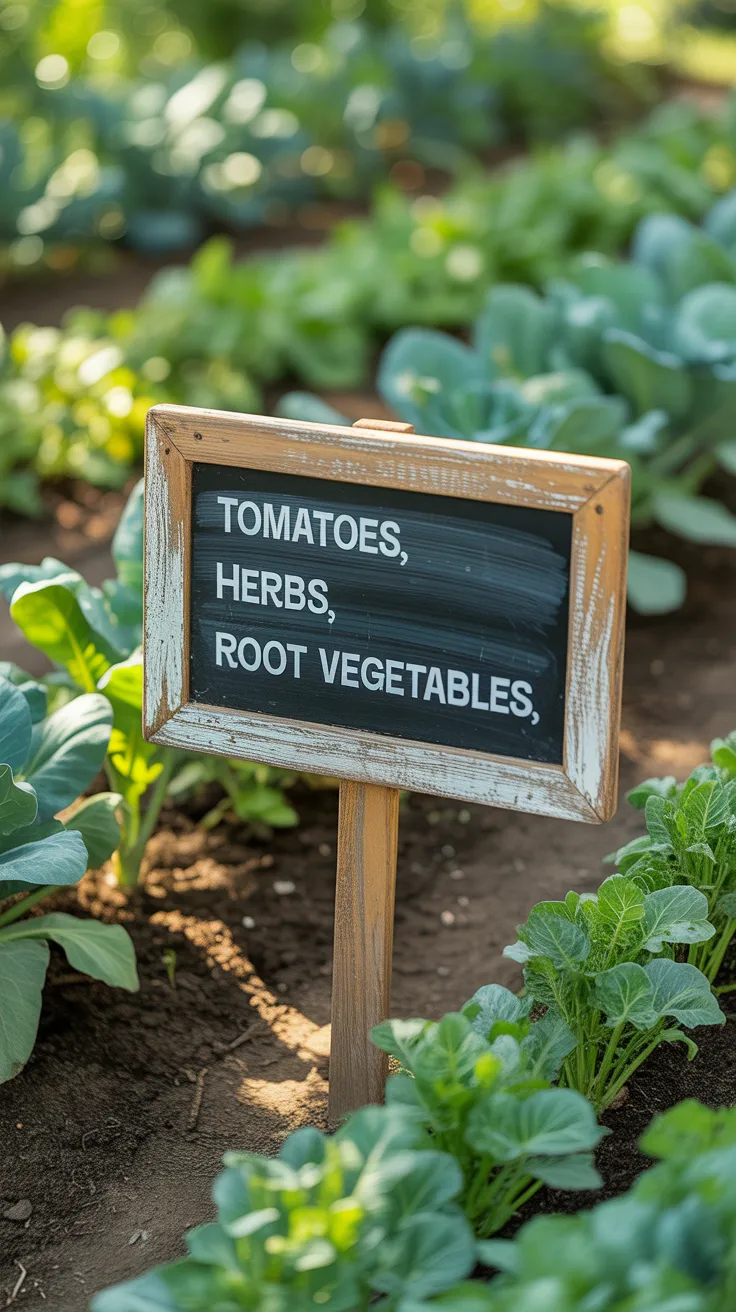
A chalkboard garden sign lets you label garden sections, mark planting dates, or add a fun seasonal message, and it can be rewritten as often as the garden itself changes.
Use an old picture frame or a scrap piece of plywood, coat it with chalkboard paint in 2–3 thin layers, and let it cure fully (usually 24 hours) before the first use. Mount it on a garden stake or lean it against a fence near the bed it labels, and write directly with standard chalk, which wipes clean with a damp cloth whenever you want to update it.
The common mistake is writing on a freshly painted board before the paint has fully cured — chalk written too early can permanently etch into under-cured paint and won’t wipe away cleanly.
Explore more garden labeling systems in our vegetable garden organization guide, and check BHG’s DIY chalkboard project basics for weatherproofing outdoor chalkboard paint.
Upcycled Boot Planters
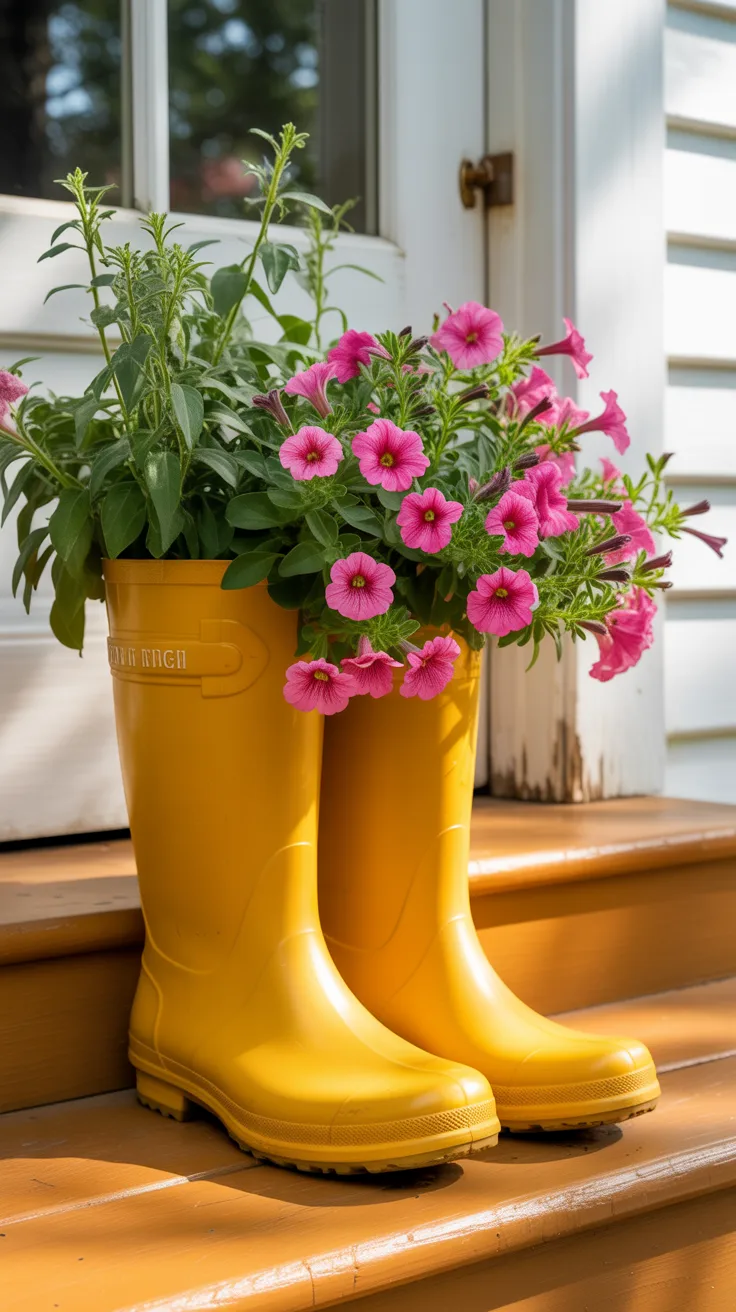
Old rubber boots with a cracked sole or worn-out lining make genuinely charming, whimsical planters that need almost no preparation beyond a few drainage holes.
Drill several drainage holes through the sole of each boot using a drill bit rated for rubber, then fill with potting mix and plant directly. Rubber boots retain heat and moisture more than porous terracotta, so they suit thirstier annuals like petunias or impatiens better than drought-tolerant succulents.
The pro insight: place a layer of gravel in the toe area before adding soil — it improves drainage in the boot’s narrowest point, which otherwise tends to stay soggy longer than the wider ankle opening.
💡 Pro Tip: Choose boots in a bold color and let the plant color complement rather than match it exactly — a bright yellow boot with purple petunias reads as playful, while matching colors can look accidental rather than intentional.
See our whimsical container garden ideas guide, and check gardenersworld.com’s upcycled container planting notes for material-specific drainage tips.
DIY Fairy Light Garden Canopy
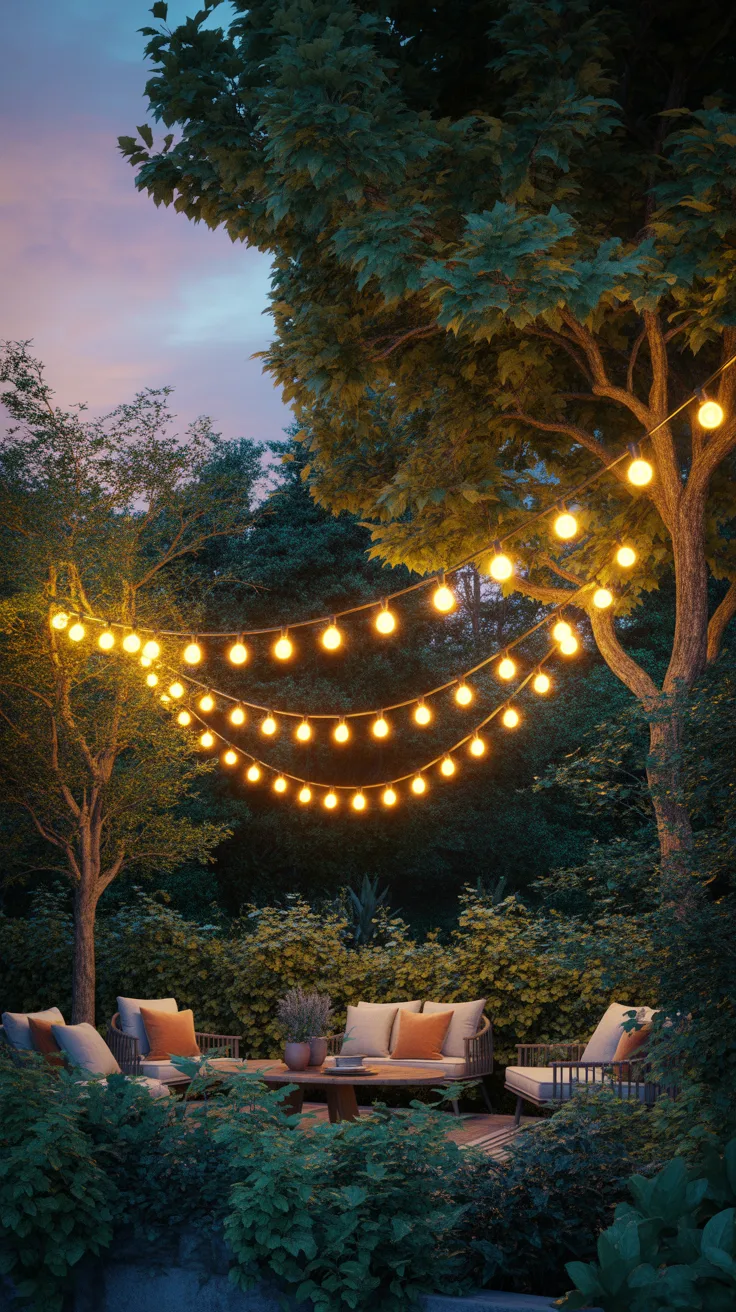
A fairy light canopy strung overhead between two trees, a fence, and a house transforms an ordinary backyard seating area into an evening destination without any electrical or structural work.
Use outdoor-rated LED string lights (check the packaging specifically for outdoor/weatherproof ratings), and stretch a support line of galvanized wire or heavy-duty string between anchor points first, then drape and zip-tie the lights loosely along that support line rather than letting the lights themselves bear the tension. Space anchor points no more than 15–20 feet apart to prevent excessive sagging in the middle.
The common mistake is hanging lights taut in a straight line — a gentle, deliberate sag or crisscross pattern reads as intentional and romantic, while overly tight lines look accidental and can pull anchor points loose over time.
Explore full outdoor lighting layout ideas in our backyard string light design guide, and check the Almanac’s outdoor electrical safety notes for weatherproofing connections.
Painted Wooden Pallet Vertical Garden Sign
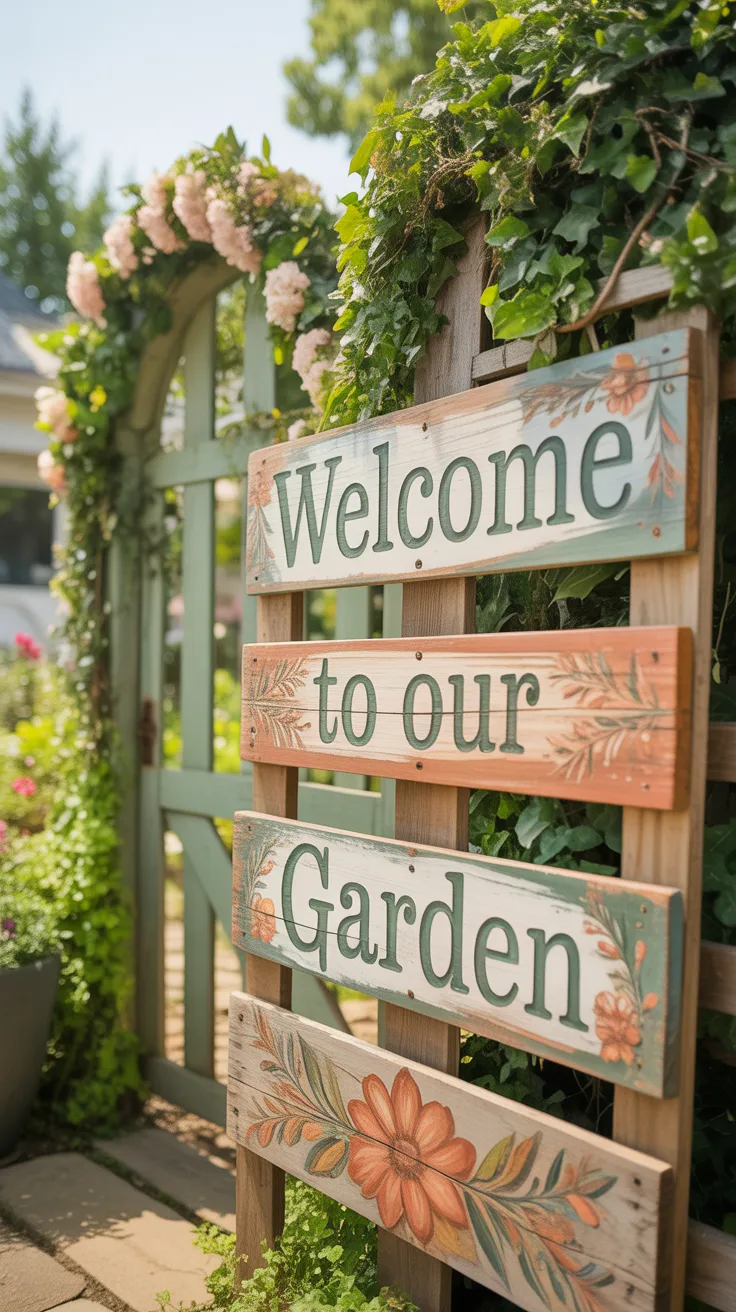
A pallet garden sign repurposes a single reclaimed pallet board into a welcoming, hand-lettered piece for a gate, fence, or garden entrance.
Break down a pallet into individual boards using a pry bar (or use one intact narrow board), sand rough edges smooth, and paint or stain the background before hand-lettering or stenciling your message. Seal the finished piece with exterior polyurethane or spray sealant to protect the lettering from fading in direct sun and rain.
The pro insight: stencil the lettering rather than freehanding it if you’re not confident with a paintbrush — painter’s tape or a purchased letter stencil kit gives clean, professional-looking edges even for a first-time project.
Sign placement ideas: garden gate entrance, fence line facing the street, or mounted above a raised bed to label the growing area.
See our full reclaimed wood sign tutorial, and check extension.psu.edu’s outdoor wood finishing guide for sealant durability comparisons.
DIY Copper Pipe Plant Stakes
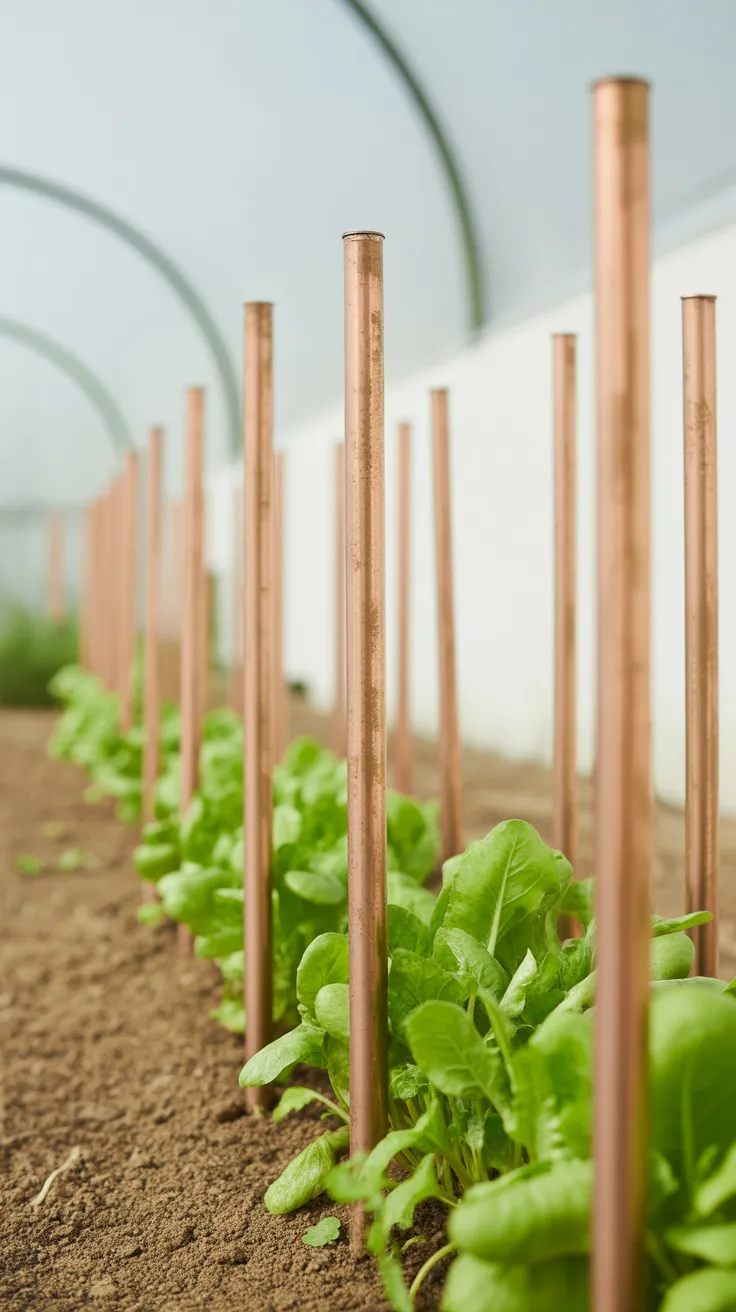
Copper pipe stakes give a garden bed a clean, modern, minimalist marker system, using leftover plumbing scraps that most hardware stores will sell inexpensively by the foot.
Cut copper pipe into 8–10 inch lengths using a pipe cutter, and either leave the natural copper shine or let a few pieces develop a weathered patina over time for contrast. Push each stake directly into the soil at the start of a row, using a permanent paint pen to write the plant name near the top, or leave them unlabeled as purely decorative row markers.
The pro insight: copper naturally develops a green-blue patina outdoors within a season, which some gardeners love for the aged look — if you want to keep the bright copper shine longer, apply a clear metal lacquer before staking.
Explore more modern garden marker ideas in our minimalist garden decor guide, and check BHG’s metal garden accent ideas for pairing copper with other materials.
Repurposed Window Frame Trellis
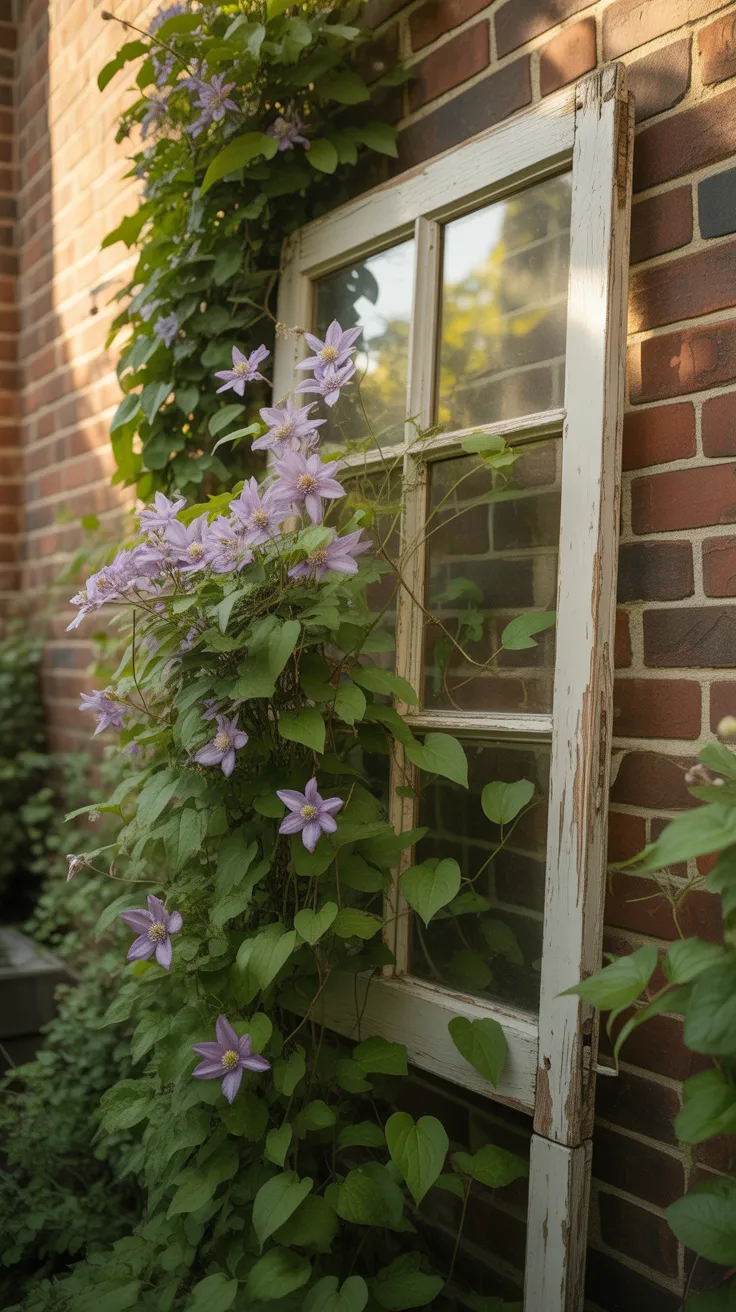
An old window frame, sash removed, becomes an instantly charming trellis grid for climbing vines, especially if it still has its original multi-pane muntin bars.
Remove any remaining glass carefully and safely (wear gloves), and either leave the frame bare for vines to weave through the empty pane openings, or add a layer of garden wire mesh behind the frame for smaller-vined plants to grip more easily. Mount securely to a wall or fence with heavy-duty brackets, since a soil-planted vine’s mature weight can be substantial.
The common mistake is mounting the frame flush against a solid wall — leave at least 2–3 inches of gap behind it for airflow and to give vine tendrils room to wrap around the frame from both sides.
Explore more architectural salvage garden ideas in our reclaimed materials garden guide, and check gardenersworld.com’s clematis training guide for pruning and support needs.
DIY Painted Gnome Garden Statue
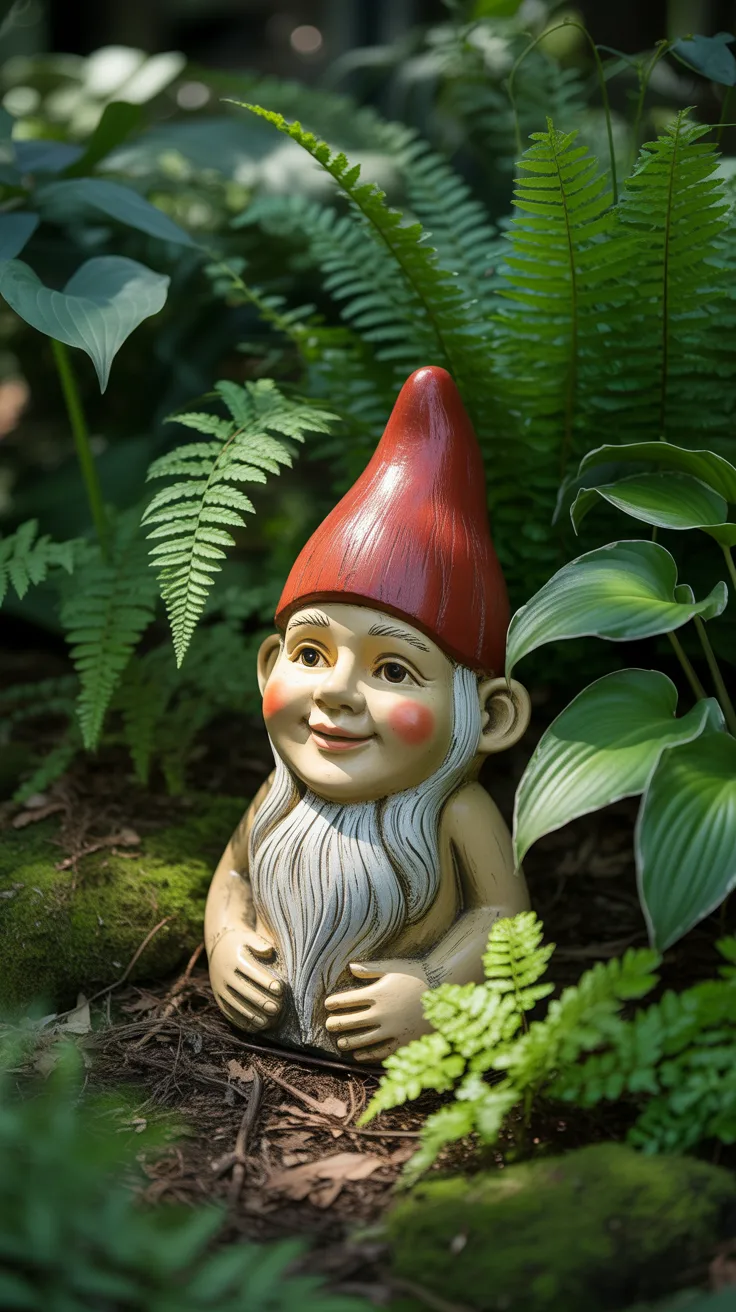
A hand-painted garden gnome gives an unfinished concrete statue (widely sold cheaply at craft stores) real personality, and painting one yourself makes it genuinely unique rather than store-generic.
Buy an unpainted concrete or resin gnome statue, and use outdoor acrylic paint applied in thin layers, starting with base colors and building up detail (facial features, hat, clothing texture) with progressively smaller brushes. Once fully dry, seal with 2–3 coats of clear outdoor sealant to protect the paint from fading and cracking through winter freeze-thaw cycles.
The pro insight: concrete statues absorb moisture, so if you’re in a freeze-prone climate, bring the piece indoors or under cover during hard winter freezes — trapped moisture that freezes inside porous concrete can crack the statue over time.
Explore more painted statuary projects in our garden statue painting guide, and check the RHS guide to garden ornament placement for scaling statues to bed size.
Suspended Tin Watering Can Planter
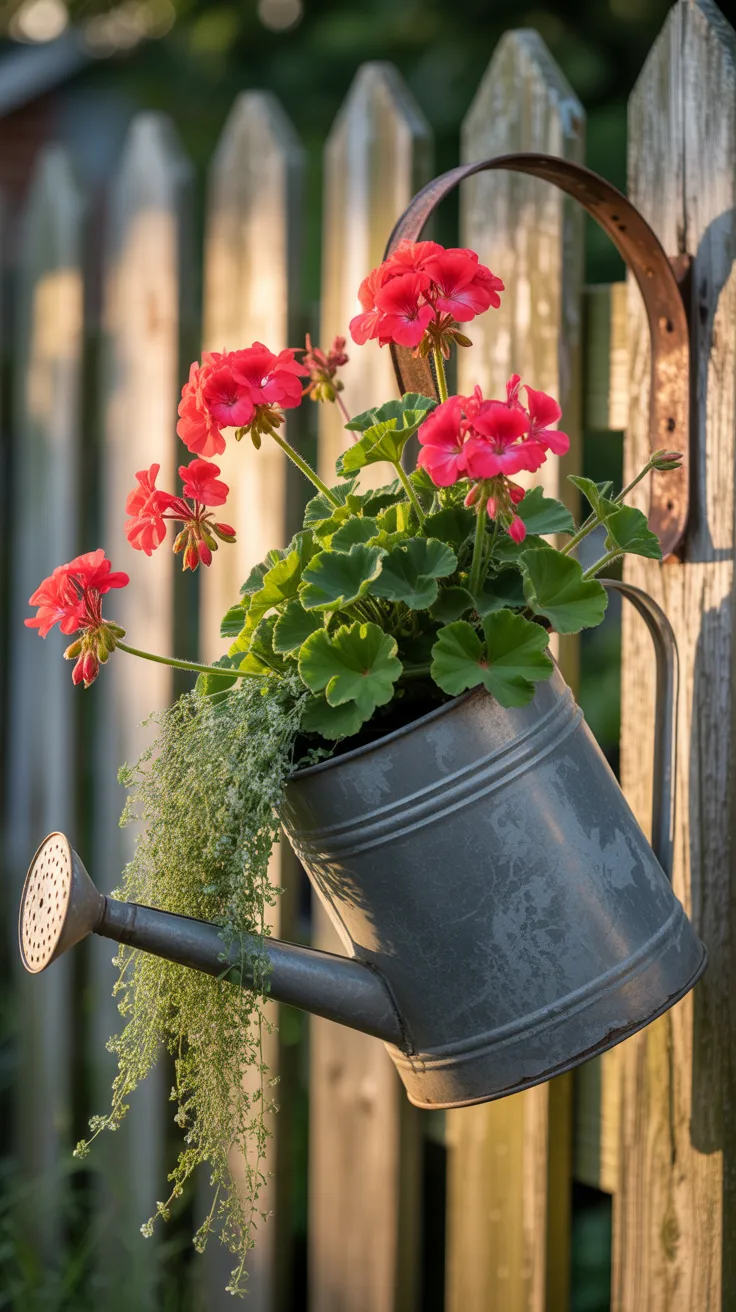
An old tin watering can, hung on its side with flowers spilling from the spout, creates a whimsical “pouring flowers” effect that’s become a genuine garden decor classic for good reason.
Drill a few extra drainage holes in the can’s belly if it doesn’t already have them, and mount it at a slight downward tilt using a sturdy wall hook or bracket so the spout angles naturally downward. Fill with potting mix, and plant trailing varieties near the spout opening specifically so their growth cascades out and downward as it matures.
The pro insight: pack soil more firmly near the spout opening than elsewhere in the can — loose soil there tends to wash out through the spout during watering, especially in the first few weeks before roots establish and hold it in place.
Best plants for the spilling effect: trailing petunias, lobelia, or ivy geranium all cascade convincingly from the spout.
See our cascading planter design guide, and check thesill.com’s trailing plant care tips for pruning cascading growth.
DIY Painted River Rock Border Edging
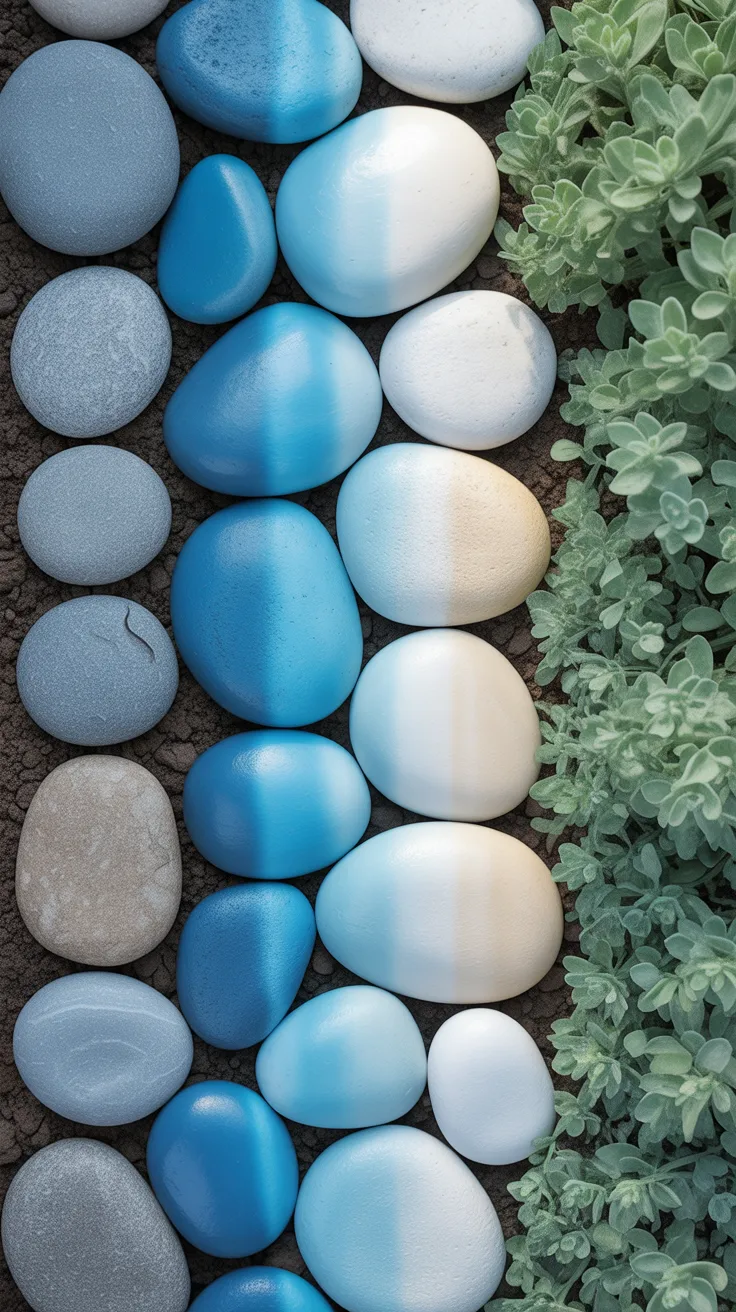
Painted river rocks used as bed edging give a clean, defined border between lawn and planting bed, with far more visual interest than plain unpainted stone.
Collect or purchase smooth, similarly sized river rocks, clean and dry them fully, then paint using outdoor acrylic — a single solid color per rock reads clean and modern, while an ombre gradient across the whole row creates a more artistic, flowing effect. Seal each rock with 2 coats of clear outdoor sealant once paint is fully dry, then set them in a snug line along the bed’s edge, pressing each partway into the soil for stability.
The common mistake is spacing rocks too far apart — a border reads as intentional and finished only when rocks touch or nearly touch along the entire edge line, not scattered with visible gaps.
Explore more bed-edging material comparisons in our garden bed edging ideas guide, and check extension.ufl.edu’s landscape edging notes for edging material durability.
Repurposed Birdcage Terrarium
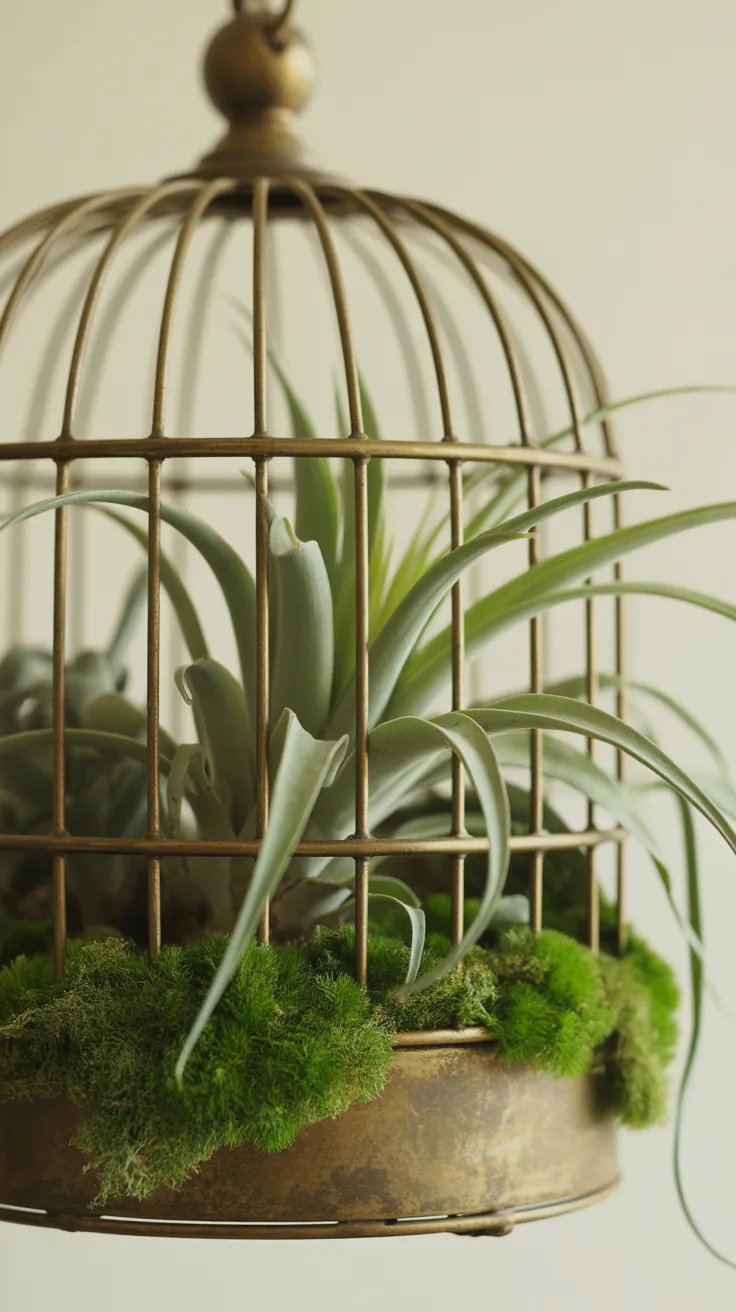
An old decorative birdcage makes a striking hanging terrarium, its open bars letting light reach plants from every direction while still framing them like a display case.
Find a birdcage with a removable base tray or bottom dish, line it with a layer of decorative moss over a base of small pebbles for drainage, and arrange air plants or small potted succulents directly inside — no soil is required if using air plants exclusively. Hang the finished cage from a plant hook or shepherd’s hook at a height where the display is easily visible and easy to mist.
The pro insight: avoid overcrowding the cage — leave visible negative space between plants so the birdcage’s decorative structure remains visible rather than being completely hidden by foliage.
Explore more display-case-style planting ideas in our decorative terrarium display guide, and check the RHS guide to air plant humidity needs for misting frequency by season.
DIY Broken Pot Fairy Stack
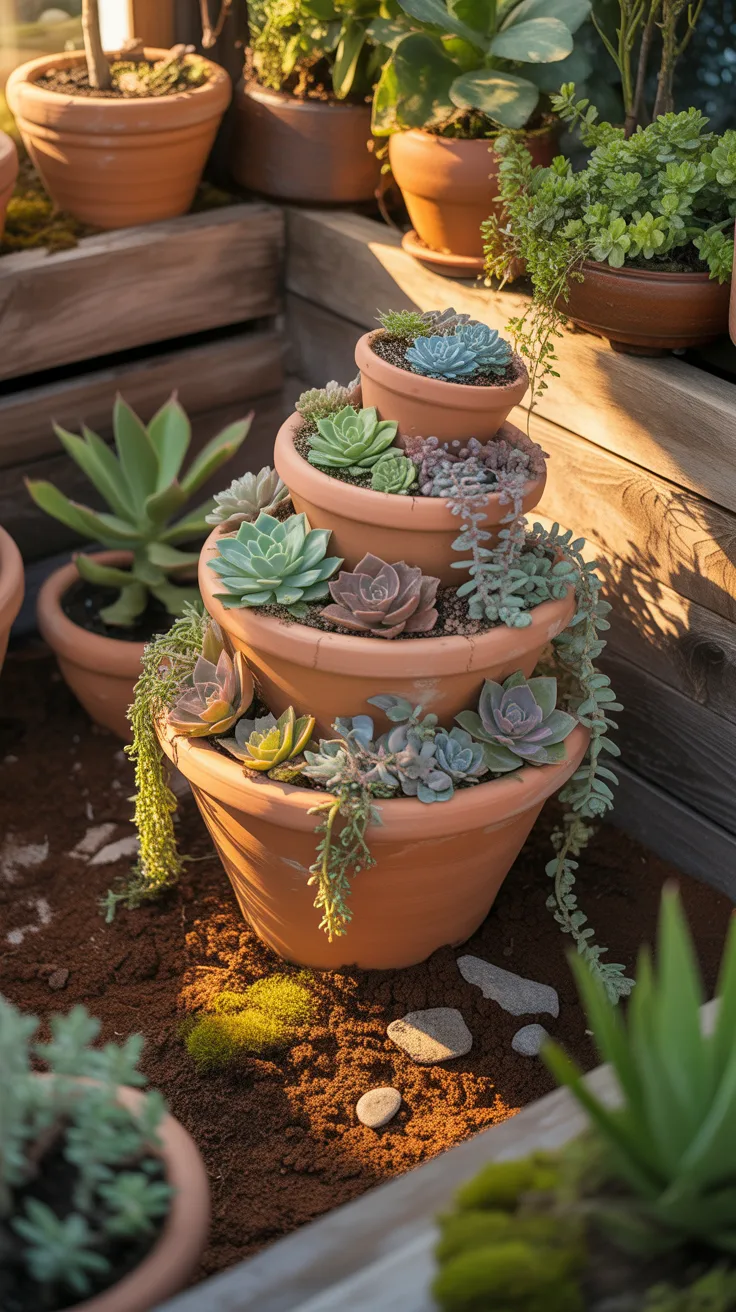
A broken pot fairy stack turns cracked terracotta pieces into a tiered, “spilling” display that looks like a stack of pots mid-tumble, with plants cascading from each broken level.
Stack 2–3 pots of decreasing size at an angle, using a bit of exterior-grade adhesive or simply propping the broken edges against each other so the tallest pot sits upright and the lower, more broken pieces lean outward. Fill each level with potting mix, planting trailing succulents like string of pearls near the “spill points” where the pots break open, so growth visually continues the pouring effect.
The pro insight: this design actually works better with pots that are genuinely broken rather than perfectly cut — irregular, natural crack lines look far more convincing as a “tumbled” arrangement than deliberately sawed edges.
💡 Pro Tip: Secure the base pot’s position with a stake driven through its drainage hole into the ground beneath — it keeps the whole stack from shifting or toppling in wind once it’s fully planted and heavier.
See our full broken pot upcycling guide, and check gardenersworld.com’s succulent cascading display tips for plant selection.
Chicken Wire and Moss Topiary Frame
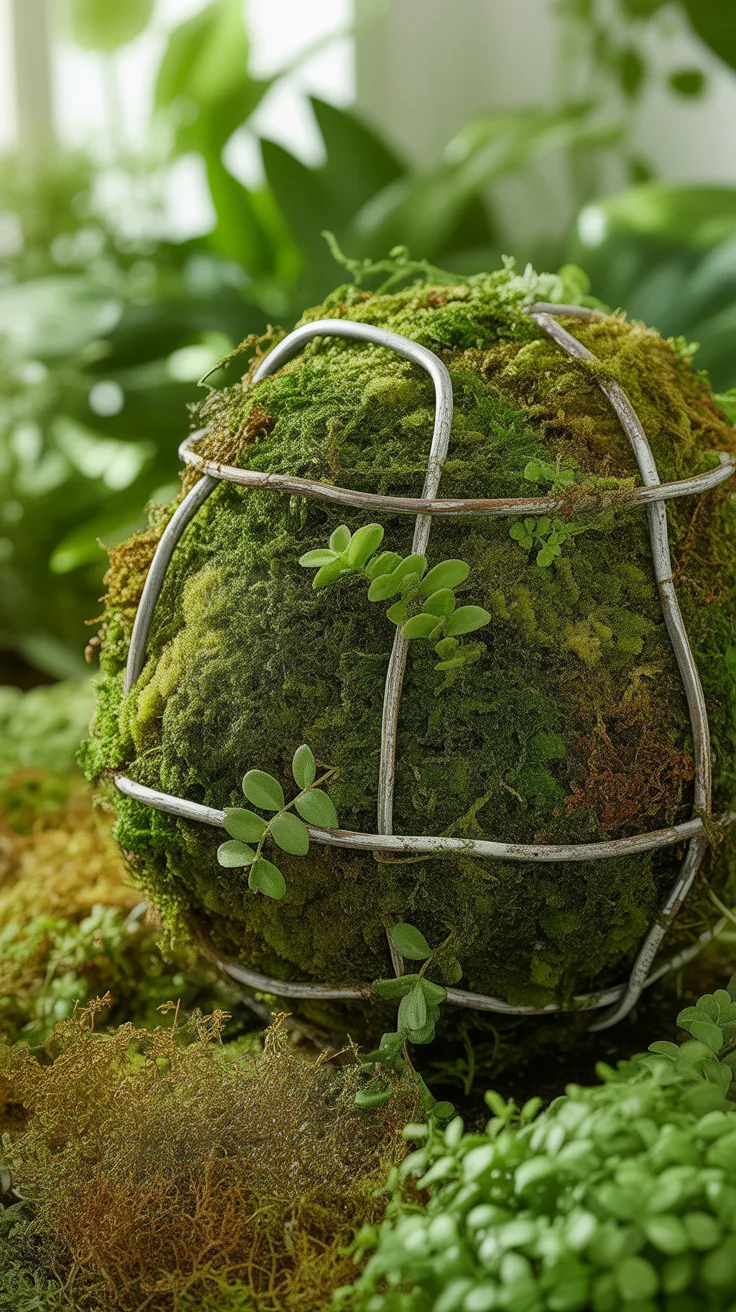
A moss topiary frame shapes chicken wire into a sphere or other simple form, then packs it with sphagnum moss and small plants to create a living sculptural piece.
Bend chicken wire into your chosen shape (a sphere is easiest for beginners), leaving a small opening to pack material through, then line the interior with dampened sphagnum moss pressed firmly against the wire on all sides. Tuck small-rooted plants like creeping thyme or baby’s tears into the moss through the wire gaps, and mist regularly to keep the moss base consistently damp.
The common mistake is letting the moss dry out completely — unlike soil, a moss-based topiary has very little water reserve and can go from healthy to crispy within just a day or two of hot, dry weather without misting.
Best plants for moss topiaries: creeping thyme, baby’s tears, and small sedums root shallowly enough to thrive in a moss base.
See our full moss topiary building tutorial, and check the Missouri Botanical Garden’s moss growing conditions guide for humidity requirements.
DIY Painted Watering Can Bird Bath
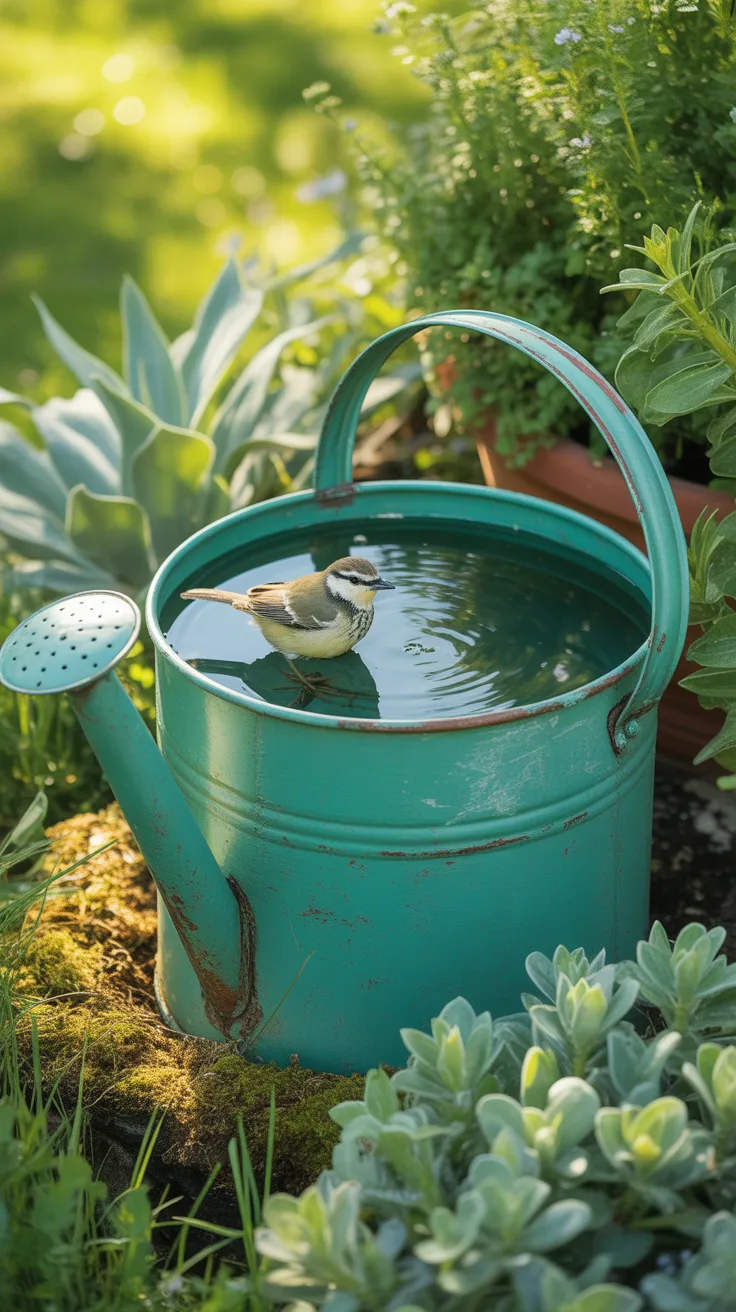
An old metal watering can, laid on its side or with the top cut open, becomes a simple bird bath that attracts genuine wildlife activity to a garden bed.
If the can has a spout, tilt it so the wide opening faces upward and level enough to hold standing water without spilling; if repurposing a larger can, cut the top open fully with tin snips for easier cleaning access. Paint the exterior with outdoor-safe metal paint, and place it in a partially shaded spot near shrubs where birds have quick cover to retreat to if startled.
The pro insight: change the water every 2–3 days regardless of how full it still looks — standing water in a shallow container becomes a mosquito breeding ground within about a week if left unchanged.
Explore more DIY wildlife water features in our backyard bird bath guide, and check BHG’s bird bath placement and maintenance tips for mosquito prevention.
Stenciled Garden Flag or Banner
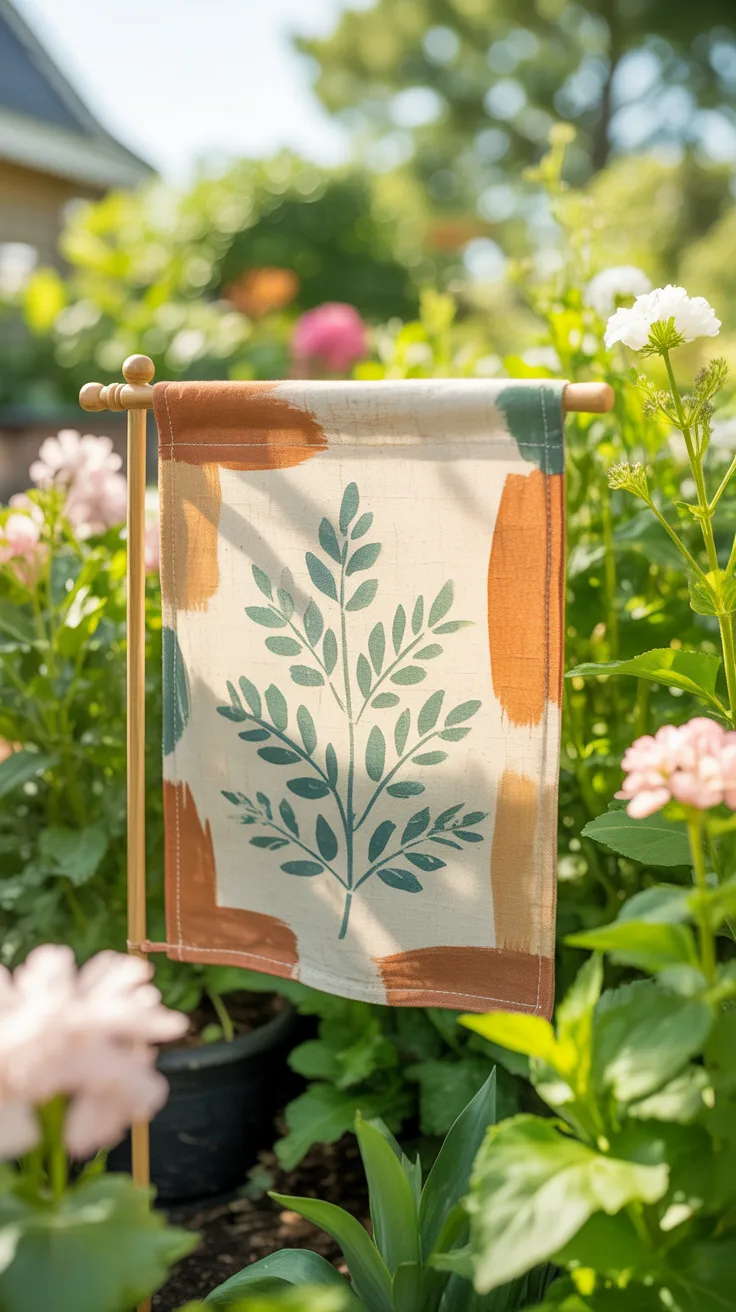
A stenciled garden flag brings a small pop of color and pattern to a bed edge or entrance, and unlike a store-bought flag, the design is entirely your own.
Use durable outdoor canvas or a plain purchased blank flag, and apply your design using fabric stencils and outdoor fabric paint, working in thin layers to keep the paint from stiffening the fabric too much. Let each color dry fully before adding the next layer if your design has multiple colors, and heat-set the finished design with an iron on a low setting (fabric side down, per your paint’s instructions) to lock the color in against fading.
The common mistake is skipping the heat-setting step — unset fabric paint on an outdoor flag fades and can bleed within its first season of sun and rain exposure.
Explore more DIY garden textile projects in our outdoor fabric craft guide, and check the Almanac’s garden flag placement ideas for sizing flags to bed proportions.
Vertical Shoe Organizer Herb Garden
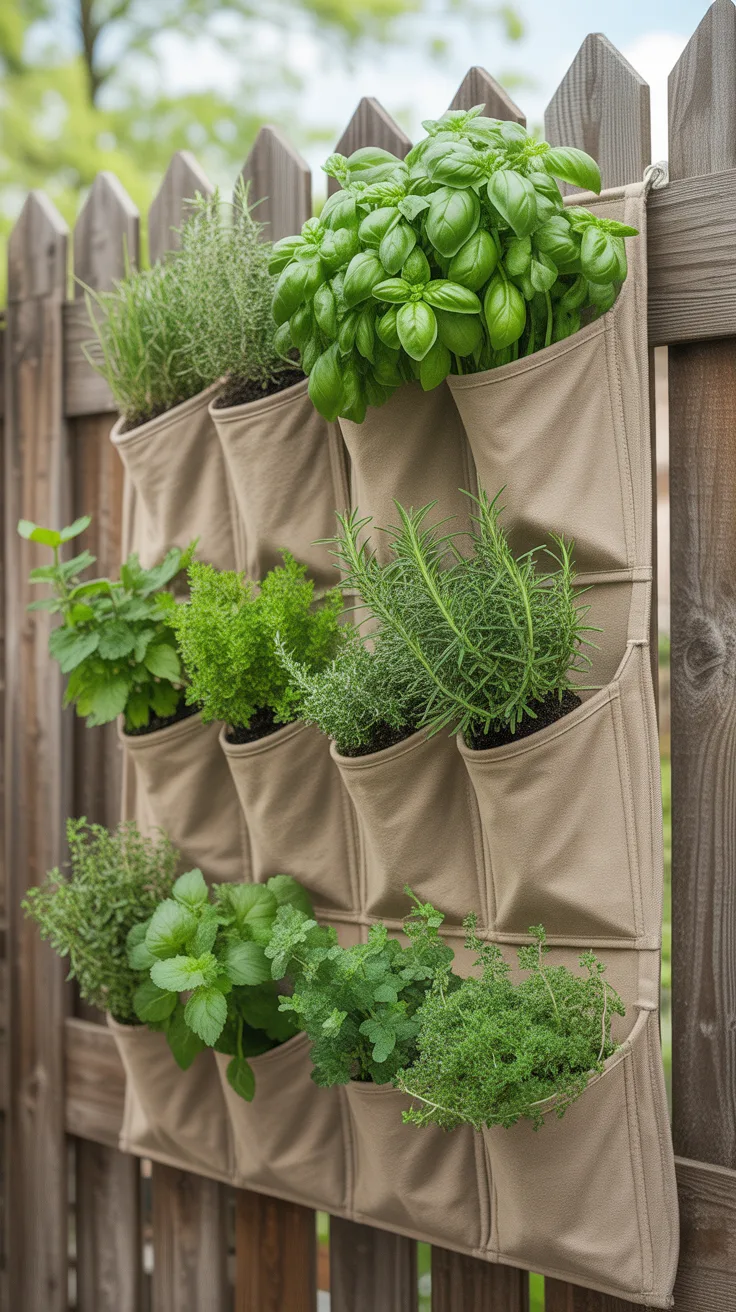
A fabric shoe organizer, the kind meant to hang on a closet door, repurposes into a surprisingly effective vertical herb garden with a dozen or more built-in pockets.
Choose a canvas or heavy-duty fabric organizer (avoid thin mesh, which won’t hold soil weight), mount it securely to a sunny fence using grommets and screws, and cut a few small drainage slits in the bottom corner of each pocket before filling with a lightweight potting mix. Plant one herb per pocket, favoring shallow-rooted varieties since each pocket only holds a few inches of soil depth.
The pro insight: water pockets individually with a small watering can rather than spraying the whole organizer with a hose — overhead watering saturates the fabric itself, which speeds up mold and mildew development between the pockets.
Best herbs for shallow shoe-pocket planting: chives, thyme, and cilantro all tolerate the limited root depth well.
See our compact vertical herb garden guide, and check extension.psu.edu’s shallow-root herb growing notes for soil depth requirements.
Getting Started With DIY Garden Decor
The easiest first step is picking one small, low-cost project — painted rock plant markers or a single tin can planter — rather than trying to tackle a big build like a pallet wall on your first attempt.
The most common beginner mistake is skipping sealants and weatherproofing steps to save time, which leads to paint peeling, wood rotting, or metal rusting within a single season. For your first purchase, buy a small bottle of outdoor acrylic sealant, a handful of smooth garden rocks, and a paint pen — this single kit sets you up for several projects on this list at once.
Realistically, most of these projects are finished the same day you start them, and you’ll see the visual payoff immediately rather than waiting on a growing season. From there, it’s easy to build up a full collection of decor pieces one weekend project at a time.
Frequently Asked Questions
What is the cheapest DIY garden decor project to start with?
Painted rock plant markers cost almost nothing if you use rocks from your own yard and a basic acrylic paint pen, and they take under an hour to complete including drying time. Wine cork markers are a close second if you’re already saving corks from other projects.
How do I make DIY garden decor last outdoors?
Always seal painted surfaces with an outdoor-rated clear sealant, since unsealed paint on terracotta, wood, or metal typically fades or peels within one season of sun and rain exposure. Choosing weather-resistant base materials — like galvanized metal, treated wood, or glazed ceramic — also extends the life of most projects significantly.
Can I use painted pots for edible plants like herbs and vegetables?
Yes, as long as you use non-toxic, exterior-grade acrylic paint on the outside of the pot only and avoid painting the interior or drainage holes where paint could contact soil and roots. Always let paint cure fully — typically 5–7 days — before adding soil and planting.
How often should I refresh or repaint outdoor garden decor?
Most outdoor acrylic-painted items need a fresh coat of sealant every 1–2 years, and full repainting every 2–3 years depending on sun exposure — south-facing, full-sun pieces fade noticeably faster than shaded ones. Metal pieces like painted birdhouses may need touch-ups sooner if they’re in a spot that gets consistent rain exposure.
What tools do I need to get started with DIY garden decor projects?
A basic kit covers most projects on this list: a cordless drill with a small metal bit, outdoor acrylic paint and a few brushes or paint pens, a clear outdoor sealant, and painter’s tape for clean lines. Larger builds like pallet walls or ladder trellises may also need a sander and exterior wood sealant.
A Few Final Thoughts
These 31 DIY garden decor ideas prove that a genuinely fun, personal outdoor space doesn’t require a big budget — it requires a willingness to look at a broken pot, an old ladder, or an empty can and see potential instead of trash. What ties every project on this list together is that same spirit of repurposing with intention, turning ordinary materials into something that makes your garden feel unmistakably yours. Whether you start with a five-minute painted rock marker or work your way up to a full pallet herb wall, the goal is the same: a green space with genuine personality baked right into it. One paintbrush, one leftover jar, one sunny afternoon — your garden decor adventure is closer than you think, now go make it happen!